Build Your Own Personal Training Exercise Bot with Python, Zappa, AWS and Twilio SMS
Time to read:
April 16, 2019
Written by
This post is part of Twilio’s archive and may contain outdated information. We’re always building something new, so be sure to check out our latest posts for the most up-to-date insights.

Heading into the new year I wanted to set myself up to be successful living a healthier life. Saying you’re going to do something is easy, following through with action is the hard part. To ensure success being more physically active I needed help with a seemingly simple question, what should I do for a workout? With so many options available I wanted to spend less time thinking about what I’m going to do and more time doing the actual workout.
I needed a prescriptive solution to dictate a workout each day that would be balanced with enough daily variation to avoid becoming redundant. Most of the fitness apps available allow tracking of workouts, but lack the prescriptive component I was looking for.
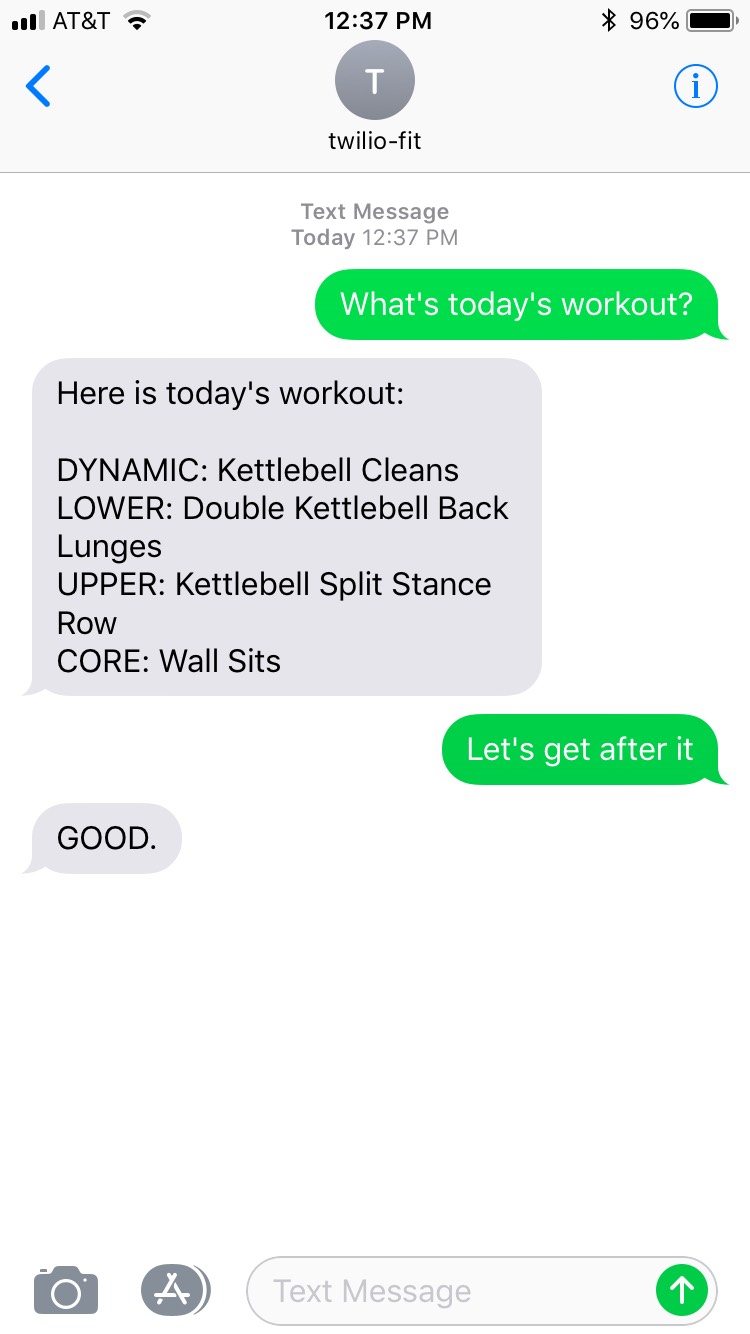
Unsatisfied, I decided to roll-up my sleeves and build my own SMS-enabled personal trainer bot I call twilio-fit. Twilio-fit designs a workout on-demand that incorporates my personal preferences. I start every morning asking my bot “What’s today’s workout?” and am well on my way to living that healthier life. Now let’s get after it and see how you can make this bot on your own!
Development Environment Setup
To complete this project we’ll be using Twilio to send/receive text messages. To complete this application you will need to have a SMS-enabled Twilio number. If you’re new to Twilio this quickstart guide will show you how to setup a Twilio account with SMS-capability. You will also need an AWS account since that will be where the serverless environment we use in this tutorial will be deployed. For an introduction on AWS and details of the various services provided, AWS has a great getting started section with detailed explanations. Finally, after you’ve setup your AWS account you will need to enable the AWS Command Line Interface (CLI), which can be done by following this guide walking through how to setup the AWS CLI tools from the shell.
The first thing we’re going to do is set up our virtual environment we’re going to work with. In the command line create a folder for the project and type the following to initialize our virtual environment.
Once the virtual environment is created we’ll build our requirements.txt file that will contain the packages we’ll use in this project. Create a new file, requirements.txt, and enter the following:
Now that we’ve defined what will go in our virtual environment let’s activate the environment and install our dependencies. From the command line enter the following two commands:
The first command activates our virtual environment. You should see a prefix, (venv-twilio-fit), displayed at the beginning of the command prompt. The second command will install the packages we defined in requirements.txt to our virtual environment. That’s it for setting up our environment. Now let’s start writing the core code for the application.
Writing the Code
With the virtual environment setup let’s get started writing the AWS Lambda function that will handle our messages. We’ll create a module, lambda_handler.py, that will contain all the code we’ll need for our application. In our module the main function is the entry point of our application and will control the conversational flow of our program. In this program we’ll be using a Flask session object to maintain the conversational context across the entire interaction. This way when a message is received we know the context through which it is being sent and the proper response can be formulated. The following code should be entered into lambda_handler.py:
Walking through the flow of main function the first thing that’s done when a message is received is we will remove punctuation and make the message lowercase, which will help us capture when a key phrase is provided.
Next, we need to check if there is already an ongoing conversation or if this is a new conversation. Since we’re storing conversational context within the session object we will test if that context exists. If it does we will assign the context variable to whatever the current context is, otherwise we’ll assume this is a new conversation and assign a context of “hello” to indicate so.
By establishing the context we can now pick up where we left off in a conversation and determine the next action. At the start of each new conversation the app will be looking for a specific wake phrase, “What’s today’s workout?”. If the wake phrase is passed to the app then a workout will be constructed and a response with the workout details will be created. Providing any other message will trigger the response, “I don’t understand what you’re asking.”
If the wake phrase is passed our workout will be constructed within the build_workout function, which will apply the rules defining what a workout should be. For this tutorial we’re keeping the logic simple. Create a JSON file, exercise_inventory.json. This file will contain the different exercises that can be chosen from to construct a workout. An example of what exercise_inventory.json looks like is below. In this tutorial a handful of exercises will be split into four different categories: Dynamic, Lower, Upper, and Core. When building the workout, one exercise from each category will be selected to ensure the workout is balanced.
The build_workout function will produce two outputs, a string representation of the workout that will be our text response and a workout dictionary object that we will use later to track the history of our workouts in DynamoDB.
Finally, we take the response we’ve generated and create the MessagingResponse using the Twilio package that will ultimately be sent as a text message response.
The next progression in the conversation is verifying a workout. After receiving the text message with the workout details you can either accept the workout, or ask for a new one. If you ask for a new workout the application will randomly generate a new workout and you will again have to verify or ask for a new one.
If you provide the validation phrase, “lefts get after it”, two things will happen. First your workout will be saved to the DynamoDB database via the write_workout_to_dynamo function. Second, this signals a natural end point to the conversation itself. A final response, “GOOD.” will be generated and returned as a text message. The conversational context from the session object will also be cleared so that the next interaction starts fresh.
Setting up the AWS Environment
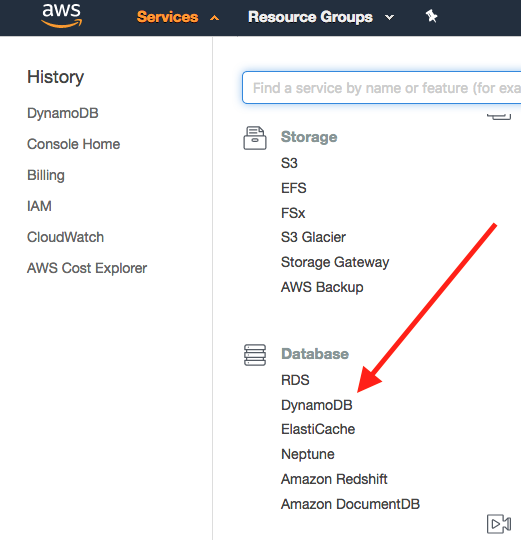
The last step is to setup our AWS serverless infrastructure, starting with our DynamoDB database. To setup the database log into your AWS account and select, “DynamoDB” from the “Services” drop down in the upper left corner.
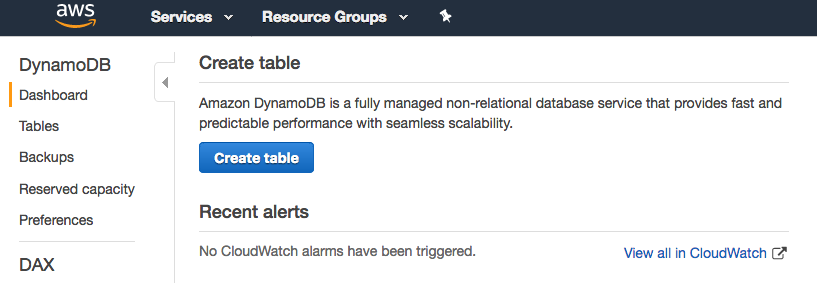
On the next screen click the “Create Table” button.
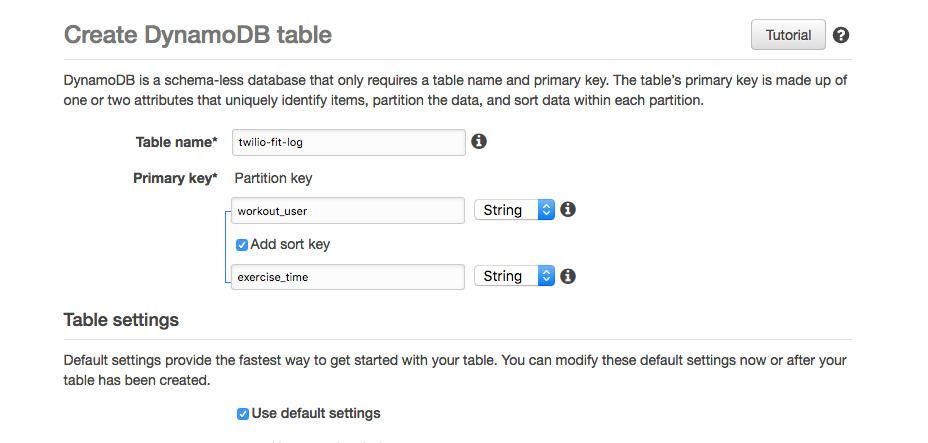
Let’s name the table and build the keys for our table. For this tutorial we’re going to name our table, “twilio-fit-log”. The primary key of the table will be a partition key, “workout_user”, and a sort key, “exercise_time”. We’ll use the default settings so you can keep the “Use default settings” box checked. At the bottom of the page click “Create” and the table will be created.
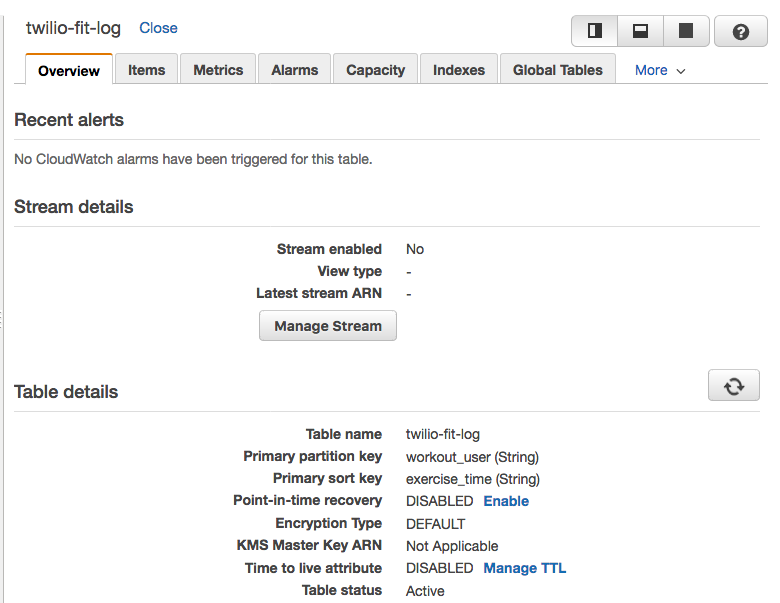
After the table is created you should be taken to a page with multiple panels listing all your DynamoDB table, but the right panel should resemble this displaying information about the “twilio-fit-log” table you just created.
To finish our deployment to AWS we’ll be using Zappa. Our code will be deployed to AWS as a Lambda function. By default AWS Lambda functions only contain core Python packages. To use other non-core packages in our AWS Lambda function we need to make sure they are packaged with the rest of our code when deployed. Zappa helps streamline that process by detecting the packages we’ve installed in our virtual environment and including them with our deployment package to AWS. To complete this step make sure you have setup AWS CLI. If you haven’t done so, please return to the documentation at the beginning of this tutorial and do so.
Zappa will also setup the rest of the serverless infrastructure including the IAM roles, Lambda function, and API Gateway. Out of the box Zappa is overly permissive when deploying applications, so we’ll make some adjustments to our Zappa deployment to make sure the role executing our code has only the permissions that are required. Create a new local file called, twilio-fit-iam-policy.json. In this file we’ll define the AWS permissions for the role that will be used when our program is executed. The role we’re going to create will need to be able to invoke the Lambda function we have defined and to write to our DynamoDB table. The twilio-fit-iam-policy.json should look like this:
We need to tell Zappa to use these permissions when deploying our code. In the same directory as the lambda_handler.py create a new file, zappa_settings.json where we’ll setup the deployment configuration for Zappa. Zappa makes it easy to define various types of deployments within the same file. We’ll name our deployment “tutorial”. In the settings file define app_function, the entry point to our Lambda function, to be “lambda_handler.app”. We also need to instruct Zappa to create an IAM role called “twilio-fit-tutorial” according to the IAM policy we defined in twilio-fit-iam-policy.json. Finally, we tell Zappa that we’re using python3.6 for our app. When it’s done the zappa_settings.json should look like this:
We’re ready to deploy our application to the cloud. From the command line enter the following where tutorial corresponds with the name we gave to our deployment in zappa_settings.json.
When Zappa completes its deployment (it may take a minute or two) you’ll get a message like Deployment complete!: https://xxxxxxxxxx.xxxxxxx-xxx.xx-xxxx-x.xxxxxxxxx.xxx/tutorial.
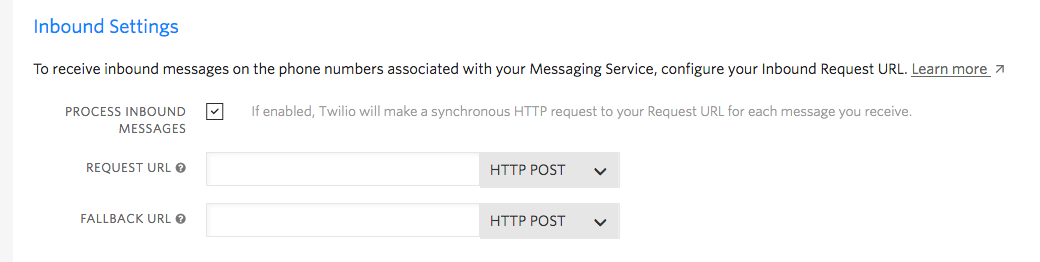
The last thing we need to do is setup the webhook to our Twilio number. Log into your Twilio account and navigate to configuration page of the Twilio number you’re going to use. Copy the Zappa link and paste it in the REQUEST URL and click Save.
You’re done! You can pull out your phone and send a message to your Twilio number. Play around a bit and notice how you can progress through the conversation using the different wake phrases at different points of the conversation.
What is great about this project is that there are so many ways to improve and expand on the basic functionality.
While building this app I had a lot of help in the form of other tutorials. In particular I found these tutorials particularly helpful:
How to Receive and Respond to a Text Message with Python, Flask and Twilio
Receive and Reply to SMS and MMS Messages in Python with Amazon Lambda
How to Send SMS Text Messages with AWS Lambda and Python 3.6
Next you can apply your own workout rules, track additional metrics like sets, reps, distance, and time of your workouts, or schedule a regular morning wake up message reminding you how many days since your last workout. All is possible with some simple extensions to this core program. Have fun and keep getting after it!
Related Resources
Twilio Docs
From APIs to SDKs to sample apps
API reference documentation, SDKs, helper libraries, quickstarts, and tutorials for your language and platform.
Resource Center
The latest ebooks, industry reports, and webinars
Learn from customer engagement experts to improve your own communication.
Ahoy
Twilio's developer community hub
Best practices, code samples, and inspiration to build communications and digital engagement experiences.