Tracking Cryptocurrencies via SMS Alarms using JavaScript, Node.js and Twilio

June 12, 2018
Written by
Steve Senkus
Contributor
Opinions expressed by Twilio contributors are their own

crypto-alerts

Bitcoin, Ethereum, Ripple, Bitcoin Cash, Dogecoin, Litecoin—the list of cryptocurrency coins is endless, and new technologies are emerging daily. In this tutorial, we are going to create an app that sends SMS text messages whenever a cryptocurrency’s market value crosses a price threshold. Cryptocurrency investors can sit back, let the market do its thing, and wait for opportunities instead of compulsively checking the markets!

Following Along

For the purpose of this tutorial, I have set up a repository with the complete code hosted Github: https://github.com/ssenkus/coin-sms-alert. You will be able to build everything you need by following the steps in this post, but if you want to see what the completed project looks like at any step, you can clone this repository with the following command on your command line interface/terminal:

git clone git@github.com:ssenkus/coin-sms-alert.git

For each step in this tutorial, you can checkout a branch that has the complete code. For example, running the command git checkout step-1-simple-express-app inside the root directory of the project will give you the exact code this tutorial instructs you to write. (Don’t worry, I will give you the specific branch names at each step.) After checking out the branch, run npm install to download any NPM packages that you need for the tutorial step.

If you get stuck, you can run and refer to the branch code to see a working example.

NOTE: To run this Node.js app from the command line, use npm start to start the app and Ctrl C to kill it.

What You’ll Need

Before we get started, you will need to have some tools and software installed on your computer.

  • Node.js – Install the LTS version for your operating system. In this tutorial, I used version 8.9.4.
  • MongoDB – For my local development on Mac OS X, I used Homebrew for my local MongoDB instance. You can choose from a number of options and operating systems here. Install the latest stable version (3.6.4 at the time of writing this article).
  • Twilio Account – Sign up for a Twilio account if you don’t have one already. (It’s free!)
  • Postman – A tool for testing APIs. In this tutorial, we will be interacting quite a bit with our custom API, so it helps to be able to generate and modify HTTP requests on the fly.
  • (Optional) Git – As you follow along with this tutorial, you may want to check your source code against the companion repository hosted on GitHub. Find an installation option here.
  • (Optional) Robo 3t (formally Robomongo) – If you work with MongoDB regularly, using the command line to run queries on database collections can be tedious. Install Robo 3T if you prefer a GUI for a visual representation of your MongoDB database.

Setting up your Twilio account

If you haven’t yet, sign up for a free Twilio account. After you have an account, you will be able to create your first project. If you already have an account with Twilio, navigate your browser to https://www.twilio.com/console/projects/create and create a project.


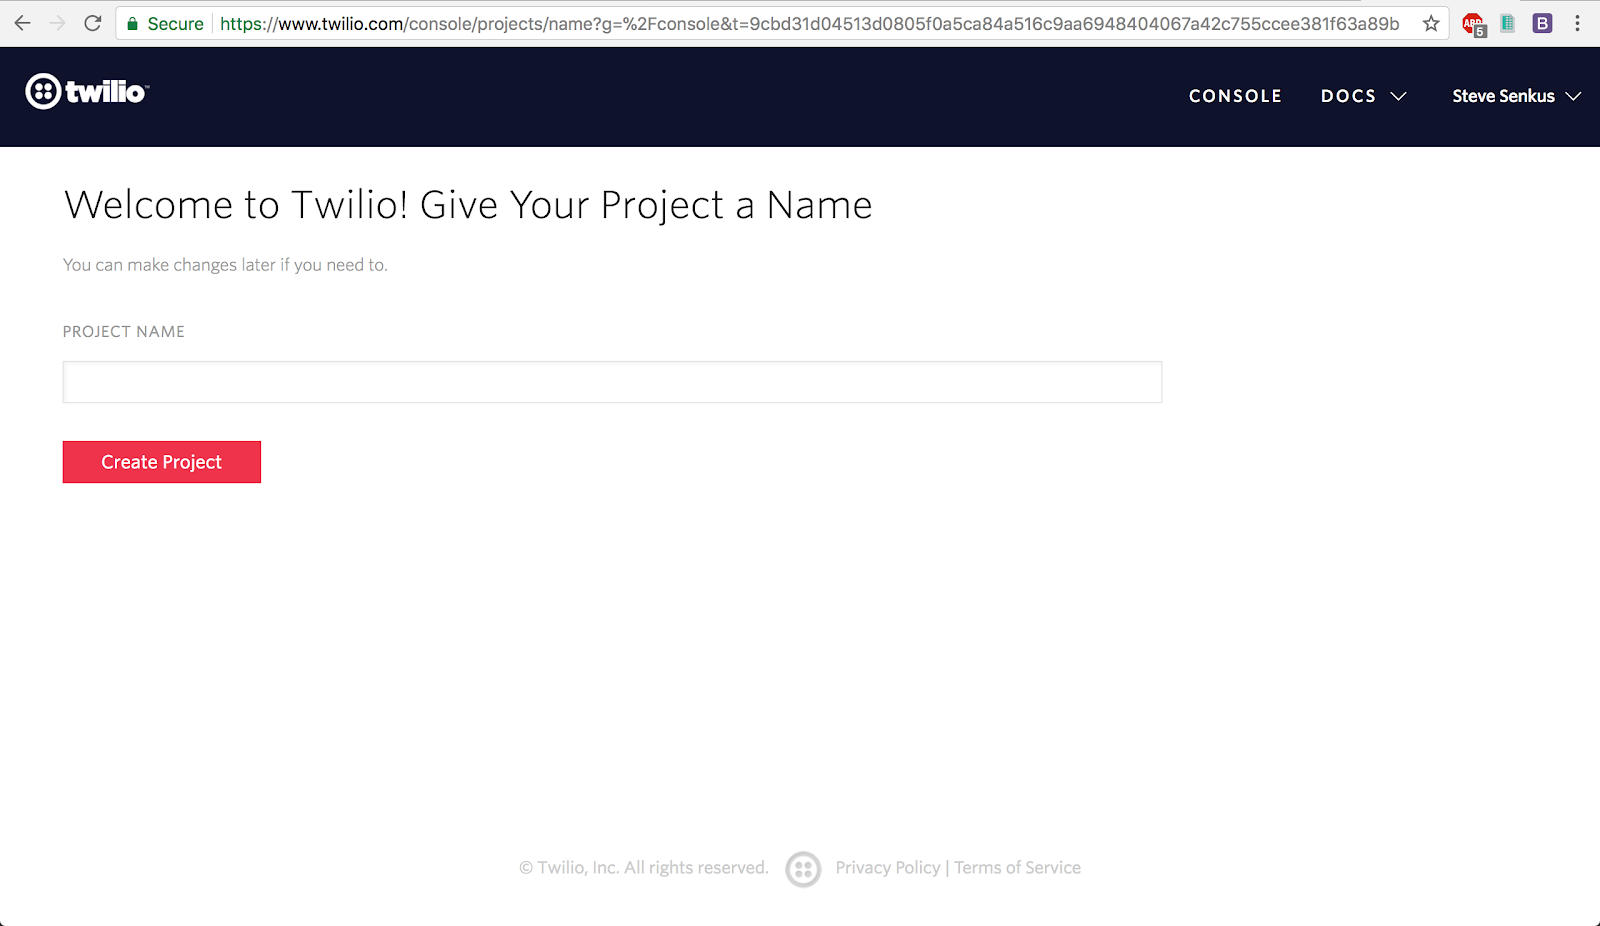
Give the project a name (i.e. coin-sms-alert), then click the Create Project button.
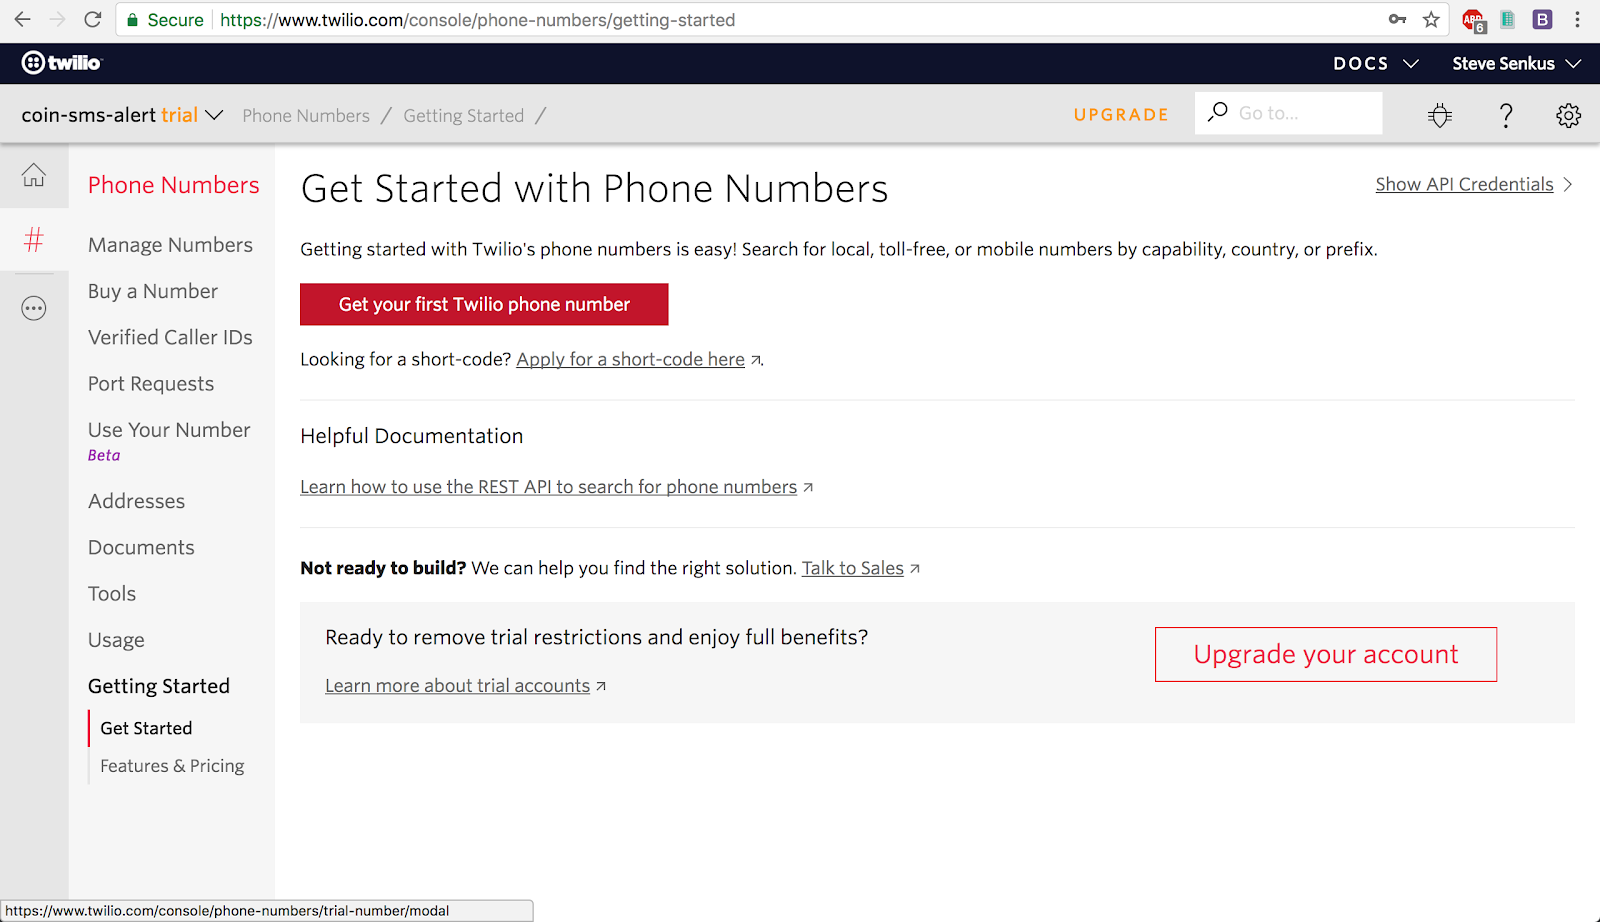
Once your project is created, you will be redirected to a fresh Twilio console. Click on Manage Phone Numbers:


Click on Get Started, then the button labeled Get your first Twilio phone number.

When the confirmation dialog appears, click Choose this Number, then save the phone number somewhere readily available. You will need to ensure that the phone number is capable of sending SMS text messages:


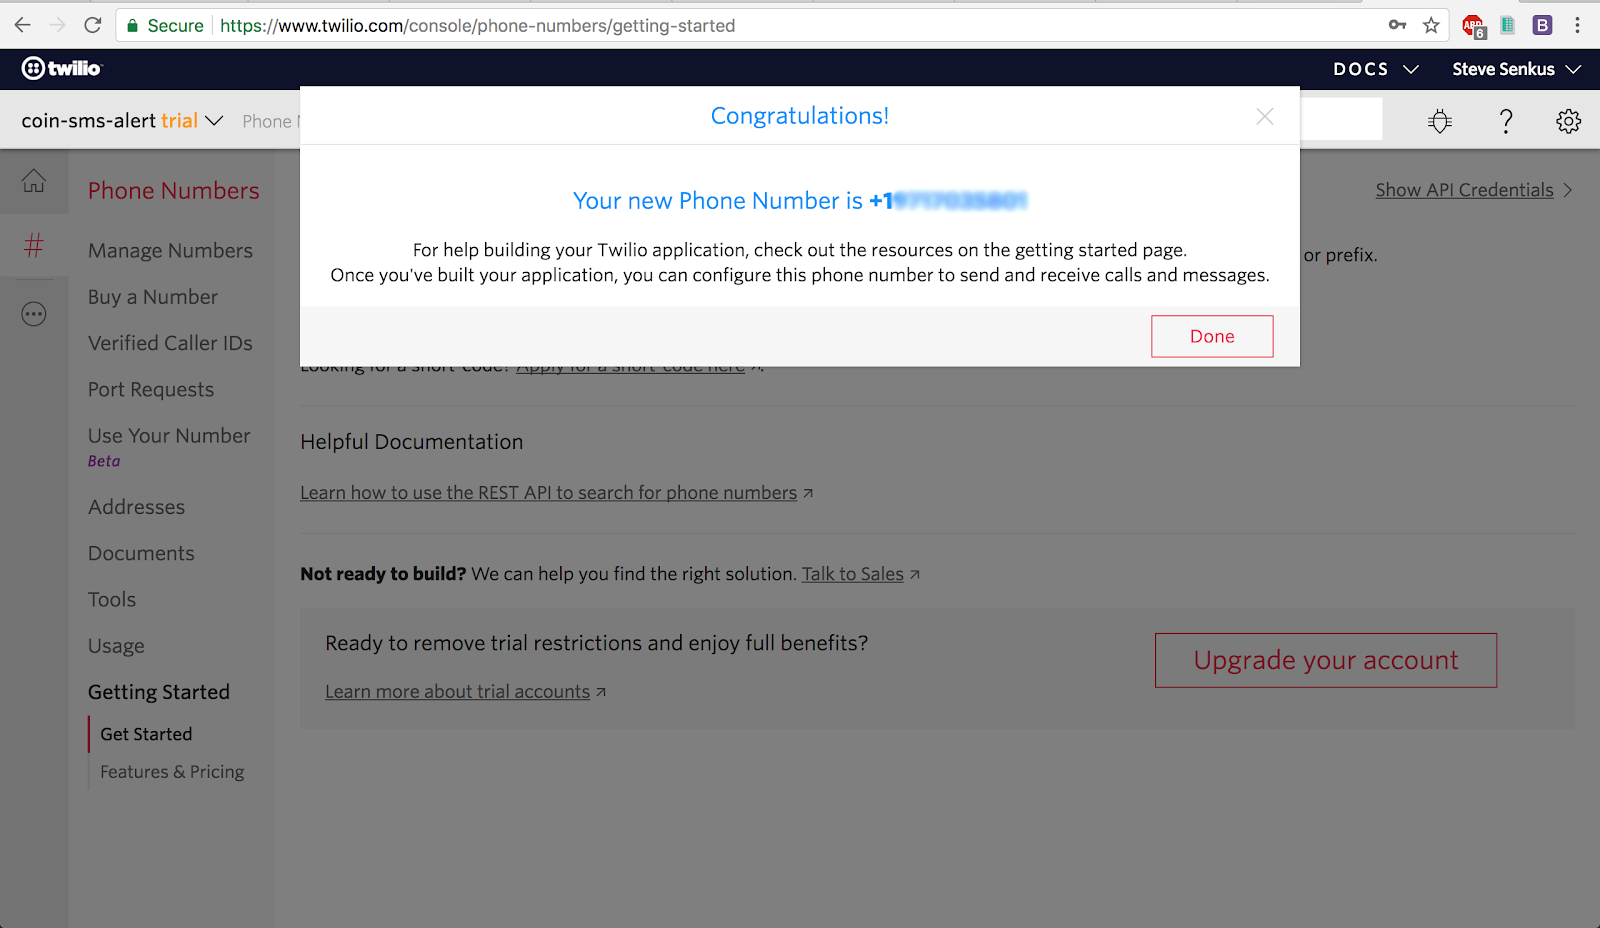
To test your new phone number, follow this Quickstart tutorial and make sure you can successfully send a SMS to your cell phone. It’s important that you save your Account SID, Authorization Token, and SMS-enabled phone number somewhere; we will need these later in this post to send SMS text messages in our app.

Building a cryptocurrency notification app

First, create a solid foundation for our project. We will build an API that we will later use to set up the alarms.

Building a simple Express app

Following along to this point in the post:

git checkout step-1-simple-express-app; npm install

Our first step is to create a simple Node.js server using the powerful Express web application framework. This will be the foundation of our app, handling simple API requests at first and later being expanded as we add features.

Using your command line terminal, create a directory named coin-sms-alert for our project, then change into this directory.

mkdir coin-sms-alert; cd coin-sms-alert

Next, initialize a Node.js project, which will create a package.json file. For simplicity, we will be using the -y flag in our command to skip all command prompts and use the defaults.

npm init -y

You should see a package.json file in your root directory.

Let’s set up a simple Node.js and Express server to listen to our requests. We will need to install the express module from npm:

npm install -save express

Create a new file called server.js with the following code:

// server.js
const express = require('express');
const app = express();

// Requests to http://localhost:3000/ will respond with a JSON object
app.get('/', (req, res) => {
   res.json({success: true});
});

// Start listening on port 3000 to start receiving requests
app.listen(3000, () => {
   console.log('Example app listening on port 3000!')
});

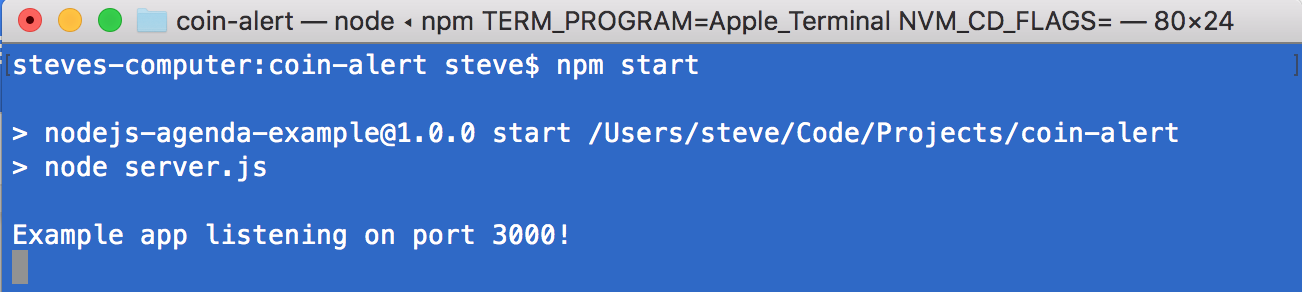
Start the project with this command:

npm start

NOTE: npm start looks for server.js by default. Alternatively, you can run node server.js for the same result.

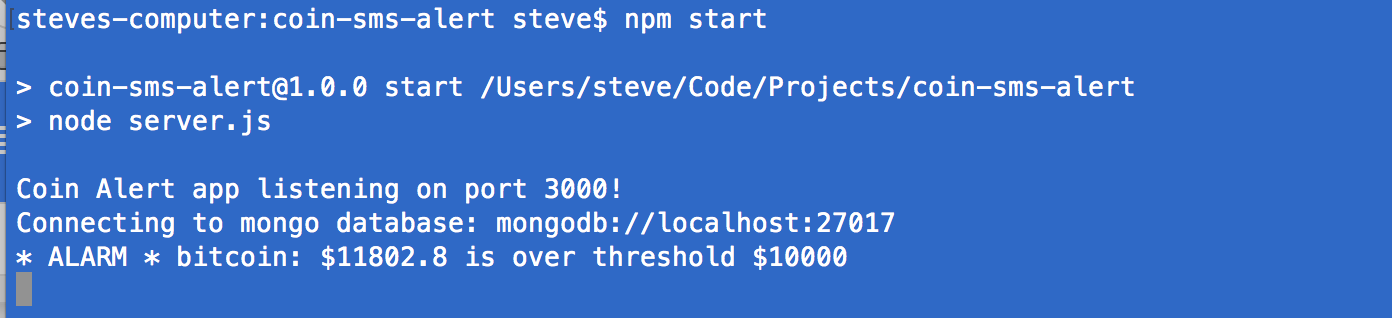
You should see this in your terminal:

Navigate your favorite browser to the url: http://localhost:3000.You should see something similar to this:


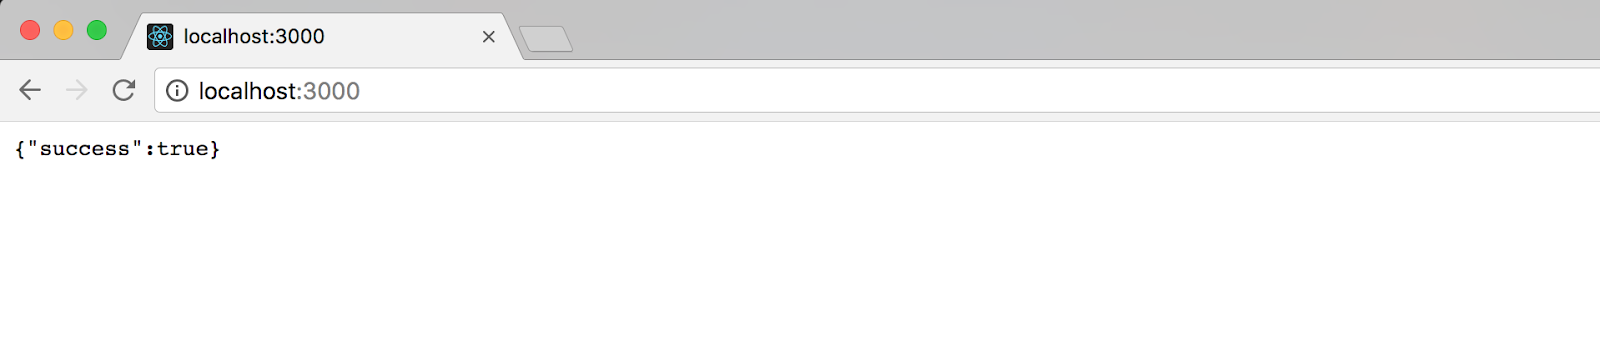
Great, we now have a very minimal foundation to build our app with.Our next step is to get coin prices.

Retrieving cryptocurrency data from the CoinMarketCap API

Following along to this point in the post:

git checkout step-2-retrieving-cryptocurrency-data; npm install

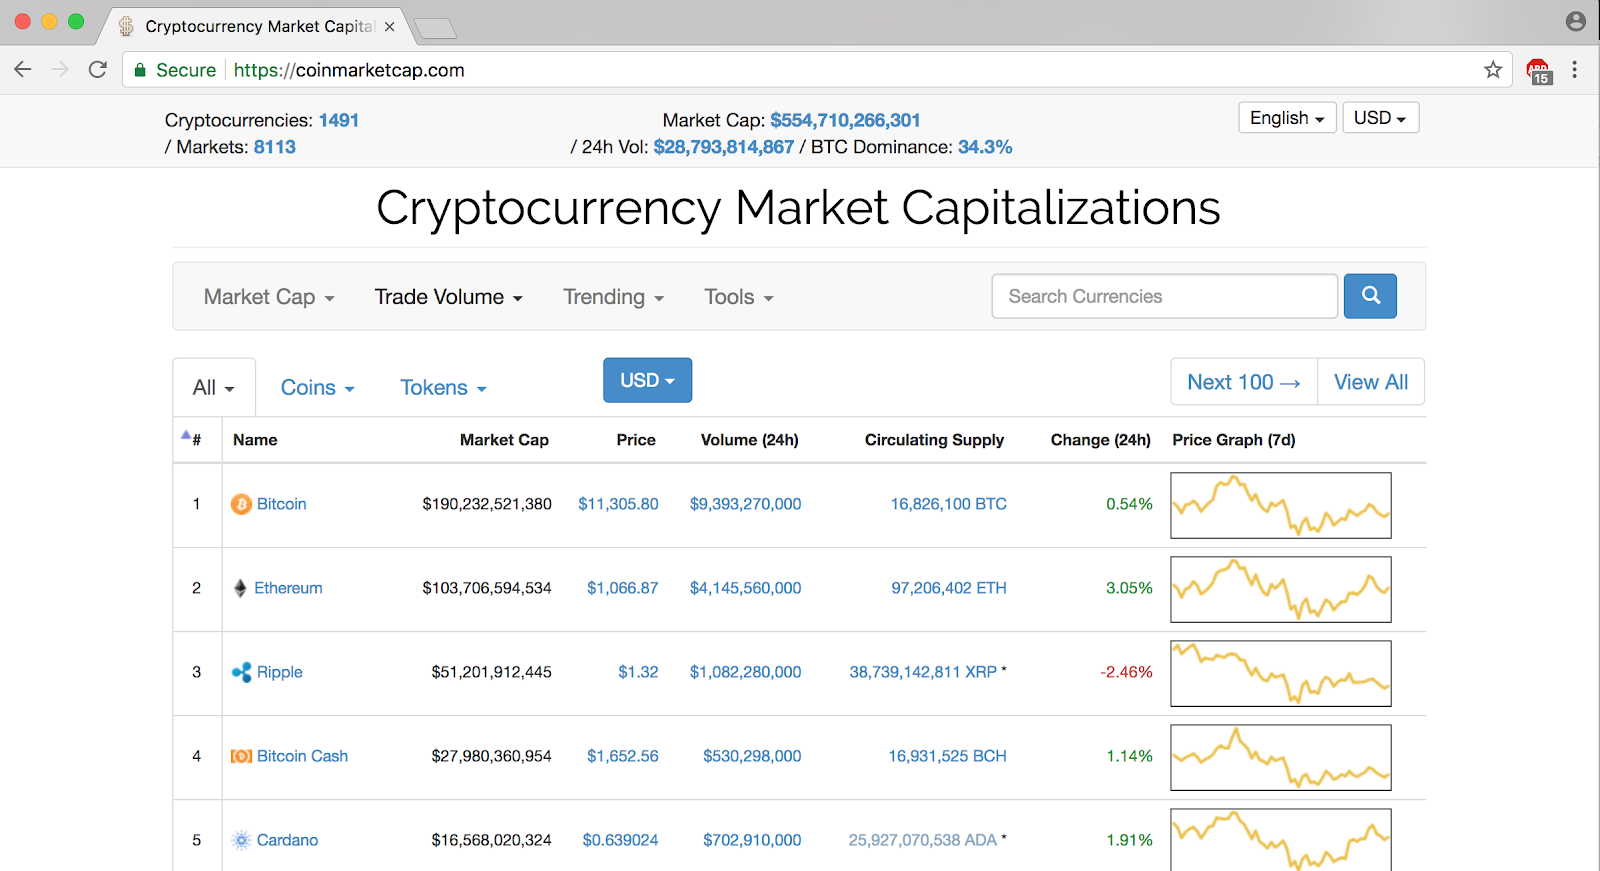
CoinMarketCap is a popular site with cryptocurrency traders because of its comprehensive data.Luckily for us, they provide an API for use in our applications: https://coinmarketcap.com/api

We can now set up a simple request to the API endpoint to retrieve the top 100 cryptocurrency prices from CoinMarketCap, in JSON.

We will need the request module from npm:

npm install --save request

Next, add an API endpoint to server.js and test to make sure it works:

// server.js

const express = require('express');
const bodyParser = require('body-parser');
const request = require('request');
const app = express();

// Use body-parser as middleware so that we have JSON data available on Request objects
app.use(bodyParser.json({type: 'application/json'}));

// Requests to http://localhost:3000/ will respond with a JSON object
app.get('/', (req, res) => {
   res.json({success: true});
});

// Requests to http://localhost:3000/api/coins will trigger a request to CoinMarketCap API,
// respond with a JSON object with coin prices, and log a message to the console.
app.get('/api/coins', (req, res) => {
   request.get('https://api.coinmarketcap.com/v1/ticker/', (err, response, body) => {
       let coinData = JSON.parse(body);

       console.log(coinData);
       res.json(coinData);
   });
});

// Start listening on port 3000 to start receiving requests
app.listen(3000, () => {
   console.log('Coin Alert app listening on port 3000!')
});

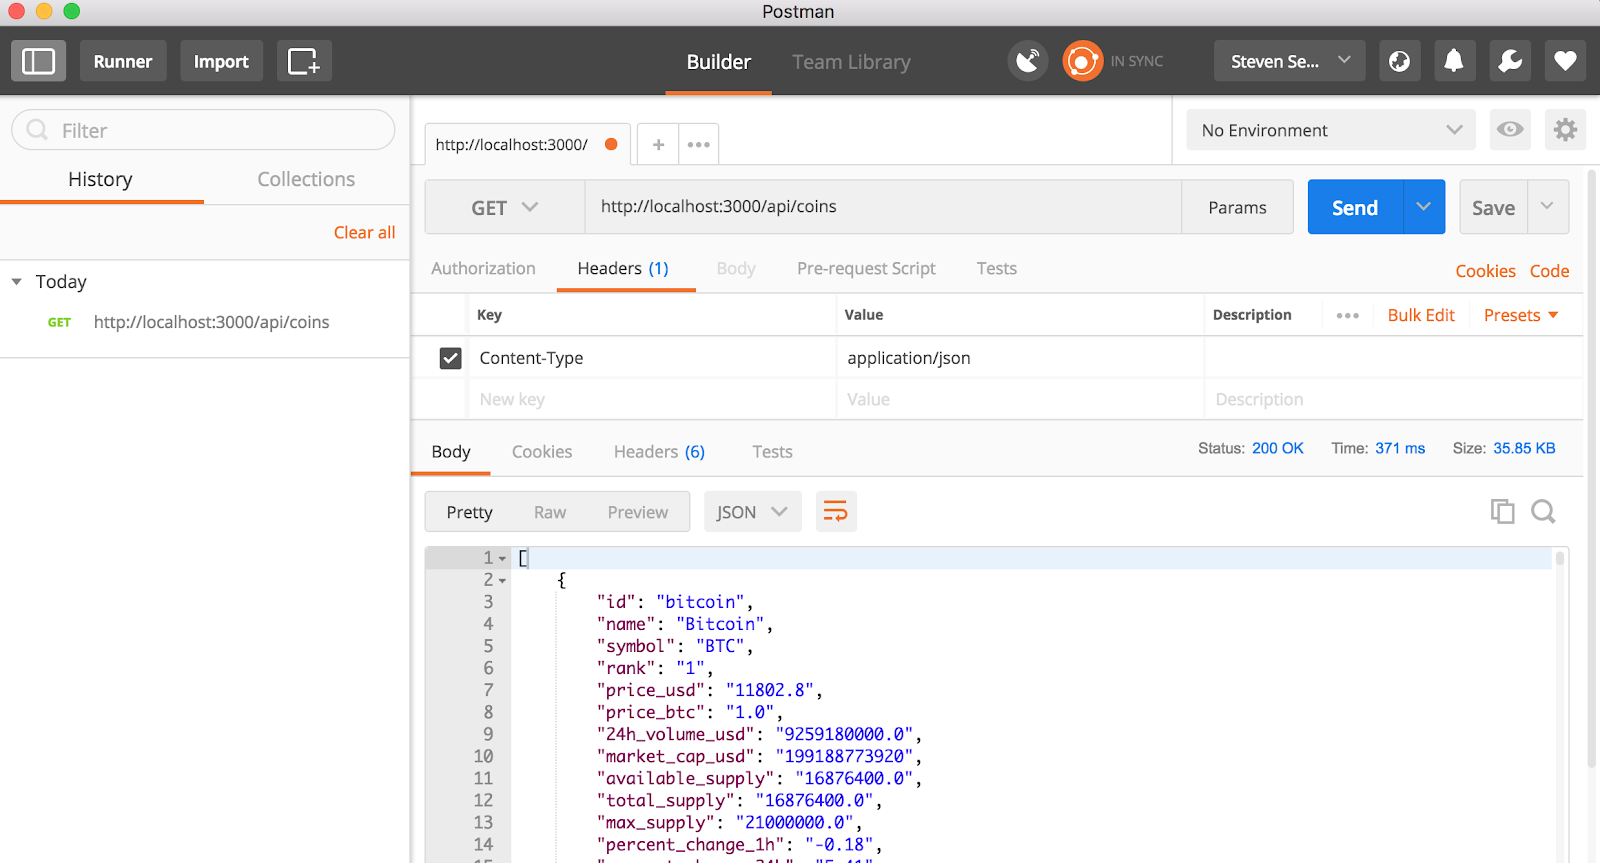
Run npm start in your terminal, and navigate your browser to http://localhost:3000/api/coins.You should see a JSON array in both your browser and your terminal, similar to this:

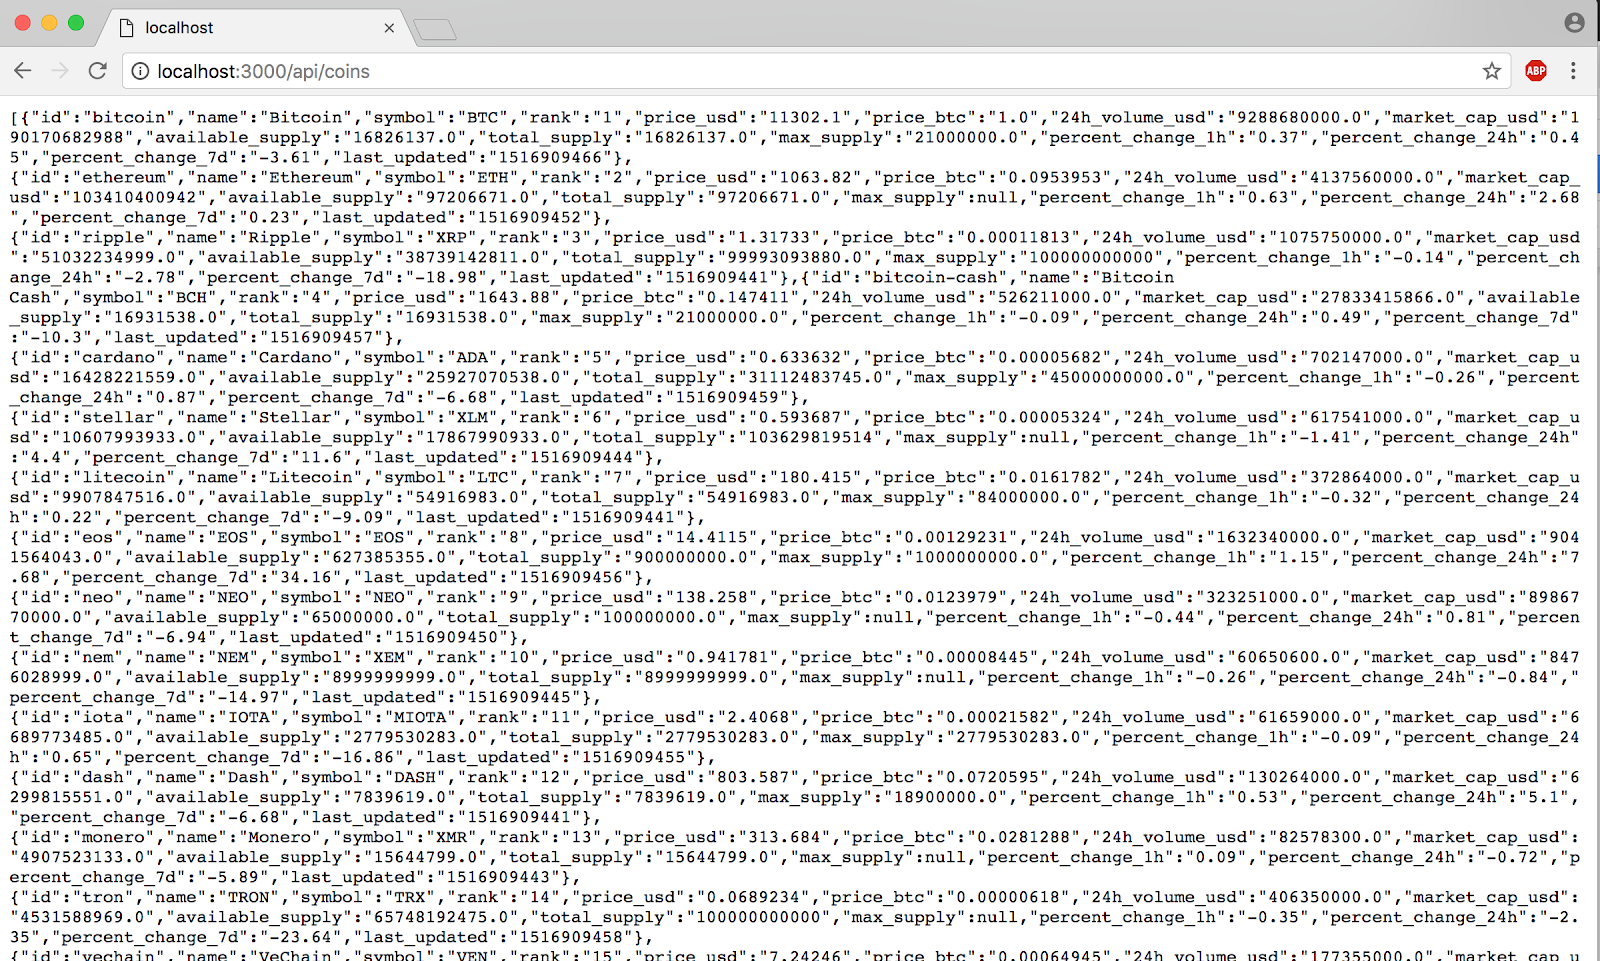
Congrats, we now have some data to play around with.

Adding an alarm with Underscore.js

Following along to this point in the post:

git checkout step-3-simple-alarm; npm install

Next, we will create a very simple alarm to detect when a cryptocurrency alarm hits a threshold.

We will use a very popular JavaScript utility library called Underscore to help traverse and filter the API data we request from the CoinMarketCap API.Install underscore via npm:

npm install --save underscore

Create a directory called models, then create a file inside this directory named alarm.js with the following code:

// models/alarm.js
const _ = require('underscore');

class Alarm {

   constructor(data) {
       // put data object onto Alarm object
       _.extend(this, data);
   }

   // Returns a boolean based on whether alarm threshold has been exceeded
   isTriggered(latestCoinData) {
       let isAlarmTriggered = false;
       switch (this.thresholdDirection) {
           case 'under':
               isAlarmTriggered = latestCoinData.price_usd < this.priceUsdThreshold; break; case 'over': default: isAlarmTriggered = latestCoinData.price_usd > this.priceUsdThreshold;
               break;
       }
       return isAlarmTriggered;
   }
}

module.exports = Alarm;

The Alarm class is very simple, taking in its object properties inside its constructor.The method isTriggered is used to compare alarm thresholds to a current cryptocoin price, returning true if the price has hit or exceeded the threshold, and false if it hasn’t.

Now, edit server.js to import our new alarm model, hardcode an alarm, and check to see if it has been triggered. For the sake of simplicity, set an alarm to trigger when Bitcoin’s price goes over $1,000:

// server.js

const express = require('express');
const bodyParser = require('body-parser');
const request = require('request');
const _ = require('underscore');
// Import our new Alarm model
const Alarm = require('./models/alarm');

const app = express();


app.use(bodyParser.json({type: 'application/json'}));

// Requests to http://localhost:3000/ will respond with a JSON object
app.get('/', (req, res) => {
   res.json({success: true});
});

// Requests to http://localhost:3000/api/coins will trigger a request to CoinMarketCap API,
// respond with a JSON object with coin prices, and log a message to the console if Bitcoin is above $1000.
app.get('/api/coins', (req, res) => {
   request.get('https://api.coinmarketcap.com/v1/ticker/', (err, response, body) => {
       let coinsData = JSON.parse(body);

       // Hardcode an Alarm with a low value to ensure alarm will trigger
       let alarm = new Alarm({
           coinId: 'bitcoin',
           priceUsdThreshold: 1000.00,
           thresholdDirection: 'over'
       });

       // Find Bitcoin’s data object inside response collection
       let latestCoinData = _.findWhere(coinsData, { id: alarm.coinId});

       //  Log the alarm data to the console if the threshold is crossed
       if (latestCoinData && alarm.isTriggered(latestCoinData)) {
           console.log(`* ALARM * ${alarm.coinId}: $${latestCoinData.price_usd} is ${ alarm.thresholdDirection} threshold $${alarm.priceUsdThreshold}`);
       }
       // Return a JSON object of the CoinMarketCap API response
       res.json(coinsData);
   });
});

// Start listening on port 3000 to start receiving requests
app.listen(3000, () => {
   console.log('Coin Alert app listening on port 3000!')
});

Start the app up through the terminal:

npm start

Navigate your browser to http://localhost:3000/api/coins to see the latest CoinMarketCap API data. You should see the console message logged, confirming that our alarm has been triggered.

We have fresh coin data and a functional alarm. It’s time to start saving this data to a database.

Saving and retrieving alarms with MongoDB

Following along to this point in the post:

git checkout step-4-save-alarm-mongodb; npm install

Incorporate MongoDB into our app to store our alarm data and retrieve it every time we fetch CoinMarketCap API coin price data. We will also refactor and structure our code into separate modules for testability and clarity.

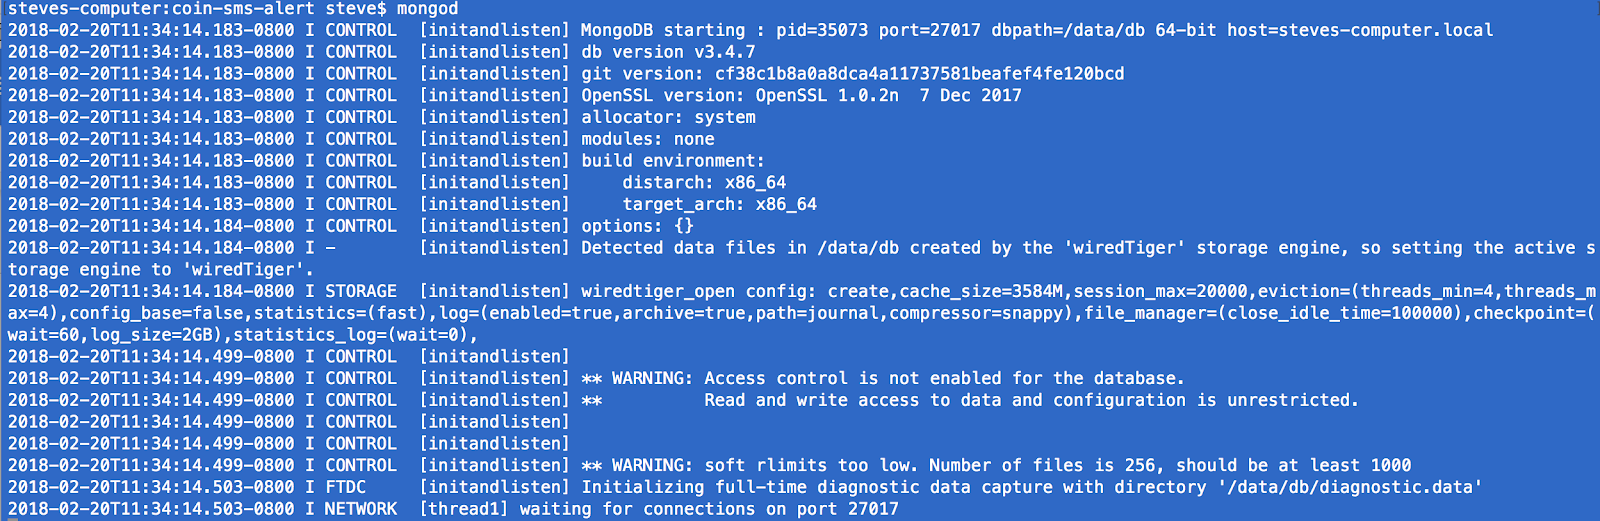
MongoDB is a flexible NoSQL database that is a popular choice for apps such as ours. Before we begin, make sure that you have MongoDB installed and running. On the command line, run:

mongod

Here is what you should see in your terminal when MongoDB is running:

Next, install the mongodb client into our Node.js app:

npm install --save mongodb

Create a folder in your root directory named dataAccess, then create a file called mongoClientWrapper.js. We can wrap the MongoDB client code in a module so that we can configure the connection string, database name, collections, and any other functionality we need.

// mongoClientWrapper.js
const mongoClient = require('mongodb').MongoClient;

let db = null;
let dbConnectionString = 'mongodb://localhost:27017';
let dbName = 'coin-sms-alert';

// Connect to our MongoDB database and make database client available for use
exports.initialize = (done) => {
   if (db) return process.nextTick(done);

   console.log('Connecting to mongo database: ' + dbConnectionString);

   mongoClient.connect(dbConnectionString, (err, connectedDb) => {
       if (err) {
           console.log('Couldn\'t connect to mongo database', err);
           return done(err);
       }

       db = connectedDb.db(dbName);
       return done();
   });
};

// Close our MongoDB connection for shutdown
exports.dispose = (done) => {
   if (db) {
       console.log('Closing connection to mongo database: ' + dbConnectionString);
       var tempDb = db;
       db = null;
       tempDb.close((err, result) => {
           if (err) {
               console.log('Error closing connection to mongo database', err);
               return done(err);
           }
           console.log('Database connection closed');
           return done();
       });
   } else {
       return process.nextTick(done);
   }
};

exports.getDb = () => {
   return db;
};

exports.alarms = () => {
   return db.collection('alarms');
};

To keep our API manageable, start setting up routes that our application will expose as its API. Create a directory called routes in your root directory. In the routes directory, we will create three files.

First, we need to import all routes modules and register them with Express. Create a file called routes.js with the following content:

const coinDataRoutes = require('./coinDataRoutes');
const alarmRoutes = require('./alarmRoutes');

// Configure all routes here
exports.configure = (app) => {

   // Test URL
   app.get('/', (req, res) => {
       res.json({success: true});
   });

   // Add routes to the express app object
   coinDataRoutes.configure(app);
   alarmRoutes.configure(app);

};

Second, create a module to register routes that RESTfully deals with CRUD operations on alarm data. Add the following to a file named alarmRoutes.js:

const alarmRepo = require('../dataAccess/repos/alarmRepository');

// Alarm CRUD (CREATE - READ/RETRIEVE - UPDATE - DELETE) routes
exports.configure = (app) => {
   // RESTful routing
   app.post('/api/alarm', createAlarm);
   app.get('/api/alarm', getAlarms);

};

// Create an alarm and respond with JSON alarm object
function createAlarm(req, res, done) {
   const alarmData = req.body;

   alarmRepo.createAlarm(alarmData, (err, alarm) => {
       return res.json(alarm);
   });
}

// Retrieve all alarms and return a JSON array
function getAlarms(req, res, done) {

   alarmRepo.getAlarms((err, alarms) => {
       return res.json(alarms);
   });

}

Lastly, create coinDataRoutes.js, a module that handles retrieving cryptocurrency data from the external CoinMarketCap API:

const _ = require('underscore');

const coinDataRepo = require('../dataAccess/repos/coinDataRepository');
const alarmRepo = require('../dataAccess/repos/alarmRepository');

// Coin routes
exports.configure = (app) => {
   // RESTful coin routes
   app.get('/api/coins', getCoinData);

};

// Get latest coin data, get all created alarms,
// determine if any alarms have thresholds that have been crossed,
// return coin data in JSON format
function getCoinData(req, res, done) {

   coinDataRepo.getCoinData((err, coinsData) => {

       alarmRepo.getAlarms((err, alarms) => {

           alarms.forEach((alarm) => {

               let latestCoinData = _.findWhere(coinsData, {id: alarm.coinId});

               if (latestCoinData && alarm.isTriggered(latestCoinData)) {
                   console.log(`* ALARM * ${alarm.coinId}: $${latestCoinData.price_usd} is ${ alarm.thresholdDirection} threshold $${alarm.priceUsdThreshold}`);
               }
              
           });

           res.json(coinsData);
       });

   });

}

With our routes established, we will now use a simplified design pattern for accessing and manipulating persistent data in MongoDB as well as for interacting with third-party API via HTTP requests.

Create a directory in the dataAccess directory named repos. In it, we will create two files:
First, create alarmRepository.js. This repository will have two methods: getAlarms to retrieve all alarms and createAlarm for alarm creation.

const Alarm = require('../../models/alarm');
const db = require('../../dataAccess/mongoClientWrapper');

// Insert an alarm document record in MongoDB alarms collection
exports.createAlarm = (alarmData, done) => {
   const collection = db.alarms();

   collection.insertOne(alarmData, (err, alarm) => {
       done(err, alarm);
   });
};

// Retrieve all alarms from MongoDB alarm collection, convert all to Alarm model objects
exports.getAlarms = (done) => {
   const collection = db.alarms();

   collection.find({}).toArray((err, results) => {
       let alarms = results.map((result) => {
           return new Alarm(result)
       });
      
       done(err, alarms);
   });
};

Second, create coinDataRepository.js. This repository handles API requests to CoinMarketCap’s API:

const request = require('request');

// Make a GET request to CoinMarketCap's API to retrieve latest cryptocoin prices
exports.getCoinData = (done) => {

   request.get('https://api.coinmarketcap.com/v1/ticker/', (err, response, body) => {

       let coinsData = JSON.parse(body);

       done(err, coinsData);
   });

};

Now that all of these files have been created, we need to refactor our main server.js file to utilize our new modules:


const express = require('express');
const bodyParser = require('body-parser');

const routes = require('./routes/routes');
const mongoClientWrapper = require('./dataAccess/mongoClientWrapper');
const app = express();

// Use body-parser as middleware so that we have JSON data available on Request objects
app.use(bodyParser.json({type: 'application/json'}));

// Start listening on port 3000 to start receiving requests
app.listen(3000, () => {
   console.log('Coin Alert app listening on port 3000!');

   // Initialize our MongoDB client
   mongoClientWrapper.initialize(() => {
       // Set up routes
       routes.configure(app);
   });

});

Now let’s start the app and test our latest code! Run npm start, you should see a message in your console that the app is running.

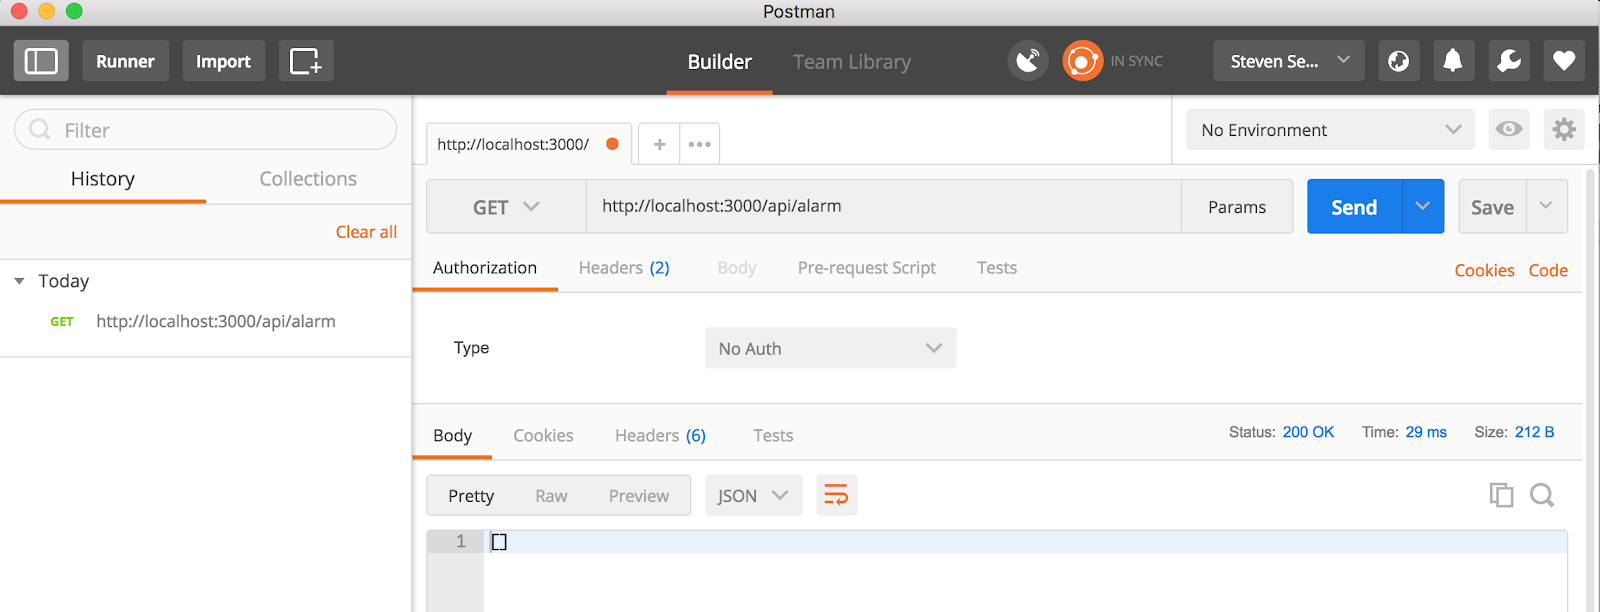
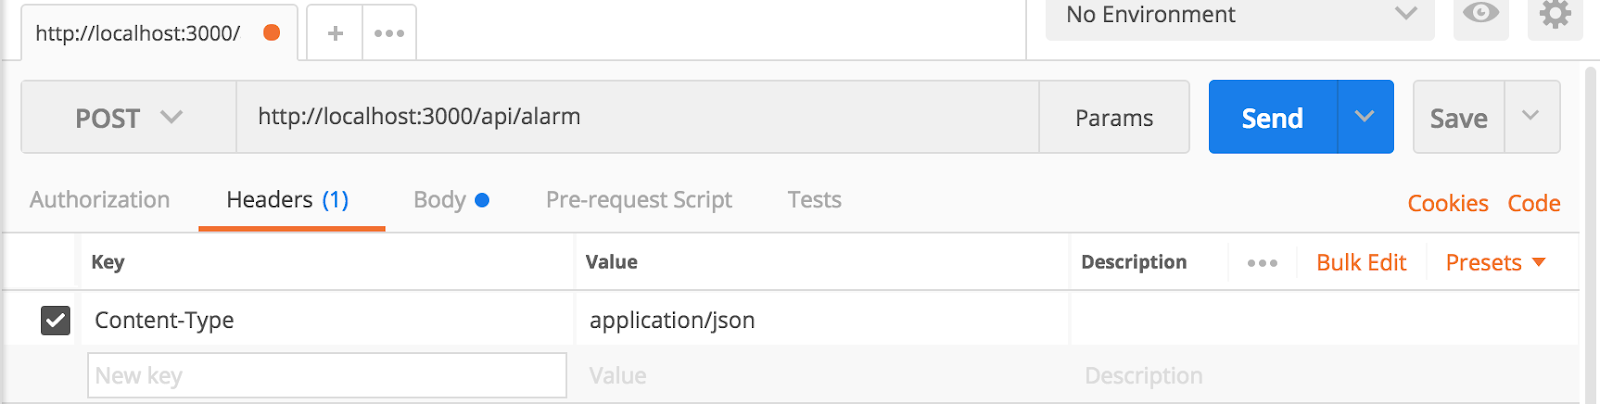
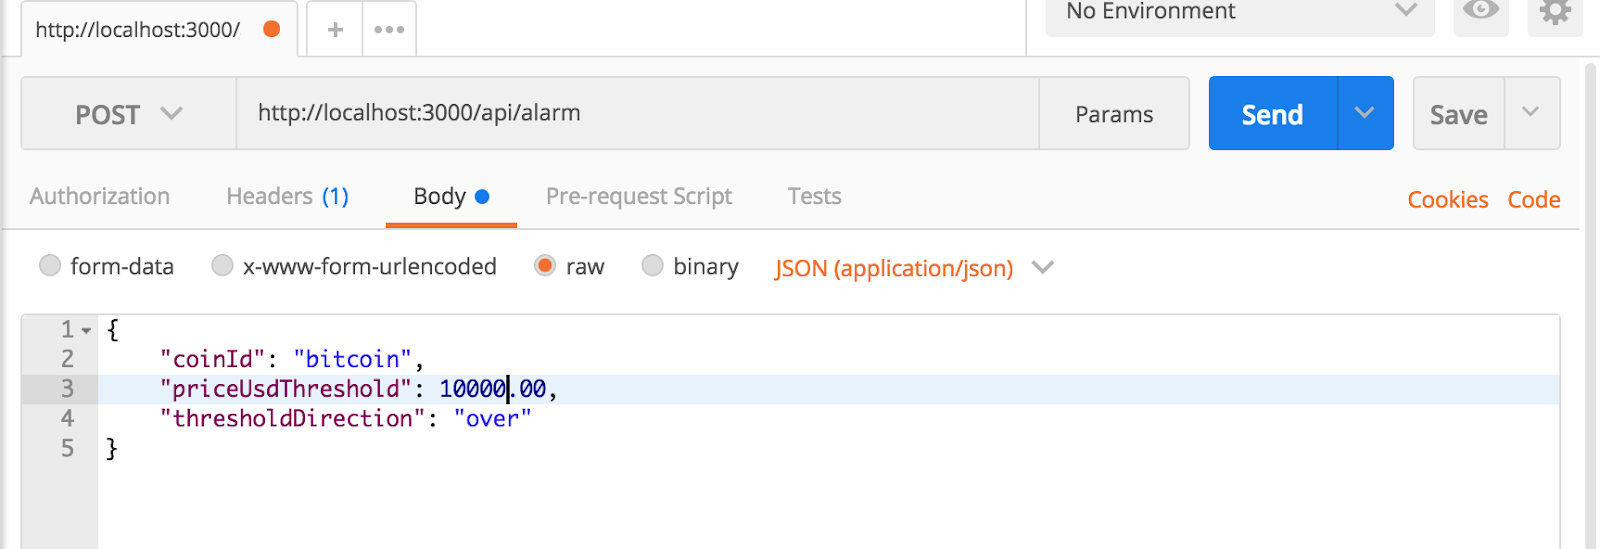
With the addition of our RESTful routing, we will need a way to send POST requests as well as GET requests. Postman is an excellent tool for this purpose. Start Postman, then build your requests as shown in the pictures below:

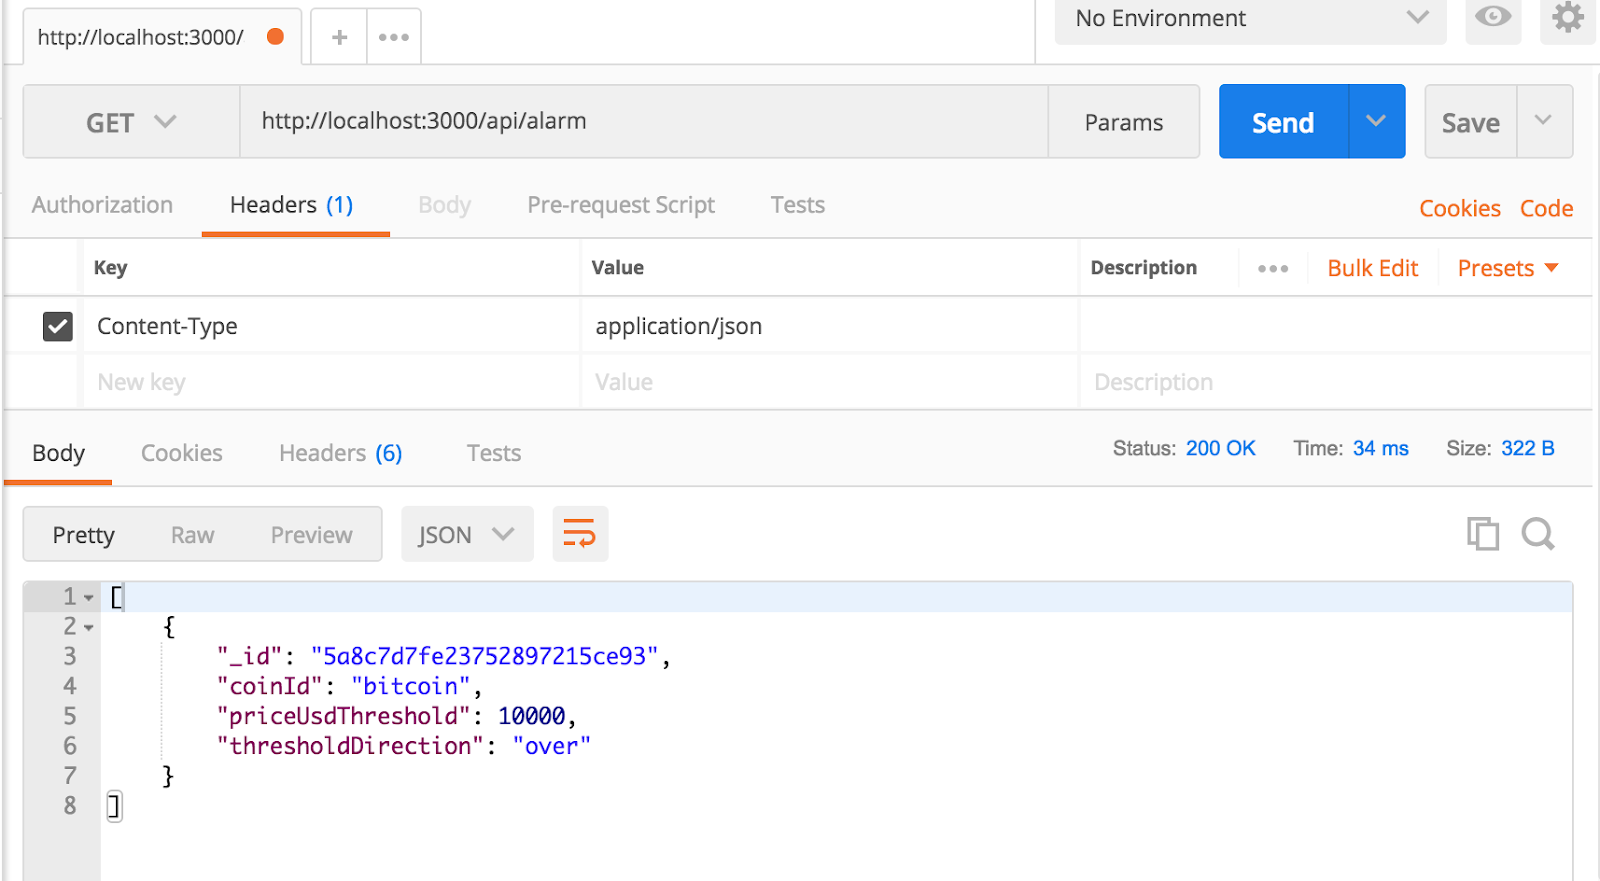
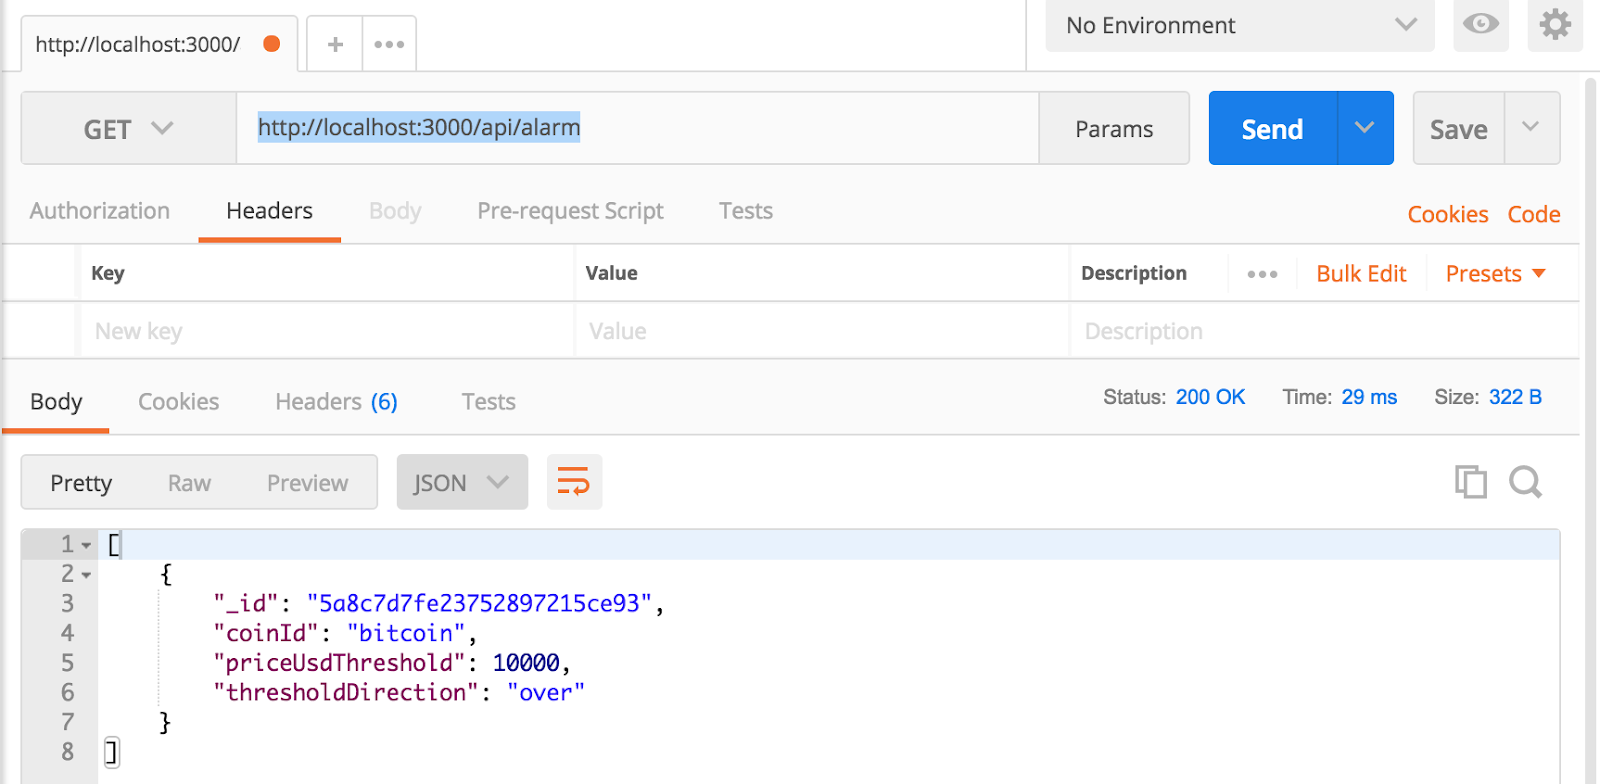
  • GET http://localhost:3000/api/alarm – this will return a JSON array contains all of our alarm objects. Initially, this array will be empty; we will be creating alarms in our next request.
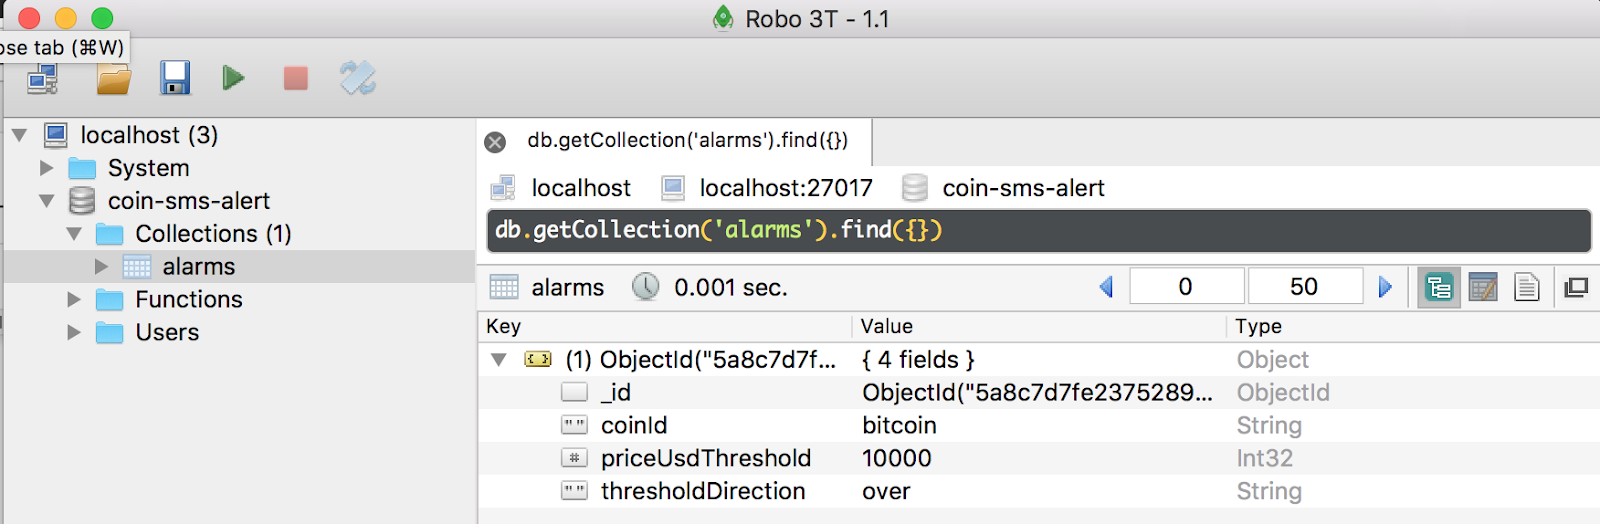
  • POST http://localhost:3000/api/alarm – given a JSON-formatted object containing alarm data and a Content-Type header, this request will create an alarm that will be stored in MongoDB. After you have executed this request, check your coin-sms-alert database for an alarms collection with a stored document:

  • GET http://localhost:3000/api/coins – this request queries CoinMarketCap’s API for the latest coin data. Once data has been retrieved, our code iterates through all of the saved alarms and checks for threshold crosses.

Wow, that was a lot of work, but it was worth it. With our alarm data being persisted and checked against the CoinMarketCap API, we can proceed to the exciting part of this tutorial: sending cryptocurrency alerts directly to our phone!

Sending cryptocurrency alarms via SMS

Following along to this point in the post:

git checkout step-5-send-sms-alarms; npm install

The Twilio API gives us the ability to send SMS and MMS text messages through a simple interface. There is an official package available on npm (https://www.npmjs.com/package/twilio) that will make sending SMS text messages a breeze!

In the beginning of this post, you should have successfully run through the Quickstart tutorial and written down your Twilio Account SID, Auth Token, and Twilio phone number. You will also need to have access to a personal phone number that can receive SMS text messages.
Instead of hard-coding these credentials, we will use a npm package called dotenv to configure our app’s environment. (If you’re curious to learn more about dotenv and its usage, check out this tutorial on the Twilio blog for more information.)

Install the dotenv package:

npm install --save dotenv

Next, create a file in your root directory named .env. This is the default file that dotenv uses for configuration of environment variables:

TWILIO_ACCOUNT_SID=yourAccountSid
TWILIO_AUTH_TOKEN=yourAuthToken
FROM_PHONE_NUMBER=yourTwilioPhoneNumber
TO_PHONE_NUMBER=yourPersonalSmsEnabledPhoneNumber

NOTE: if you are following along with the GitHub repository, you will have a file named .env.template. Copy this file’s contents to a file named .env and fill in your credentials.
Install the twilio module with npm:

npm install --save twilio

Create a directory called services in the root directory of your project, and then a file called smsService.js. This service file will handle all interaction with the Twilio API, making it easy to integrate into our app:

const dotenv = require('dotenv');
const Twilio = require('twilio');

const config = dotenv.config().parsed;
const client = new Twilio(config.TWILIO_ACCOUNT_SID, config.TWILIO_AUTH_TOKEN);


exports.sendSms = (bodyMessage, done) => {

   let message = {
       to: config.TO_PHONE_NUMBER,
       from: config.FROM_PHONE_NUMBER,
       body: bodyMessage
   };

   client.messages.create(message, (err, message) => {
       if (err) return done(err);

       return done(null, message);
   });

};

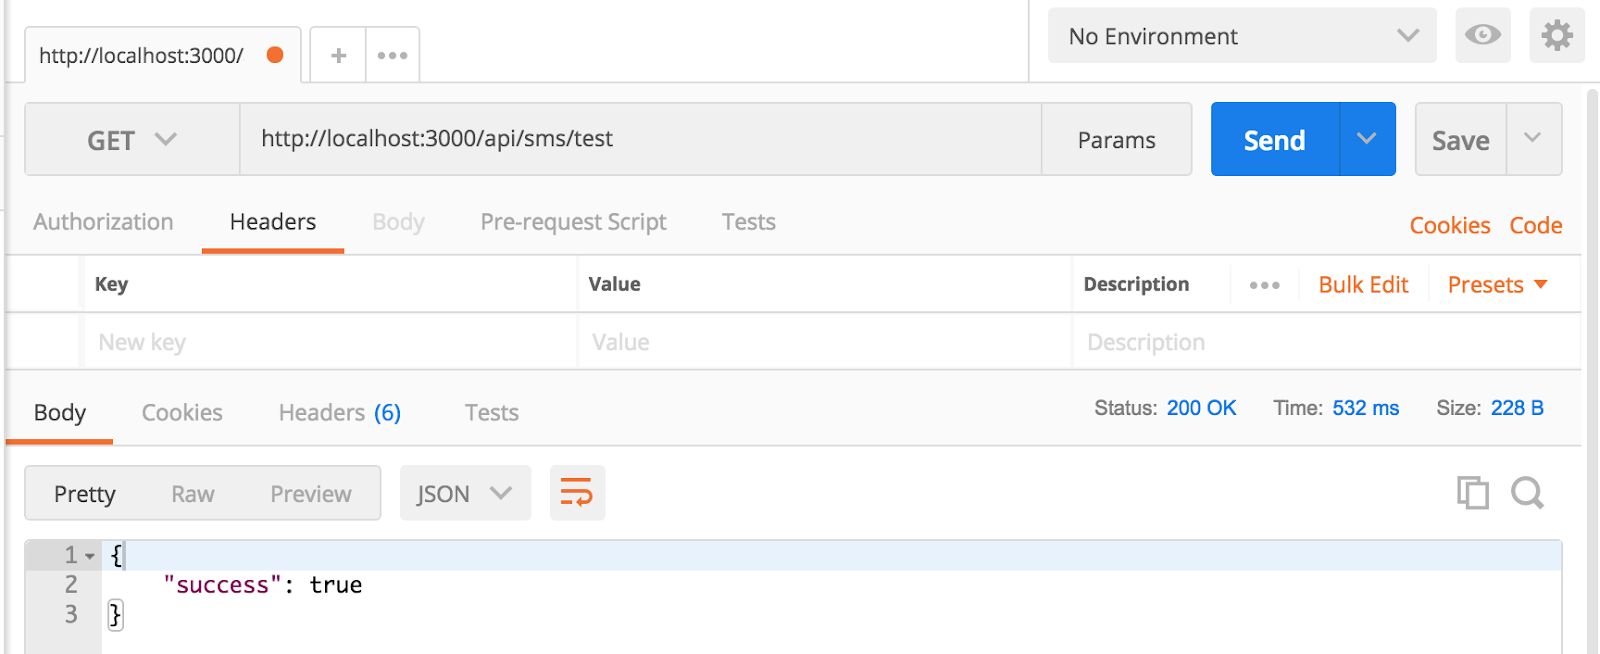
Create a file in the routes directory named smsRoutes.js, which will use our newly-created smsService.js. We will set up one route to test our application, http://localhost:3000/api/sms/test, which we can access through a browser and confirm that we have configured our project correctly:

const smsService = require('../services/smsService');

// SMS-related routes
exports.configure = (app) => {
   // Test route to ensure API successfully sends a SMS alarm to our phone
   app.get('/api/sms/test', sendSmsTest);

};

// Send an SMS test message
function sendSmsTest(req, res, done) {

   smsService.sendSms('This is a test message from our Node.js App!', () => {
       console.log('Successfully sent a SMS message');

       res.json({
           success: true
       });
   })

}

Add this route to the routes.js file:


const coinDataRoutes = require('./coinDataRoutes');
const alarmRoutes = require('./alarmRoutes');
const smsRoutes = require('./smsRoutes');

// Configure all routes here
exports.configure = (app) => {

   // Test URL
   app.get('/', (req, res) => {
       res.json({success: true});
   });

   // Add routes to the express app object
   coinDataRoutes.configure(app);
   alarmRoutes.configure(app);
   smsRoutes.configure(app);

};

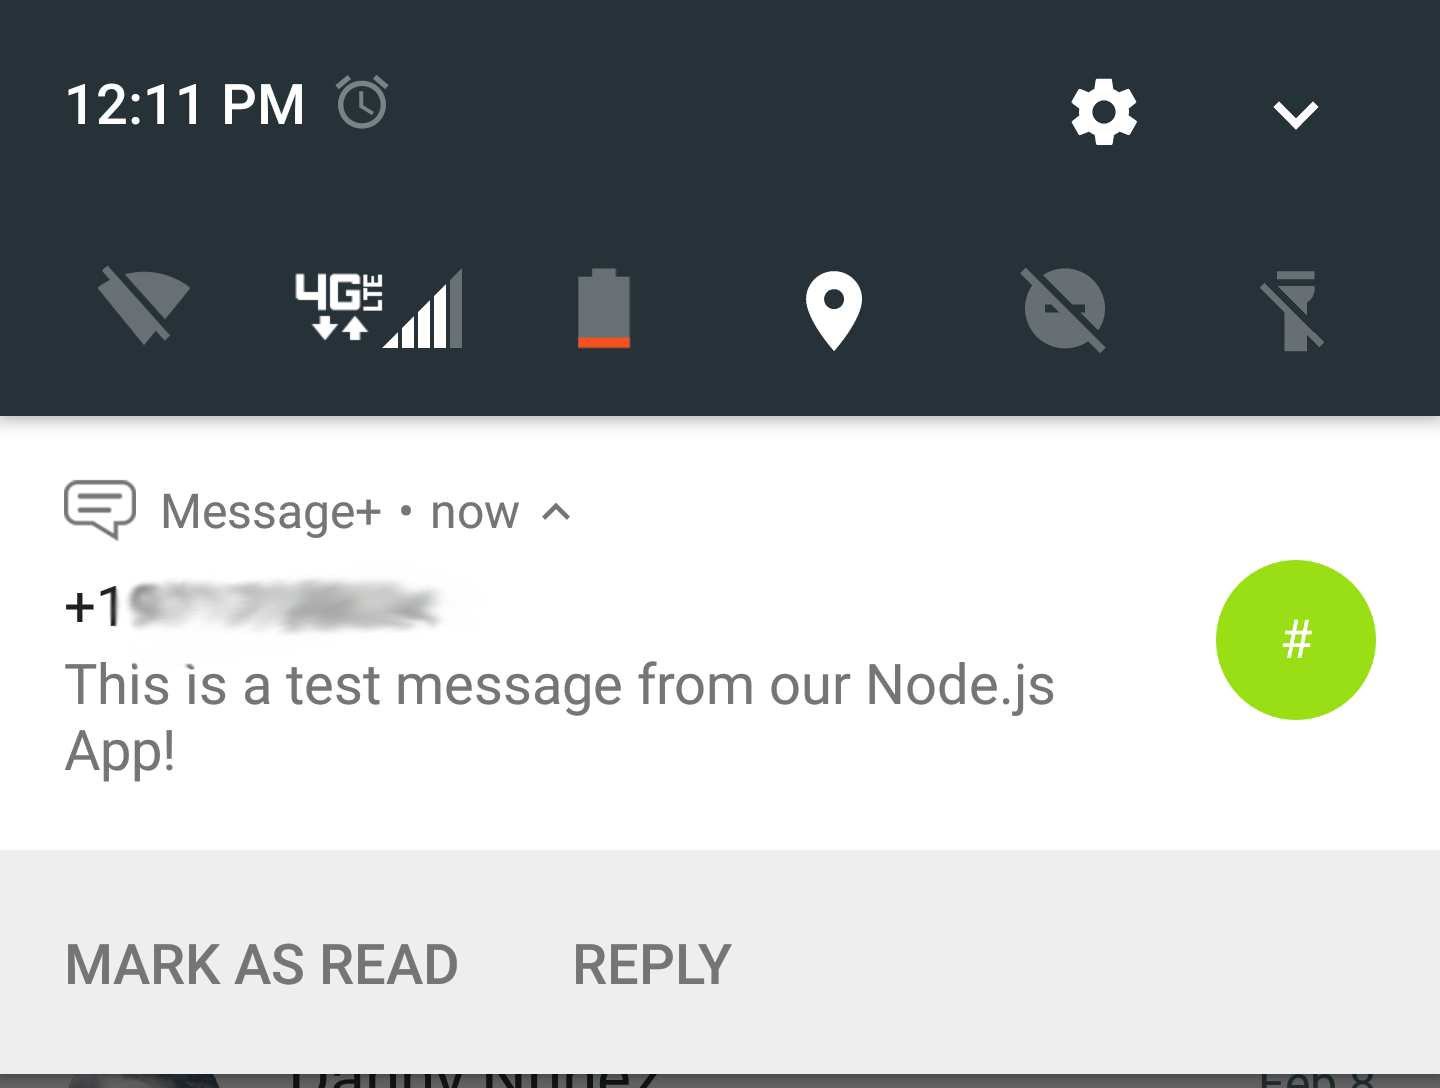
Start your app with npm start, then use a browser or Postman to send a GET request to http://localhost:3000/api/sms/test. The app should respond with JSON, and you should receive a text message on your phone.

Now that we have verified that SMS texts are successfully being sent, it is time to integrate this into our existing API. Open coinDataRoutes.js and refactor the code to use our new smsService. It’s probably easier to delete the contents of the file and paste this in:

const _ = require('underscore');

const coinDataRepo = require('../dataAccess/repos/coinDataRepository');
const alarmRepo = require('../dataAccess/repos/alarmRepository');
const smsService = require('../services/smsService');

// Coin routes
exports.configure = (app) => {
   // RESTful coin routes
   app.get('/api/coins', getCoinData);

};

// Get latest coin data, get all created alarms,
// determine if any alarms have thresholds that have been crossed,
// return coin data in JSON format
function getCoinData(req, res, done) {

   coinDataRepo.getCoinData((err, coinsData) => {

       alarmRepo.getAlarms((err, alarms) => {

           alarms.forEach((alarm) => {

               let latestCoinData = _.findWhere(coinsData, {id: alarm.coinId});

               if (latestCoinData && alarm.isTriggered(latestCoinData)) {

                   let message = `* ALARM * ${alarm.coinId}: $${latestCoinData.price_usd} is ${ alarm.thresholdDirection} threshold $${alarm.priceUsdThreshold}`;

                   smsService.sendSms(message, () => {
                       console.log(message);
                   });

               }

           });

           res.json(coinsData);
       });

   });

}

Ensure that you have some alarms created—preferably with thresholds low enough to trigger an alarm—by sending a GET request to http://localhost:3000/api/alarm

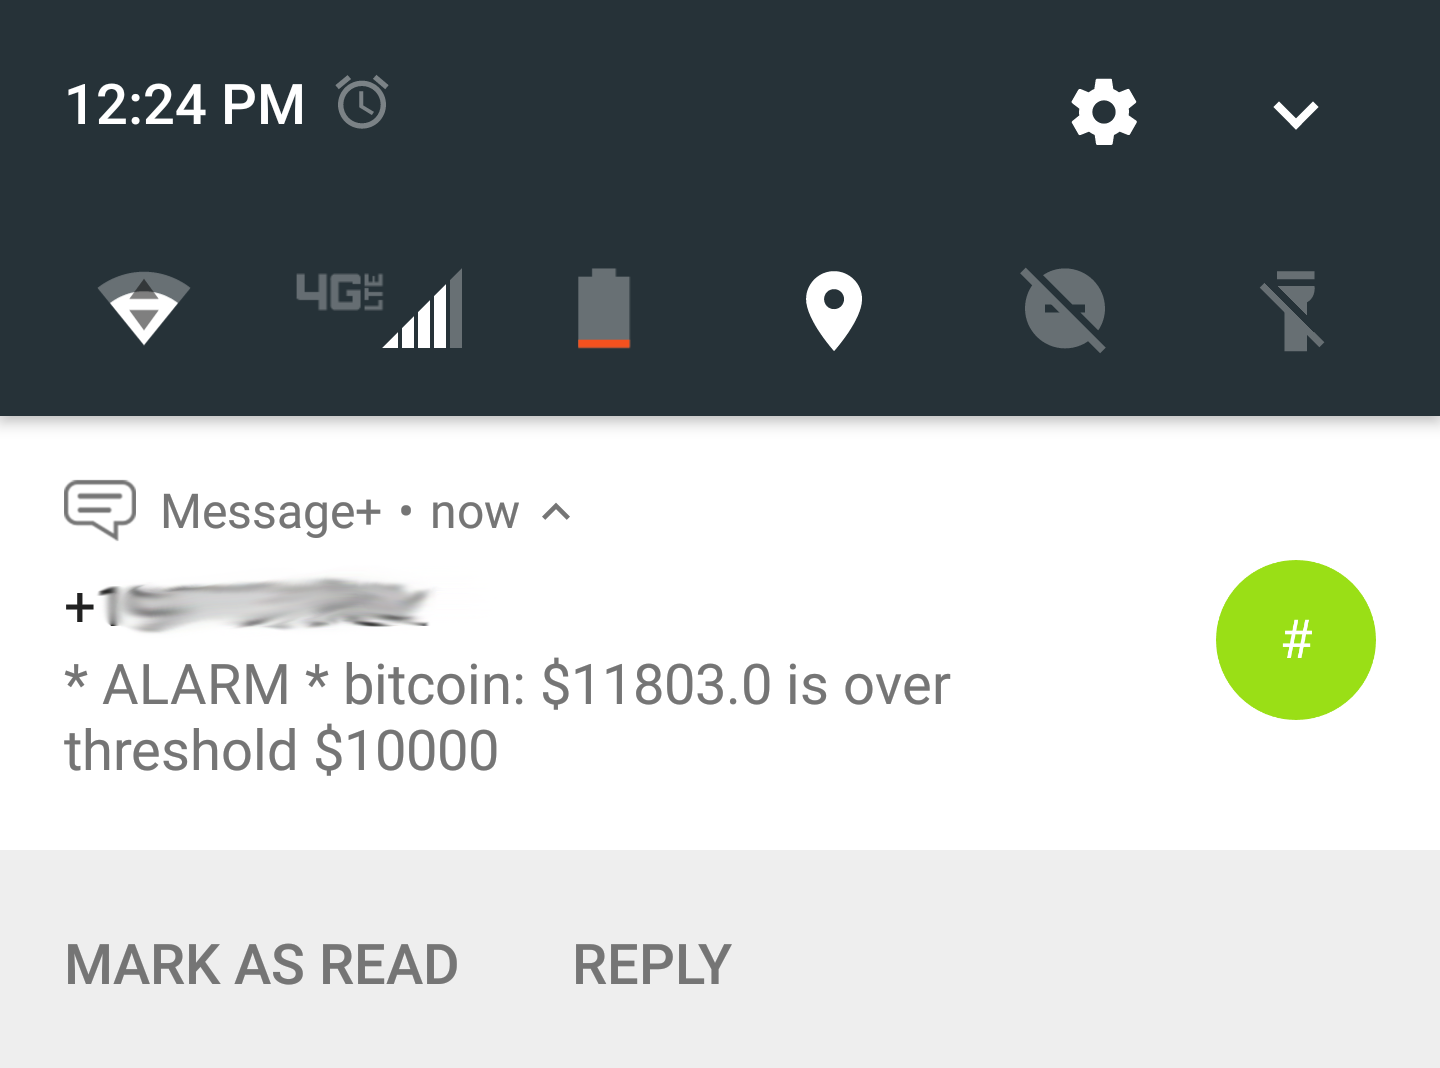
Restart the app with npm start and make a GET request to http://localhost:3000/api/coins. You should receive a SMS text message if any alarm thresholds were exceeded.


Great! Every time that we manually make a request to http://localhost:3000/api/coins, we check our alarms and send out SMS text alerts. But wouldn’t it be better if our app could check coin prices periodically and send these alerts to our phone?

Scheduling tasks with Agenda

Following along to this point in the post:

git checkout step-6-task-scheduling; npm install

In the previous step, we were able to send ourselves SMS text alarm messages whenever we made requests to http://localhost:3000/api/coins. This is fine for a proof-of-concept, but we can further refactor our code to schedule this task to run at a regular interval.

npm hosts an excellent job scheduling module called agenda http://agendajs.com/. This module has a use case similar to cron on Unix-like systems or Task Scheduler on Windows. Basically, we want our application to do something forever at a specified interval (every minute, hour, day, specific day of the week, etc.) or at specific moment in time. agenda is a very flexible module that we can use to set up a recurring job to check our alarms against the latest cryptocoin prices from the CoinMarketCap API.

Install the agenda package with npm:

npm install --save agenda

agenda requires a MongoDB database and connection string to store information about scheduled tasks. We have hardcoded this in a previous step, but we should be security-conscious developers and move our configuration out of our application code. Update .env like this:


TWILIO_ACCOUNT_SID=yourAccountSid
TWILIO_AUTH_TOKEN=yourAuthToken
FROM_PHONE_NUMBER=yourTwilioPhoneNumber
TO_PHONE_NUMBER=yourPersonalSmsEnabledPhoneNumber
MONGODB_CONNECTION_STRING=mongodb://localhost:27017
MONGODB_DATABASE=coin-sms-alert

Next update the mongoClientWrapper.js file to use our new environment values:

const mongoClient = require('mongodb').MongoClient;
const dotenv = require('dotenv');

let config = dotenv.config().parsed;
let dbConnectionString = config.MONGODB_CONNECTION_STRING;
let dbName = config.MONGODB_DATABASE;

let db = null;
let connectedClient = null;

// Connect to our MongoDB database and make database client available for use
exports.initialize = (done) => {
   if (db) return process.nextTick(done);

   console.log('Connecting to mongo database: ' + dbConnectionString);

   mongoClient.connect(dbConnectionString, (err, client) => {
       if (err) {
           console.log('Couldn\'t connect to mongo database', err);
           return done(err);
       }

       db = client.db(dbName);
       connectedClient = client;
       return done();
   });
};

// Close our MongoDB connection for shutdown
exports.dispose = (done) => {
   if (db) {
       console.log('Closing connection to mongo database: ' + dbConnectionString);
       db = null;

       connectedClient.close((err, result) => {
           if (err) {
               console.log('Error closing connection to mongo database', err);
               return done(err);
           }
           console.log('Database connection closed');
           return done();
       });
   } else {
       return process.nextTick(done);
   }
};

exports.getDb = () => {
   return db;
};

exports.alarms = () => {
   return db.collection('alarms');
};

exports.agendaJobs = () => {
   return db.collection('agendaJobs');
};

Create a directory called jobs, then create two files named jobs.js and checkAlarmsJob.js.

jobs.js handles the initialization, registration, and shutdown of the jobs used in the app:

const Agenda = require('agenda');

const db = require('../dataAccess/mongoClientWrapper');
const checkAlarmJob = require('./checkAlarmJob');

const mongoConnectionString = `${process.env.MONGODB_CONNECTION_STRING}/${process.env.MONGODB_DATABASE}`;

let agenda = null;


exports.start = () => {
   // configure Agenda
   agenda = new Agenda({
       db: {
           address: mongoConnectionString
       },
       processEvery: 'one minute'
   });

   // Register event listener for when agenda starts up
   agenda.on('ready', () => {
       // Delete the jobs collection on startup
       deleteJobsCollection(() => {

           // Set up our job with agenda
           checkAlarmJob.register(agenda);
           // Job will run every minute
           checkAlarmJob.setSchedule('one minute');

           // Start agenda
           agenda.start(() => {
               console.log('Started jobs');
           });

       });
   });

   // error event listener
   agenda.on('error', (err) => {
       console.log('Error with Agenda!', err);
   });
};

// Gracefully stop errors
exports.stop = (done) => {
   agenda.stop(() => {
       console.log('Successfully shut down jobs');
       done();
   });
};

// Delete the MongoDB jobs collection
function deleteJobsCollection(done) {
   db.agendaJobs().drop(done);
}

checkAlarmsJob.js is a refactoring of code we previously used in our coinDataRepository.js. We are moving the code so that our application is more modular, testable, and easier to understand.

const _ = require('underscore');

const coinDataRepo = require('../dataAccess/repos/coinDataRepository');
const alarmRepo = require('../dataAccess/repos/alarmRepository');
const smsService = require('../services/smsService');

const jobName = 'Check Alarm Job';
let agendaInstance = null;

// Register our job with the agenda instance
exports.register = (agenda) => {
   agendaInstance = agenda;

   // Define what this job will do
   agendaInstance.define(jobName, () => {
       console.log(`'${jobName}' executed at ${new Date()}`);

       // Request coin data from the CoinMarketCap API
       coinDataRepo.getCoinData((err, coinsData) => {
           // Retrieve all alarms from our database
           alarmRepo.getAlarms((err, alarms) => {
               // Iterate through all alarms
               alarms.forEach((alarm) => {
                   let latestCoinData = _.findWhere(coinsData, {id: alarm.coinId});

                   // If the alarm's coin is found and the alarm is triggered...
                   if (latestCoinData && alarm.isTriggered(latestCoinData)) {
                       let message = `* ALARM * ${alarm.coinId}: $${latestCoinData.price_usd} is ${ alarm.thresholdDirection} threshold $${alarm.priceUsdThreshold}`;

                       // ...send a SMS message!
                       smsService.sendSms(message, () => {
                           console.log(message);
                       });
                   }
               });
           });
       });
   });
};

// Set schedule
exports.setSchedule = (timeInterval) => {
   agendaInstance.every(timeInterval, jobName);
};

Our app is so close to being production-ready! Let’s add some updates to server.js to gracefully shutdown our application:

const express = require('express');
const bodyParser = require('body-parser');

const routes = require('./routes/routes');
const mongoClientWrapper = require('./dataAccess/mongoClientWrapper');
const jobs = require('./jobs/jobs');
const app = express();

// Use body-parser as middleware so that we have JSON data available on Request objects
app.use(bodyParser.json({type: 'application/json'}));

// Start listening on port 3000 to start receiving requests
app.listen(3000, () => {
   console.log('Coin Alert app listening on port 3000!');

   // Initialize our MongoDB client
   mongoClientWrapper.initialize(() => {
       // Set up routes
       routes.configure(app);
       jobs.start();
   });

   // Process terminal signal event listeners
   process.on('SIGINT', shutDown);
   process.on('SIGTERM',shutDown);
});

// Gracefully shut down
function shutDown() {
   console.log('\nShutting down!');
   // Stop all running jobs
   jobs.stop(() => {
       // safely clean up mongodb connection
       mongoClientWrapper.dispose(() => {
           process.exit(0);
       });

   });

}

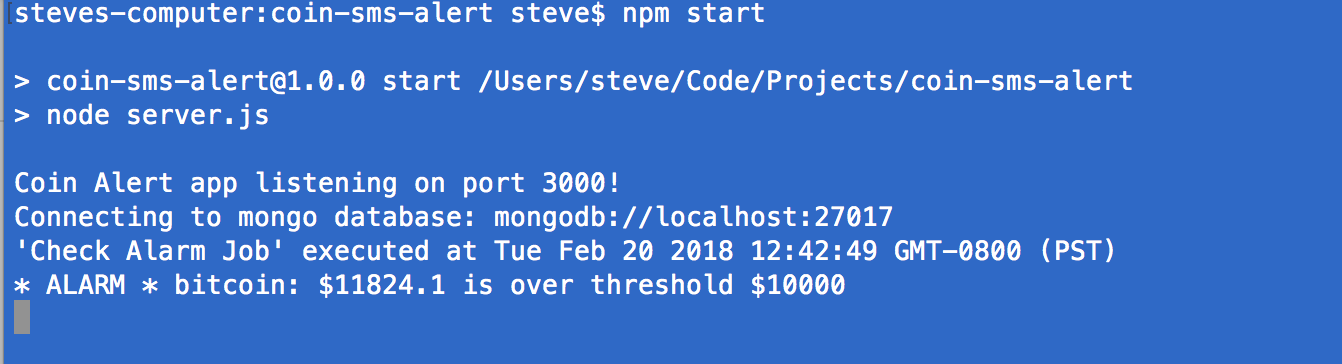
Start the app using npm start. You should receive at least one SMS text message to your phone. You should also see console messages informing you that the job was run as well as alarms whose threshold was triggered.

NOTE: If you do not receive a SMS text message, you may need to check the latest prices for cryptocurrencies to create alarms that will be triggered successfully.

To stop the app, use Ctrl C in your terminal. You should see messages indicating that the app is shutting down, the connection to MongoDB has been closed and all jobs have been stopped.

We made it!

Congratulations! Together, we have successfully created a very useful API and automated our cryptocurrency price checks. We’ve used the flexible Node.js and capable Twilio API to create a useful, real-world application that can help us all become cryptomillionaires! Thanks for following along with the tutorial and stay tuned for a follow-up article where we will create a dashboard UI (user interface) for our alarm app with React.js!

Steve Senkus is an avid software developer based in sunny, sunny San Diego, CA. When he’s not soaking up the sun or swing trading cryptocurrencies, you can reach him on Twitter (@stevesenkus) or by email at steve.senkus@gmail.com.