How to build an email contact form with SendGrid and Node.js
Time to read:
March 21, 2022
Written by
Reviewed by

Displaying your email address on a website can result in your email being scraped and used for spam. One way to get around this, but still allow people to contact you from your website, is to build a contact form.
In this post you will build a contact form using SendGrid to deliver emails to your inbox without exposing your email address.
You will build the project with Twilio Functions, but you could adapt the code to use in any Node.js environment.
How is this different to sending an email with an API?
When someone fills in a contact form, you might expect to receive an email in your inbox from their email address. However, to maintain a good email sending reputation, SendGrid only allows you to send emails from addresses that you have verified individually or from domains you have authenticated.
So, instead of using the submitted email address as the from address, you can enter it as a reply-to address instead. That way, SendGrid will send the email from your authenticated email address, but when you hit the reply button in your email client the new email will be to the submitted email address.
Since you control the email sending process, you can do other things like add a [contactform] tag to the email subject so you can easily filter emails from your contact form. Or you could capture extra information and include it in the body of the email.
Now you know the considerations for building a contact form with SendGrid, let's get on and build our own.
Build a contact form
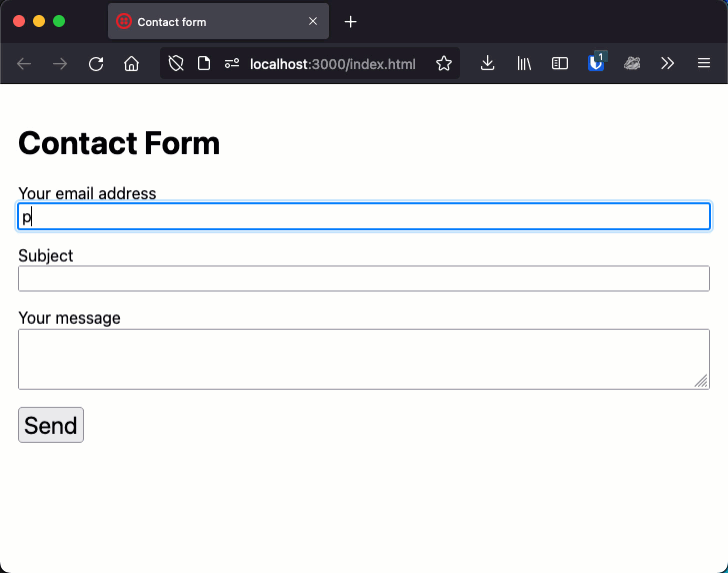
You're going to build a form that looks and works like this:
Here is everything you'll need to start building:
What you'll need
- A Twilio account (if you don't have one yet, sign up for a free Twilio account here and receive $10 credit when you upgrade)
- A SendGrid account (Sign up here to send up to 100 emails per day completely free of charge)
- An email address you can use to send emails from SendGrid, using either an authenticated domain or a verified sender
- Node.js installed (we'll be using Twilio Functions, which currently requires version 12)
- The Twilio CLI installed
Initiate the project
To build the server-side of our contact form, you're going to use a Twilio Function. When the project is finished, you'll be able to host the complete project in Twilio's infrastructure.
Once you have the Twilio CLI installed, install the Serverless Toolkit plugin by running this command in your terminal:
With this plugin you can create, run, and deploy your project. Create a new project with the following command:
The --empty flag generates a project without example files. Open your new project up in your text editor. Let's start with just the code you'll need to send an email, and then expand to build the full contact form experience.
Setting up the environment
You need to set up some environment variables that you will need for sending an email.
- To use the SendGrid API you need to get a SendGrid API key from your SendGrid dashboard. Make sure the API key has permission to send emails
- You also need an email address you can send emails from (either from your authenticated domain or a verified sender)
- Finally, you need an email address you want the email to be delivered to
Open the .env file and enter those details like this:
Now it's time to write some code to send your first email.
Sending an email
To send an email with SendGrid, you'll first install the SendGrid Node helper library. In your project directory, run the following command:
Now, create a file in the functions directory called send-email.js and open it. Start by requiring the helper library you just installed:
This file will act as a Twilio Function, so you need to create a handler function that receives 3 arguments: context, event, and callback:
Now, the code to send the email. Back in send-email.js, you need to configure the SendGrid library with the API key. The context object contains all of your environment variables from the .env file. Then, build an object with the properties to, from, subject, and text.
To send the email, pass this object to the send function of the sg object. This is an asynchronous operation, so await the result and wrap the whole thing in a try/catch block.
This is all the code you need to send an email. In the terminal, run the app with this command:
Then open the URL http://localhost:3000/send-email, this will run the function. If you get the message "Email sent!" check your inbox, you should have received an email!
If there's an error, check the console to see more information. Alternatively, if the code did run successfully but you did not receive the email, check the Email Activity page in your SendGrid dashboard to see what happened.
Create the contact form
So far this code sends the same email every time you request the URL. To build a contact form, you need a front-end that will take some input, like the subject, content of the email, and the email address of the person sending it. You then need to take that user input and change your existing code to send the email with the submitted content and make the submitted email the reply-to address in your email.
Start by creating a file called index.html in the assets directory, and enter this code:
This is an HTML page that includes a form with inputs for the email address and the subject, and a textarea for the content of the email. Submitting the form makes a POST request to your /send-email function.
Let's add a bit of style to this to make it a little easier on the eye. Create a file in the assets directory called style.css and add the following code to the file:
This makes the page a bit nicer (not much, but a bit!) to look at.
Now, you need to fix up your function to use the data submitted to the form to send the email. Open functions/send-email.js again.
The data from the form will be passed into the function in the event object. Update the code to create the email object to the following:
You're still sending to your own email address and from your authenticated/verified address, but the other properties are updated like so:
- You've added a
replyTofield, which will be the user submitted email address - The subject comes from the subject submitted in the form, with an additional tag
[contactform]which you can use to filter these emails in your inbox - The text content of the email now uses the email to show who submitted the form and is then filled with the text content from the form.
You need to update the way you respond from this function too. Right now it just returns a string or an error object. That's not very user friendly. Instead, respond with a JSON object that you can use in your interface to show success or failure. Before you try to send the email, create a response object:
When the message is sent successfully, return a successful 200 status and a JSON object that reports the success:
If there's an error, return an error response with a 400 status and send back the error from the API.
The whole function should look like this now:
To top all of this off, let's add some JavaScript to the form to use the JSON response from our function.
Open assets/index.html again. After the </main> tag add a new <script></script> element.
Inside the script element you can start writing your front-end JavaScript. Start by grabbing references to the elements on the page that you will want to interact with:
Add a couple of functions that will help show the status of the email:
These functions show or hide the paragraph below the form. You can use them to show success or error messages when you get the result of the form submission.
Finally, you need to handle the form submission. You'll do this by listening to the form's "submit" event, collecting the data from the form fields, then submitting it to your function using the fetch API. This is quite a bit of code, so I added comments to explain what it's doing.
That's all the JavaScript! If you stopped the server earlier, start it again with npm start and open the page up at localhost:3000/index.html and enter an email, subject, and the content for your email. Submit the form and you should see a success message.
Check your inbox and you will receive an email from your contact form. And remember, the email came from your domain, but when you reply, it will go back to the email address submitted in the form.
Your contact form, powered by SendGrid
In this example, you've seen how to build an email contact form with SendGrid, powered by Twilio Functions.
This is a Twilio Function, so you can actually deploy your application publicly to the Twilio infrastructure with the command npm run deploy.
The full code for this example can be found in the Twilio Labs function-templates repository on GitHub. You can also deploy this application from the Twilio Code-Exchange here.
An email contact form is just the start of what you can build using Twilio SendGrid, you could send images from the Mars Rover over email, receive inbound emails with the Inbound Parse webhook or even send interactive AMP emails.
I'd love to know what you're building, so drop me an email at philnash@twilio.com or send me a message on Twitter at @philnash.


Related Resources
Twilio Docs
From APIs to SDKs to sample apps
API reference documentation, SDKs, helper libraries, quickstarts, and tutorials for your language and platform.
Resource Center
The latest ebooks, industry reports, and webinars
Learn from customer engagement experts to improve your own communication.
Ahoy
Twilio's developer community hub
Best practices, code samples, and inspiration to build communications and digital engagement experiences.