How to Export a CSV file with Message Resources Using Twilio Programmable SMS
Time to read:
June 17, 2020
Written by
Reviewed by

If you’re utilizing SMS text messaging to interact with an audience of subscribers or consumers, it can be difficult to keep track of the frequency (and message content) you’ve sent out.
One way for you to look at message volume and content is to utilize the Twilio CLI to find what you need. However, sometimes you just need a quick way to export message history as you build out your Python app and start to improve your customer engagement. Completing this tutorial will allow you to export a .csv file with a history of messages you’ve sent out to clients, as well as a file of their responses for you to analyze.
Follow along in this post to learn how to fetch filtered message resources using Twilio Programmable SMS, Python, and Flask.
Tutorial Requirements
In order to build this project, you will need to have the following items ready:
- Python 3.6 or newer. If your operating system does not provide a Python interpreter, you can go to python.org to download an installer.
- ngrok. We will use this handy utility to connect the development version of our Python application running on your system to a public URL. This is necessary for the development version of the application because your computer is likely behind a router or firewall, so it isn’t directly reachable on the Internet. If you don’t have ngrok installed, you can download a copy for Windows, MacOS or Linux.
- A free or paid Twilio account. If you are new to Twilio get your free account now! (If you sign up through this link will give you $10 credit when you upgrade.)
After you have downloaded the requirements, we can move forward with the coding portion.
Configuration
We’ll start off by creating a directory to store our project files. Inside your favorite terminal, enter:
Since we will be installing some Python packages for this specific project, let’s create a virtual environment.
If you are using a Unix or MacOS system, open a terminal and enter the following commands:
If you are on a Windows machine, enter the following commands in a prompt window:
If you are curious to learn more about the packages, you can check them out here:
- The Flask framework, to create the web application that will receive message notifications from Twilio
- The python-dotenv package, to load the environment variables created
- The python-twilio package, to send messages through the Twilio service
Configure Twilio SMS
This is where we make sure you have a Twilio number activated.
Log onto the Twilio Dashboard to view your Active Numbers. Click on the number you want to use to view the details. If you haven’t purchased a number yet, learn how to search for and buy a Twilio phone number.
Receive and send messages with Twilio
The goal of our app is to track the history of messages from you and your clients which utilize a Twilio number. We also need to make sure that all of the responses from your audience are received properly. We’ll go more into depth on how your audience should be using this program.
Send messages
Let’s start by sending out some text messages from your app.
We will have to create a .env file to safely store some important credentials that will be used to authenticate against the Twilio service. Here is what the .env file should look like:
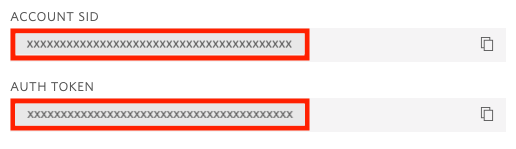
For the TWILIO_ACCOUNT_SID and TWILIO_AUTH_TOKEN variables, you can obtain the values that apply to your Twilio account from the Twilio Console:
For the purpose of this tutorial, use your personal phone number as the RECIPIENT_NUMBER so you can view the progress as we build out the app. Make sure that both TWILIO_NUMBER and RECIPIENT_NUMBER are in the E.164 phone number representation.
After the authentication process, we will send a message to ourselves from Python. Create a Python file called app.py and add the following lines:
Type python3 app.py on your console to run this file.
Now, check your phone – you should have received a text message from your TWILIO_NUMBER with the message “body”.
In your console, you should see a print statement that starts with an “SM” and looks something like SMxxxxxxxxxxxx. The “x” letters here are a unique juxtaposition of alphanumeric characters. This is an sid, also known as a Twilio-provided string that uniquely identifies the Message resource.
Depending on what else you would like to see in your .csv file, this unique sid will gather other pieces of information that you might need to analyze your messages. You can view other keys in the JSON API Response on the Twilio Docs.
Receive messages
The Twilio API for Programmable SMS uses a webhook (web callback) to allow real-time data to be delivered to other applications. This is especially important, since we want to record what our audience is saying back to us.
Here’s some code to help you write your first webhook handler. Add the following route and function to your app.py Python file:
We have a few things going on with the code above. The @app.route is a decorator from the Flask framework, which instructs Flask to serve a route at our chosen location (in our case, /webhook). This decorator will work with our webhook() function so that we can receive and react to incoming messages from any user.
We also created a recipient variable which receives a value from Flask’s request.form function. When we look at the From number, Flask is able to parse the phone number of the sender in E.164 phone number representation.
Creating the recipient variable is essential for our case – we will need to keep track of the users and numbers who are in the directory. You can play around and parse other variables in a text message, but for now, we’ll move on to the next part of our project.
Reply to a message
Next, we have to handle confirming with a recipient that we received their text message. The webhook allows us to issue a response to the recipient, the one who sent the message, by providing a TwiML payload in response to the webhook. TwiML is short for Twilio Markup Language, an XML-based syntax that the webhook can use to provide instructions to Twilio regarding how to handle the message.
The Twilio Helper Library for Python allows us to generate TwiML responses using classes and objects, and pairs perfectly with Flask.
For our project, we will utilize best programming practices by writing the definition for a respond() function so that we can call it throughout our project to generate a response that is sent back to the sender.
Add the new import line to the top of the app.py file and the new respond() function above or below the webhook.
Don’t forget to call the newly created function in the webhook, too. Here’s an example of what your starter code might look like:
If you are curious to see how TwiML looks, start a Python shell and enter the following code to generate an example response:

Set up a webhook with Twilio
By now, we’ll have our code for our first webhook function.
However, to make sure it works, we must test it out and make sure it’s running properly by sending and receiving a few text messages.
Add a .flaskenv file (make sure you have the leading dot) to your project with the following lines:
These incredibly helpful lines will save you time when it comes to testing and debugging your project.
FLASK_APPtells the Flask framework where our application is locatedFLASK_ENVconfigures Flask to run in debug mode
These lines are convenient because the server will automatically reload when changes are made to the code, and you will not have to restart the server while you are adding more code to your application. That is: every time you save the source file, the server will reload and reflect the changes. Neat huh?
So, we’ll move forward by starting our Flask application with the following command:
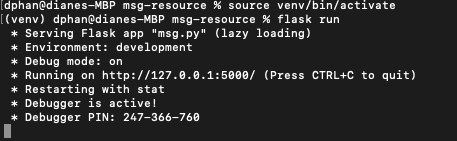
The screenshot above displays what your console will look like after running the command flask run. The service is running privately on your computer’s port 5000 and will wait for incoming connections. You will also notice that debugging mode is active, and that my flask server restarted to reflect my changes.
While flask is running in one terminal window, open up a second tab or terminal window. Start ngrok with the following command:
Great, you have now enabled your Flask service publicly over the Internet!
Ngrok is a great tool because it allows you to create a temporary public domain that redirects HTTP requests to our local port 5000.
Make sure to return to this step and make sure ngrok is located and executable in the correct directory.
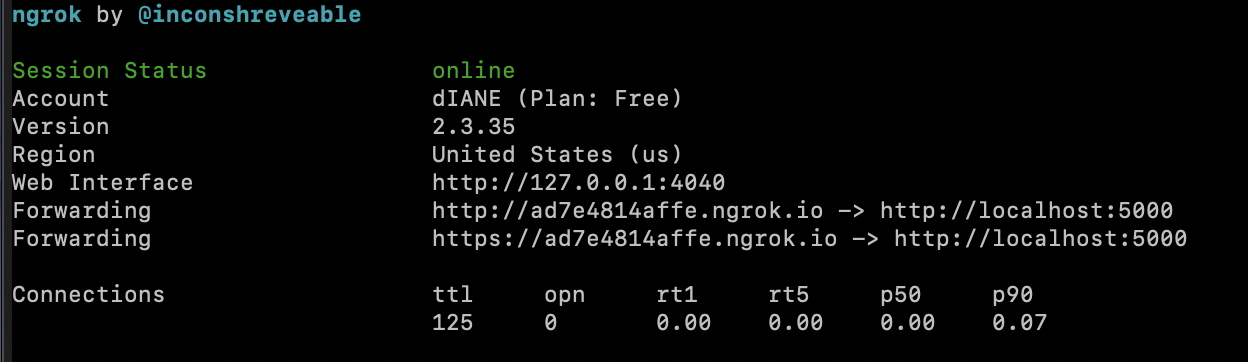
Your ngrok terminal will now look like the picture above. As you can see, there are URLs in the two “Forwarding” lines. These are public URLs that ngrok uses to redirect requests into our flask server.
Copy the URL starting with https:// and return to the Twilio Console, where we will tell Twilio to send incoming message notifications with this URL.
In the Twilio Console, click on the (...) on the left sidebar to scroll down and find Phone Numbers. Click on the active phone number that you want to use for this project and scroll down to “Messaging”.
Paste the URL copied from the ngrok session into the “A MESSAGE COMES IN” field and append /webhook, since that is the endpoint we defined with the app decorator above.
Here is my example for reference:
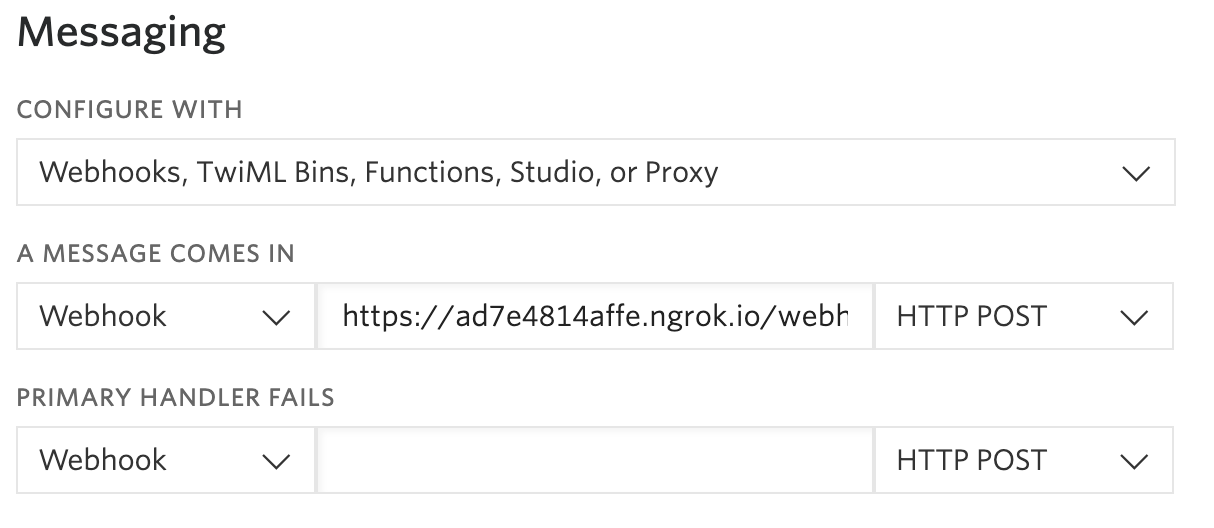
The URL from ngrok is “https://ad7e4814affe.ngrok.io/webhook”
Before you click on the “Save” button, make sure that the request method is set to HTTP POST.
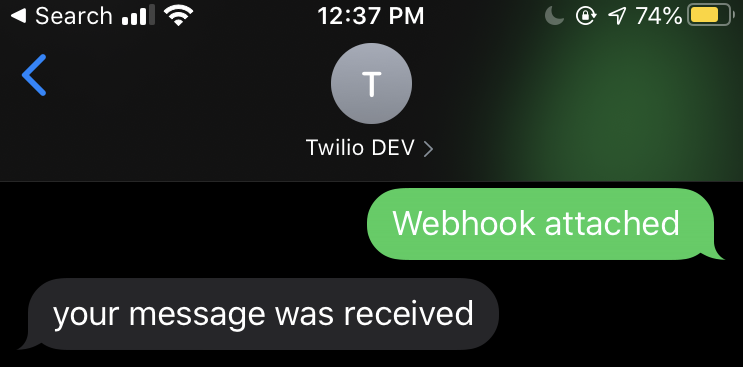
Time to test things out! Grab your SMS-capable phone, and send a text message to your active Twilio number. I sent something random such as “Webhook attached” and my Twilio Number responded with a confirmation message.
Export message resource .csv files
Filter messages
After you send out messages to your audience using the Twilio Number, you can start filtering out the messages you want to view by date. There are plenty of ways to filter as you may notice here in the Twilio Docs.
For me, I wanted to check out 5 messages I sent on June 9, 2020.
Using Python’s datetime library, we can use the datetime object to specify the numbers for the date and time. In my example, I used datetime(year, month, day, hour=0, minute=0, second=0) to conduct my search. Be sure to modify the date to today’s date, or whenever you last sent text messages.
We can also use limit as a parameter to query the appropriate results. Here’s an example of what my filtered message history looks like:
Let’s check and see if this is correct and you actually sent these text messages out from your TWILIO_NUMBER on the provided datetime.
We’ll write the following for loop to iterate through our filtered_message_history:
Add these below the filtered_message_history. The print statement takes the msg object and extracts the sid with the body of the message.
Recognize the body part? If you do, then you’re on the right track to obtaining the filtered messages!
Write to the .csv file
Our filtered_message_history variable is currently storing the values of the messages you sent to the specified recipient. In order to save these to a .csv, we’ll use the csv library in Python.
The following lines of code will open (or create, if it doesn’t exist) a file sender_message_history.csv. The second parameter indicates the action that will happen on the file. The w means that we will write to the .csv file.
As you can see, we loop through each record from the filtered_message_history and call the built-in write function on the JSON keys that you are using in your code. I decided to save the sid of the record so I can distinguish between each unique message that was sent, as well as the body message that matched the SID.
Check out the other keys that you can call in the Twilio Docs.
After you are satisfied with the .csv file, you will call the built-in close function on the file so your program can stop writing.
Alter the the contents in the .csv file
To save the records from your audience, you would follow the same steps above to open or create a new .csv file. However, if you have multiple recipients that you interact with, you might want to change the code so that you can keep track of which recipient sent the message.
The following code writes the RECIPIENT_NUMBER to recipient_messages_csv first by calling a from_ key on the array of recipient_messages. Afterwards, your for loop is called to proceed writing every body message sent from RECIPIENT_NUMBER.
Here’s an example of what my recipient_messages_csv looks like. I texted a bunch of nonsense to my TWILIO_NUMBER to make sure every message was recorded properly.
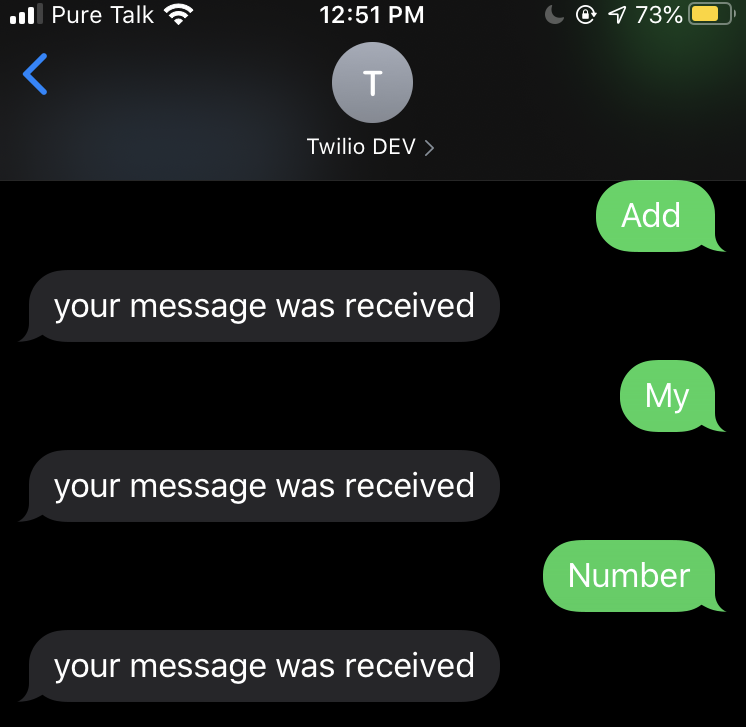
Notice that the words “Add”, “My”, and “Number” were added to recipient_messages_csv along with other messages that I have sent before and after those words shown above.

Fetch message resources and export content
Make sure that all of your code has been saved and that you have one tab running flask and one tab running ngrok. If you closed a tab for any reason, open the terminal again and start the corresponding process with the following commands in their respective tabs.
In the Flask tab:
And in the second, run the ngrok tab:
Furthermore, make sure that your SMS endpoint is configured with the forwarding URL reported by ngrok. Each time you restart ngrok the URL changes, so you will have to replace the URL in your Twilio Active Phone Numbers console.
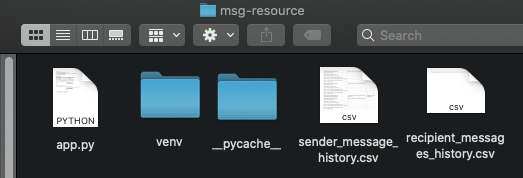
If you are running flask and ngrok at this point, text yourself a few more times. Then, rerun the app.py file again and check your directory msg-resource to find two .csv files. You can see the text messages you just sent to yourself in the sender_history_csv file.
Conclusion: Exporting CSV Files with Message Resources
Congratulations, now you can further analyze your interactions between you and your recipients through these newly created .csv files! This simple SMS tutorial showed you how to fetch your message history and filter it appropriately for your use cases. Feel free to view the completed code on GitHub.
You can perform further analysis or simply remember what type of messages you have been sending to your recipients... whether they were friends, subscribers, or contacts of any sort.
What’s next for fetching message resources?
I hope that this tutorial demonstrated your ability to write code to make your life easier – and that you’re using the results to create memorable connections with your audience.
Looking for more ways to expand? Try the following:
- Alter the code so that you can fetch the message history from a list of 2+ recipients
- Export the message resource history from WhatsApp
Let me know if this tutorial improves your daily workflow! You can also learn more about sentiment analysis and to build a stronger brand for yourself.
Diane Phan is a Developer Network Intern on the Developer Voices team. She loves to help beginner programmers with growing businesses write code to improve their audience engagement and discover tools to enhance their workflow. She can be reached at dphan [at] twilio.com.


Related Resources
Twilio Docs
From APIs to SDKs to sample apps
API reference documentation, SDKs, helper libraries, quickstarts, and tutorials for your language and platform.
Resource Center
The latest ebooks, industry reports, and webinars
Learn from customer engagement experts to improve your own communication.
Ahoy
Twilio's developer community hub
Best practices, code samples, and inspiration to build communications and digital engagement experiences.