Get an Email with Today’s Extreme Stock Movers Using Node.js, IEX, and Twilio SendGrid
Time to read:
September 23, 2020
Written by
Reviewed by
This post is part of Twilio’s archive and may contain outdated information. We’re always building something new, so be sure to check out our latest posts for the most up-to-date insights.

Everyone knows the Twilio API for SMS messaging. But did you know that you can also send email via Twilio? The Twilio SendGrid email API has all the ease of use you expect from Twilio, combined with the power of the SendGrid email engine.
In this post, you’ll write a Node.js script to:
- Retrieve the biggest stock movers of the day from IEX Cloud
- Create HTML tables from the data
- Send the HTML via email using the Twilio SendGrid Email API
To get the email daily, you can run the script with your favorite scheduler, i.e. cron, Task Scheduler, or launchd.
Prerequisites
- You'll need Node.js installed on your computer. The SendGrid wrapper supports back to version 6, but they recommend using the latest version (12).
Start the Node.js Project
Note: you can find the finished project in this GitHub repo.
To start, you’ll need to do some not-very-interesting "creating a Node.js project" stuff. First, make a project directory called twilio-stock-email. Then cd into it, and initialize git and npm:
You can either fill out the metadata for the npm init, or hit enter to accept each default.
Install Dependencies
Luckily, both the Twilio SendGrid Email API and the IEX Cloud API have wrappers for Node. Wrappers are packages that provide functions for using an API, rather than needing to make the HTTP calls yourself. You can find the wrapper documentation for these packages at Twilio SendGrid Email API Quickstart for Node.js and IEX Node.js wrapper GitHub.
To make the code available to your project, install these packages:
.env File
In a minute, you’ll be getting access keys from IEX and SendGrid. You’ll want to keep your SendGrid API key off of GitHub, so that spammers can't use it for their own nefarious purposes (you’ll want to keep your IEX info safe from bad actors too). There are different ways to do this, but in this tutorial, you'll store API keys in a .env file, use the dotenv npm package to access the secret values, and make sure the .env file doesn't get uploaded to GitHub.
First, create a .env file in your project.
Next, install the dotenv package by running npm install dotenv from your command prompt.
Keep the .env file out of GitHub by creating a .gitignore file at the top level of your project. Update the .gitignore contents with a single line that says .env (this will tell GitHub to ignore files whose names match this pattern).
Actually, while you're in there, add a second line that says node_modules. There’s no need to store those in GitHub, since they're easily recreated from package.json.
First Git Commit
It’s time to make sure you're not going to commit those lovely API keys (or node modules) to git.
Run the following command:
Your output should look something like this:
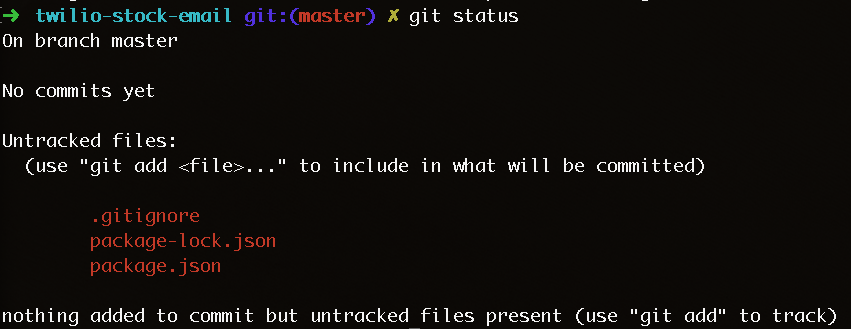
No .env? No node_modules? Great, it's safe to commit:
Getting the Keys
Now it’s time to get the API keys to populate your .env file (of course, if you already have authentication for IEX or SendGrid, you can use the keys you already have).
SendGrid
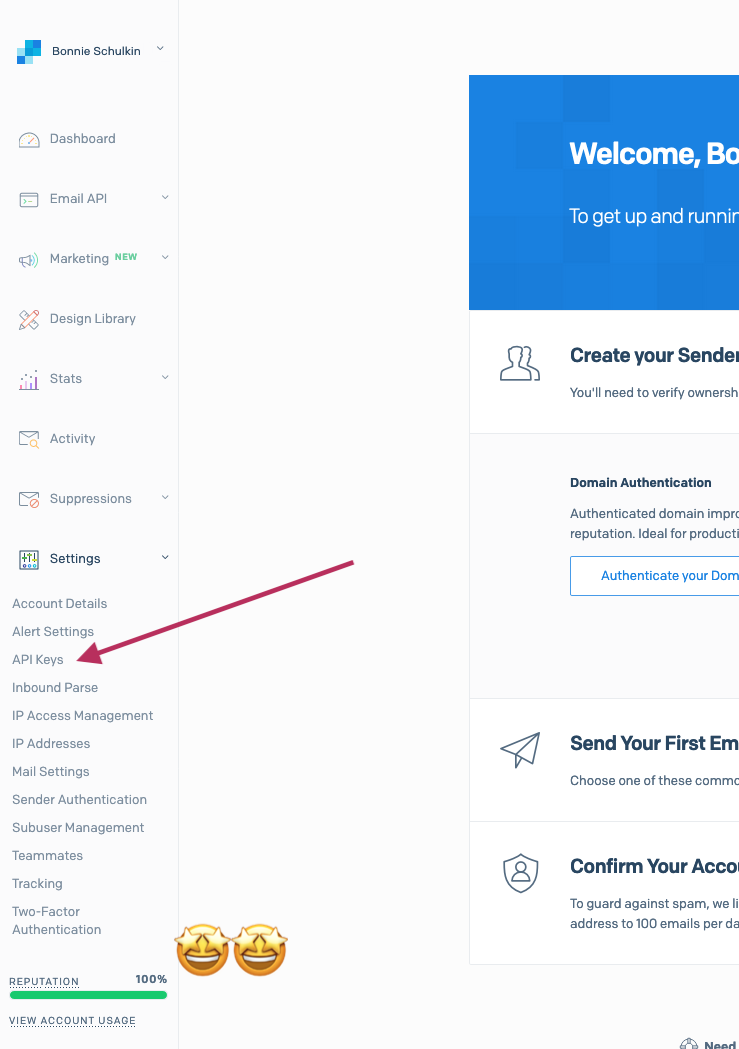
First, create an account at https://signup.sendgrid.com. When the signup is complete, you’ll see an account dashboard.
After basking in your stellar reputation, go to Settings → API Keys on the sidebar:
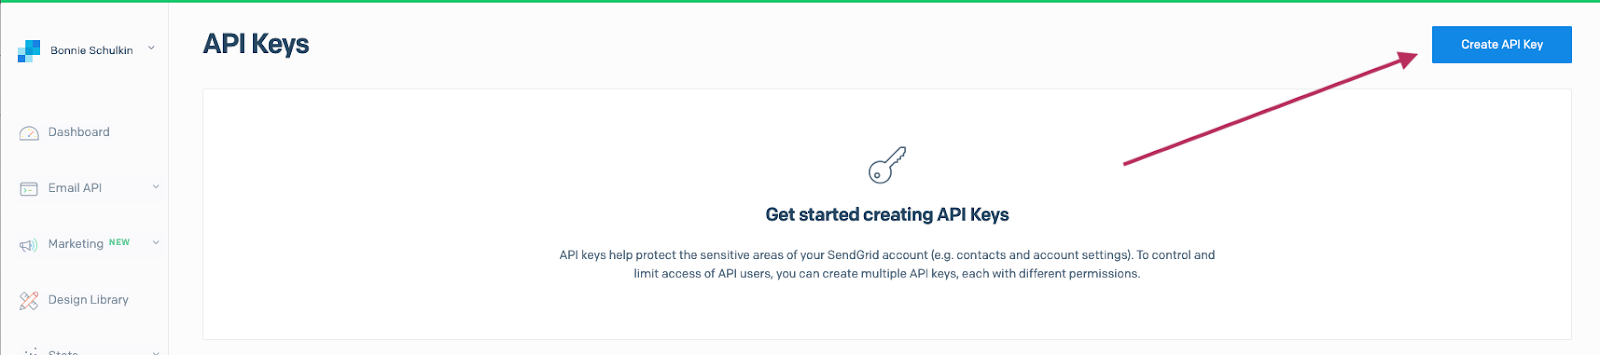
Click the "Create API Key" button. When prompted, give your API key a name and then select “Full Access” for permissions.
Copy the API key into your .env file like so:
You may also want to save this API key in a backup location (they aren't kidding when they say they won't show it to you again). I use LastPass to manage passwords, so I pasted the key into the "Notes" section for my SendGrid password record in LastPass.
IEX Cloud
To start, sign up for an Individual account.
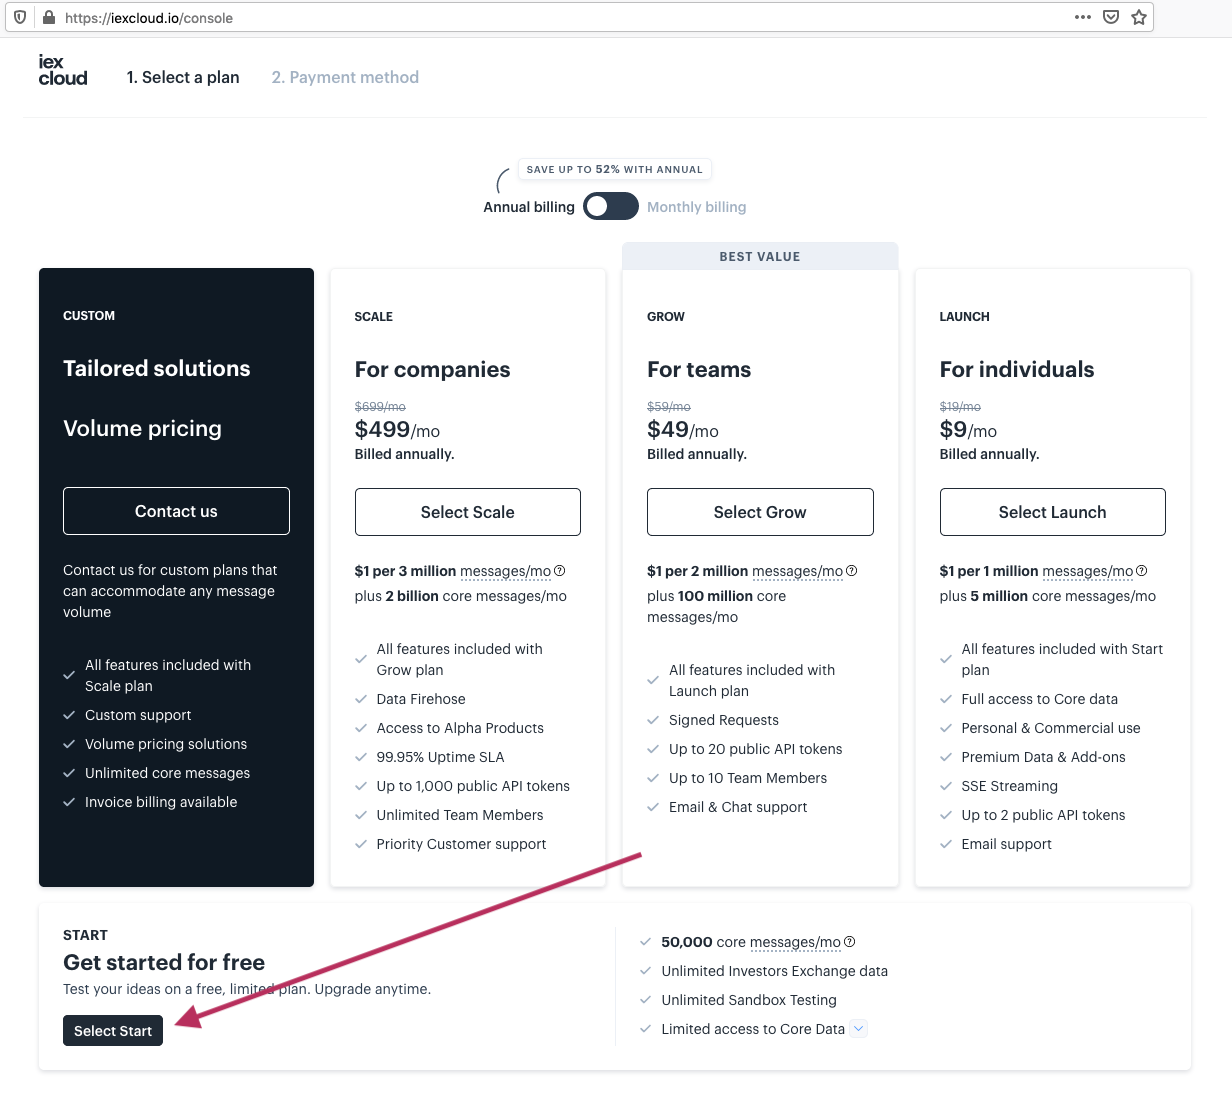
After you create your account, you'll be asked to select a plan. You’re just testing the waters here, and don't need to plunk down any money just yet, so choose "Select Start" under "Get started for free":
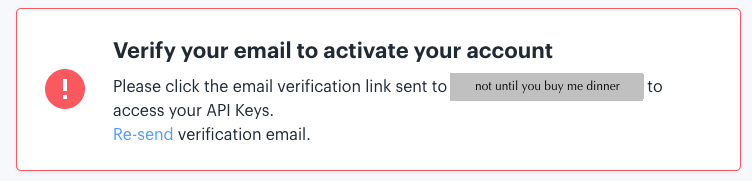
Check your email and click the verification link they sent (you can't get your API keys without a verified email).
Close any pop-ups (you may get one introducing the IEX Cloud Console) after email verification.
Copy your public key to your .env file.
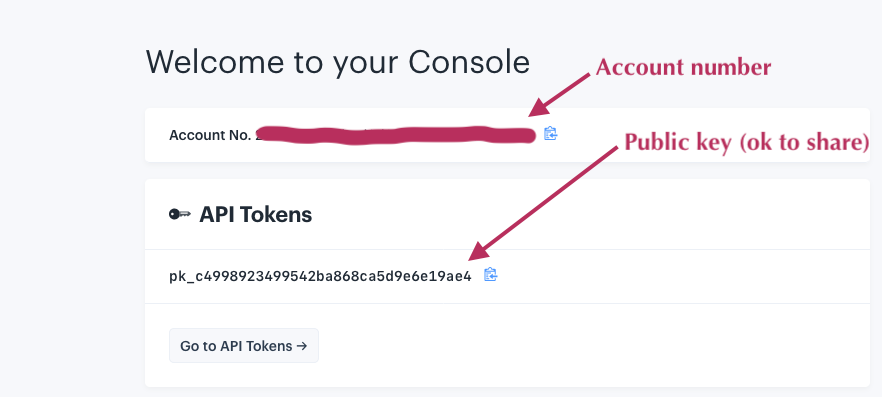
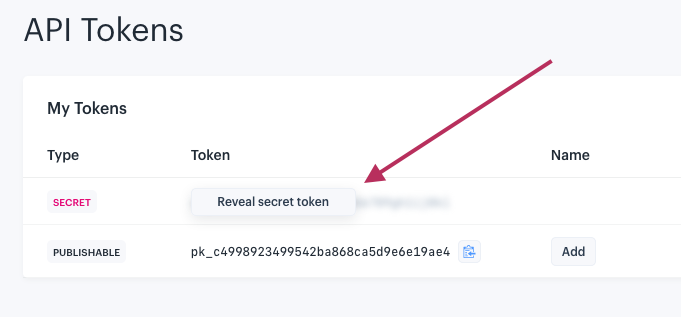
Click "Go to API Tokens", then click "Reveal secret token" for your private keys:
Add this key to your .env file, too, plus the version (we’ll go with “stable”).
Getting Data from IEX Cloud
Ok, now it's time for the fun stuff. First, make a file for your script called daily-stock-email.js.
You’ll start by importing the IEX Cloud wrapper, and making a function to retrieve the stock data.
A couple notes here:
The iex_cloud_wrapper automatically looks in the .env file for your API keys, so you don't even have to include them explicitly in the script!
Since the methods for iex_cloud_wrapper are async, you’ll need to make the function async too, in order to use await.
Looking at the Data
Looking at the IEX Cloud API docs, I can see that the list endpoint will help us get the day's biggest gainers and losers (see the "examples" for this endpoint for gainers and losers).
Following the example shown in the IEX Node.js wrapper README file, add code to getMoverData() that retrieves the gainers and (temporarily) logs the response to the console:
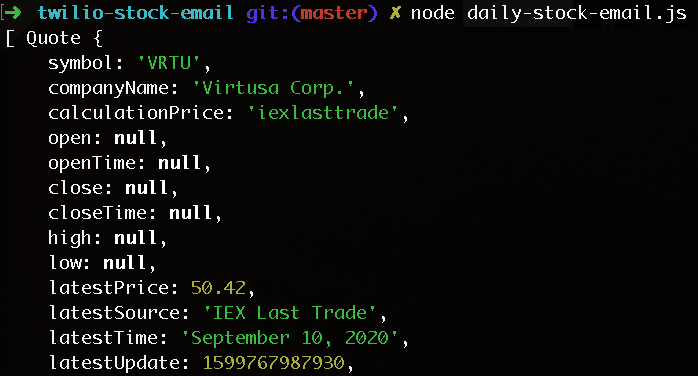
Now run the script and see what happens!
Your script should have generated several hundred lines of output containing an array of Quote objects, each object representing one of the top ten gainers for the day. Great, knowing this format will be useful once it’s time to start processing the data. Here's the beginning of the output I got:
Finishing the Function
To finish the getMoverData() function, let's get the stock losers too, and then return an object that contains both responses. Eventually, you’ll pass this object to a function that will generate the HTML.
Finally, you’ll remove the temporary getMoverData() call below the getMoverData() function declaration (that call was only there so you could see what the output looked like). In its place, you’ll write the main function that will be called when the script runs.
Note the snazzy destructuring of the getMoverData() object output. 😉
Formatting the Data into HTML Tables
So you could just mail those hundreds of lines to yourself, but your future self might not need to know all of that information. To help your future self out, you’ll parse out only the data you’re interested in. Even better, you'll display the parsed data in HTML tables for easy viewing.
You'll start with a generateTable() helper function, which you’ll use to make tables from the data returned by IEX Cloud.
For the generateTable() function, I chose some properties I was interested in. Feel free to customize the table to your own interests!
First, create a generateTable() function, immediately after the getMoverData() function. It will take one argument, stockData, (either the gainers or losers value that is returned from getMoverData()).
Then create the skeleton of the table, including hard-coded column headers:
Finally, you’ll use the array method map() to create rows from the data:
Incorporating the Tables into an HTML Email
All right, now that you have a way to make the tables, it’s time to make a function to generate the full HTML. You’ll generate the tables using the generateTable() helper function, and surround it with some explanatory headers.
Make a function called generateHtml() and put it right after getMoverData(), before generateTable(). This new function will take two arguments, gainers and losers, which will come from getMoverData(). You’ll need those to pass to generateTable() individually.
I'll add some CSS because I like my tables with lines, but you do you. 😄
Now, update main() so it calls generateHtml() and passes to it the destructured values returned from getMoverData():
Sending the Email
The moment has arrived! You have the HTML all ready, and it just needs a function that will send it via email.
Let's take a look at the Twilio SendGrid Email API Quickstart for Node.js to see what's what.
First, set up the SendGrid Node.js wrapper at the top of the file:
require('dotenv') is what allows us to access the SendGrid API key from your .env file with process.env.SENDGRID_API_KEY.
Now that that's out of the way, you can use the example from the Quickstart Guide to make a function of your own. The function needs the async keyword because sgMail.send() is an async function and I want to use the await syntax.
Note that you’re getting the "to" and "from" email from .env too. I don’t know about you, but I do not like spammers enough to give them my email in GitHub.
To avoid this, you’ll need to add a line to .env that looks like this:
Add a call to sendEmail to the end of main():
Finally, print out a success message on successful call of main():

Hmmm. The red "Forbidden" text doesn't seem like a good sign. Fortunately, the yellow message is very clear:
The from address does not match a verified Sender Identity. Mail cannot be sent until this error is resolved. Visit https://sendgrid.com/docs/for-developers/sending-email/sender-identity to see the Sender Identity Requirements.
When you were setting up your SendGrid account, did you notice this persistent banner?

Apparently it wasn't one of my better life choices to ignore this. Let's fix the problem by going to the link specified in the error message.
Since this is an individual project, you’ll follow the link that says Single Sender Verification page. If this were a business application, you might follow How to set up domain authentication.
The single sender verification documentation indicates that from your dashboard, you need to go to Settings, then Sender Authentication, and then click "Get Started" under "Verify an Address".
Fill out the form that comes up, using the email address you specified in you .env file. It's ok if you're using a free address and get a warning like this (for the purposes of this small app, it's not a problem):

Finally, go to the email inbox for the address that you entered and click the "Verify Single Sender" button in the email from SendGrid.
The button should take you to a page like this:
Now try the script one more time:

No errors! Huzzah! Check your email now (be sure to check your spam folder, as emails coming from the same address they're sent to are sometimes marked as suspicious).
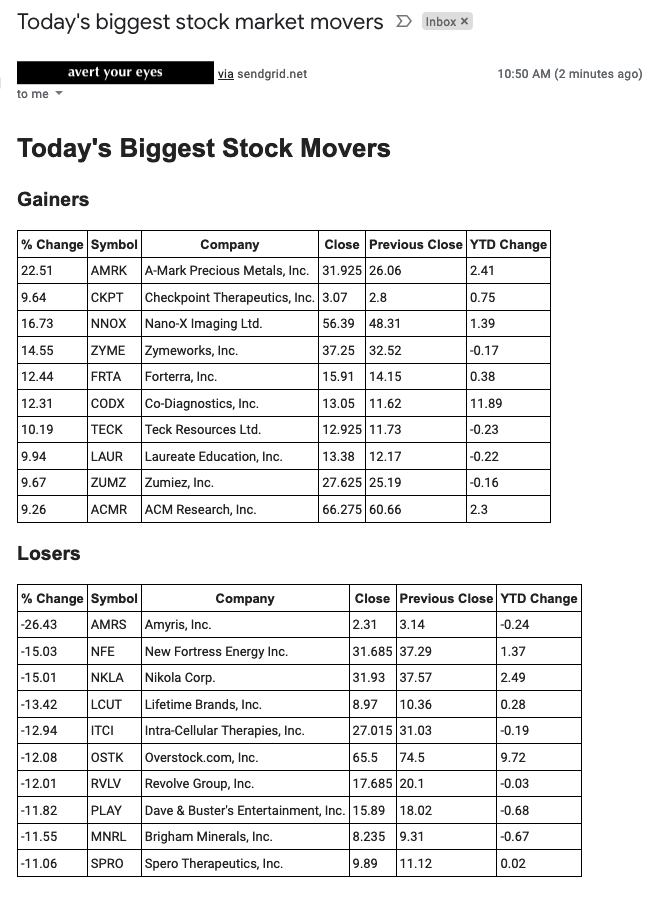
Fantastic! One last thing, that first table doesn't seem to be sorted properly (it's not in descending order of percent change). You can fix that by sorting the results by percentage change before making the table. Since the biggest mover belongs on top of the table, regardless of whether it's positive or negative, you'll sort on the absolute value of the changePercent:
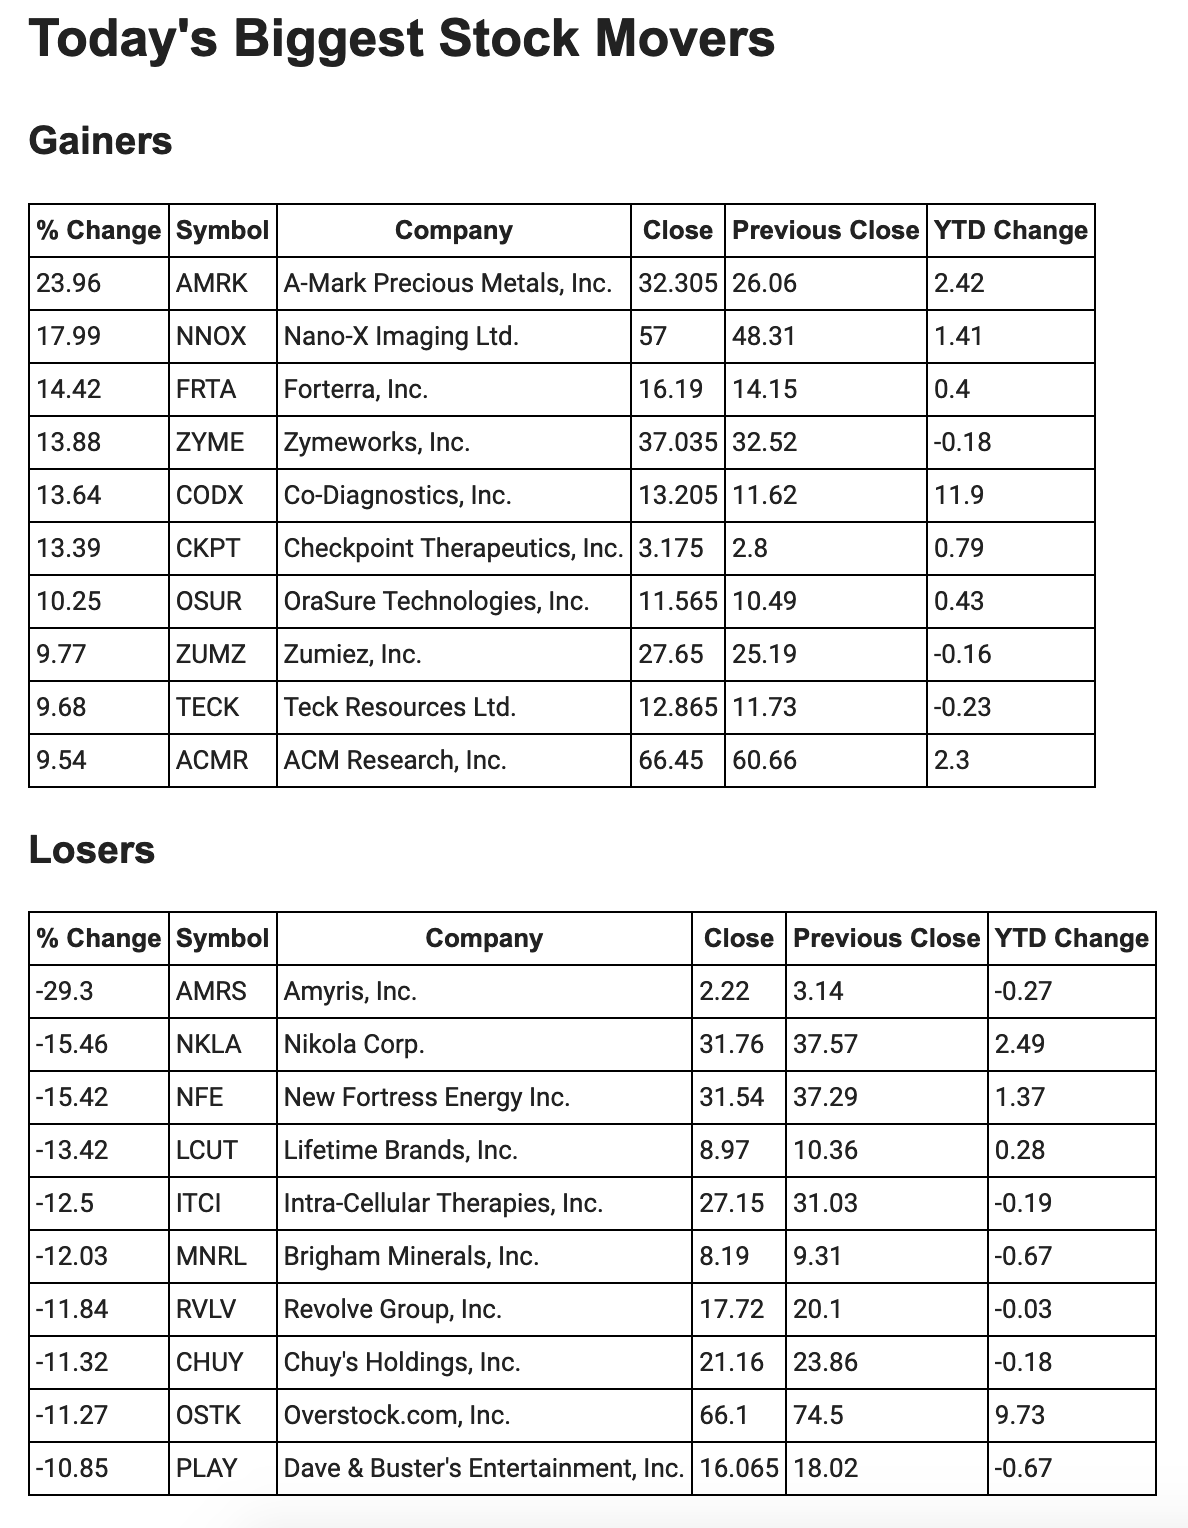
Now that's a mighty fine looking email.
Conclusion
Congratulations! Now that you have completed this tutorial, you know how to:
- Retrieve stock market data from IEX Cloud
- Format the data into HTML tables
- Send an HTML email with the Twilio SendGrid email API
Next Steps
Right now, the script is only being run manually. If you want this information to be sent to you automatically every day (and who wouldn't?!), you'll need to set up a scheduler like cron, Task Scheduler, or launchd.
Bonnie Schulkin is a teacher, coder, and mediocre stand-up bassist. You can find her Udemy courses at https://www.udemy.com/user/bonnie-schulkin/ and her tweets via @bonniedotdev. She’s absurdly proud to have claimed @bonnie on github and the https://bonnie.dev domain.

Related Resources
Twilio Docs
From APIs to SDKs to sample apps
API reference documentation, SDKs, helper libraries, quickstarts, and tutorials for your language and platform.
Resource Center
The latest ebooks, industry reports, and webinars
Learn from customer engagement experts to improve your own communication.
Ahoy
Twilio's developer community hub
Best practices, code samples, and inspiration to build communications and digital engagement experiences.