How to add push notifications to Android
Time to read:
May 25, 2016
Written by
This post is part of Twilio’s archive and may contain outdated information. We’re always building something new, so be sure to check out our latest posts for the most up-to-date insights.

Having the right engagement strategy within a mobile app has never been more important since users expect your app to provide them with useful and timely information.
With Notify, the new Twilio notifications API you can send your users real-time push notifications even when the app is not open.
Let’s build an Android app that can receive and react to push notifications sent from the server.
Our tools
- Your favourite IDE for Android development. I will be using Android Studio.
- Node.js installed.
- A Twilio Account – Sign up for free!
- Access to Notify – Request early access here
- ngrok – You can read more about ngrok here.
Backend Configuration
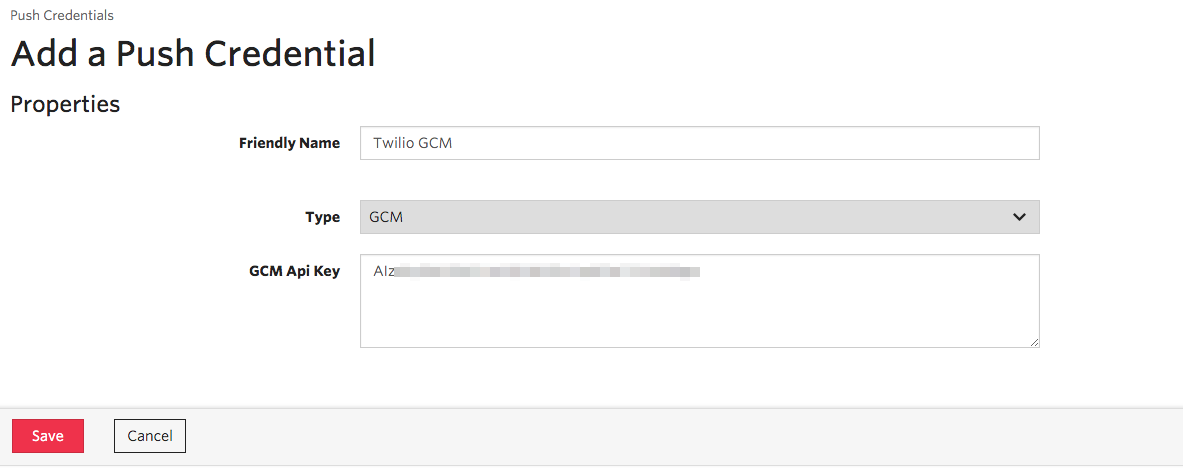
To get our backend server going, we first need to create some credentials. Head to the Credentials section on the Notify Console and create a new push credential of type GCM. You will need a GCM API Key and a configuration file which you can generate by following the steps described in this page.
The Android Package Name must match your application’s package. If you have an existing application, you can copy this information from app/src/main/AndroidManifest.xml and in the manifest tag copy the value for package. If you’re creating an application from scratch, use the values as seen above.
When you’ve done that click Download google-services.json and copy the Server API Key. You will have to paste that key back where we were creating a push credential.
Make sure you save that and make a note of the SID of this push credential. You can find it back on the Credentials page.
Head to Services, click Create Service and name it anything you fancy. I’ve named mine Twilio Push. Under GCM Credential SID, choose the push credential you just created and hit Save.
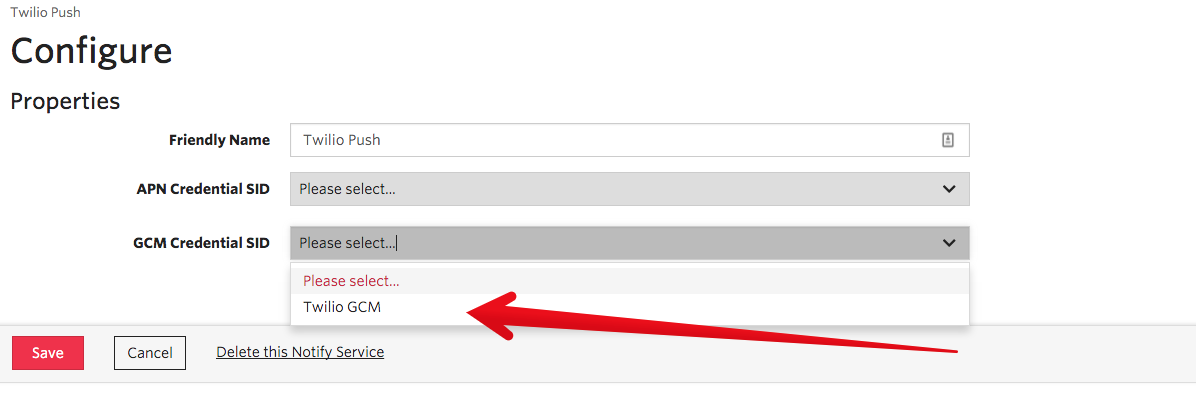
Make a note of the SID for that too as we will need it when configuring our backend app. You can get that by going back to the Services page.
Our backend
Now that we have all the necessary credentials to send push notifications let’s do some work on our backend.
Clone the Notifications Quickstart repository and change the config.json file to use the credentials we’ve just created along with your Account SID and Auth Token which you can get from here.
Your config.json should look similar to this when you’re done with it:
Fire up the application by going to your terminal and running:
Head to http://127.0.0.1:3000 and you should see a screen that looks similar to this:
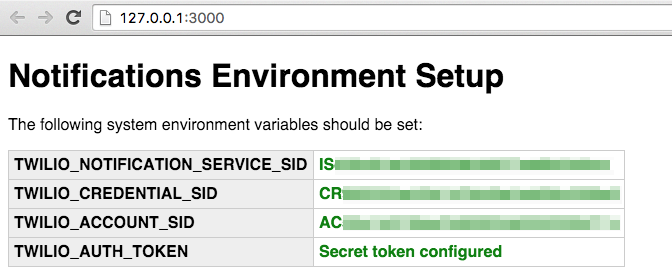
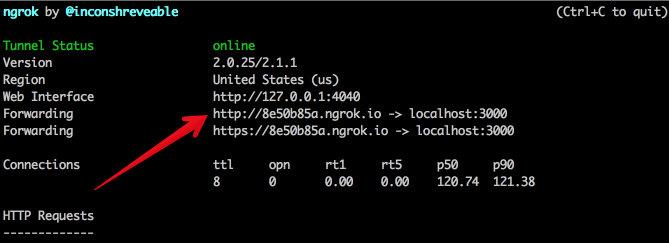
Our backend is now configured and we just need to make it’s available outside of our environment so our mobile app can see it. We will use ngrok for this.
In a new terminal screen run the following and take a note of the forwarding URL generated.
If you don’t feel like going through the entire app build and just want to download and deploy an app to your device, feel free to clone this repository.
Building the app
At this point we have a backend ready to send push notifications and you can either follow the next steps to add functionality to an existing app you’re already building or create a new Android app with an empty activity.
On your app open up your project level build.gradle and add the following dependency to it.
On the module level build.gradle file add the following dependencies:
apply plugin: ‘com.google.gms.google-services’
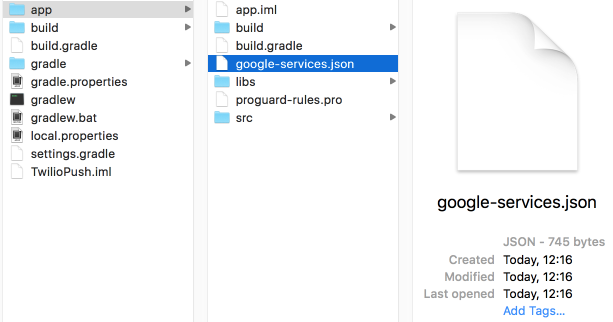
Android Studio will then ask you to sync, but before you do that make sure you move the google-services.json file you downloaded earlier into your app folder so you end up with something like this:
Now that we have all necessary dependencies, we will change our AndroidManifest.xml so it knows our app can receive push notifications and that those notifications can be received even when our application is running in background.
Add the following permission requests:
Next we will register our Broadcast Receiver and Service classes. These will make sure our application can receive messages and that it responds to an intent even when in background.
But our services refer to classes that still haven’t been created. Those classes are pretty much the same as the ones on the Google Services Sample Code, so let’s just copy those classes into our project. To keep things neat add the following four classes to a new folder called service in src/main/java/com/testapp/.
- MyGcmListener.java
- MyInstanceIDListenerService.java
- QuickstartPreferences.java
- RegistrationIntentService.java
In this last class you’re gonna want to replace YOUR_NGROK_URL with the url you got from ngrok earlier. Make sure you only use the URL without the protocol, so it will be something like:
If you look in that file, you will see we’re referencing another class called BindingResource which wasn’t originally part of the Google Sample code. That is because the sample code didn’t have an implementation for the server registration as there are different servers you can register with.
In the application’s root along with MainActivity.java, create a new class called BindingResource.java. We will use a very nifty library called Retrofit which converts an HTTP API into a Java interface. This means we can get our app to bind directly to our backend application.
We have all the classes in place now, so let’s make a change to our layout to make sure our application started correctly and is bound to our services. Open src/main/res/layout/activity_main.xml and replace the existing TextView with the following:
Now open src/main/java/com/testapp/MainActivity.java and at the top add the following imports and member variables.
The onCreate method is where we’re going to register our BroadCastReceiver and update the status of our layout’s status field to tell us whether the binding was successful or not.
We’re using SharedPreferences to store our tokens and identity information. You can use a database for that as well if you want.
Next implement a couple more methods for creating the service registration and resuming the activity upon wakeup.
When our application starts we create an identity and an endpoint for this device. An Identity is defined by your application and can have multiple endpoints, so if your application has a concept of users you could use that instead.
An Endpoint is the identifier of the device to which this registration belongs. You can find out more about bindings here. Feel free to change those values with yours instead.
Go to the Build menu item and choose Rebuild Application. Once that’s done run the application on the device or emulator and you should see that it successfully registers with our endpoint.

Now that you know your application is correctly bound to the endpoint, let’s try to send a notification to it.
Back in your terminal application open a new window making sure you’re inside the notifications-quickstart-node folder and enter the following:
You will need to replace marcos with whatever you used as the Identity on the createBinding method.You should now get a nice push notification on your device.

Timely information at your fingertips
With only a few lines of code we transformed a dumb app into something that gives users time sensitive information.
You can add this to your shopping app to let users know when the product they’ve been looking for becomes available. You could also add it to your game to tell the players when a new DLC has been released, or to your messaging app to let users know when someone wants to communicate with them.
I would love to see what you build. Hit me up on Twitter @marcos_placona or by email on marcos@twilio.com to tell me more about it.
Related Posts
Related Resources
Twilio Docs
From APIs to SDKs to sample apps
API reference documentation, SDKs, helper libraries, quickstarts, and tutorials for your language and platform.
Resource Center
The latest ebooks, industry reports, and webinars
Learn from customer engagement experts to improve your own communication.
Ahoy
Twilio's developer community hub
Best practices, code samples, and inspiration to build communications and digital engagement experiences.