How to Create an API Texting Service using Twilio SMS and Python
Time to read:
August 01, 2022
Written by
Reviewed by

Texting is one of the most common forms of communication in the modern age. Twilio provides a simple and easy-to-use interface for sending SMS text messages through their SMS API.
In this tutorial, you’ll be using the Twilio SMS API to create your very own API texting service using Python and the FastAPI framework.
Additionally, you’ll also learn about testing backend servers created with FastAPI, as well as how to deploy the API to Heroku using Docker.
If you're unfamiliar, FastAPI is a Python web framework for creating fast API applications. FastAPI also has default integration with Swagger documentation and makes it easy to configure and update.
Docker, on the other hand, is an industry staple in software engineering, as it is one of the most popular containerization softwares out there. Docker is used for developing, deploying, and managing applications in virtualized environments called containers.
The main selling point of using Docker is that it solves the problem: "it works on my machine, why not on yours?". Coincidentally, I actually faced this exact issue working on this very project, ultimately fixing it when I decided to use Docker.
Heroku, lastly, is a cloud platform where you can deploy, manage, and scale web applications. It works with back-end applications, front-end applications, or full-stack applications.
Prerequisites
In order to complete this tutorial, you will need the following:
- A Twilio account, and Twilio CLI installed (I’ll show instructions on how to do this). If you haven't signed up yet, sign up for a free Twilio trial.
- A Twilio phone number (check buying a Twilio phone number)
- A Heroku account, and Heroku CLI
- A Docker account, and Docker Desktop
Install Twilio CLI, and Setup
You’ll first need to install, and set up the Twilio Command Line Interface (CLI). For Linux, the setup commands are below.
Instructions for installing sqlite3 on Windows, or MacOS can be found here. If you’re on MacOS, or Windows, check the CLI quickstart on the Twilio Docs to install the Twilio CLI.
twilio login will ask for your credentials which you can see on the Twilio Console and will prompt you to input a username for your local profile. Once you finish that, run the following:
If you haven't bought a Twilio phone number already, you can do that through the command line by running the line below and picking a phone number from the list produced:
Development Environment Setup
Let’s first set up our development environment by installing all the needed dependencies. Create a new directory named twilio-sms-api, and then, navigate to that directory.
As a part of good practices for Python, you should also create a virtual environment. If you are working on UNIX or macOS, run the following commands to create and activate a virtual environment.
However, if you are working on Windows, run these commands instead:
Then, create a requirements.txt file in the twilio-sms-api directory and input the following below.
Then, run pip3 install -r requirements.txt to install the dependencies. After running that, you should have installed FastAPI, Uvicorn, the Python Twilio SDK, as well as python-dotenv - which we will be using for accessing environment variables.
Also, run pip3 install pytest in order to install pytest, which we will use for testing the application logic.
After doing that, create a file named .env in the twilio-sms-api directory, and add the following:
You’ll need your account SID and auth token for interfacing with the Twilio SDK. You can access these under Account Info in your Twilio Console. Plus, it’s best practice to include confidential stuff like these environmental variables in a .env file instead of it lying in your codebase. If using a platform like GitHub, don’t forget to create a .gitignore file and add the .env file to this file.
Send a Message with the Twilio SMS API
With that out of the way, we can finally start making our application. First off, let me show you how you can easily send SMS messages with the Twilio SMS API. Create a send_sms.py file in the twilio-sms-api directory, and add in the following:
In the code snippet above, we use the load_dotenv() function so that Python knows to look through the .env file. To interface with the Twilio API, we need to use the Twilio Client -> Client. There we pass in our account_sid, and auth_token which we have in our .env file.
Note that a Twilio trial account is restricted to only sending messages to verified phone numbers. Additionally, we can only send SMS through the phone number we bought through the CLI, and all sent SMS messages will start with Sent from a Twilio trial account. For our use case, this is fine.
Now, run the application by typing in python3 send_sms.py in the command line. You should then see the print messages on the console, as well as receive a text message on your phone number.
Quick Intro to FastAPI
Now, create a main.py file and add in the following:
Okay, so let's look into our root() method. As you can see, we make use of a GET request here by adding in @app.get() which then takes in a required path parameter. Since this is the root path, we just add in "/" as the path. We then optionally add in a status.HTTP_200_OK as our status_code, as that is what we expect to receive if the request is successful.
Below that, we have a function that will return something. Our template for writing FastAPI endpoints will then be:
Running the command python3 -m uvicorn main:app --reload will run the app, and will listen to changes we make on the server.
Alternatively, you can use python3 main.py and it would run the app on port 5000, courtesy of the last 3 lines of code. However, this would not let the app listen to changes we make, so you would have to re-run the app every time you wanted to see your changes.
We also added the CORSMiddleware which essentially allows us to access the API in a different host. That is, we can extend the app further by creating a front-end interface for it. We won't cover that in this article, but I put it here just in case you want to create a front-end to interact with the API as well.
Navigating to the port where the app is running in your browser, you'll get this.
Brief Intro to Testing FastAPI Applications
Testing in FastAPI is pretty straightforward, as it allows you to use Pytest directly. In particular, we use TestClient, and pass in our app variable from earlier. We then write assert statements to test out the application.
Create a tests directory in the twilio-sms-api directory, and inside, create a test_main.py file. There, add in the tests for main.py:
This short test just tests that navigating to our root endpoint returns the expected response. If you run the command python3 -m pytest tests/test_main.py, you should see that the test passes.
Create the Endpoint for Sending SMS Messages
Now, let's create the endpoint for sending SMS messages. We will basically port the code we have at send_sms.py to our main.py file which will contain the endpoint.
At the top of main.py, update the file with the following new lines:
Then, below the root endpoint, add the following code:
Now, here we have a POST request, as we will be sending information over to the server which will then return something to us. We add in three required query parameters, which are the variables we'll be needing for sending our SMS messages. You'll also see that we have some raise HTTPException() statements. Here we just check for some simple edge cases that would make our application not work as expected (return an Internal Server Error). There are loads more edge cases to tackle, but for our use case, these will do.
Once we get past the checks for errors, we now create our Twilio Client, and send a message with the values in the query parameters passed. Similar to send_sms.py, you must use the number you bought from Twilio, and the number you used for verifying your Twilio account.
We then just simply return a JSON response which includes the query parameters passed, and the SMS message sent by Twilio.
Test the Endpoint for Sending SMS Messages
Let's now test the endpoint we created. In test_main.py, add in the following tests:
For the first test, we test a successful POST request to the endpoint. Here we expect a 201 status code, and we check for the appropriate JSON response. Again, you will have to replace the placeholder values for the corresponding phone numbers in the highlighted lines. Notice that Python doesn't automatically encode URLs, so we use %2B in place of the + symbol.
In the next two tests, we check for missing query parameters. As these query parameters are required, FastAPI automatically raises a 422 status error when one is missing.
The last two tests, on the other hand, check for some edge cases we handled in our main.py file.
Running again python3 -m pytest tests/test_main.py, you should see that all tests should pass.
Deploy the Application to Heroku with Docker
Okay! We now have our RESTful API working as intended on our localhost. Now, the next thing we'll do is deploy this API to Heroku, using Docker. Start off by creating a Dockerfile named Dockerfile in the twilio-sms-api directory.
This pulls the Python 3.9.13 image, and installs all the necessary packages defined in the requirements.txt file. Then, it will run the application by using the command python main.py as defined in the last line of the file.
Make sure you have Docker Desktop running, and that you are logged in. Then, think of an app-name for your app, such as sms-app. You can build, then run the application on port 5000 using the following CLI commands.
A container-id is returned when running the docker run command above.
Then, you can stop the app, and free up system resources by running the following.
With the app now Dockerized, we can now deploy it to Heroku.
Let's first create the app in Heroku through the CLI.
Then we can push, and release the app through the Docker container we made earlier with the following commands.
After this, you can go to your Heroku dashboard and open the app. You should see something similar to below.
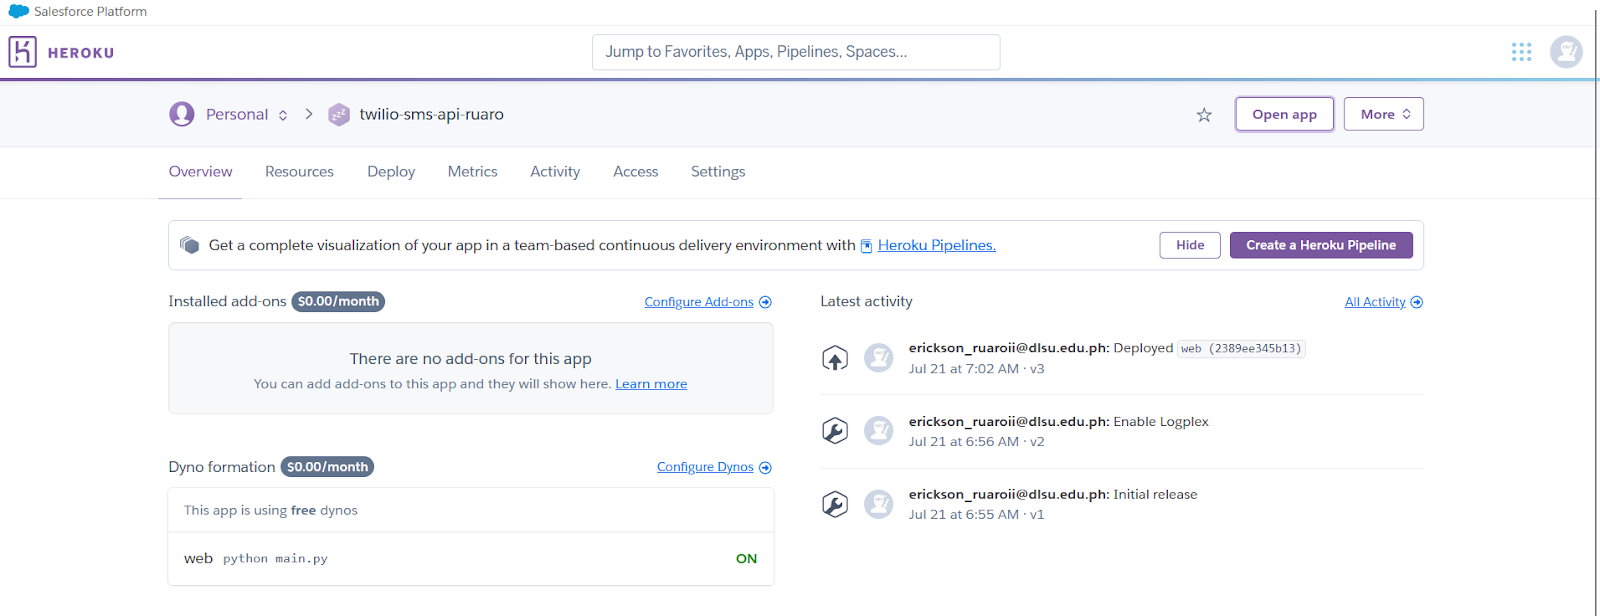
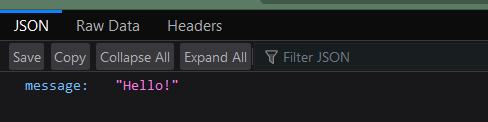
From here, press the Open app button. You should be greeted with the JSON message we have in the "/" directory of the application.
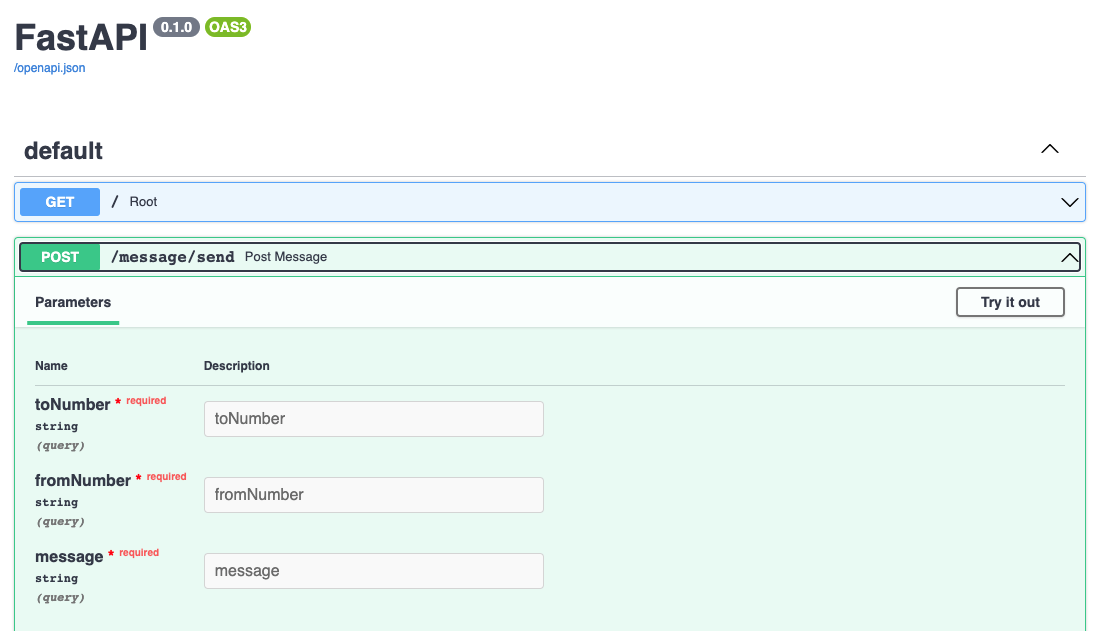
Navigating to the /docs, you'll be greeted with the Swagger documentation of the application (this comes with FastAPI by default). Here you can play around with the POST request we created and see if it works.
Conclusion
In this article, you learned how to send SMS messages with the Twilio SMS API, develop a RESTful API using Python and FastAPI, test the API using Pytest, Dockerize the whole application, and lastly, deploy the API to Heroku.
If you find this article helpful, feel free to share, and let's connect on Twitter! You can also support me by buying me a coffee.
Neil is a software engineer who recently graduated from high school. He started learning how to program during the start of the COVID-19 pandemic, and got his first internship a year later. Professionally, he has worked on the mobile, backend, and blockchain areas of an application. Other than that he has also given talks, and workshops on mobile development with Flutter, as well as written articles on backend-related stuff such as the article you just read, as well as machine learning.


Related Resources
Twilio Docs
From APIs to SDKs to sample apps
API reference documentation, SDKs, helper libraries, quickstarts, and tutorials for your language and platform.
Resource Center
The latest ebooks, industry reports, and webinars
Learn from customer engagement experts to improve your own communication.
Ahoy
Twilio's developer community hub
Best practices, code samples, and inspiration to build communications and digital engagement experiences.