Making and Receiving Phone Calls with .Net MVC
Time to read:
July 29, 2015
Written by
This post is part of Twilio’s archive and may contain outdated information. We’re always building something new, so be sure to check out our latest posts for the most up-to-date insights.


I usually get people at hackathons asking me about how to get started with the Twilio .Net Helper Library. My default answer is to always point people to the excellent series of blog posts showing how to use the library written by my colleague Devin.
The thing about hackathons though is that sometimes people just want to get on with things and finish an implementation as soon as they can. This can mean the difference between being a contender for a sponsor’s prize or not.
If you look at Devin’s last blog post on that series you will see he goes very deep into how to build a telephone workflow but I usually find people just ask me about how to make and receive a phone call using Twilio.
Today I will show you how to build an application to make and receive phone calls using .Net MVC 5 and Twilio.
Our tools
- Visual Studio and .Net MVC 5 installed.
- A Twilio Account and a Twilio Phone Number – Sign up for free!
- Ngrok to expose your local environment to Twilio
First things first
We will now setup the barebones for our project, but you can also download it from the Github repository if you don’t feel like writing all the code.
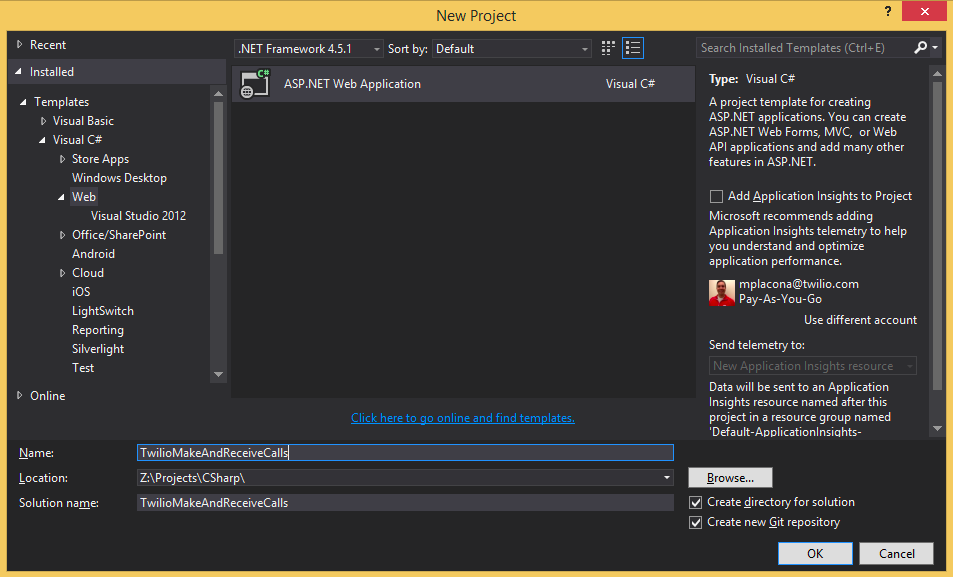
In Visual Studio, create a new ASP .Net Web Application and call it TwilioMakeAndReceiveCalls.
On the subsequent screen choose the Empty template and check the MVC box.
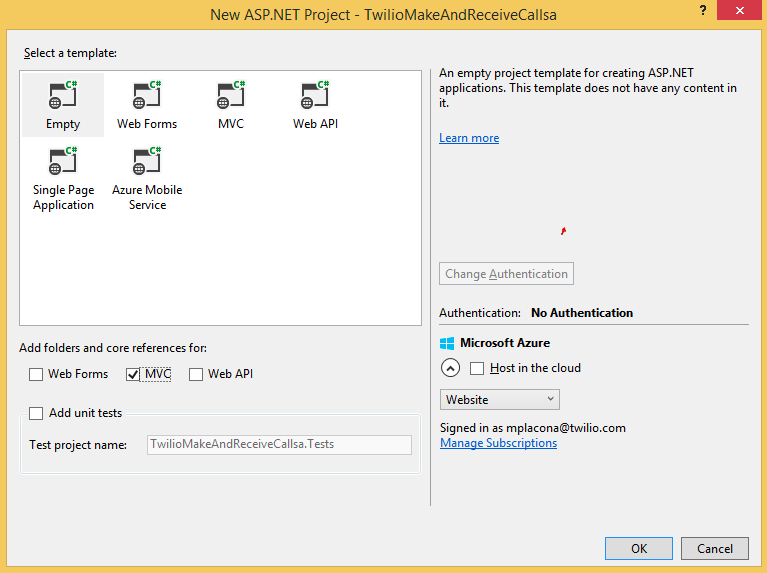
Click OK and an empty application will be created for you.
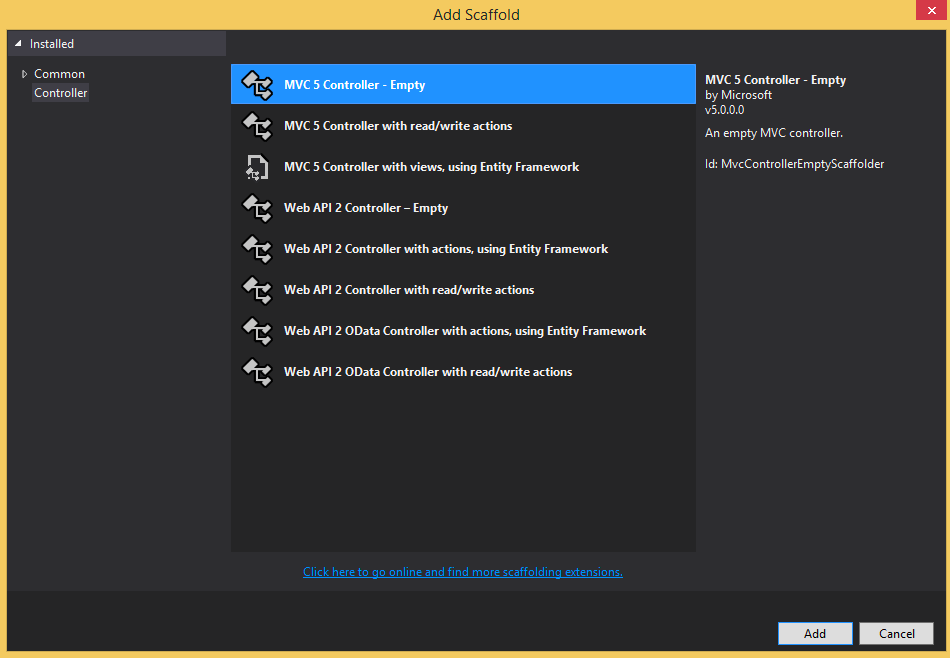
It is time to add a controller so we can check our application works as expected. Right click on the Controllers directory in Visual Studio Solution Explorer and choose Add > Controller. Choose MVC 5 Controller – Empty and click Add. Name it HomeController.
Under the Views/Home folder create a new view by clicking Add > View and name it Index.

Run it
When you run the application, it will open up a new browser tab and the application will be running under a specific port. Make a note of that port as we will use it as a parameter in ngrok to give Twilio access to our local environment.
My colleague Devin has also written a very comprehensive post explaining how to configure your .Net application to run with ngrok. You can also deploy it to a hosted cloud service such as Azure if you don’t want to follow these steps.
Once you’re done with configuring ngrok, you should be able to tunnel your application by running:
This will give you a url that looks like the following:
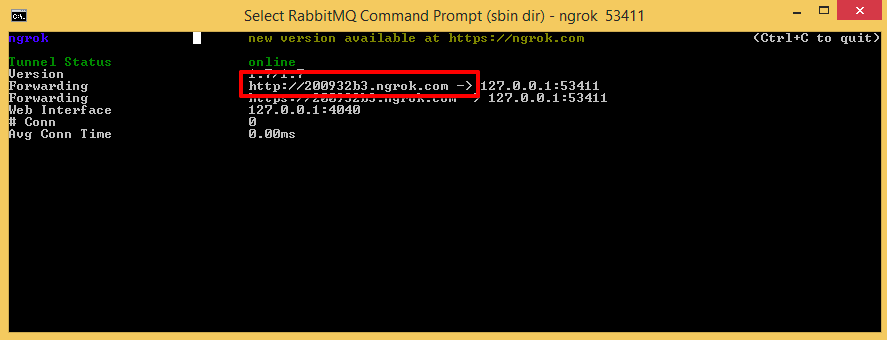
Copy the highlighted url and paste it to your browser. Providing you have made the necessary changes described in the post mentioned above, you should see the exact same thing when you run the application via localhost.
Hook it up to Twilio
Get a Twilio telephone number if you don’t already have one. The following animated gif shows the process of acquiring a telephone number in case you need it. Make sure you select the country where you want that number.
Now that you have a number, make sure it is configured to access the application when someone calls it.
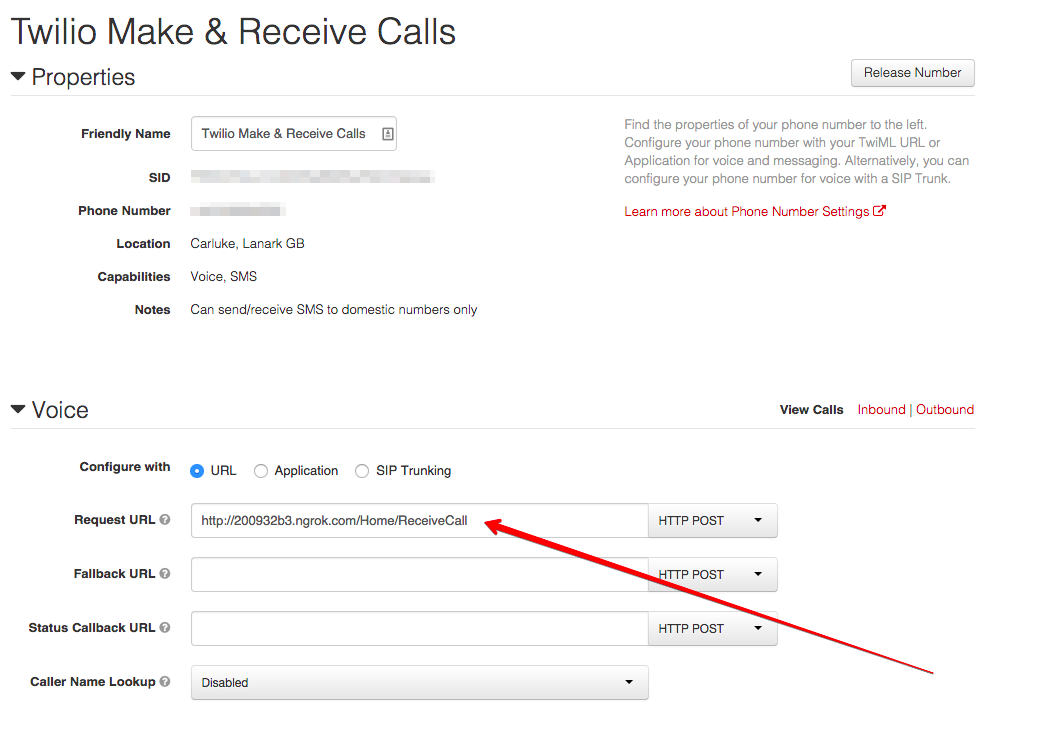
Change the Request URL under Voice to point to the ngrok url you were given and to the ReceiveCall endpoint which we will create next.
Receiving Calls
We have just configured our webhook to hit our application every time someone calls our number. Now we need to build a handler for that.
Before we change our application we need to make sure the Twilio library is installed. Go ahead and run the following from Package Manager Console.
This will take care of all the dependencies we will need throughout this project.
Create a new file called Settings.cs under the Controllers directory and add the following code to it.
It is good practice to store your account information as environment variables, but feel free to just hard code them.
Open up Controllers/HomeController.cs and modify the class to extend from TwilioController instead of Controller.
Add the following endpoint to it.
This is exactly how Twilio will see it when someone calls your Twilio phone number.
Go ahead and call your Twilio number from a different phone. Your own number should ring and you will know everything is working as it should.
Making Calls
Open Views/Home/Index.cshtml and add a form inside the body tag.
Go back to ControllersHomeController.cs and add a new endpoint called MakeCall. This endpoint will be the action of the form we just created in our view.
Run the application, and you should see a screen that has a single form field and a button where you can enter a telephone number.

When you enter a telephone number and submit the form, the MakeCall endpoint handles this request and initiates a telephone call using the Twilio Rest API to the number you entered.
Once the call is picked up the person on the other side of the phone will then hear music playing. That’s because the URL passed as the third parameter contains a link to an MP3 file.
You could also change this to get the application to give a personal message instead or Record their reaction for posterity.
Conclusion
Making and receiving telephone calls with Twilio is super easy. In just a few lines of code we’ve been able to start a telephone call from a page in our browser that will call our friends and play them a great tune.
From here we could take advantage of the Gather verb to build an IVR and the Record verb to store all our calls. This would give us access to our very own call centre.
I would love to see what you come up with. Reach me up on Twitter @marcos_placona, by email on marcos@twilio.com or MarcosPlacona on G to tell me about it.

Related Resources
Twilio Docs
From APIs to SDKs to sample apps
API reference documentation, SDKs, helper libraries, quickstarts, and tutorials for your language and platform.
Resource Center
The latest ebooks, industry reports, and webinars
Learn from customer engagement experts to improve your own communication.
Ahoy
Twilio's developer community hub
Best practices, code samples, and inspiration to build communications and digital engagement experiences.