How to move your project to TypeScript - at your own pace
Time to read:
January 06, 2020
Written by

We've all been there. You are working on a feature or bug in JavaScript, think you finally got it, run the code and there it is, it basically screams at you: "undefined is not a function". I love JavaScript but as my codebases for projects grow, certain pains appear again and again. From easily refactoring large parts of the codebase to avoiding said "undefined is not a function" and similar bugs, we all encountered pains with JavaScript's approach to types. One of the tools that is trying to help with these pain points and has been growing in popularity recently is TypeScript.
TypeScript introduces a type system to JavaScript to give you a better understanding of your code and assist you in your development flow. But let's also introduce the elephant in the room early: a lot of us enjoy not having to add types to everything like in a statically typed language. It might even be the reason why we chose it in the first place.
Before you close this post because your mind is already set that you don't want to use TypeScript, please stop and give it a read. There might be some things that you can benefit from without moving to TypeScript. Projects like Webpack have successfully used TypeScript while staying with JavaScript. And we'll talk about that later in the post.
This post is structured in a way that will allow you to gradually incorporate TypeScript into your project at your own pace and how much you want to. After any chapter you should be able to to stop and have a working codebase and hopefully a bit of improved developer experience.
You might be using TypeScript already
Even if you've never knowingly written a line of TypeScript before, chances are high that you've written TypeScript and probably also used TypeScript tooling.
The first thing to keep in mind is that TypeScript is a superset of JavaScript. That means any valid JavaScript is valid TypeScript. If you wrote some JavaScript that successfully ran, congratulations, you wrote valid TypeScript. All without declaring explicit types. TypeScript always tries to guess types for you as best as it can.
Given that every valid JavaScript is valid TypeScript, chances are high you've also used some TypeScript-powered tooling. The Monaco editor - the editor behind Visual Studio Code, CodeSandbox, Stackblitz and various other tools - is powered by TypeScript to offer you better autocomplete or features like code refactoring. So if you've ever used the autocomplete or refactoring capabilities from these editors, you used TypeScript!
Pair-program JavaScript with VS Code
At this point I have to confess, most of the time I don't use the TypeScript compiler or TypeScript files. Instead I just use a normal JavaScript tool pipeline. However, I'm still relying at every step on the way of the help from TypeScript thanks to my editor pair-programming with me.
VS Code contains a setting that you can enable either for your entire editor or for just a specific workspace/project to enable TypeScript checks on your JavaScript.
To enable it for a project, create a file in your root project directory .vscode/settings.json and place the following into it:
Alternatively you can place the same rule into your global editor settings or use the settings UI to edit your workspace settings.
Now if you'd write a line that is not fully type safe, TypeScript will mark that code for you in your editor. This code for example would create a complaint:
The reason is that process.env.PORT is of type string and 3000 is of type number. This would mean that PORT += 1 would equal in two different types of results. In the first one it would append a '1' to the string while in the second case it would result in 3001 as a number.

It's important to note that these error messages do not influence your code because they are only shown in your editor. Even if an error like this is thrown, your code might still run. But at the same time you've been warned about a scenario you might have not thought through during testing.
This setting can also sometimes be annoying if you are on purpose violating some type rules. In that case you can either turn of the setting if you don't like it at all, or disable the type checks per line by adding the following comment above that line:
To disable type checks on an entire you can use:
I personally love this setting and always have it turned on because it always makes me think about every line of JavaScript I write and how it might have edge cases that I've never thought about. It's like a pair-programming buddy that is constantly watching over your shoulder to help.
Using the TypeScript compiler for JavaScript
The setting we enabled in VS Code actually sets a setting on the TypeScript compiler called checkJs. It is related to another setting called allowJs that will run JavaScript files through the TypeScript parser and together they are the perfect start to transition an existing JavaScript project step by step to TypeScript.
To show you how it works, I'll be using the following project as an example: github.com/dkundel/ts-move-demo
Feel free to follow along by cloning the project or apply the steps to your own project.
Installing the TypeScript compiler
First we'll have to install the TypeScript compiler. The compiler is published to npm as typescript and exposes a command-line utility called tsc. You could install the compiler globally but I would recommend to install it per project as a dev dependency in order to allow you to have different compiler versions for different projects.
To install the TypeScript compiler locally for a project run:
I would recommend to also set up a new build script in the scripts section of your package.json:
Now every time you want to build you can run npm run build. Alternatively if you'd want to run TypeScript in watch mode you can run npm run build -- --watch or define another script that calls tsc --watch.
Create a TypeScript configuration
If you don't want to constantly pass a bunch of configuration options via command-line arguments to the TypeScript compiler, I'd recommend creating a tsconfig.json file for your project. There are two ways to do this. You can either create the file by hand or run tsc --init to create a default configuration. In our case since we have a build script set up that calls tsc, so we can run:
Afterwards you'll find a tsconfig.json in your project that contains all available settings with comments explaining what they do. Some of these are commented out while others are set to what TypeScript considers best practices.
These settings are great for a brand new project but for our use case not optimal.
Configuring the TypeScript compiler for JavaScript
As a first step we want to make sure that the TypeScript compiler picks up our JavaScript files.
Replace the existing tsconfig.json with the following:
In this configuration we changed 5 things compared to the default settings:
"target": "esnext": We changed this toesnext. This means that TypeScript will not perform any down transpiling of modern JavaScript features. This way you can keep using tools like Babel to take care of your transpiling. But feel free to test this by changing the value to something likees5and see how your code will be changed"allowJs": true: This means the TypeScript compiler will pick up any JavaScript files it will find and run them through the TypeScript compiler"checkJs": false: For now we disabled the type checks on JavaScript files since we only want to see if they are being passed through the compiler correctly"outDir": "./dist": Every file that the compiler will pick up will be processed and then placed in a newdist/directory based on the location in therootDir"rootDir": "./src": While you could omit this setting in general for some use cases, especially for a gradual transition that includes both JS and TS files, I would recommend placing all your code into a directory likesrc,libor whatever you prefer as the root of your code. That way the compiler can easily find all the code and knows how to reproduce the structure in thedistfolder."strict": false: In order to gracefully move our project to TypeScript without having TS immediately yell at you, we'll disable strict mode for now.
The example project already has all files moved into a src/ folder but if you are trying this with a different project or use a different folder make sure to either move your files or adjust the rootDir value.
Additionally, you'll have to adjust the paths that references the source files to map to the new compiled files. In our example that means updating the main entry in the package.json file:
Once this is all set up, it's time to test our changes. First run:
This should create a new dist folder containing all your JavaScript files and potentially transpiled if you changed the target value.
Afterwards you can run your code to see if it is still working. In our case run:
And visit http://localhost:3000 to see if the server is up.
Checking your JavaScript using TypeScript
Now that we have all of our JavaScript go through the TypeScript compiler, it's time to enable type checks on our JavaScript. For this update the flag in the tsconfig.json:
If you are using Node.js or Electron or something that has global objects that are not part of the DOM, you'll have to install the types for it in this step. For Node.js you can do this by running:
With the types installed it's time to compile your code. Since this time we might hit a couple of type errors, I'd recommend to run the TypeScript compiler in watch mode so that it continuously re-runs while you are fixing files:
TypeScript will do its best to do type assumptions on your JavaScript code but it will also take JSDoc comments into consideration if these are present.
If you wrote your project with the checkJs flag enabled in VS Code already you might have little to nothing to fix. Most errors that you might encounter at this step might be related to either missing checks like checking that the result of document.getElementById() is not null before accessing it. Others might be actual errors that you have based on type assumptions you made.
In either case you'll likely find some things that you might have not thought about before. And if there is something you are doing on purpose, again you can use the // @ts-ignore comment above a line in your code for TypeScript to ignore it.
Finding hidden bugs
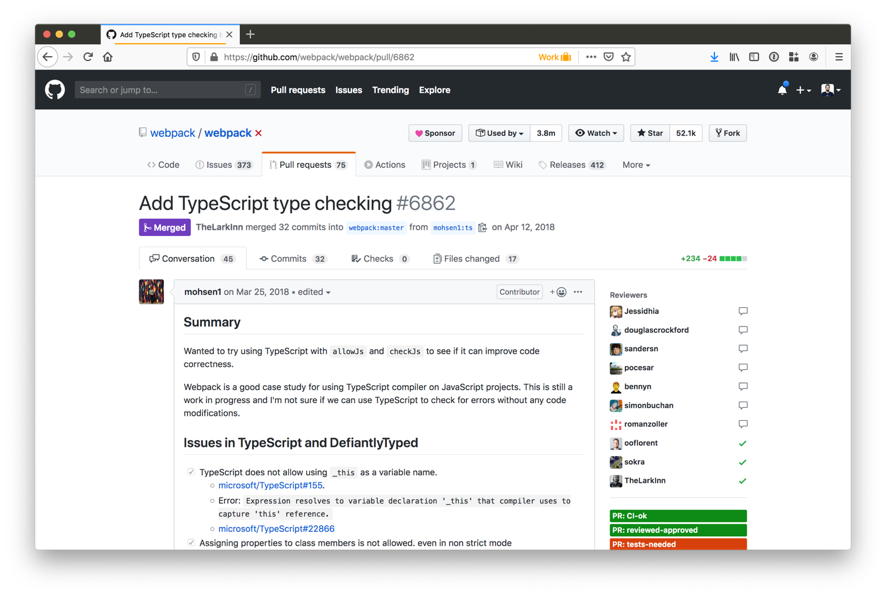
Once you have this set up and fixed the errors the compiler has found, you can also stop at this point. In fact, this is the approach Webpack is using. Webpack is still written in JavaScript but uses TypeScript to check for errors. When Webpack introduced TypeScript back in April 2018 they found various bugs thanks to the compiler. All even though the codebase was heavily tested.
If you want to use TypeScript like them and without even transpiling your code, you can update your configuration the following way:
This way the compiler will act more like an additional linter instead of a compiler.
Turning JavaScript files into TypeScript files
After having ensured that our files are as type-safe as possible in JavaScript, your next step is to turn them slowly one by one into TypeScript files. Since we have allowJs enabled, you don't have to move all at once though. You can gradually move them over instead.
Since we already ran type checks on the JavaScript code, there won't be too much we'll have to update.
The very first step for you is to rename your file extension from .js to .ts This will tell the TypeScript compiler that this is no longer JavaScript but TypeScript and enables additional syntax features like defining types.
The thing that is most likely for you to update is the way you import and export values. If you are already using ES Modules syntax, you are good to go here! If you are using CommonJS syntax (basically using require() and module.exports) you'll have to do some updates since TypeScript uses ES Modules syntax.
Replace each require() call with the equivalent in import syntax, every exports.* into an export and get rid of module.exports.
For our example the src/routes/data.js file would look like this when turned into src/routes/data.ts:
One important note is that module.exports is not the same as export default for ES Modules. There is no equivalent. export default x is actually more equivalent to exports.default = x but because we have the esModuleInterop option set in our tsconfig.json, TypeScript will take care of it if we try to import a JavaScript file with a module.exports. For example:
However, this does not work if we require a file that we wrote in TypeScript from JavaScript. Meaning in our case here we'll have to update our imports our file like this:
As a general rule of thumb, you should try to avoid using module.exports = x to act like default exports. Instead either export each property separately or set it to module.exports = { default: x } to be ES Module compatible.
After you fixed all of your imports re-run the TypeScript compiler to see if it passes successfully. Once you've done that, re-run your app to see if everything works. Then continue to repeat the same process gradually for every file as you are transitioning your project to TypeScript.
Getting strict: Introducing more types
Now that your files have been turned into TypeScript, it's time to unleash the power of TypeScript by giving it more information. So far we actually haven't really told TypeScript much about the things we are doing unless you used JSDoc comments.
TypeScript has a few options to make the type checks more strict. Some of these are:
If you want to slowly dive into TypeScript I would recommend enabling them one by one. If you prefer to solve all problems at once you can alternatively set the following option in your tsconfig.json:
This will enable all of these settings at once.
One error you'll immediately encounter is that some libraries will throw an error that they are missing types. Similarly how we had to install the types for Node.js we'll have to install the types for these libraries. We don't have to do this for every library because a lot of libraries started shipping types with them. But some libraries are written in JavaScript and don't maintain their own types. Instead you'll have to resort to community maintained types under the DefinitelyTyped project. For example for ExpressJS we'll have to install the community types by running:
If you are only using the types internally in your project and are not authoring a library that ships its own types, you should install all types as dev dependencies. We'll cover the other case later.
Once you’ve enabled the various strict flags, make sure you fix the errors it will tell you.
After that you can optionally add more types to your code to make it even more strongly typed. In my case I want to make it more explicit what my data route can return as payload data. For this I'll define a new type called Payload and import an additional helper type to update the types in my src/routes/data.ts file.
This change will make sure that we can only ever send back an object with { "hello": "world" } but nothing else. Try to change it to another string or add another property and it will complain. You can then go and change the type Payload definition to adjust the payload but you'll have an easy to check contract here that others can reference to.
As your codebase grows into TypeScript you'll probably find yourself adding more types. The TypeScript handbook and libraries like type-fest are great places to learn about various different utility functionality to help you define those types.
Maintaining a library with TypeScript
If you are maintaining a library that you are sharing with others, whether internally or externally, there is another reason why you might want to consider including TypeScript into your build chain. That reason is type declaration files (also referred to as TypeScript definition files). These are files that others consume when they use your library with TypeScript and editors like Visual Studio Code use them to fetch autocomplete information for your library.
These declaration files can be distributed in two ways. The first one is directly with your library. That means they live somewhere in your published project (ideally side by side with your transpiled JavaScript) and have the types property in the package.json point at the right file that corresponds to the main JavaScript file. You can learn more about this in the TypeScript documentation.
You can create these declaration files by setting the declarations property in your tsconfig.json to true:
This will generate them directly side by side with your JavaScript. Since TypeScript version 3.7 you can now combine allowJs and declaration, meaning that even if your project is written in JavaScript only you can still generate some basic TypeScript declaration files instead of hand maintaining them.
The alternative way someone might consume types for your library is through the community project DefinitelyTyped. Anyone can create a pull request to add or update declaration files for libraries that don't self-publish declarations.

One thing to keep in mind is that TypeScript is ultimately a tool here to serve you. You can use it as much or as little as possible. But just like in every good friendship it gets better if you put something in yourself instead of just taking out of it. TypeScript will try as much as it can (and it constantly gets better) to guess the types for the code you write. But sometimes you'll need to provide some assistance if you want it to help you even more.
I hope these steps will help you in your journey into TypeScript and that TypeScript will help you as your project grows. I've personally used these steps to move projects like twilio-run successfully from JavaScript to TypeScript. If you want to see the steps applied to the demo project, check out the related pull request.
If you have any questions, feel free to reach out to me and I'm happy to see how I can help :)
- Email: dkundel@twilio.com
- Twitter: @dkundel
- GitHub: dkundel
- dkundel.com
Related Resources
Twilio Docs
From APIs to SDKs to sample apps
API reference documentation, SDKs, helper libraries, quickstarts, and tutorials for your language and platform.
Resource Center
The latest ebooks, industry reports, and webinars
Learn from customer engagement experts to improve your own communication.
Ahoy
Twilio's developer community hub
Best practices, code samples, and inspiration to build communications and digital engagement experiences.