Receive Daily News Emails in Node.js with Twilio SendGrid
Time to read:
February 17, 2022
Written by
Reviewed by

Introduction
There is so much going on around the globe every day, sometimes, it’s hard to keep up with it all. As life gets busier and busier, you are left with very little in the daytime to read the news. What if you could have the latest news sent to your inbox every day?
In this article, you will learn how to automate and receive daily news updates in Node.js using Twilio SendGrid and News API .
Prerequisites
Before proceeding, you will need the following:
- Node.js installed on your machine.
- A News API account to get the API Key.
- A free SendGrid account to receive emails.
- A code editor - For this tutorial, I’ll be using Visual Studio Code but you are free to use any editor of your choice.
Configure the Environment
Before you begin writing code, you must first prepare the environment to meet the needs of your project. This ensures that your code executes without issues. So, let's get started!
Set up a Node.js Project
To begin, you will initialize your Node.js project named daily-news-emails which is where you will do all of your project execution. Open your terminal or command prompt, navigate to your preferred directory and run the following commands to create the project:
After you've created your project, open it in your editor.
.env File
After you open your project in the editor, you will need to create a .env file. This file will be used to store all your API Keys safely and in one place. It is important to hide your API Keys so that they do not get misused.
Place the following in the .env file
The XXXXXXXXXXXXXX placeholders will be replaced with their respective API keys which you will obtain in the next section. In order to use these values inside your application, you’ll need to install the dotenv package. To install the package, head back to your terminal and execute the following command:
Get Started with SendGrid
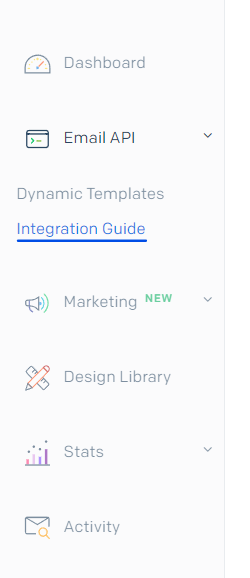
The next step is to generate the SendGrid API key. Log on to SendGrid and you will be brought to the SendGrid dashboard. On the left sidebar, you'll find many categories, where you will click on the Email API dropdown menu and select Integration Guide.
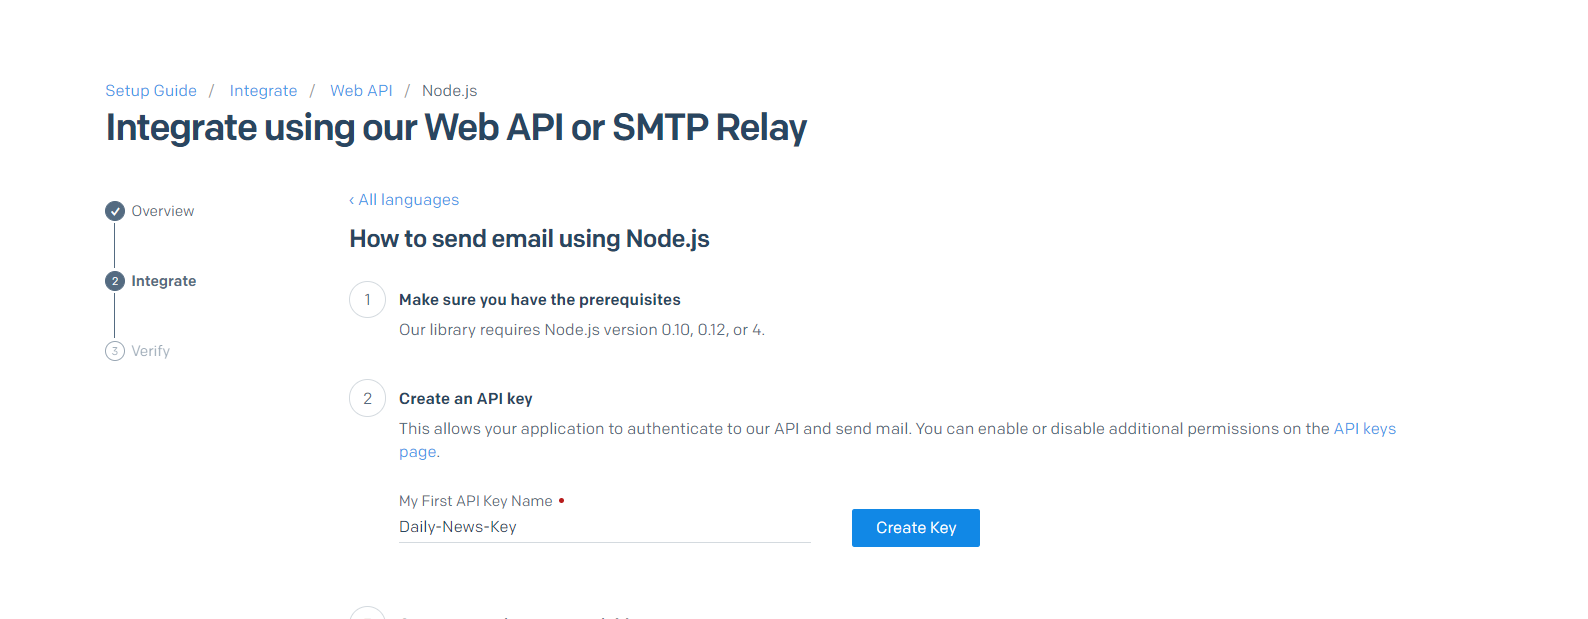
From there, you’ll be directed to the following page and will be prompted to choose one of the options. You need to choose Web API to integrate with your application. On the next page select Node.js as the language and proceed.

After that, you’ll be brought to the page depicted below. Give a name to your API Key and click the Create Key button to generate your API Key.
Head back to your .env file and replace the existing XXXXXXXXX placeholders with the newly generated API key:

Log in if you already have an account, or click Get API Key, fill out the form, and submit.
You will see a field with the label API Key. Copy the key given and replace it with the existing placeholderand save the file:
Install Dependencies
Now that you have all of the necessary APIs for your project, you can begin utilizing them; however, you must first install a few dependencies.
Normally, when dealing with APIs, you must make external HTTP calls, but thankfully, the SendGrid API and the News API include wrappers for Node.js applications. This allows us to directly use the API functions without making any direct calls.
So, fire up the terminal and execute the following command:
Finally, because your program must send emails on a daily basis, your node script must run constantly. To do this, you must install the forever package. Forever is an npm package that is used to keep the node server alive and execute Node.js scripts in the background as a daemon indefinitely.
You'll also need to install the node-schedule package to make the most of the Forever package. Node Schedule is a Node.js task scheduler with a lot of flexibility. Node Schedule, unlike other schedulers, is designed for time-based scheduling rather than interval-based scheduling.
Run the following command in your terminal:
Build the Application
After successfully configuring your environment, it's time to get to the exciting part: coding!
In your daily-news-emails folder, create an index.js file.
The first step is to import the .env file and API methods into your index.js file. The code for the same is explained below.
Get the Daily News
After successfully importing all of the necessary files, you will write an async function: getDailyNews(). This function will retrieve all of the top headlines from the News API between yesterday and today.
Copy the function below in the index.js file:
Generate HTML Template for Email
A JSON response sent as an email is really unpleasant to read. So, to make your email more understandable, you will construct a basic HTML Template for the JSON response data.
Append the following in your index.js file:
Use SendGrid to Send the Email
Now you'll write the message that will be delivered by email. This message includes the recipient's address, the sender's name and address, the subject, and the body. The body will be the htmlTemplate that you made in the last section.
Add the following to the the index.js file:
Once copied into your file, don’t forget to replace the test@example.com placeholders with the actual emails you will use to test out the project.
Schedule the Main Function to Send Updates
You’ll need to create a main function that calls your previously written functions in a proper sequence:
Now that all of the functions are pieced together, let’s set up the program to send out an email update every minute. To do that add the following line and save the file:
The function above uses a cron expression as a parameter. The cron expression used is * * * * * and instructs the function to have it run every minute. To understand how cron expressions work, click here.
Test the Application
Now that you are done with the coding part let’s put it to the test. Open your terminal and run the following command:
Wait for a minute and you should see a terminal log that says “Daily News Sent!”. Once you see the terminal log, check the recipient email address you used and you should see your Daily News Email!
To stop the execution, use ctrl+c on your terminal.
Schedule to get Daily Updates
Now that you have successfully tested your application, let’s modify it to send daily updates.
To do that update the following changes:
This will send you emails at 00:00 every day.
To run the node continuously, open your terminal and execute:
This will keep your node server running indefinitely unless you stop it.
To stop the server, run:
Let’s Summarize!
Great! You made it; now begin your day with a good cup of coffee/tea served with the latest news from around the world. In this tutorial, you learned:
- How to build a program that will send regular news updates directly to your inbox.
- How to handle various APIs.
- How to retrieve data from News API.
- How to schedule a job in node.js.
If you want to keep exploring the code, try to either modify the HTML template or schedule updates to be sent to you multiple times a day so you can be constantly in the know!


Related Resources
Twilio Docs
From APIs to SDKs to sample apps
API reference documentation, SDKs, helper libraries, quickstarts, and tutorials for your language and platform.
Resource Center
The latest ebooks, industry reports, and webinars
Learn from customer engagement experts to improve your own communication.
Ahoy
Twilio's developer community hub
Best practices, code samples, and inspiration to build communications and digital engagement experiences.