Build a Virtual Whiteboard for Back to School: Save Incoming SMS, MMS, and Voice Calls to Airtable with JavaScript
Time to read:
August 25, 2022
Written by
Reviewed by
It’s back to school time and for college students in a remote environment, what better way to recreate the dorm experience than with a virtual whiteboard. Your friends can send a text or MMS to your Twilio phone number and it will appear on your web app.
In learning how to build a virtual whiteboard, you’ll master two concepts: saving incoming SMS and MMS messages to an Airtable database, and displaying these messages on a web app. That second part – displaying the messages on a web app – will be covered in a second post.
Prerequisites
To get started with this tutorial, you’ll need the following:
- Node.js version 14.16 or above. installed on your machine, along with a package manager like
npmoryarn - A free Twilio account
- A Twilio phone number
- The Twilio CLI installed on your machine
- A free Airtable account
Create your Airtable base
Login to your Airtable dashboard and click on the grey square with the plus button to create a new base in your workspace. Once you click on it, a small submenu will appear. Select the Start from Scratch option. When prompted, name your base “Virtual Whiteboard”.
In the top left of your new base, you’ll see a tab for the current table named Table 1. Double click the tab and change the name of the tab to “Posts”.
There are four columns, known in Airtable as fields, that have been automatically added to your table.
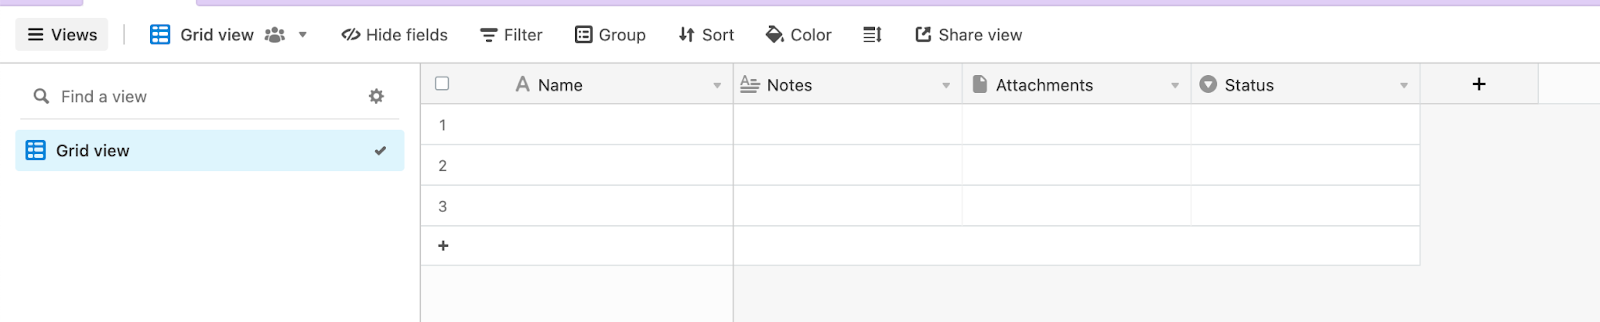
Delete the three rightmost fields, Notes, Attachments, and Status, by clicking the small arrow next to each of their names and selecting Delete Field at the very bottom of the sub-menu.
Double click the name of the remaining field, Name, to edit its name and type. Change its type to an auto-generated ID by selecting Autonumber from the dropdown. Then change the name of the Name field to id.
Add the following fields by clicking the + button to the right of the final column:
| Field name | Field Type |
|---|---|
| `created` | Created time |
| `body` | Long text |
| `from` | Single line text |
| `attachmentUrl` | Single line text |
| `type` | Single line text |
At this point, your Airtable base should look like this:

Build the app’s backend with Twilio Functions
The backend of your app will run on Twilio Functions. Twilio Functions is a serverless environment that lets you deploy backend services without the overhead of setting up a server. With Twilio Functions, you can develop locally and deploy to production through the Twilio CLI.
The first step is to create a Functions Service. If you haven’t already, install the Twilio CLI using the following command:
Next, install the Twilio Serverless Toolkit plugin for the Twilio CLI:
Run the following command to login to the Twilio CLI:
You’ll be prompted to enter your credentials, which can be found in the Twilio Console.
Now that you have the plugin installed and you’re logged in, you can initialize a new Functions service:
This command will create a new directory on your computer called virtual-whiteboard-server. Still inside your terminal, navigate into this folder by running the following command:
Because you’re using Airtable to store incoming messages to your Twilio number, you’ll need to install the Airtable npm package:
Add your Twilio and Airtable credentials to your environment
In your file navigator, find your new virtual-whiteboard-server folder and open the .env file that was automatically created for you when you created the Functions Service. This file should be pre-populated with your Twilio Account SID. It may also be pre-populated with your Auth Token or have a blank variable where you can add it. Verify that both these values are present and correct. They can be found in the Twilio Console.
Get an Airtable API Key
To get an Airtable API key, visit the Account section of Airtable and scroll down to the API section. Click the button that says Generate API key.

This will create a new key that will be masked unless you click on it.
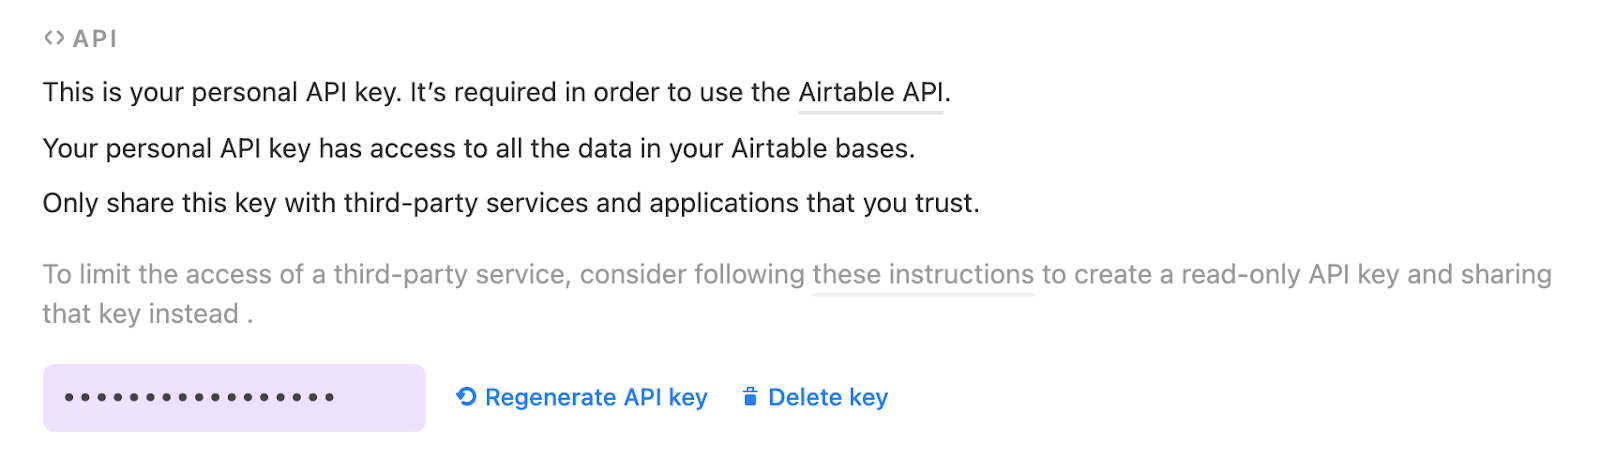
Click into the field with your masked key to toggle the visibility.
In your .env file, add your new Airtable API key by pasting in the following line and replacing the placeholder XXX value with your actual API key.
Save and close your .env file.
Create your functions
Open the sub-folder virtual-whiteboard-server/functions and delete the folder's contents, but not the folder itself.
To create the three function files you’ll need for this app, run the following command from your terminal or create them in your text editor:
Open the new messaging.js file in your favorite text editor. Paste in the following code:
This function will be run every time a message comes in to your Twilio phone number. The function intercepts the message, processes and organizes some of the data attached to the message, and then uploads the organized data to Airtable using the Airtable API.
Save and close this file.
Open the voice.js file and paste in the following code:
The function runs whenever there is an incoming voice call to your Twilio phone number. When the call connects, the caller will hear “Thanks for leaving a voice message on my virtual whiteboard!” Afterward there will be a beep and the code will initialize a recording sequence that allows the caller to leave a voice message.
When the recording has finished processing, this function will run whatever file is referenced in the action value on line five. In this case, that’s record.js, which you’ll complete now.
Open record.js and paste in the following code:
This code is very similar to the code in messaging.js, except the post data uploaded to Airtable will be of type voice and it will include the recording URL provided by Twilio, and not a text message body.
Save and close any open files.
Deploy your functions
From your terminal, first make sure you’re in the top-level directory of your project (virtual-whiteboard-server), and then run the following command to deploy your Function Service:
It will take a few moments for the deployment to complete, but once it does, you’ll be presented with details about it including the URL to each of your functions (and any assets, if you had any).
Take note of the URLs for your messaging.js and voice.js functions. These URLs should look something like this:
You’ll need these URLs in just a moment to configure your webhooks.
Configure your webhooks
In your web browser, navigate to the Phone Numbers section of the Twilio Console and then click on your phone number.
Voice webhook
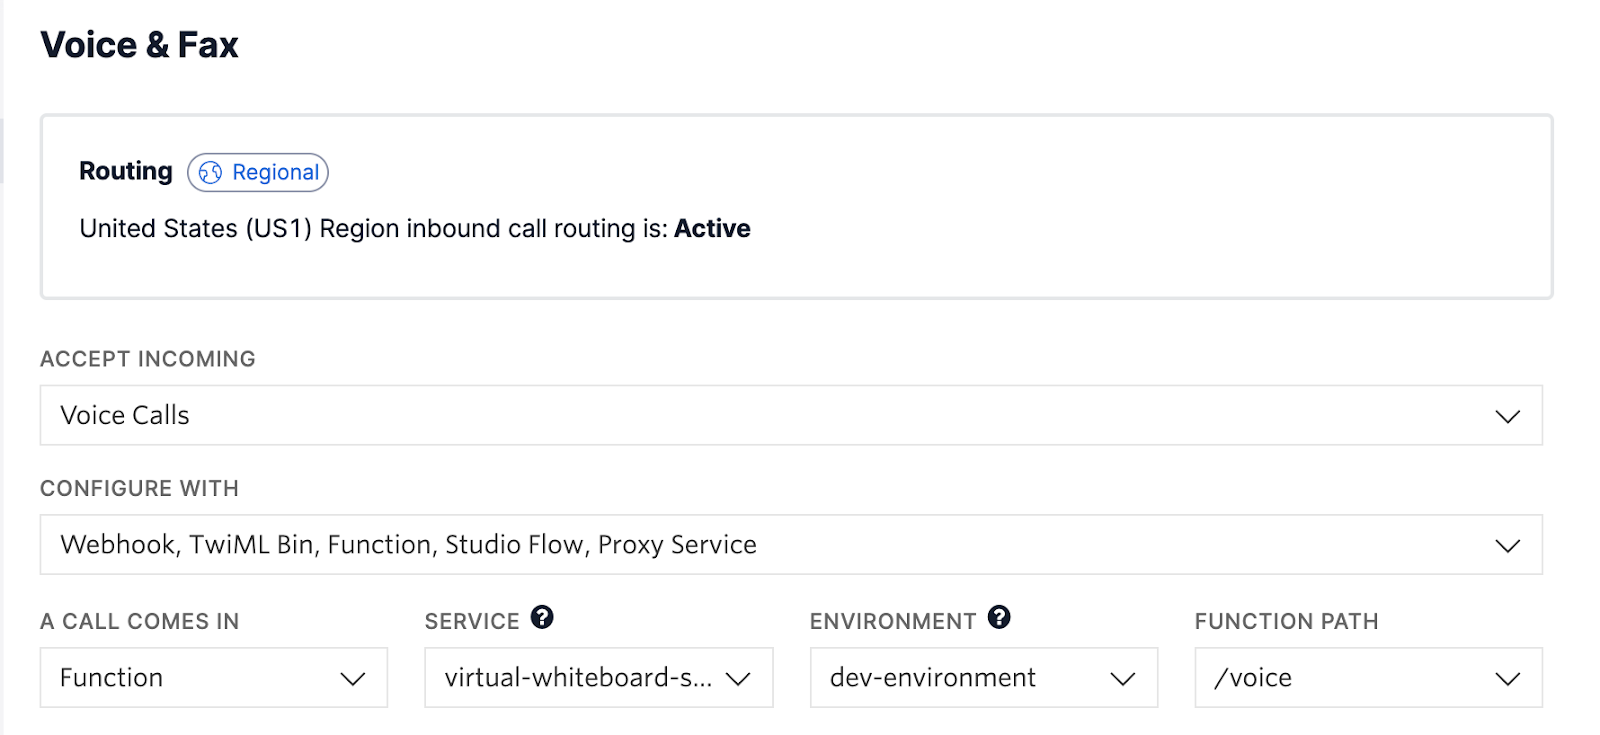
Scroll down to the Voice & Fax section and select the following settings:
- For “Accept Incoming” select Voice Calls.
- For “Configure with” select Webhook, TwiML Bin, Function, Studio Flow, Proxy Service.
- For “A call comes in” select Function in the left dropdown.
- For “Service” select virtual-whiteboard-server, or the name of the service you created earlier.
- For “Environment” select dev-environment.
- For “Function Path” select /voice.
Messaging webhook
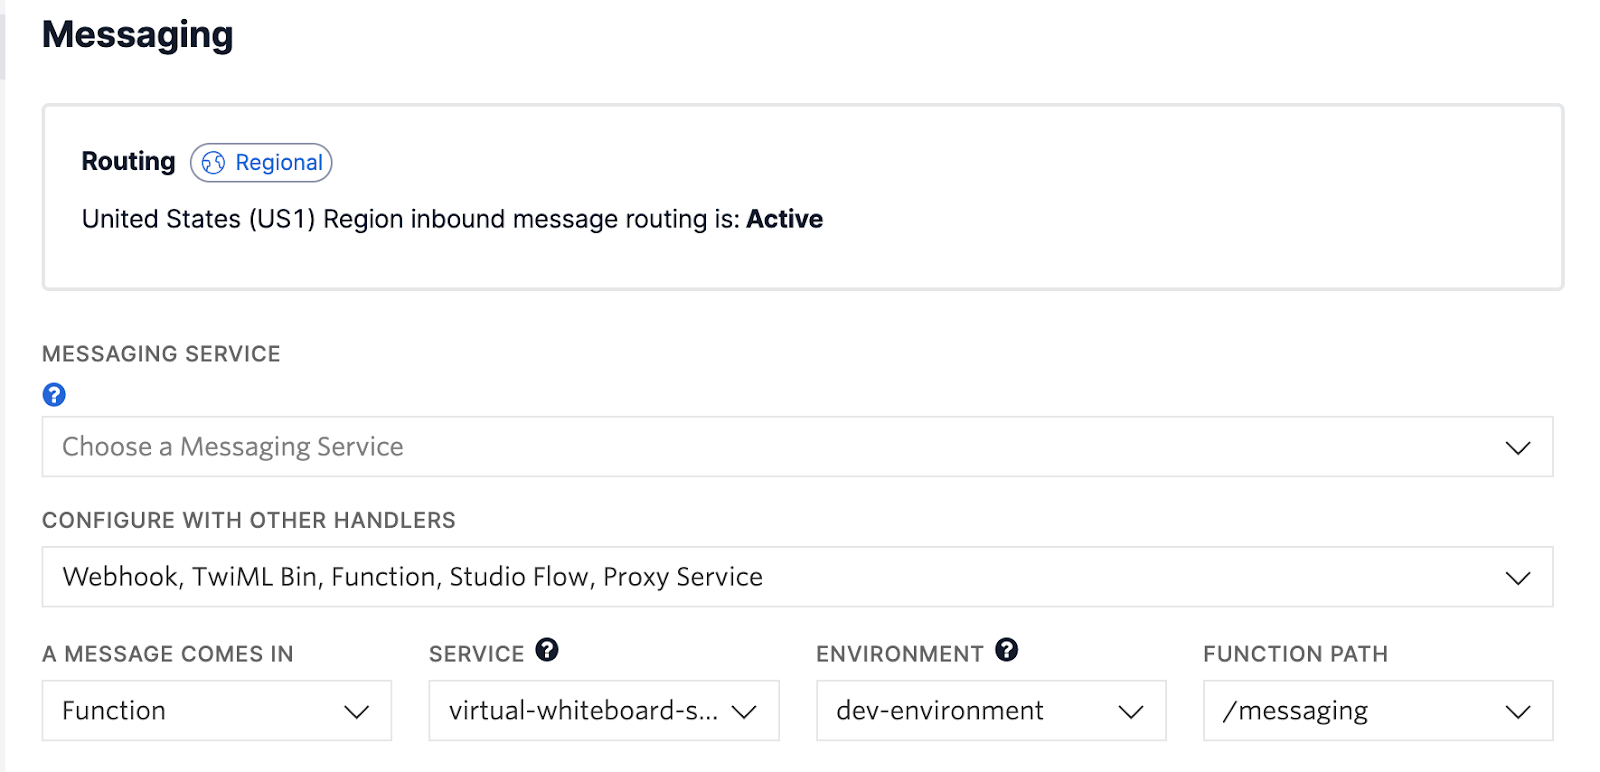
Scroll down a little farther on the page to the Messaging section, and select the following settings:
- For “Configure with” select Webhook, TwiML Bin, Function, Studio Flow, or Proxy Service.
- For “A message comes in” select Function in the left dropdown.
- For “Service” select virtual-whiteboard-server, or the name of the service you created earlier.
- For “Environment” select dev-environment.
- For “Function Path” select /messaging.
Don’t forget to click the Save button at the bottom of the page to record these changes!
Test it out
On your mobile device, text or call your Twilio phone number. If you’re calling, leave a voice message. In your web browser, head over to your Airtable base to see if your text or voice message was properly inserted.
I hope you enjoyed learning about saving incoming messages and voice calls to your virtual whiteboard to Airtable. In the next part of this article, learn how to access these posts in a Svelte app.
Ashley is a JavaScript Editor for the Twilio blog. To work with her and bring your technical stories to Twilio, find her at @ahl389 on Twitter. If you can’t find her there, she’s probably on a patio somewhere having a cup of coffee (or glass of wine, depending on the time).


Related Resources
Twilio Docs
From APIs to SDKs to sample apps
API reference documentation, SDKs, helper libraries, quickstarts, and tutorials for your language and platform.
Resource Center
The latest ebooks, industry reports, and webinars
Learn from customer engagement experts to improve your own communication.
Ahoy
Twilio's developer community hub
Best practices, code samples, and inspiration to build communications and digital engagement experiences.