Create Secret Santa Matches Using Python Flask and Twilio SMS
Time to read:
December 24, 2021
Written by

For the second year in a row, my family decided to embrace the “secret santa” method of giving gifts at Christmas. Rather than everyone getting a gift for everyone else, which can be expensive and time consuming, each person’s name is put in a box and we each draw one name from the box. The name we draw is the person we give a gift to, up to a certain dollar amount that we’ve all agreed on in advance.
This year, my family is spread all over the United States so it wasn’t possible to draw names from a box. Instead, I thought it would be fun to create my own Flask application that would match people up and notify each person of their gift recipient using Twilio SMS.
Follow along with the tutorial below, or clone the GitHub repository if you’re in a rush!
Prerequisites
- Python 3.6+
pip, the Python package installer- A list of phone numbers of the people who are participating in the Secret Santa exchange
- A Twilio account
- A Twilio phone number
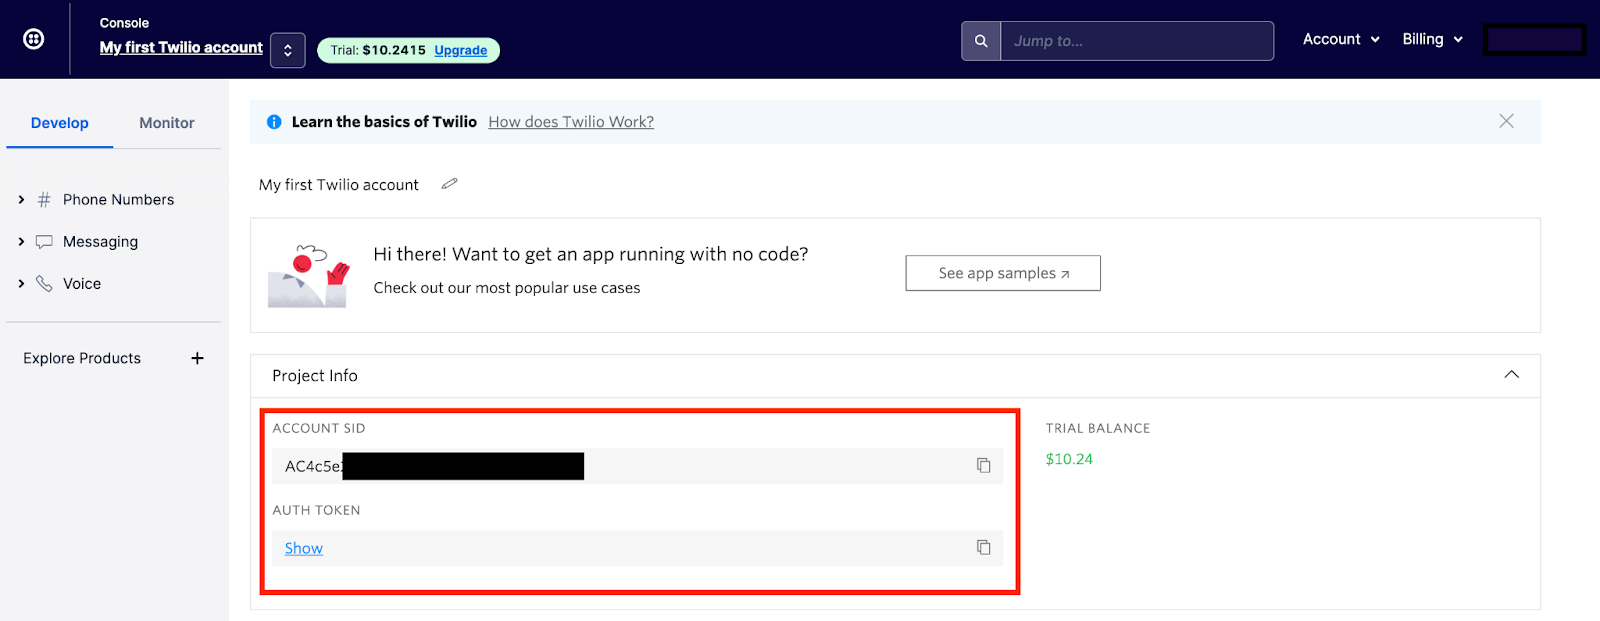
- Your Account SID and Auth Token, found in your Twilio account dashboard as shown below:
Create the Python virtual environment
Create a new directory for this project in your command prompt called flask-secret-santa-sms/, then navigate to this new directory:
We will create a new virtual environment for this project so that the dependencies we need to install don’t interfere with the global setup on your computer. To create a new environment called “env”, run the following commands once you’ve navigated to the flask-secret-santa-sms/ directory:
After you source the virtual environment, you'll see that your command prompt's input line begins with the name of the environment ("env"). Python has created a new folder called env/ in the flask-secret-santa-sms/ directory, which you can see by running the `ls` command in your command prompt.
Create a file called .gitignore in the flask-secret-santa-sms/ directory as well.
Open the .gitignore file in the text editor of your choice, then add the env/ folder to the contents of the .gitignore file:
Note that the env/ folder created by Python for the virtual environment is not the same thing as the .env file that’s created to store secrets like API keys and environment variables.
Store environment variables securely
You’ll need to use the Account SID and Auth Token you located at the beginning of this tutorial in order to interact with the Twilio API. These two environment variables should be kept private, which means we should not put their values in the code. Instead, we can store them in a .env file and list the .env file in our .gitignore file so git doesn’t track it. A .env file is used whenever there are environment variables you need to make available to your operating system.
> Note that the env/ folder created by Python for the virtual environment is not the same thing as a .env file created to store secrets.
First, create the .env file:
Then, add the .env file as a line item in the .gitignore file:
Next, open the .env file in your favorite text editor and add the following lines, replacing the random string placeholder values with your own values:
Source the .env file so it becomes available to your operating system, then print the environment variable values to your console to confirm they were sourced successfully:
Install the Python dependencies
The Python packages required for the project are:
Dependencies needed for Python projects are typically listed in a file called requirements.txt. Create a requirements.txt file in the flask-secret-santa-sms/ directory:
Copy and paste this list of Python packages into your requirements.txt file using your preferred text editor:
Install all of the dependencies with the command given below, making sure you still have your virtual environment (“env”) sourced.
Create the Flask server
It’s time to write some code! In the flask-secret-santa-sms/ project directory, create a new file called app.py:
Open the app.py file in your preferred text editor and add the following code, which imports the dependencies, pulls in our environment variables, and creates a simple Flask server:
Create an HTML form that accepts participants’ phone numbers
On the homepage of our Secret Santa app, we’ll show a simple HTML form where you can enter the phone numbers of your group’s participants. For this tutorial, we’ll include text fields for 4 participants.
You can change the number of text fields to match the number of people in your group by deleting any extra text fields shown in the HTML code below, or by adding new text fields. If you’re adding new text fields, make sure each text field has its own unique id and name. The code we’re going to write will dynamically determine how many text fields there are, so you won’t need to change anything in the code if you want to change the number of people in the Secret Santa group.
In the flask-secret-santa-sms/ directory, create a templates/ directory to store our HTML file. Then, create an index.html file inside of the new templates/ directory.
Copy and paste this code into your index.html file. It's a simple HTML form that includes text fields for each participant's name and phone number.
Display the HTML form on the home page
Now that we have the HTML form to collect all the phone numbers, we need to create a Flask route to serve the form. For simplicity, we’ll show this form on the home page of our application. Add this new route to the bottom of the app.py file, which simply renders the HTML form on the home page:
Create a Flask route to handle the HTML form data
Now that we have an HTML form, it’s time to write a function that will process the data that comes through in the form.
Copy the create_assignments() function found on lines 21 - 61 of the app.py file in the GitHub repo and paste it at the bottom of your own app.py file. The function does the following:
- Intakes the form data
- Separates the name and phone number information into separate lists
- Sorts each list so that each participant’s name and phone number appear at the same index of each list
- Creates the Secret Santa matches
- Calls a helper function that sends the SMS notifications
Create a helper function to send the SMS notifications
The last thing we need to do is write a function that handles sending the SMS notifications. Copy and paste this function into the bottom of your app.py file, underneath the create_assignments() function you added in the previous step.
Remember to change the placeholder from_ number in the example code below to your own Twilio phone number, making sure to maintain the E.164 format.
Remember, this function is called within the create_assigments() function. It sends an SMS message to each participant to notify them of who they should give a gift to.
Start the server
It’s time to start the server and try this out! While you’re in the flask-secret-santa-sms/ directory, run this command to start the Flask server:
Navigate to localhost:5000 in your web browser. Enter the names and phone numbers for each of the 4 participants, then click the button at the bottom of the form to continue. Behind the scenes, our create_assignments() function will create the Secret Santa pairs, then call the send_assignments() helper function to send the SMS messages. Check your phone to see if the SMS message came through, and also check your CLI output for more details that were printed from the Python script.
Note: Because of how the matching logic works, you cannot enter a phone number more than once. Thus, if you want to test this out before running it on a real group, you’ll need a few people to agree to be part of your test.
Congratulations!
You now have a working application to assign Secret Santa pairs for your family or group! You just learned how to:
- Create a web server using Flask
- Receive and manipulate data from an HTML form
- Send SMS messages using Twilio’s API
Next steps
If SMS isn’t the right mode of communication for the people in your Secret Santa group, you could modify this tutorial to use one of these instead:
- Twilio WhatsApp API
- Twilio SendGrid API to send notifications via email
- Twilio Programmable Messaging to send and receive group SMS messages
Or, check out the Build A Secret Santa Bot for WhatsApp Using Python and Twilio tutorial on the Twilio blog.
I can’t wait to see what you build!
Author bio
August is a Pythonista on Twilio's Developer Voices team. She loves Raspberry Pi, real pie, and walks in the woods.


Related Resources
Twilio Docs
From APIs to SDKs to sample apps
API reference documentation, SDKs, helper libraries, quickstarts, and tutorials for your language and platform.
Resource Center
The latest ebooks, industry reports, and webinars
Learn from customer engagement experts to improve your own communication.
Ahoy
Twilio's developer community hub
Best practices, code samples, and inspiration to build communications and digital engagement experiences.