How to send RSS feed digest email with C# and SendGrid Dynamic Email Templates
Time to read:
July 26, 2022
Written by
Reviewed by

In this article, you will learn how to create a nicely formatted dynamic email using the Twilio Blog RSS feed as source data and send it via the SendGrid API. You will first look into creating the template with test data. Then you will learn how to parse RSS and HTML and send the emails with dynamic data.
Prerequisites
You'll need the following things for this tutorial:
- A free Twilio SendGrid account. Sign up for a SendGrid account here to send up to 100 emails per day completely free of charge
- An OS that supports .NET (Windows/macOS/Linux)
- .NET 6.0 SDK (newer and older versions may work too)
- A code editor or IDE (Recommended: Visual Studio Code with the C# plugin, Visual Studio, or JetBrains Rider)
- SendGrid API key (See Manage SendGrid API Keys)
- A verified Sender email or domain to send emails from (See Adding a Sender)
- Git CLI
Create a Dynamic Email Template
Follow the steps below to create the dynamic email template for RSS feed digest email:
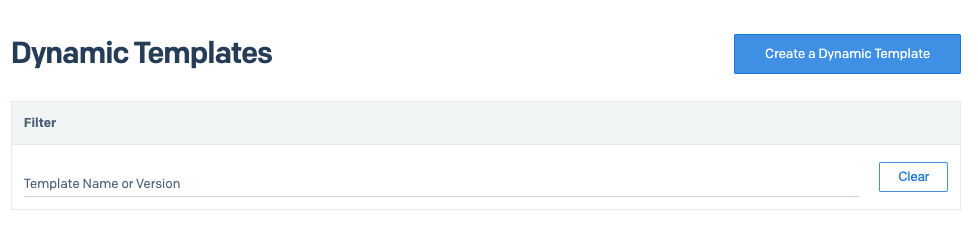
Go to the Dynamic Templates dashboard and click Create a Dynamic Template.
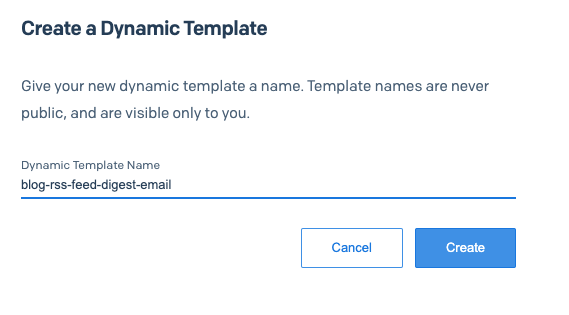
Enter the name of your template (e.g. blog-rss-feed-digest-email) and click Create.
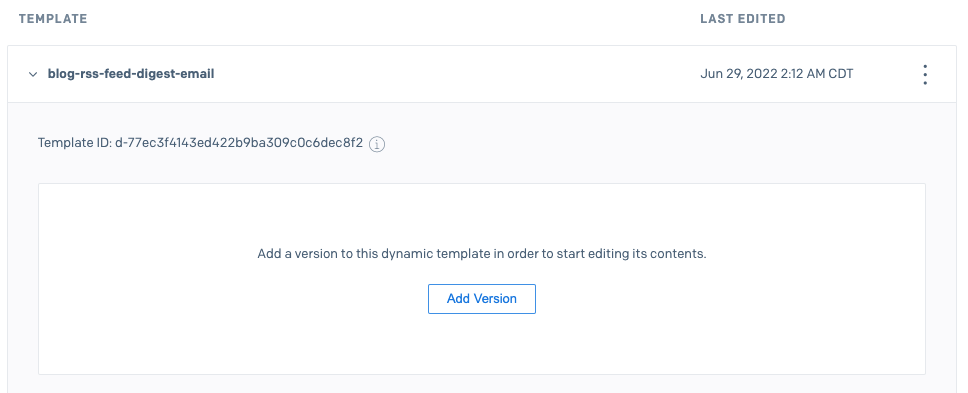
Expand your template and click Add Version.
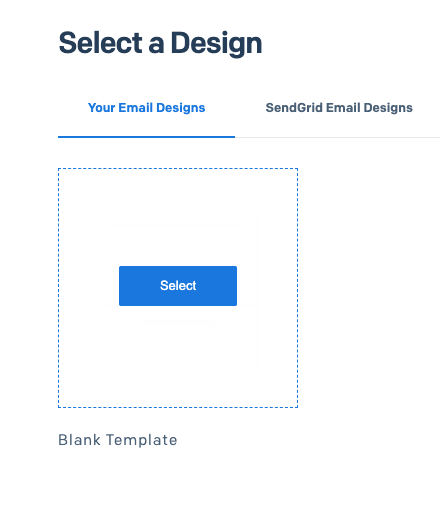
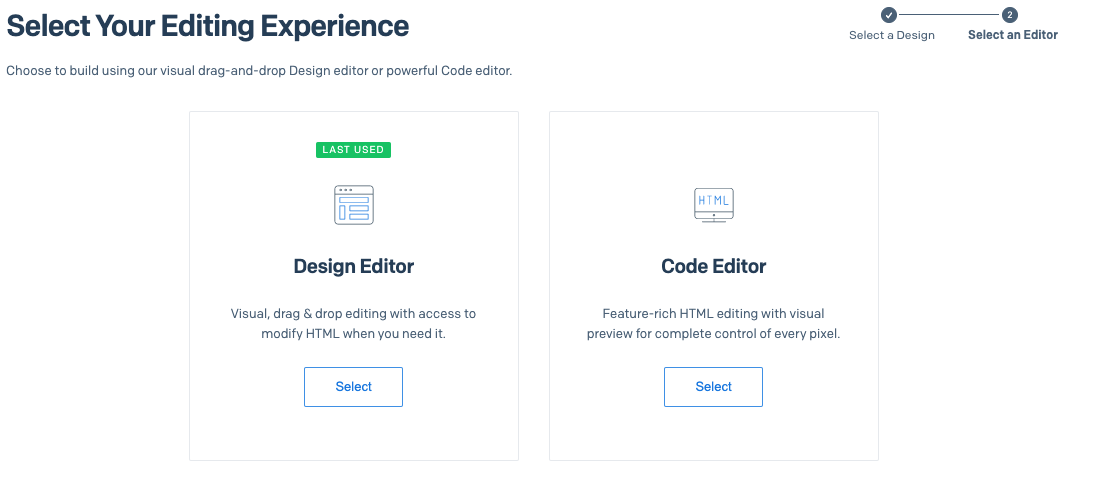
Hover over Blank Template and click the Select button.
Click the Select button in the Design Editor section.
Update Version Name to version-1, and then update the Subject to {{subject}}.
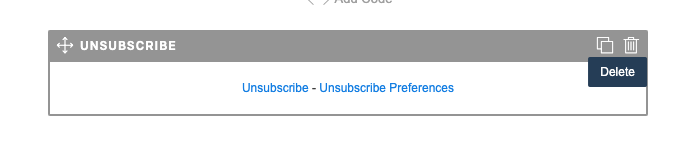
Delete the Unsubscribe module by hovering over it and clicking the trash can icon.
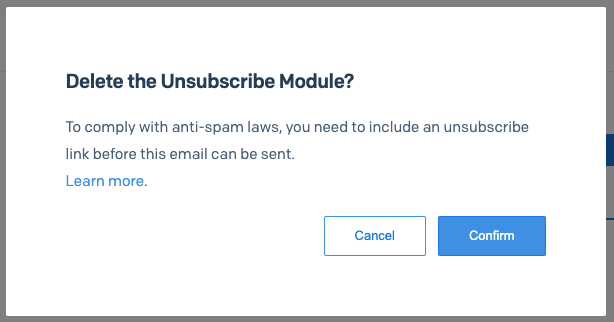
Confirm the deletion by clicking Confirm button in the dialog box.
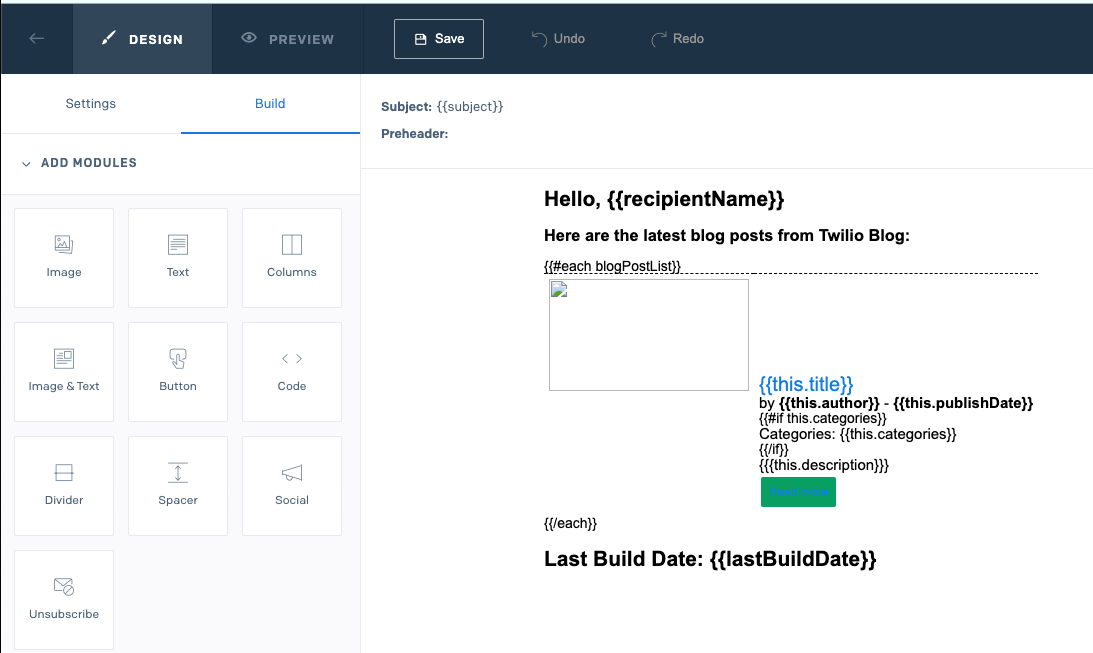
Now click the Build tab and drag the Code module into the design area that says Drag Module Here.
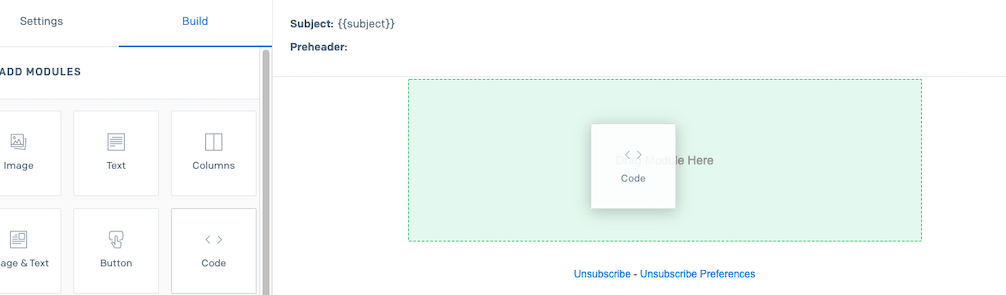
The edit module screen will automatically appear. Paste the following code inside the editor and click Update.
Click Save in the top menu.
Handlebars Templating Language
SendGrid uses the Handlebars Templating Language to handle variable substitution and add some logic to the templates. You can find all the supported features on SendGrid documentation: Using Handlebars. You might also want to check out this article which also uses Handlebars templating.
Let me show you some of the Handlebars features used in the dynamic email template.
Conditionals
Twilio blog posts can belong to multiple categories. Also, in some cases, they don’t have any categories. So, instead of showing a blank Categories line in the email, you can hide the line if the post does not have any categories.
To check if a string is empty or not, we can use a simple if statement as shown below:
If the value of this.Categories variable is an empty string, it evaluates to false. In that case, the p element will be hidden.
HTML Injection
As you will see later in the Parsing HTML section, the full HTML post is included in the XML, and you will parse the first paragraph as HTML. In the email, you need to embed this block as HTML; otherwise, it would look broken if other HTML elements were inside the paragraph.
To inject HTML, you can just use triple curly braces as shown below:
Iterations
In the example, you will send an RSS feed digest, meaning there will be multiple blog post sections in the email. Handlebars supports arrays and iterations. You can access each item in the array by using the each keyword. In the example, you did this for the blogPostList array:
Between {{#each blogPostList}} and {{/each}}, you can access each item in the array by using the this keyword.
Test the Template
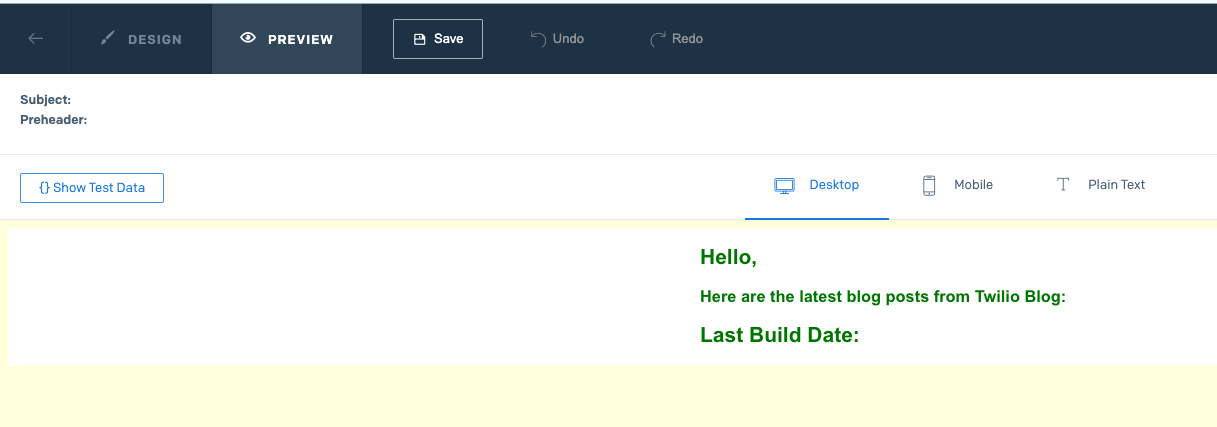
The SendGrid designer allows you to preview the rendered output by using hard-coded test data. This is a handy feature as you get to see all the variable substitutions in action right in the designer.
To test your template, click the Preview button in the top menu. You should see something like this:
Next, click Show Test Data to open the data panel on the left.
I obtained some test data manually from the actual Twilio Blog to make the test more realistic. Paste the following JSON into the data panel:
You should now see the rendered output on the right-hand side:
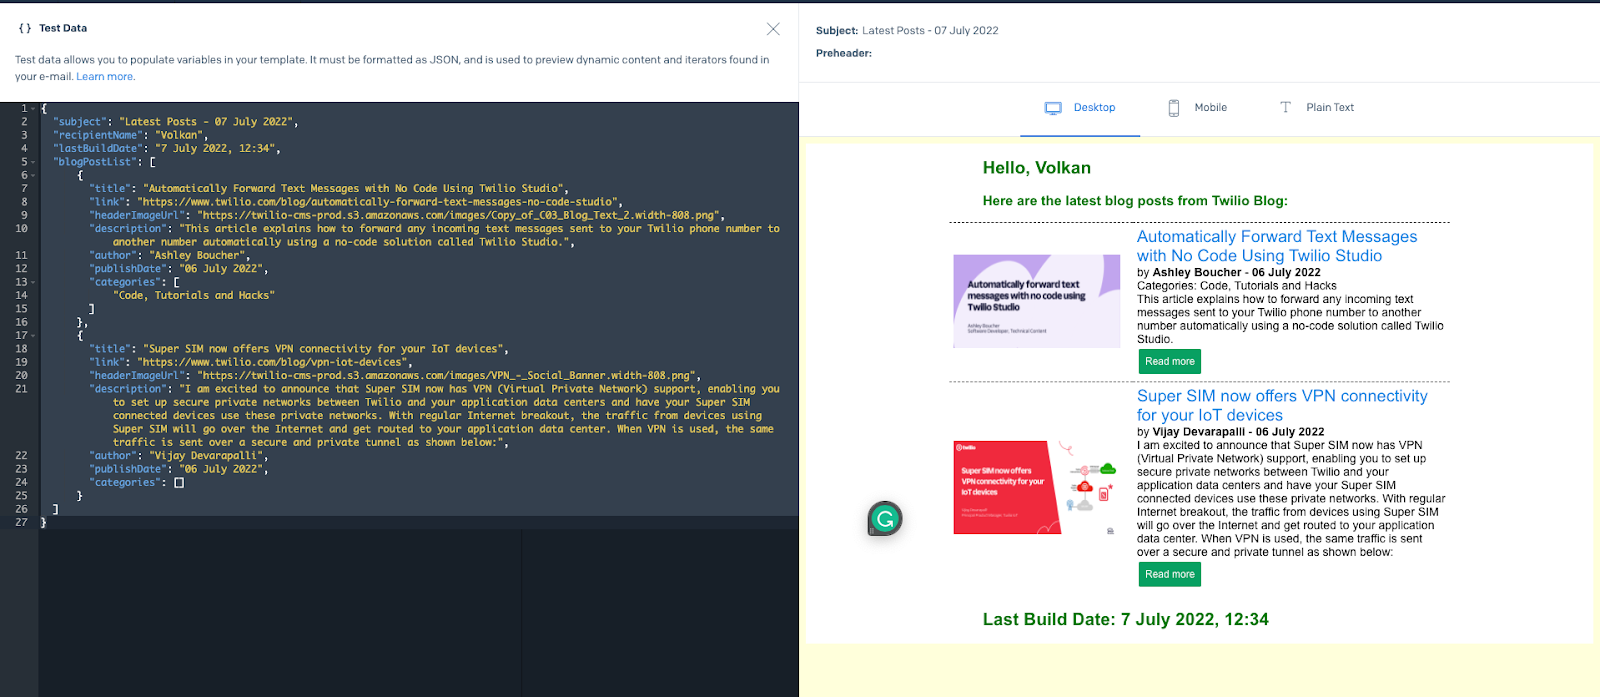
As you can see, by using the preview feature, you can see the final output without writing any code and sending any emails. Even though the preview is quite accurate, you might want to see it in your inbox as an email. You can also do that in the designer.
Click the Design button on the top menu.
Then, expand Test Your Email section on the left panel:
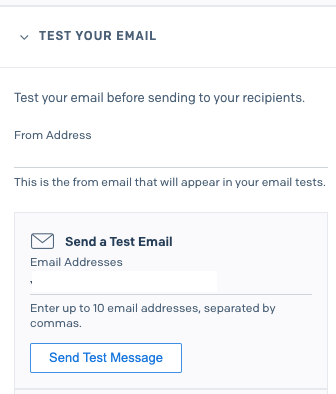
By default, the From Address field is populated by the email address you used when you created your SendGrid account. However, you can replace it with your verified sender address if you like.
Fill in the Email Addresses field with your recipient's email address. You can test up to 10 recipients.
Click Send Test Message button. Then, check your inbox, and you should see an email that looks like this:
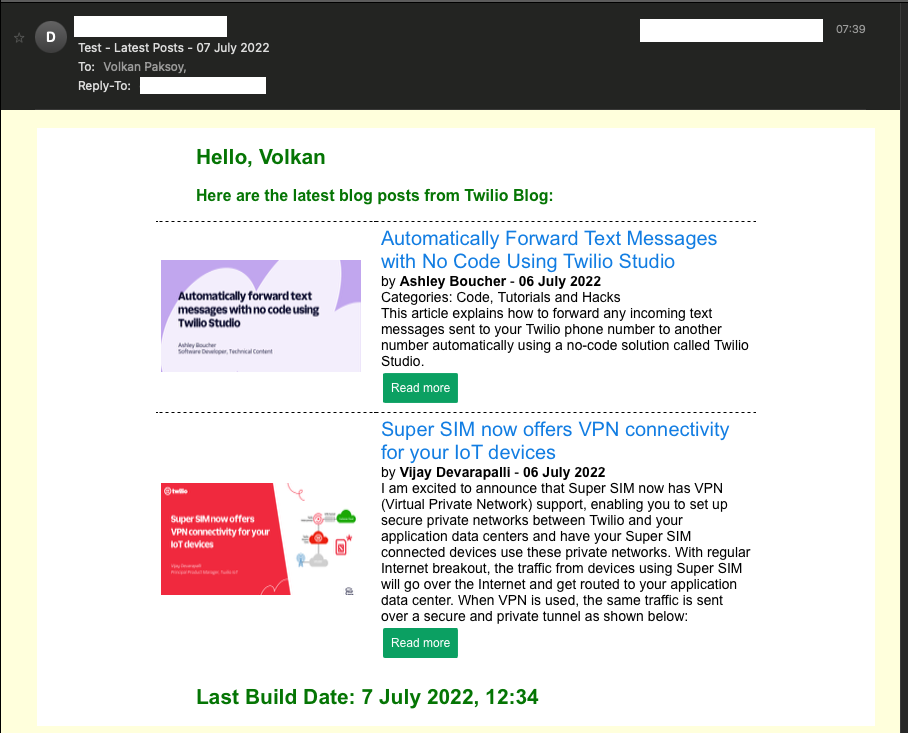
It looks like the real thing, except that SendGrid prepends the subject with “Test - “.
So far, you have developed an email template, reviewed the rendered output and sent out actual emails using the designer. Now, it’s time to write some code to send the emails programmatically using the same hard-coded data.
Set up your Project to Send Emails
This tutorial will start from an existing git repository. To get the application up and running, follow the steps below:
Clone the GitHub repository:
Alternatively, you can open the repository, switch to the 00-starter-project branch and then click Code and Download ZIP button.
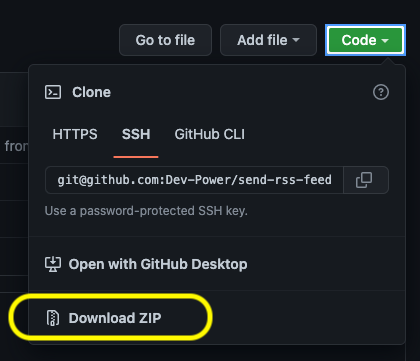
As a third option, you can download the zip file by clicking on this link.
Navigate into the project folder:
To store your SendGrid API key securely, add it to the project user secrets by running the following command:
Replace [YOUR SENDGRID API KEY] with the SendGrid API key you created earlier.
Update appsettings.json and configure the email settings sections:
Update
senderEmailAddresswith your SendGrid sender email address,senderDisplayNamewith any name that you would like the recipient to see,recipientEmailAddresswith the email address you want to email,recipientDisplayNamewith the name of the recipient,- and the
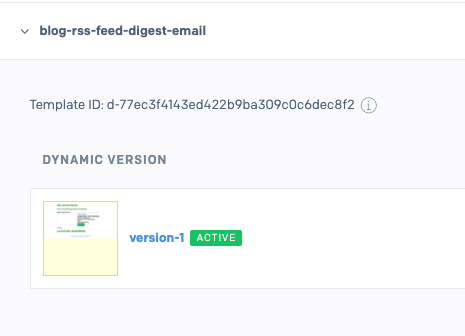
templateIdwith the ID of the template you created earlier. You can obtain the Template ID by expanding it in the dashboard:
Now that the project has been set up, review the important parts of the code.
Currently, the project contains an EmailService class to talk to the SendGrid API using the SendGridClient class. It uses a data provider to get the template data. In this example, you have a JsonDataProvider class that looks like this:
It reads the data from a hard-coded JSON file named DummyData.json under the Data folder. The contents of DummyData.json are exactly the same as you used in the designer preview.
Having a separate provider for data makes the email service data-agnostic. The SendTemplatedEmail implementation looks like this:
As the email service does not construct the template data itself, you can use different data by swapping out JsonDataProvider with new classes that implement the IDataProvider interface.
The main program is set up like this:
You can see in the setup, user secrets are added to the configuration by calling the AddUserSecrets method. This is required to read the API key from .NET user secrets as you configured in the previous section.
Also, SendGridClient is added to the Dependency Injection (DI) Container using the SendGrid.Extensions.DependencyInjection NuGet package. This way, you don’t have to instantiate the SendGridClient object manually inside the EmailService.
Finally, note that JsonDataProvider is registered for the IDataProvider interface. When you implement getting dynamic data from the RSS feed, you will only have to change the line below, and you won’t have to touch the EmailService:
Now that you’ve covered the main parts of the application, go ahead and run by running the command:
If all goes well, you should receive an email shortly that looks like this:
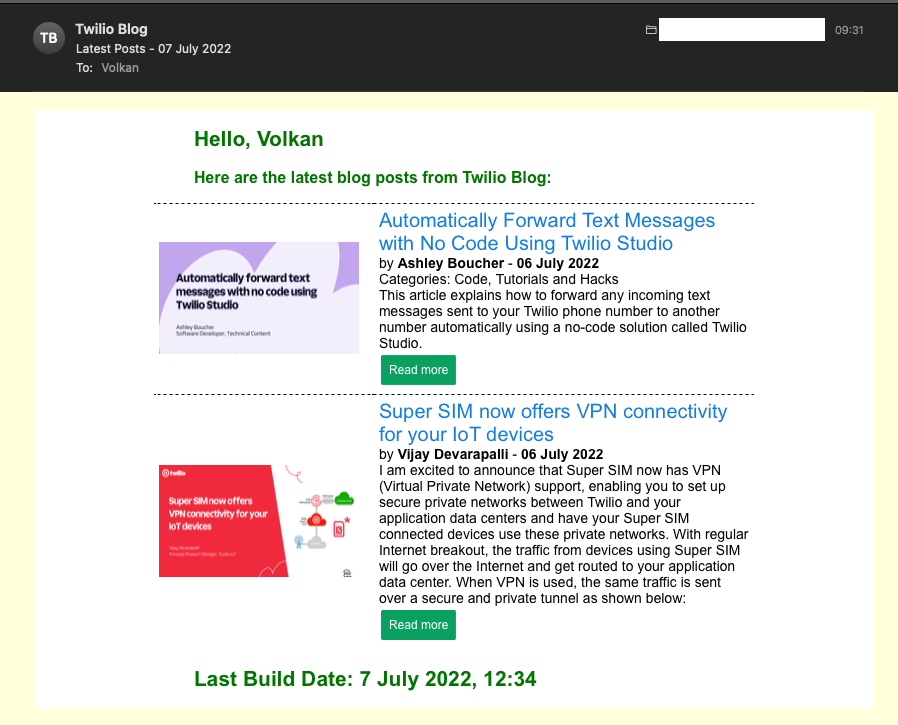
It’s almost identical to the one you sent using the SendGrid dashboard, except that the subject is not prepended with “Test - ”.
Next, you will learn how to get the Twilio Blog RSS feed, obtain relevant data from XML and blog post HTML pages, and prepare the dynamic data for the email template.
Get the Twilio Blog RSS Feed
To follow the code explanations below, check out the latest code. While still in the project folder, run:
Alternatively, follow the instructions below to get to the last version of the code:
Under the Services folder, create a new file named TwilioBlogDataProvider.cs and replace its contents with the following:
Under Services/Interfaces, create IRssService.cs and paste the following code:
Under Services, create RssService.cs and paste the following code:
Under Services/Interfaces, create IHtmlService.cs and paste the following code:
Under Services, create HtmlService.cs and paste the following code:
Under Configuration, create EmailDataSettings.cs and paste the following code:
Under Configuration, create RssSettings.cs and paste the following code:
Update Program.cs as below:
Update appsettings.json and add the new configuration settings after the emailSettings section:
What is RSS?
RSS (Really Simple Syndication) is an easy way to keep up with news and blogs. It’s an XML-based feed generated by the websites. RSS readers periodically download these feeds and compare them to what they have locally. This way, the user can get notifications for the updates.
In this example, you will only look into downloading and parsing an RSS feed.
Downloading RSS Feed
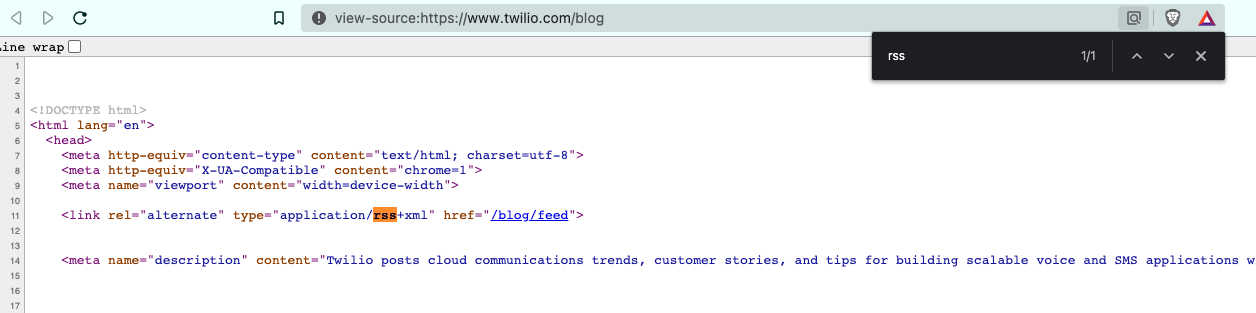
First, you need to find out the address of the RSS feed. These are generally plain XML files hosted on the blog or website. If you know that there is an RSS feed, but you don’t know how to find it, one way to find out is to check the website's source code. For example, on the Twilio Blog, you can view the source and search for RSS in the code. Next, you should see the link to the feed:
Once you know where to download the feed, the rest is the same as downloading any file from the internet. The project uses the following code snippet to download the RSS feed and create the XmlDocument by loading the XML stream:
The _httpClientFactory variable shown above is injected during the program setup:
Parsing XML
After you get the raw XML, the next step is to parse and extract the bits you will use in your dynamic template.
You can find the full RSS 2.0 specification here. In the example project, you will use the main required elements: title, link, and description.

In the example, the built-in System.XML classes are used to parse the XML. The blog post items are under the /rss/channel/item path, so you get those elements like this:
The next step is to loop through the XML nodes in the XmlNodeList object which can be accessed by their index in the array:
Other nodes are parsed and used in the example, but for brevity, the code snippet above only shows the required ones.
One thing to note is parsing the elements with namespaces. In the example project, only the author element has a namespace, and that’s why it’s treated a bit differently. For example, an author element looks like this in the RSS feed:
To access this element, first, you need to define an XML namespace:
And in the parsing code, you can access the element like this:
Parsing HTML
Initially, I was planning to use only the RSS feed to obtain all the data used in the dynamic template. I also wanted to use the blog header image and published date in the digest email. Unfortunately, those bits of information don’t come in the RSS XML data. That’s why I resorted to HTML parsing. The risk of HTML parsing is that Twilio could change its HTML structure and CSS classes at any point, which would break the code.
For every blog post in the feed, the sample project parses the post HTML and selects the header image and the publish date:
The important part is finding the CSS selector of the element you’re interested in. This is relatively straightforward with the Developer Tools in your browser.
For example, to get the selector of the header image, open a Twilio blog post. Then right-click on the header image and select Inspect from the context menu. While the element is still selected, right-click again to open the context menu. Click Copy and then Copy selector as shown in the screenshot below:
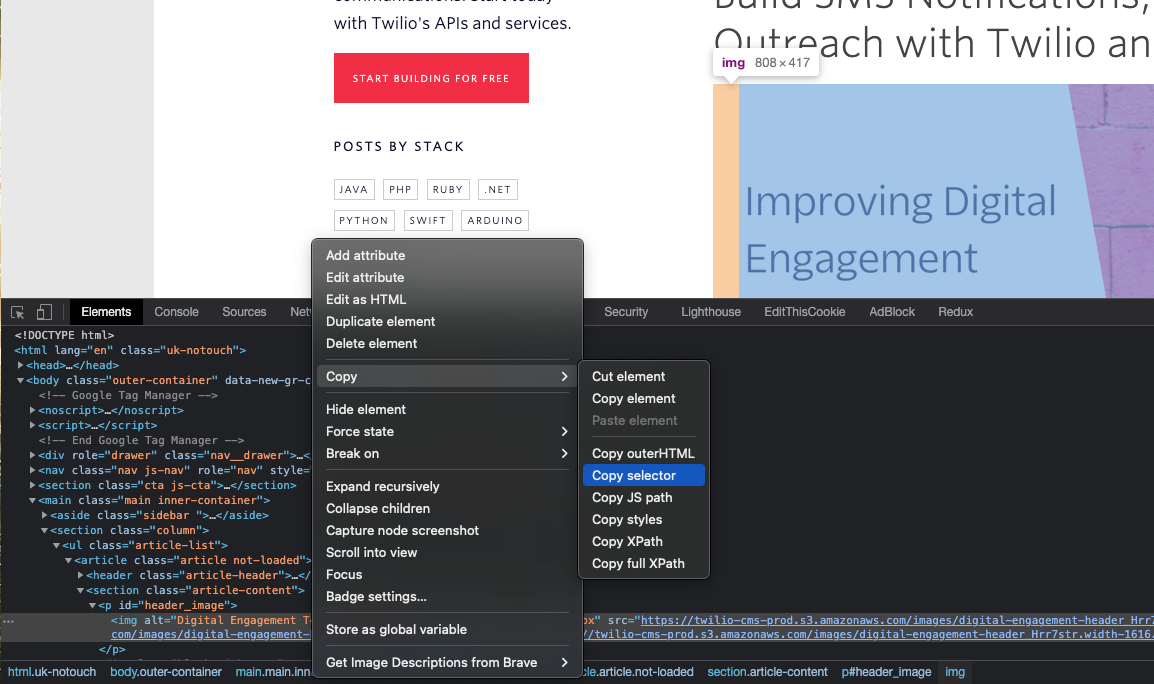
The selector copied should look like this: #header_image > img
This is the selector used in the project to get a reference to the img element. Then the src attribute is accessed by the following line:
Similarly, you can obtain the CSS selector for the publish date cell and use it to extract the date as a string.
Another use of HTML parsing is to get the introduction part of the blog post. The entire blog post is published in the XML feed, but it would take too much space to put it all in the email, so I decided to pick the first paragraph element (<p>).
Also, I didn’t want to load the URL for this task as it’s already in the XML data downloaded. So a different approach is used to parse the first paragraph of the blog post, as shown below:
It’s more concise as it doesn’t need to download the HTML over the network and only uses the raw HTML passed in the rawPostHtml argument.
Putting it All Together: Sending the Latest Posts from the Twilio Blog via Email
Finally, it’s time to reap the rewards of all the preparation work you put in. The example project supports one last command you will look into now: Send email command.
You get all the data to use in the email from the IDataProvider.GetEmailData implementation. In this final version of the sample application, you will use TwilioBlogDataProvider, which in turn uses the RssService by calling the GetBlogInfo method.
Next, you prepare the dynamic data to be used in the rendered HTML:
The code that sends the email is quite concise:
To send the email, run the application, and the final email looks like this:
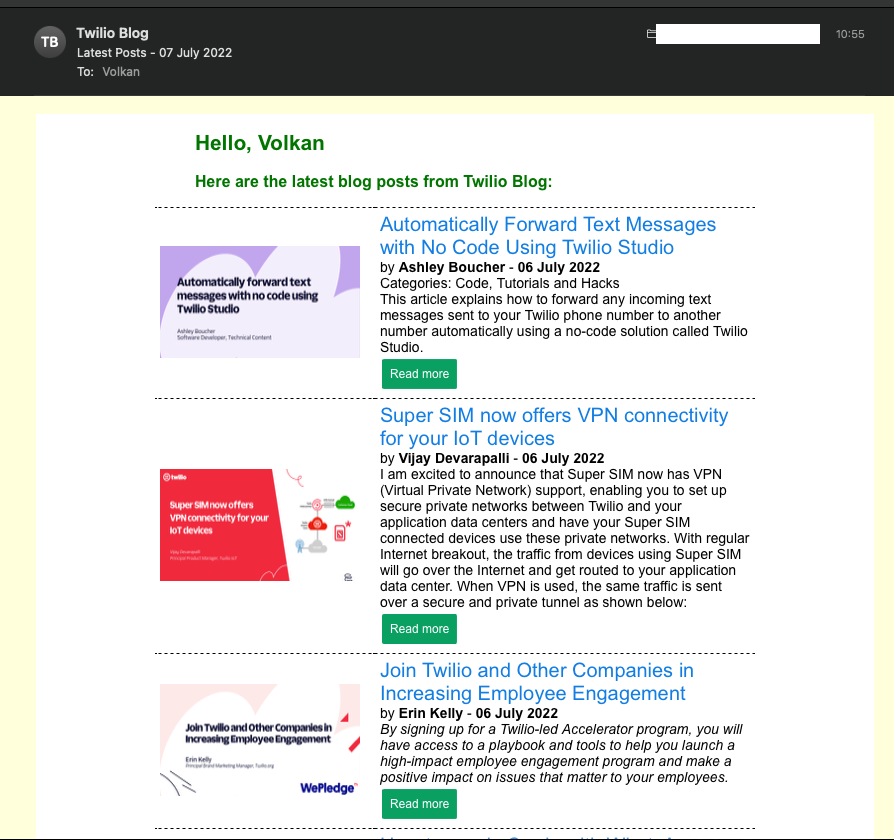
Now you get the same email but with data downloaded from the Twilio Blog RSS feed and individual blog pages and formatted in one nice digest email.
Conclusion
In this article, you learned how to create a Dynamic Email Template. You created an HTML email with CSS and used Handlebars templating to render the email with test JSON data. You also learned how to retrieve and parse RSS XML feeds as well as basic HTML parsing.
I hope you found this article helpful and interesting. The source code is publicly available, so feel free to download and play at will.
If you enjoyed this article, here are a few articles I’d recommend reading about template-based emails:
- Send Emails with C#, Handlebars templating, and Dynamic Email Templates
- What is Razor Templating, really?
- Render Emails Using Razor Templating
Volkan Paksoy is a software developer with more than 15 years of experience, focusing mostly on C# and AWS. He’s a home lab and self-hosting fan who loves to spend his personal time developing hobby projects with Raspberry Pi, Arduino, LEGO and everything in-between.


Related Resources
Twilio Docs
From APIs to SDKs to sample apps
API reference documentation, SDKs, helper libraries, quickstarts, and tutorials for your language and platform.
Resource Center
The latest ebooks, industry reports, and webinars
Learn from customer engagement experts to improve your own communication.
Ahoy
Twilio's developer community hub
Best practices, code samples, and inspiration to build communications and digital engagement experiences.