How to send SMS from Microsoft Excel using Twilio Programmable Messaging
Time to read:
March 08, 2022
Written by
Reviewed by

Using Twilio, you can programmatically send customized SMS the way you want to, but your users may just want to send out SMS from a simple spreadsheet of their customers, without having to worry about how to program. Luckily, you can add that functionality to an Excel spreadsheet for them with Microsoft Office Scripts.
In this post, you will learn how to build a tool to send SMS to your customers from a Microsoft Excel sheet using Microsoft Office Scripts.

Prerequisites
To build this solution, you will need:
- A free Twilio account
- An active phone number in your account if you want to send messages from a specific number, otherwise, you can get started without any setup for alphanumeric sender IDs.
- Access to Microsoft Office Scripts (as described here) which includes:
- Excel on the web (other platforms, such as desktop, are not supported).
- OneDrive for Business.
- Any commercial or educational Microsoft 365 license with access to the Microsoft 365 Office desktop apps, such as:
- Office 365 Business
- Office 365 Business Premium
- Office 365 ProPlus
- Office 365 ProPlus for Devices
- Office 365 Enterprise E3
- Office 365 Enterprise E5
- Office 365 A3
- Office 365 A5
- Basic Node.js and Typescript knowledge
Twilio account setup
If you don’t already have a Twilio account, you can quickly get a free account here.
Then, go and buy a new phone number from Twilio. The cost of the phone number will be applied to your free promotional credit, if you're on a trial account.
Once you’ve set up your account and phone number, enable Twilio to send SMS to the countries you want. Details on permissions settings for international SMS can be found here.
If you are using a trial Twilio account, you can only send text messages to Verified Caller IDs. Verify the phone numbers you want to SMS if it isn't on the list of Verified Caller IDs.
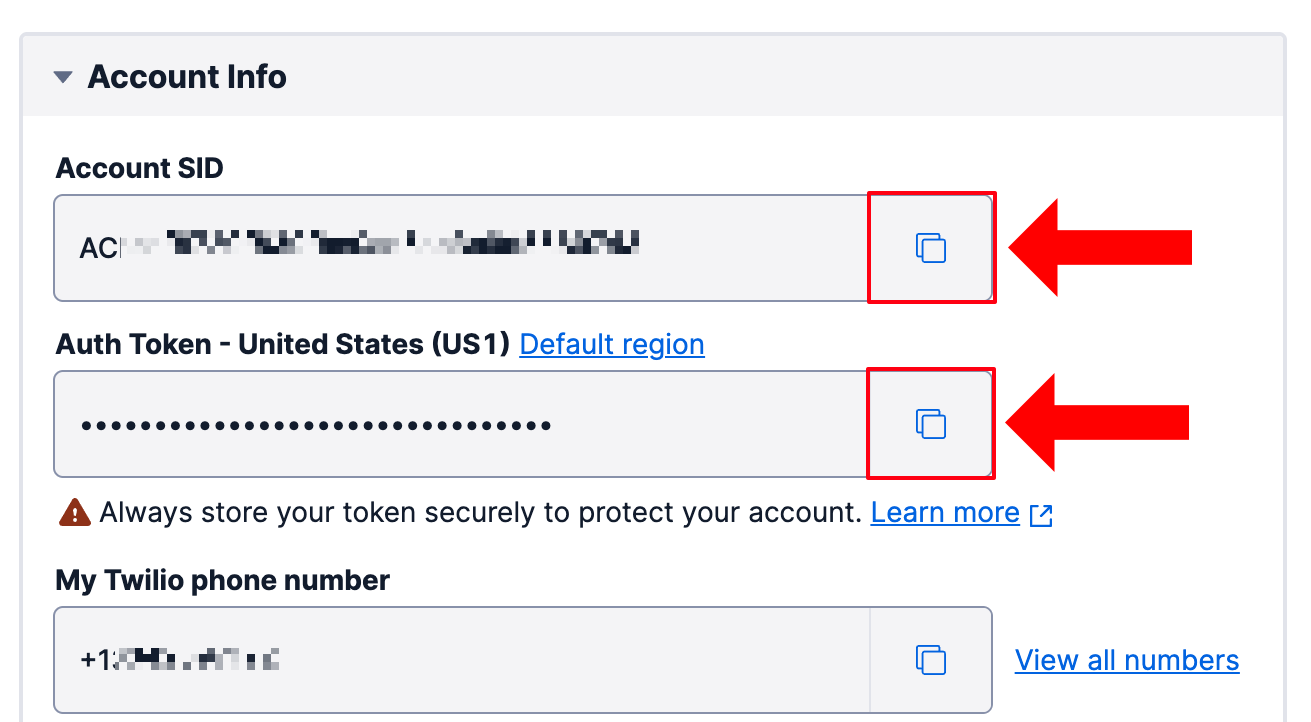
That's it, but to develop with Twilio you'll need to take note of a couple of things. Navigate to your Twilio account page and take note of your Twilio Account SID, Auth Token, and your Twilio Phone Number located at the bottom left of the page.
Creating the Excel Online spreadsheet
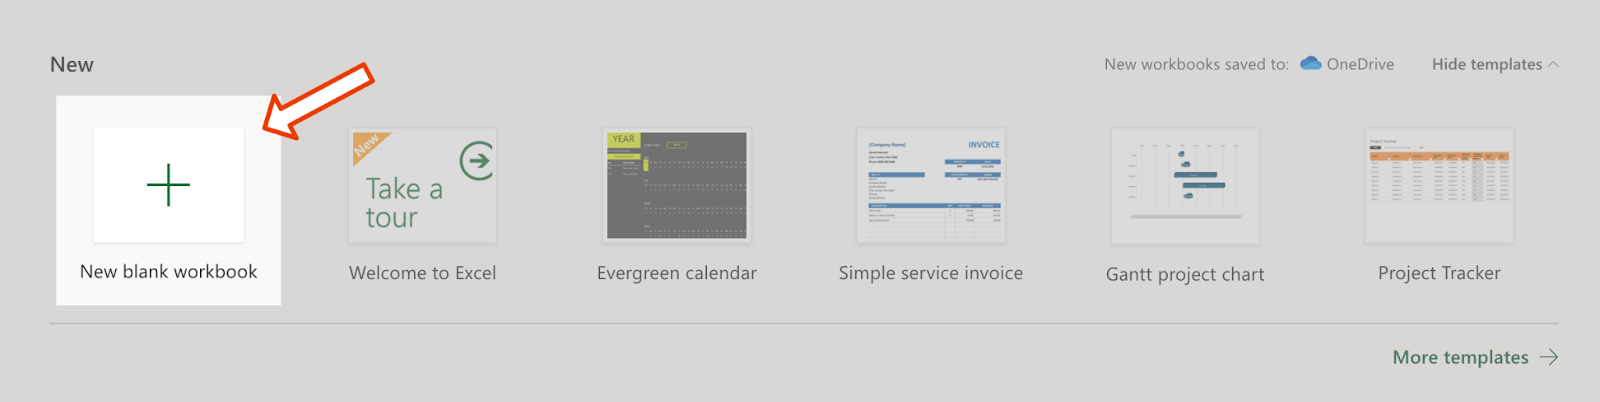
Head to Excel Online and create a new blank Workbook:
Create 4 column headers in the new workbook you just created:
- To: The number of the recipient you are sending a message to. Make sure you put this into E.164 Format, otherwise you will receive an error.
- Message: The content of the message you want to send to the recipient.
- From: The number you are sending the message from. This could either be a Twilio provisioned number. As mentioned in the setup, you can also use an alphanumeric sender ID as long as the country of the recipient number supports alphanumeric sender IDs.
- Delivery Attempt Status: This column will be automatically filled in with information around the delivery attempt.

Next, head to the Automate tab (This tab is only available if your account has office scripts enabled. If you have it enabled in your account and still do not see this tab, it might be because Office Script can take up to 48 hours to be enabled according to the documentation)

Click on the create new script button.

This will open a code editor on the right-hand side. Add the following code into the script editor:
Replace <YOUR_ACCOUNT_SID> with your Twilio Account SID and <YOUR_ACCOUNT_AUTH_TOKEN> with the Auth Token you took note of earlier.
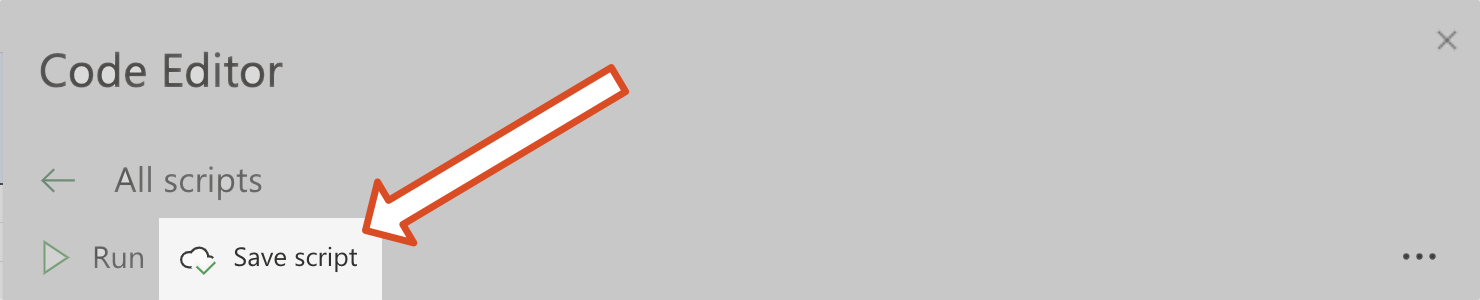
Finally, press the Save Script button to save this script:
To make sure this works, add some data into your sheet and press the Run button:
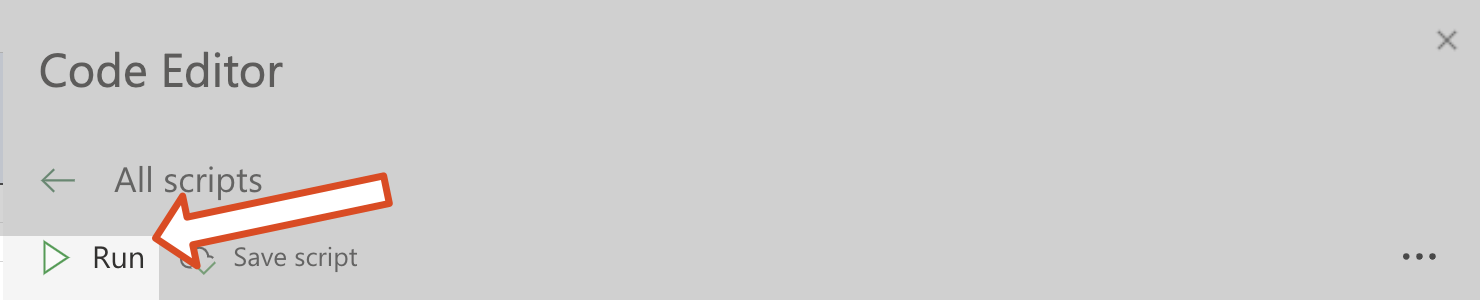
Your script will run through each row and try to send an SMS. Depending on if the delivery attempt was successful or not, you will see the info in the Delivery Attempt Status column.

If you want to run this script with an embedded button, you can do so as explained in this Microsoft Office blog:
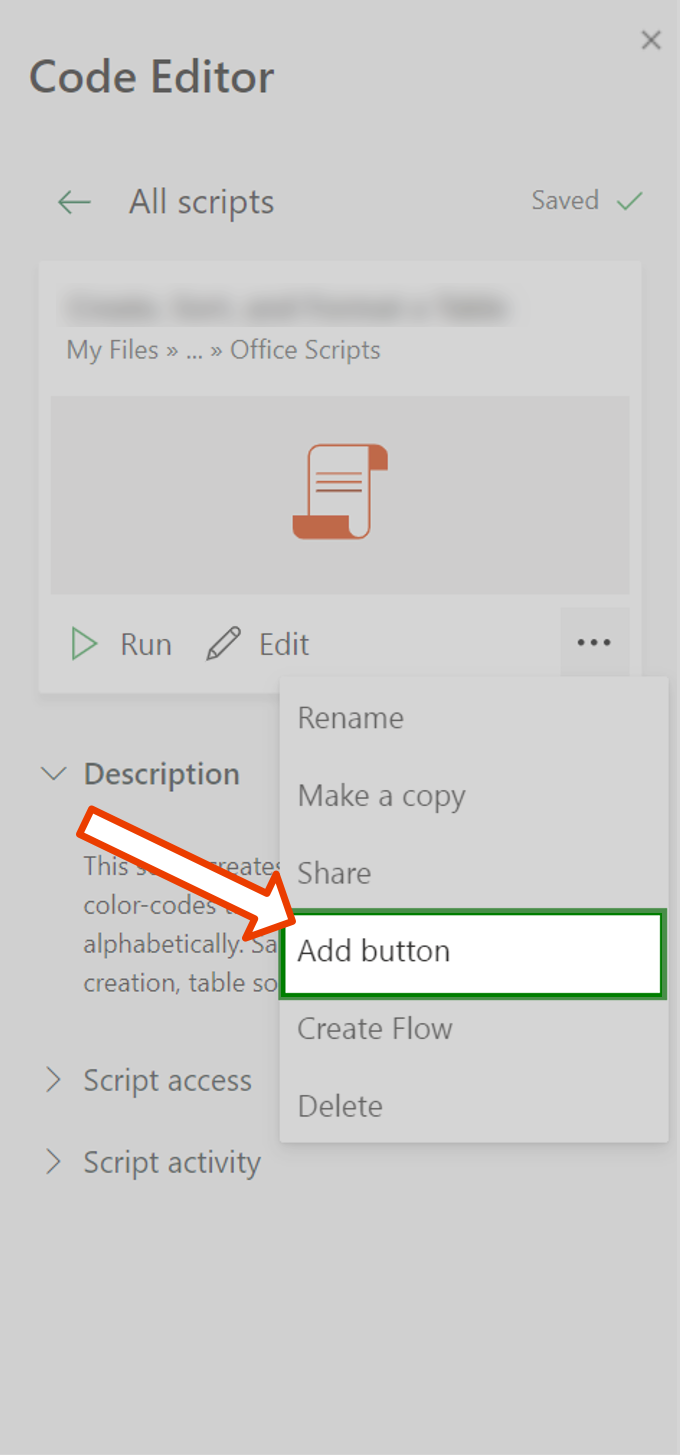
You can customize the look of the button and place it where you want. If you press the button, the same script will be triggered to send the outbound SMS.

Future Improvements
This is a great starting point, but you can improve this solution in many ways:
- Office Scripts does not allow you to store any authentication tokens on the user's machine, which is why you had to hard-code the Twilio Auth Token. Anyone who can read the Office Script can also read the Auth Token which is a security risk. There are a couple of solutions to this:
- You can build a similar solution as a web service and call the web service from Office Scripts. You can then use network security to only make the web service available to your users. Alternatively, you can add authentication to your web service, but Office Script won't let you store security tokens, so users will need to authenticate every time the service is called.
- You can build the same functionality using a Power Automate flow. Power Automate flow has connectors for Excel to work with spreadsheets and for Twilio to send SMS. The connections between Excel, Twilio, and Power Automate will be stored in the Power Platform.
- Instead of using a specific number, you could use a Messaging Service. This is a free-of-charge service that optimizes the number selection process for you. You could adjust the script to not show the From column and use a Messaging Service ID as the sender within the script itself.
- You could integrate WhatsApp as an additional Channel, both as a specific sender or integrated into the previously mentioned Messaging Service. More information can be found here.
Sending text messages from Microsoft Excel Online with Twilio
Using Office Scripts, you can add functionality to your Excel sheets using Node.js and TypeScript. You can use this functionality to grab the data from the spreadsheet, and send text messages using Twilio by making HTTP requests to Twilio's APIs. By combining Microsoft Office Scripts and Twilio's APIs, you developed a bulk SMS tool to send text messages using Excel.
It’s important to note that this tutorial focuses on building a solution quickly to send bulk SMS without much development effort, not necessarily on scalability and robustness. If you plan to build a long-term solution that is scalable and robust, we would recommend looking into building out a similar solution as suggested in the future improvements sections.
You used a single Twilio Phone Number in this tutorial, which works well if you're not sending a very large number of text messages. However, if you need to send a large amount of bulk SMS, you'll need to update your solution to handle the increased scale. To do this, you can follow this guide to sending bulk SMS with Twilio and Node.js, or by reaching out to our sales team and having a detailed discussion about your use case to find the ideal solution for your business.
Author:
Ted Gieschen is a Munich based senior solutions engineer in the DACH region who is passionate about helping customers find elegant technical solutions to their business problems. When Ted isn’t busy finding solutions for his customer’s problems he’s most likely out running 🏃🏻♂️, climbing 🧗🏻♂️ or snowboarding 🏂. Feel free to reach out to him at tgieschen [at] twilio.com
Reviewer:
Pradheep Rajendirane is a senior Solutions Engineer based in Paris passionate about coding and more specifically building web applications. Check out his GitHub profile here.


Related Resources
Twilio Docs
From APIs to SDKs to sample apps
API reference documentation, SDKs, helper libraries, quickstarts, and tutorials for your language and platform.
Resource Center
The latest ebooks, industry reports, and webinars
Learn from customer engagement experts to improve your own communication.
Ahoy
Twilio's developer community hub
Best practices, code samples, and inspiration to build communications and digital engagement experiences.