How to Write Your Own Serverless Framework Plugin for AWS Lambda using JavaScript

October 26, 2017
Written by
Maciej Treder
Contributor
Opinions expressed by Twilio contributors are their own

serverless-framework-logo

The Serverless framework makes it easy to deploy applications to AWS Lambda. However, Serverless does not currently support binary files, but we can solve this issue by implementing a Serverless plugin and uploading proper configuration to the AWS API Gateway.

In this post we will:

  1. Set up an npm project and create a Hello World application with a fancy image background
  2. Configure the Serverless framework and deploy this app on AWS Lambda
  3. Learn how to use AWS SDK by recreating serverless plugin for binary support in AWS API Gateway 
  4. Publish plugin in the npm repository

To accomplish tasks in this post you will need:

Set up environment & Hello World!

Let’s create our app. Set up the npm project and install dependencies:

mkdir serverless-apigw-binary
cd serverless-apigw-binary/
npm init
npm install aws-serverless-express express body-parser ejs --save
npm install nodemon serverless --save-dev

Create our app:

mkdir -p dist/assets/css
mkdir dist/assets/img
mkdir dist/views
touch dist/app.js
touch dist/views/index.html
touch dist/assets/css/main.css
touch local.js

Inside dist/app.js we will:

  • Initialize express application
  • Set views extension and catalog
  • Add mapping to the homepage (‘/’)

To do that paste this code to the dist/app.js file:

const express = require('express');
const awsServerlessExpressMiddleware = require('aws-serverless-express/middleware');

const app = new express();
const bodyParser = require('body-parser');

app.use(awsServerlessExpressMiddleware.eventContext());

app.engine('html', require('ejs').renderFile);
app.set('view engine', 'html');
app.set('views', 'dist/views');

app.use('/', express.static('dist', {index: false}));

app.get('/', (req,res) => {
   let basePath = 'http://' + req.headers['host'] + "/";
   if(req.headers['host'] && req.headers['host'].indexOf(".amazonaws.com") > -1)
       basePath = 'https://' + req.headers['host'] + '/production/';

   res.render('index', { basePath: basePath });
});

module.exports = app;

Next, add our view. Paste this code to the dist/views/index.html file:

<html>
<head>
   <meta charset="UTF-8">
   <title>API GW binary example</title>
   <base href="<%= basePath %>" >
   <link rel="stylesheet" href="assets/css/main.css">
</head>
 <body>
   <div><h3>Hello World!</h3></div>
</body>
</html>

Here comes time for making some fancy decoration with CSS. Paste this styles to the dist/assets/css/main.css file:

@import url(https://fonts.googleapis.com/css?family=Source+Sans+Pro:400,600,300);
* {
 font-weight: 300;
 font-family: 'Source Sans Pro', calibri, Arial, sans-serif;
}

html, body {
 height: 100%;
 margin: 0;
}
body {
 min-height: 100%;
 max-width: 600px;
 margin: 0 auto;
}

h1 {
 color: orange;
 text-align: center;
}
div {
 background: url('../img/sandbox.gif') no-repeat center;
 height: 350px;
 position: relative;
}
h3 {
 position: absolute;
 right: 260px;
 top: 14px;
 color: deepskyblue;
}

a:hover {
 text-decoration: none;
 color: orangered;
}
a {
 margin: 0 10px;
 color: orange;
}

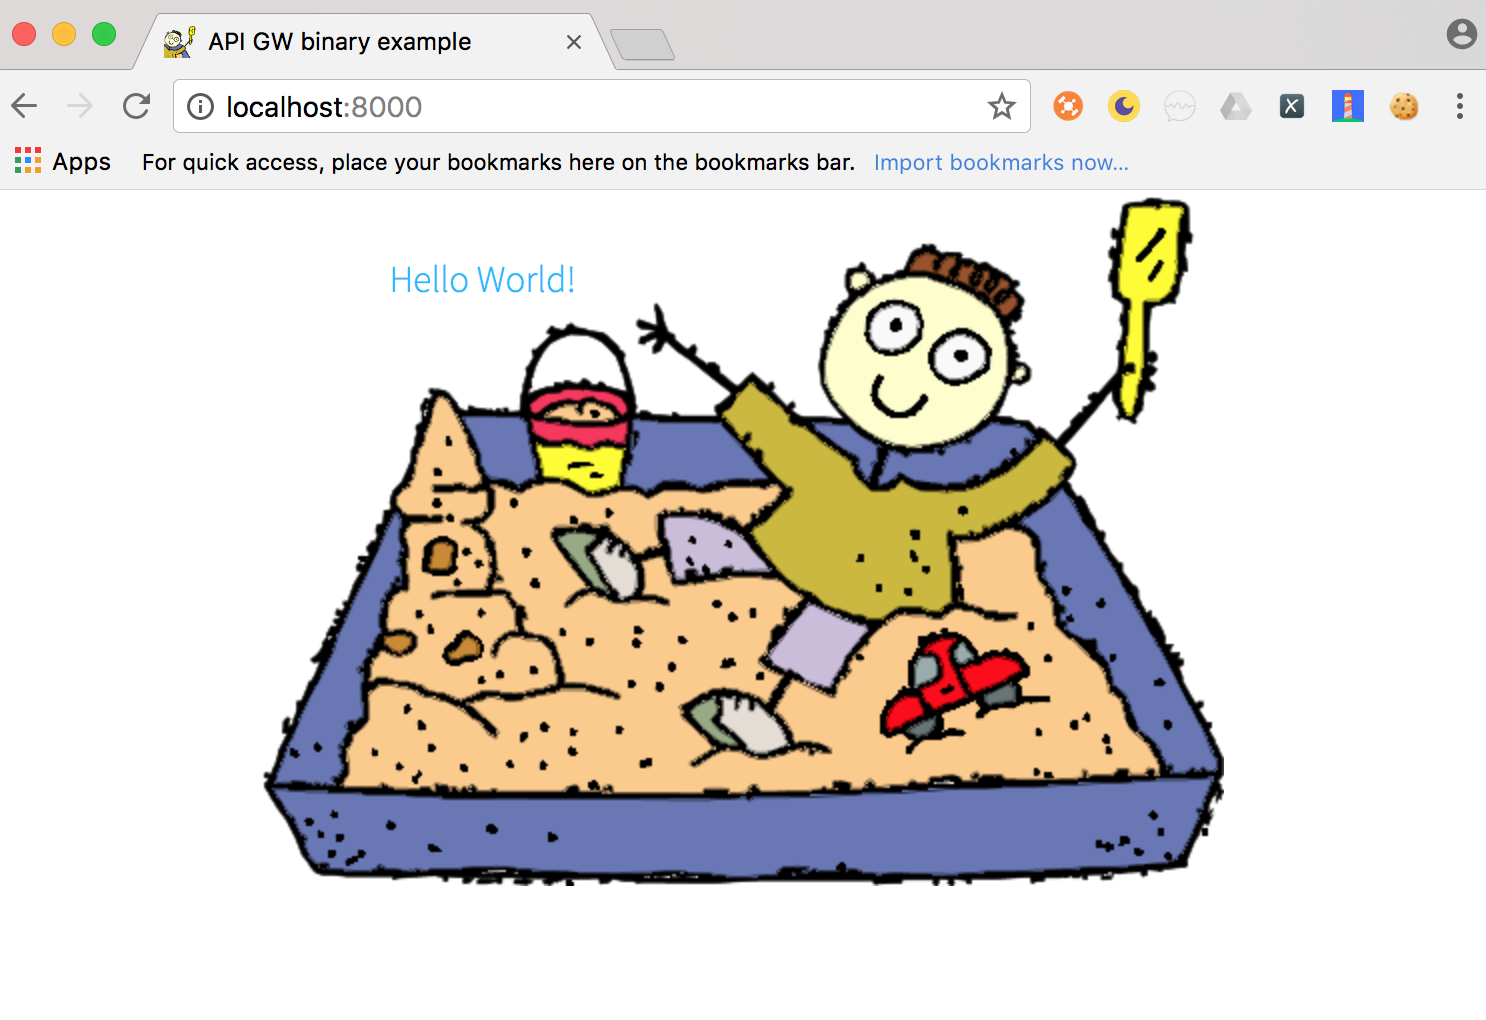
As you can see we are using the image as a background for our app. You can get it here and save it in the dist/assets/img directory as sandbox.gif:


It is fancy. Isn’t it?

We are ready to put some code to our “localhost-entry” file, local.js:

let app = require('./dist/app');
let port = process.env.PORT || 8000;

// Server
app.listen(port, () => {
   console.log(`Listening on: http://localhost:${port}`);
});

We need only to add proper scripts in the package.json file:

"scripts": {
 "start": "npm run server",
 "server": "nodemon local.js"
},

And we can launch our app on the localhost:

npm start

The output from this command you should see:

nodemon] 1.12.0
[nodemon] to restart at any time

After reaching the given url in your browser, you should see:

Ok! App is ready. Let’s go forward now and deploy it on AWS Lambda. What we need to do now is add two files:

touch lambda.js
touch serverless.yml

Inside lambda.js add code for the AWS Lambda function:

const awsServerlessExpress = require('aws-serverless-express');
const app = require('./dist/app');

const server = awsServerlessExpress.createServer(app);

module.exports.express = (event, context) => awsServerlessExpress.proxy(server, event, context);

In the serverless.yml add following configuration:

service: my-awesome-app

provider:
 name: aws
 runtime: nodejs6.10
 memorySize: 128
 timeout: 10
 stage: production
 region: eu-central-1

functions:
 api:
   handler: lambda.express
   events:
     - http: ANY {proxy+}
     - http: ANY /

Now we need only to add one more script inside package.json:

"deploy": "serverless deploy"

And we can deploy the app:

npm run deploy

Output from this command should be:

Serverless: Packaging service...
Serverless: Excluding development dependencies...
Serverless: Creating Stack...
Serverless: Checking Stack create progress...
.....
Serverless: Stack create finished...
Serverless: Uploading CloudFormation file to S3...
Serverless: Uploading artifacts...
Serverless: Uploading service .zip file to S3 (775.99 KB)...
Serverless: Validating template...
Serverless: Updating Stack...
Serverless: Checking Stack update progress...
.................................
Serverless: Stack update finished...
Service Information
service: my-awesome-app
stage: production
region: eu-central-1
stack: my-awesome-app-production
api keys:
  None
endpoints:
  ANY - https://czfe2f6wij.execute-api.eu-central-1.amazonaws.com/production/{proxy }
  ANY - https://czfe2f6wij.execute-api.eu-central-1.amazonaws.com/production
functions:
  api: my-awesome-app-production-api

After reaching provided URL you can see your app deployed on AWS Lambda.

But…hey…my awesome background image is missing!

That is because of lack of support for binary files in our API Gateway, but we can solve it with our plugin.

If you want to catch up this step:

git clone https://github.com/maciejtreder/serverless-apigw-binary.git
cd serverless-apigw-binary
git checkout tutorialFirstStep
npm install 

Add support for binary files in API Gateway

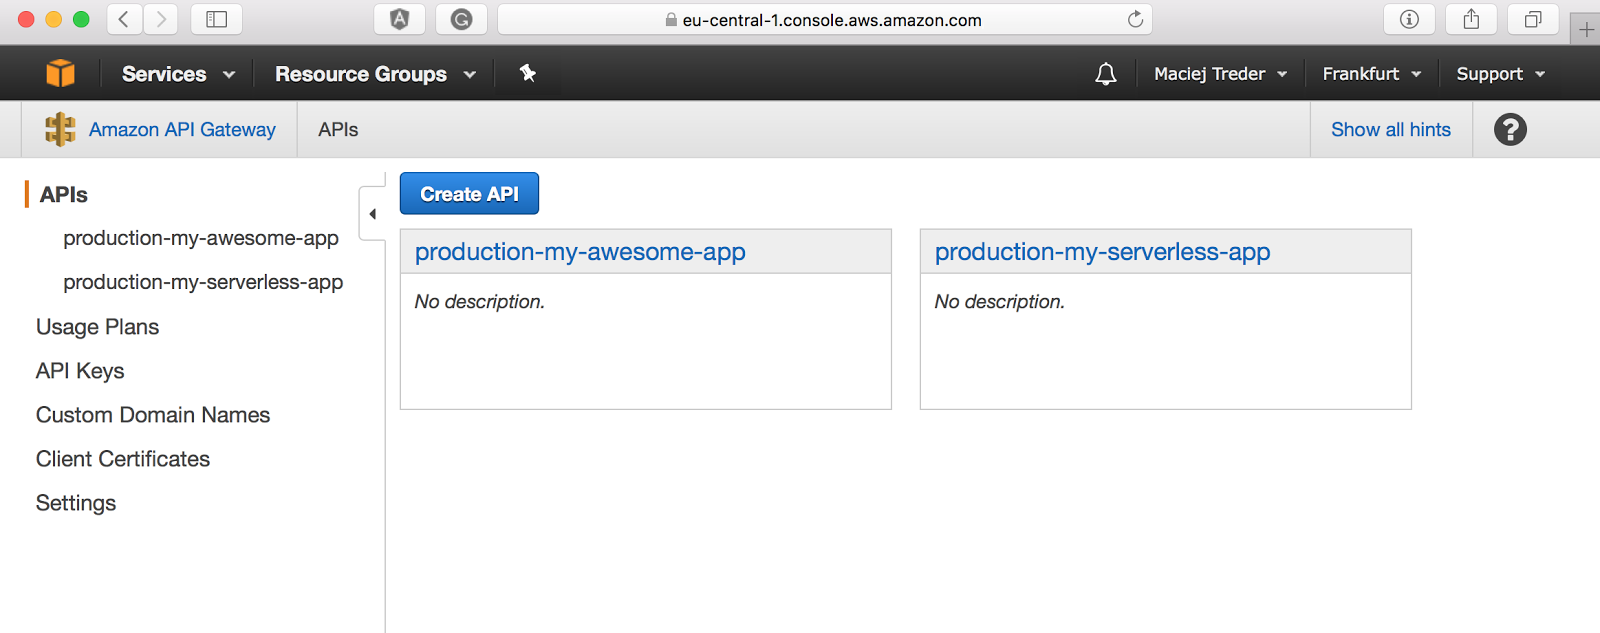
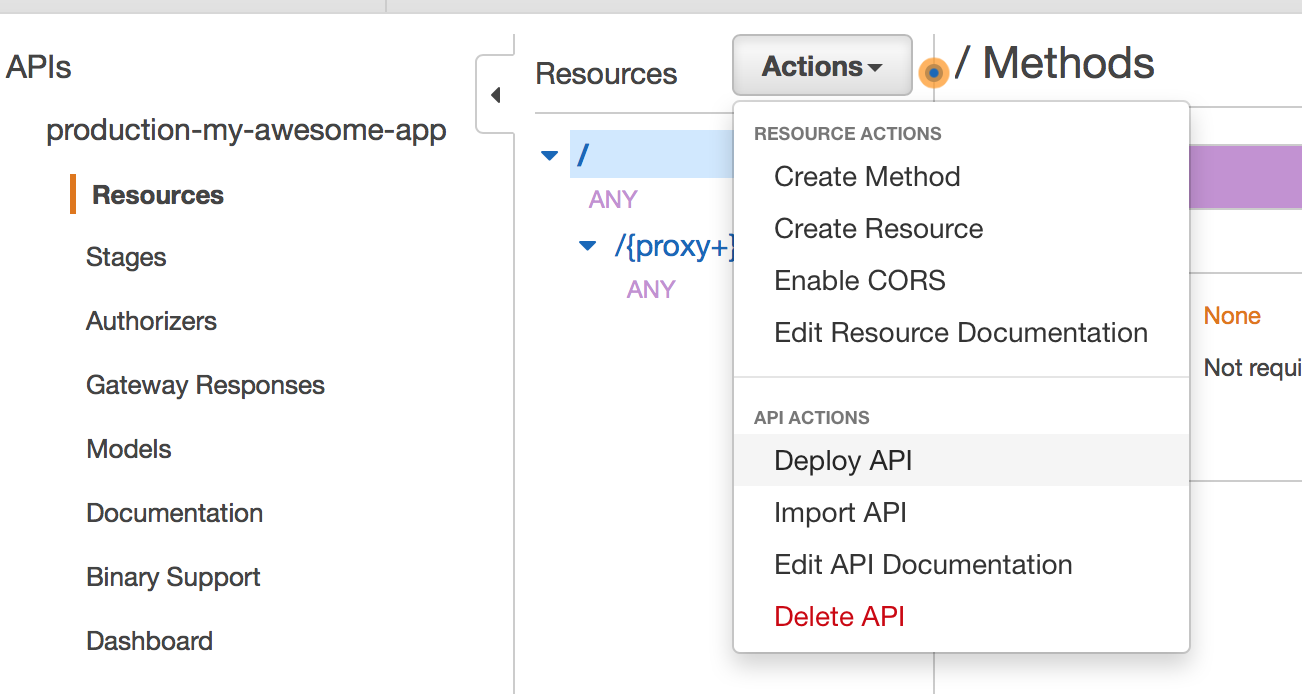
We can use the AWS console to solve the problem manually. After login to console, choose ‘API Gateway’ from the “Services” menu under “Application Services”, and click on your API (make sure that you are in proper AWS region):

From the left navigation pane choose Binary support:

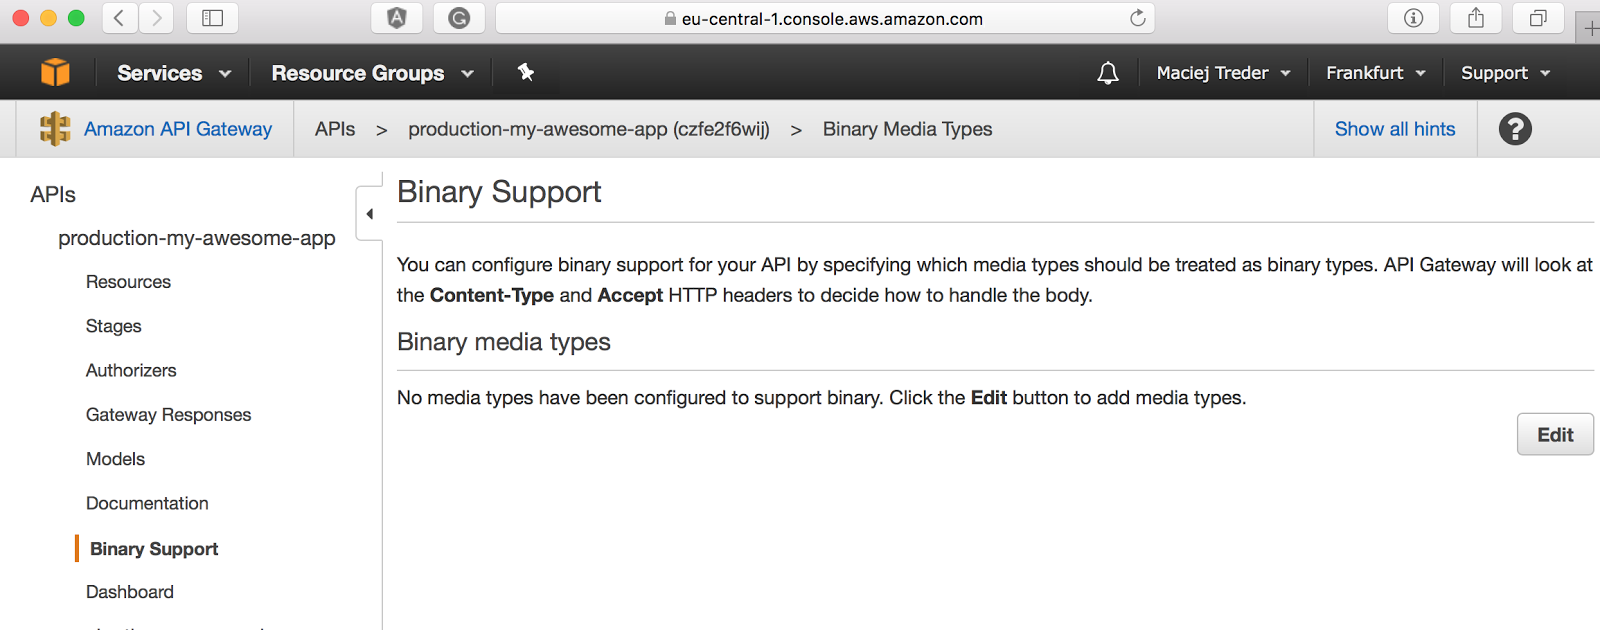
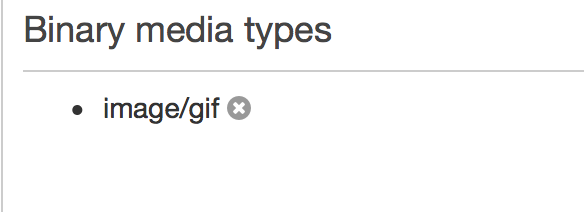
As you can see there is no type listed here. Let’s add our image type: click on edit button, then on add binary media type in the input type image/gif and click save:

After this (and each other) change in API Gateway you need to redeploy it:

Let’s try to reload our page again. And…

Still not working, an image is not visible, what is going on? No worries, let’s check it with some REST testing tool (ie Postman):

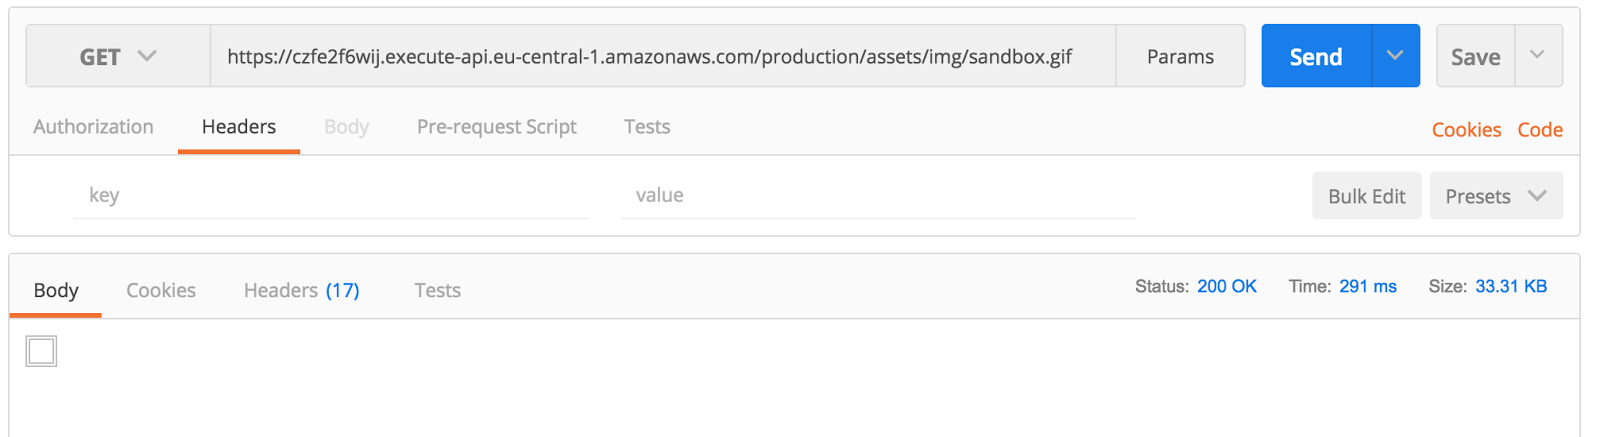
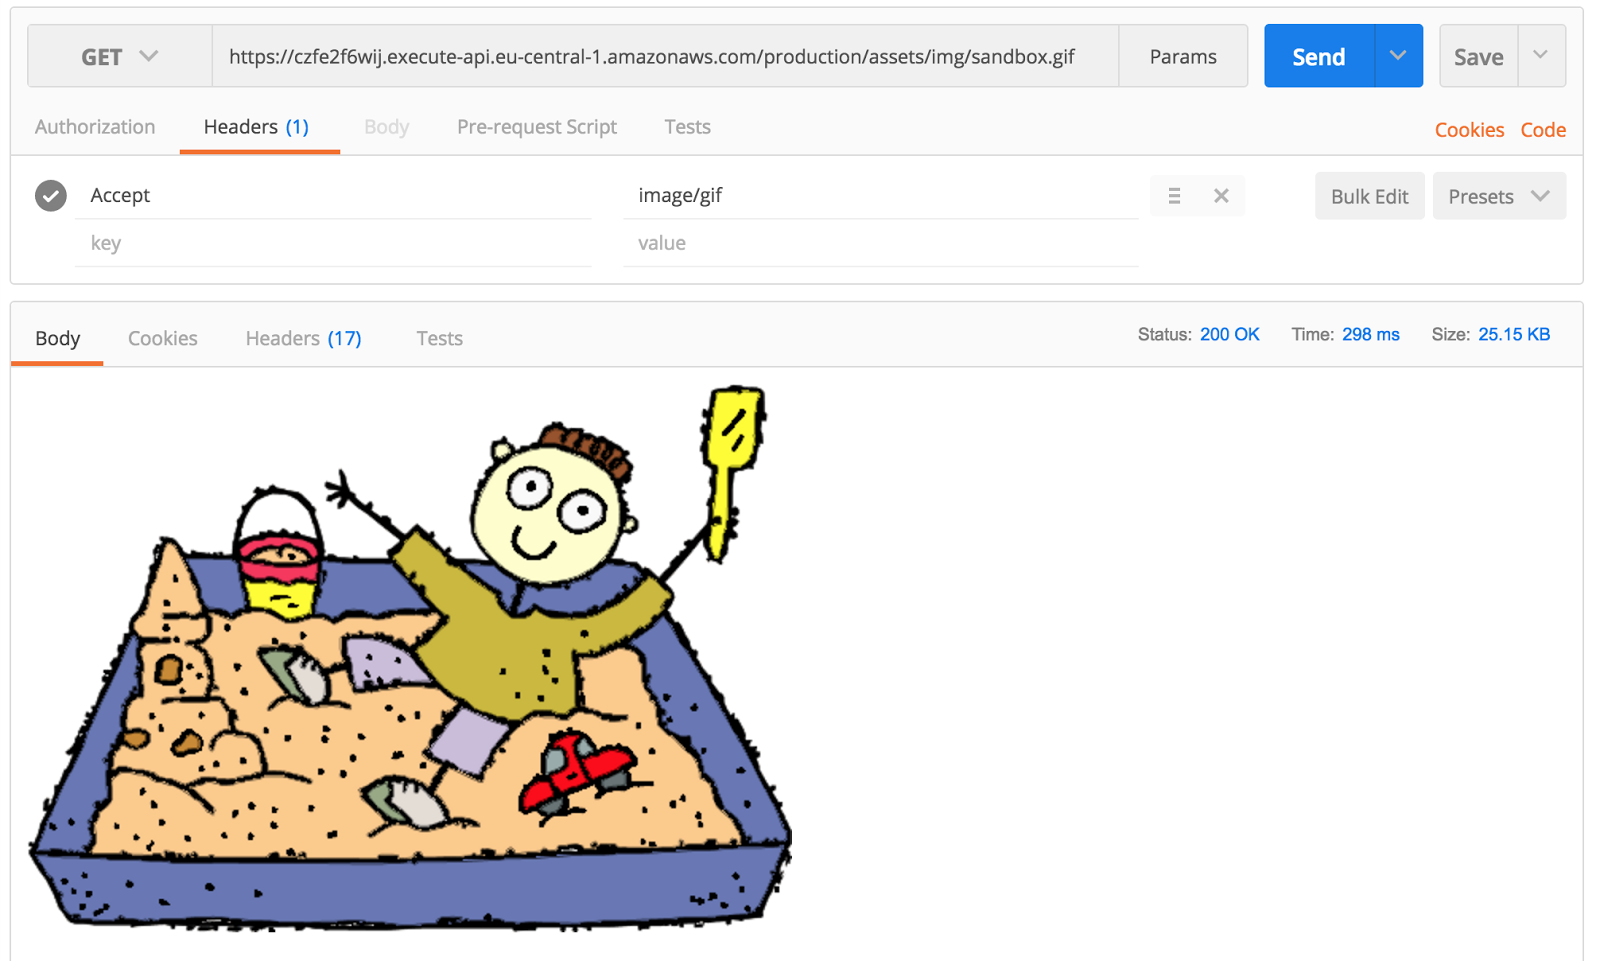
What the hell?! Ok, easy. There is a one ‘small’ issue in AWS API Gateway. Update your request with header ‘Accept’ and value ‘image/gif’. Boom! Now it’s working:

But.. Browser doesn’t send Accept header. What now? There is a workaround for that. To make API Gateway send binary files as a response to every request (without expecting Accept header), you need to specify at least one mime type as a wildcard */*. You can read more about this issue here:
https://github.com/awslabs/serverless-application-model/issues/145#issuecomment-311672573 

As it is written in the issue now all our binary data is sent in base64-encoded form, so we need to encode it on the server side. Change lambda.js file to:

const awsServerlessExpress = require('aws-serverless-express');
const app = require('./dist/app');
const binaryMimeTypes = [
   'image/gif'
];

const server = awsServerlessExpress.createServer(app, null, binaryMimeTypes);

module.exports.express = (event, context) => awsServerlessExpress.proxy(server, event, context);

Now our application will work correctly. Deploy it again (npm run deploy) and check given URL.

If you want to catch up this step:

git clone https://github.com/maciejtreder/serverless-apigw-binary.git
cd serverless-apigw-binary
git checkout tutorialSecondStep
npm install
npm run deploy

Create Serverless plugin

We have our application ready and working. But we can’t stop at this moment. We use Serverless to automate the deployment process. Login to AWS console and set up binary support manually is definitely not that what we are looking for. Let’s create a plugin which will customize binary types for us, during deployment.

We will keep everything in one repo, in two catalogs example/express (here the app will be kept) and plugin.

Move our app to subcatalog:

mkdir -p example/express
shopt -s extglob
mv !(example) example/express

Create the main file for our plugin and initialize npm project:

mkdir -p plugin/src
touch plugin/src/index.js
cd plugin
npm init

We need to make one important change in the package.json file. Ensure that “main” field value is src/index.js (the exact path to our plugin entry point). Your plugin package.json should look like (more or less) this:

{
 "name": "serverless-apigw-binary",
 "version": "1.0.0",
 "description": "",
 "main": "src/index.js",
 "scripts": {
   "test": "echo \"Error: no test specified\" && exit 1"
 },
 "repository": {
   "type": "git",
   "url": "git+https://github.com/maciejtreder/serverless-apigw-binary.git"
 },
 "author": "Maciej Treder <contact@maciejtreder.com>",
 "license": "MIT",
 "bugs": {
   "url": "https://github.com/maciejtreder/serverless-apigw-binary/issues"
 },
 "homepage": "https://github.com/maciejtreder/serverless-apigw-binary#readme"
}

We can start writing plugin now. Specify the main class for it and proper constructor (in src/index.js file):

class BinarySupport {
   constructor(serverless, options) {
       console.log("Hello world!")
   }
}
module.exports = BinarySupport;

Let’s try to use our plugin with the app:

npm link
cd ../example/express/
npm link serverless-apigw-binary

Add a plugin in your Serverless configuration. Paste this to the serverless.yml:

plugins:
  - serverless-apigw-binary

And take a look if our ‘Hello world!’ message is displayed to the console:

npm run deploy

We should see the output:

Hello world!
Serverless: Packaging service...
Serverless: Excluding development dependencies...

Hooray! Let’s go forward. What we are going to do now is move our message to the method and bind it to the ‘after:deploy:deploy’ hook (hooks are described by convention ::, so our hook means: after users run command deploy deploy afterDeploy method). This is how ../../plugin/src/index.js file should look like after those changes:

class BinarySupport {
   constructor(serverless, options) {
       this.hooks = {
           'after:deploy:deploy': this.afterDeploy.bind(this)
       };
   }

   afterDeploy() {
       console.log("This method should appear after deploy of my application");
   }
}
module.exports = BinarySupport;

Execute of deploy should give following output:

npm run deploy
> serverless deploy
 
Serverless: Packaging service...
Serverless: Excluding development dependencies...
Serverless: Uploading CloudFormation file to S3...
Serverless: Uploading artifacts...
Serverless: Uploading service .zip file to S3 (971.45 KB)...
Serverless: Validating template...
Serverless: Updating Stack...
Serverless: Checking Stack update progress...
..............
Serverless: Stack update finished...
Service Information
service: my-awesome-app
stage: production
region: eu-central-1
stack: my-awesome-app-production
api keys:
  None
endpoints:
  ANY - https://czfe2f6wij.execute-api.eu-central-1.amazonaws.com/production/{proxy+}
  ANY - https://czfe2f6wij.execute-api.eu-central-1.amazonaws.com/production
functions:
  api: my-awesome-app-production-api
This method should appear after deploy of my application
Serverless: Removing old service versions...

Ok. Plugin works, hook works. Now let’s connect to the AWS using their SDK and make proper changes in just-deployed API. At the beginning, we will specify mime-types in the serverless.yml file (the convention is custom -> pluginName -> values):

custom:
 apigwBinary:
   types:
     - '*/*'

Retrieve them in the plugin constructor (../../plugin/src/index.js):

this.serverless = serverless;
this.mimeTypes = this.<em>serverless</em>.service.custom.apigwBinary.types;

Additional data which we need to collect are the provider used by the client and the stage to which we are deploying:

this.options = options || {};
this.provider = this.serverless.getProvider(this.serverless.service.provider.name);
this.stage = this.options.stage || this.serverless.service.provider.stage;


This is how our constructor looks after all that actions:
constructor(serverless, options) {
   this.serverless = serverless;
   this.mimeTypes = this.serverless.service.custom.apigwBinary.types;
   this.options = options || {};
   this.provider = this.serverless.getProvider(this.serverless.service.provider.name);
   this.stage = this.options.stage || this.serverless.service.provider.stage;

   this.hooks = {
       'after:deploy:deploy': this.afterDeploy.bind(this)
   };
}

The next step is to add a getApiId method to our BinarySupport class. For that we will use describeStacks method from AWS SDK. We can reuse the request method from the serverless.provider class, because of some nice logic attached to it, such as support for different AWS profiles and retries of requests in case of error.

As a parameter we need to pass a name of the class from AWS SDK (CloudFormation), a method which we want to invoke (describeStacks) and a payload which we want to pass to it:

getApiId() {
   return this.provider.request('CloudFormation', 'describeStacks', {StackName: this.provider.naming.getStackName(this.stage)});
}

Let’s try it. Update your afterDeploy method with following code:

npm run deploy
…
…
{ ResponseMetadata: { RequestId: '63946386-b2a0-11e7-b5d9-099e82305a34' },
  Stacks: 
   [ { StackId: 'arn:aws:cloudformation:eu-central-1:548199570266:stack/my-awesome-app-2-production/788f3ea0-994b-11e7-b6b8-500c52a6ce9a',
       StackName: 'my-awesome-app-2-production',
       Description: 'The AWS CloudFormation template for this Serverless application',
       Parameters: [],
       CreationTime: 2017-09-14T12:51:48.240Z,
       LastUpdatedTime: 2017-10-16T18:32:17.097Z,
       RollbackConfiguration: {},
       StackStatus: 'UPDATE_COMPLETE',
       DisableRollback: false,
       NotificationARNs: [],
       Capabilities: [Array],
       Outputs: [Array],
       Tags: [Array] } ] }

For next step we need url of our just deployed API. It is hidden under Outputs: [Array]. Let’s print it out. Make change in the afterDeploy method inside plugin/src/index.js:

afterDeploy() {
   this.getApiId().then(apiId => console.log(apiId['Stacks'][0]['Outputs']));
}

If you will invoke npm run deploy (from the example/express directory) again. You should get this lines as an output:

Outputs: 
   [ { OutputKey: 'ApiLambdaFunctionQualifiedArn',
       OutputValue: 'arn:aws:lambda:eu-central-1:548199570266:function:my-awesome-app-2-production-api:2',
       Description: 'Current Lambda function version' },
     { OutputKey: 'ServiceEndpoint',
       OutputValue: 'https://ehevufyjz8.execute-api.eu-central-1.amazonaws.com/production',
       Description: 'URL of the service endpoint' },
     { OutputKey: 'ServerlessDeploymentBucketName',
       OutputValue: 'my-awesome-app-2-product-serverlessdeploymentbuck-oozz6ihic66b' } ]

We have now full information about the just-deployed stack. The most important thing for us is inside Outputs array. We have there our ServiceEndpoint which contains API ID in it. Let’s filter out this output and retrieve that id:

getApiId() {
   return new Promise(resolve => {
       this.provider.request('CloudFormation', 'describeStacks', {StackName: this.provider.naming.getStackName(this.stage)}).then(resp => {
           const output = resp.Stacks[0].Outputs;
           let apiUrl;
           output.filter(entry => entry.OutputKey.match('ServiceEndpoint')).forEach(entry => apiUrl = entry.OutputValue);
           const apiId = apiUrl.match('https:\/\/(.*)\\.execute-api')[1];
           resolve(apiId);
       });
   });
}

What we are going to do now is put our binaryTypes into this API. We will provide changes in the Swagger format, so let’s prepare it inside our hook method – afterDeploy(). Add following code at the beginning of afterDeploy() method:

const swaggerInput = JSON.stringify({
"swagger": "2.0",
"info": {
"title": this.getApiGatewayName()
},
"x-amazon-apigateway-binary-media-types": this.mimeTypes
});

As you can see, inside the JSON body of our swaggerInput constant we are providing information about the swagger format version, the title of our API (if we won’t add this, AWS will override our API name with the default value), and x-amazon-apigateway-binary-media-types to which we are passing an array of strings representing mime-types provided by the serverless.yml configuration file.
Let’s implement a getApiGatewayName method inside our BinarySupport class:

getApiGatewayName(){
   if(this.serverless.service.resources && this.serverless.service.resources.Resources){
       const Resources =  this.serverless.service.resources.Resources;
       for(let key in Resources){
           if(Resources.hasOwnProperty(key)){
               if(Resources[key].Type==='AWS::ApiGateway::RestApi'
                   && Resources[key].Properties.Name){
                   return  Resources[key].Properties.Name;
               }
           }
       }
   }
   return this.provider.naming.getApiGatewayName();
}

Ok. We have an API ID and name collected; we can make changes to it now. To do that we are going to use the putRestApi method from the AWS SDK, and pass information about changes which we want to perform:

putSwagger(apiId, swagger) {
   return this.provider.request('APIGateway', 'putRestApi', {
       restApiId: apiId,
       mode: 'merge',
       body: swagger
   });
}

We are going to chain all added methods in the after:deploy:deploy hook. Let’s update it:

afterDeploy() {
   const swaggerInput = <em>JSON</em>.stringify({
       "swagger": "2.0",
       "info": {
           "title": this.getApiGatewayName()
       },
       "x-amazon-apigateway-binary-media-types": this.mimeTypes
   });
   return this.getApiId().then(apiId => {
       return this.putSwagger(apiId, swaggerInput)
   });
}

We are ready to test our plugin now. To make sure that we don’t have old deployments, remove them:

./node_modules/serverless/bin/serverless remove
Serverless: Getting all objects in S3 bucket...
Serverless: Removing objects in S3 bucket...
Serverless: Removing Stack...
Serverless: Checking Stack removal progress...
................
Serverless: Stack removal finished…

npm run deploy

Now we are going to deploy application again, log in to AWS console and take a look at Binary Support section. Yay! The app is there! Binary types are there! Let’s navigate to it. Oh.. an issue, again. The beautiful picture is missing..

The reason is simple. Do you remember that we were redeploying the API after any changes made in it? That’s what we forgot to do with our Serverless plugin. Let’s add that step:

createDeployment(apiId) {
   return this.provider.request('APIGateway', 'createDeployment', {restApiId: apiId, stageName: this.stage});
}

And update promise chain in the afterDeploy() method:
return this.getApiId().then(apiId => {
   return this.putSwagger(apiId, swaggerInput).then(() => {
       return this.createDeployment(apiId);
   })
});

Now we can deploy our app and be happy because it is working correctly and deployment process is fully automated!

If you want to catch up this step:

git clone https://github.com/maciejtreder/serverless-apigw-binary.git
cd serverless-apigw-binary
git checkout tutorialThirdStep
cd plugin
npm link
cd ../example/express
npm install 
npm link serverless-apigw-binary
npm run deploy

Let’s go public

Ok. We have our plugin ready. It is working perfectly. What now? Now we are going to make our plugin available to the world!

We have several ways to do that.

Node Package Manager (npm)

It’s really simple. You need to do two things.
Login to your npm account via npm CLI:

npm login
Username: maciejtreder
Password: 
Email: (this IS public) contact@maciejtreder.com
Logged in as maciejtreder on https://registry.npmjs.org/.

And publish package:

cd plugin
npm publish

More interesting (in my opinion) is Git deployment. Why? It gives you the possibility to make your package available to only people which you want to use it (ie. team in your company).
The only thing which you need to do is just push your code to the repo:

cd plugin
git init
git remote add origin <your-repository-address>
git commit -m "my awesome plugin" .
git push --set-upstream origin master

After that, if you want to install the package in your project you need to provide your git repo address ie:
npm install https://github.com/maciejtreder/serverless-apigw-binary.git

Next steps

In the previous post, we learned how to use Serverless framework. Today we created Serverless plugin using the AWS SDK to compensate for the lack of default support for binary files. Now we are ready to make use of this knowledge and make something awesome. In next post, we will create and deploy Angular 4 application and deploy it on the AWS Lambda!

Live demo of app used in this post can be found here: https://serverless-apigw.maciejtreder.com 
Plugin git repo: https://github.com/maciejtreder/serverless-apigw-binary 
Plugin npm repo: https://www.npmjs.com/package/serverless-apigw-binary 

Maciej Treder,
contact@maciejtreder.com
https://www.maciejtreder.com
@maciejtreder (GitHub, Twitter, StackOverflow, LinkedIn)