A Socially Distanced Mother’s Day Gift with WhatsApp and Cloudinary
Time to read:
March 24, 2020
Written by
This post is part of Twilio’s archive and may contain outdated information. We’re always building something new, so be sure to check out our latest posts for the most up-to-date insights.

It was Mother’s Day last weekend (For those of us in the UK*), and I’m going to be totally honest: I completely forgot! The worst part is that most of the shops were closed so I was not able to go out shopping for a personal gift. Now, I could have just headed online and ordered a generic gift. However, I wanted this gift to be more personalised, something to remind my mum of the amazing influence that she has had on my life and the lives of others. So I decided to crowdsource pictures and messages from my extended family and my mum’s friends to create a scrapbook full of memories and personal messages. Here’s how I did it:
Step 1: Design an Overlay
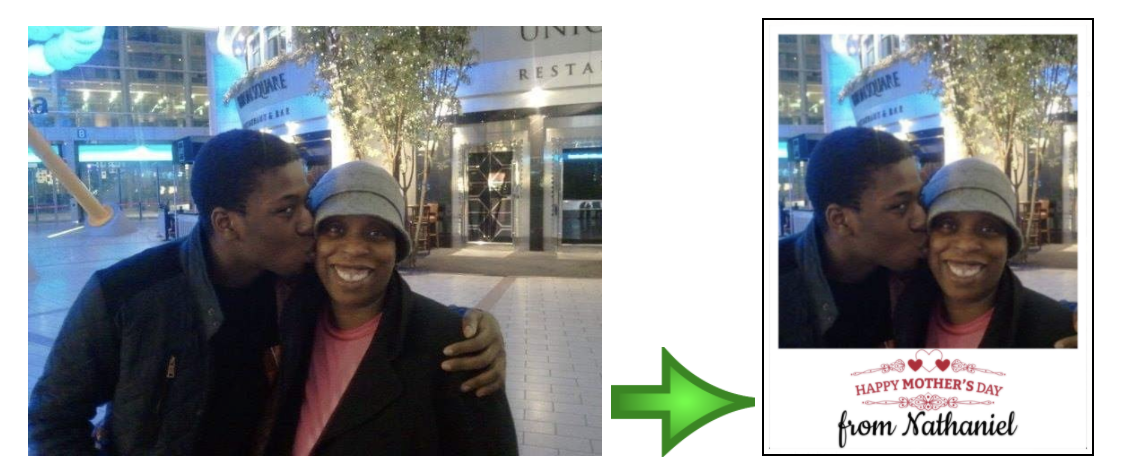
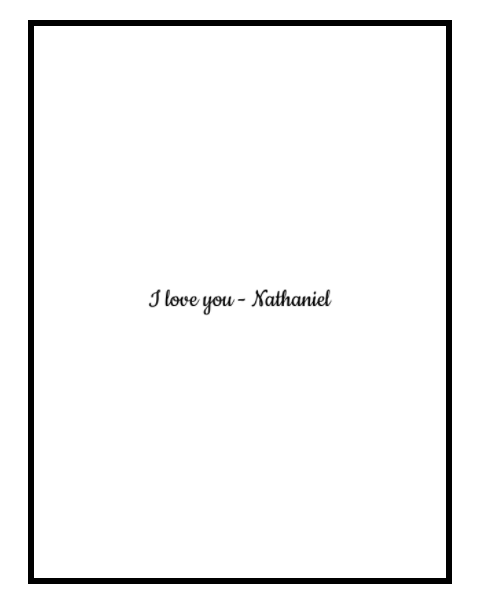
I wanted all the photos that were sent in to have an overlay that has the names of the people in the photo. A bit of magic in a graphics editor (I used Adobe Illustrator but any graphical editor should work) and I soon had a transparent PNG. I uploaded this to the Cloudinary console and saved it as an asset in my Media Library to use later. You can download it here. I also created a blank image of the same dimensions to hold a message from each sender. Here’s a link to my blank image.

Step 2: Overlaying images
I used the Cloudinary SDK within a Twilio Serverless Function that would take an incoming picture from the Twilio Studio Flow and return a new picture with the overlay I created in step one.
Cloudinary Transformations are really powerful and have the ability to add extra flair to your photos. I was inspired by my colleague Dominik’s blog post where he created a Photo Booth powered by WhatsApp. Read his blog post to find out more about how to use cloudinary transforms. I edited his code to create a function that crops an image and then that puts the Happy Mother’s Day overlay as well as the name of the person who sent it.
Below is how I used the Cloudinary SDK in the Twilio function.
Within the exports.handler function I can manipulate the photo. All the uploaded photos need to fit onto a postcard sized piece of paper in a portrait orientation. I created a Cloudinary transform object to crop and scale the photo. I used a width and height of 1200 and 1600 respectively to fit a postcard sized sheet of paper. The PICTURE_OVERLAY_ID is the name of the overlay image file that I uploaded to cloudinary.
I also used some additional Cloudinary transforms to add the overlay I made earlier and also add text stating who the photo came from. Then, the image is uploaded to Cloudinary with the added transformations.
Here’s a link to the entire Twilio Function Code.
Step 3: Collecting Mother’s Day Messages
The great thing about Cloudinary is that it can also be used to manipulate text. I created a second Twilio Function to take a message and turn it into an image with the message and who it was from. To be more precise, I overlaid the blank.png with their message to create an image of a message.
Here’s a link to the Function Code.
Step 4: Starting a Conversation Flow
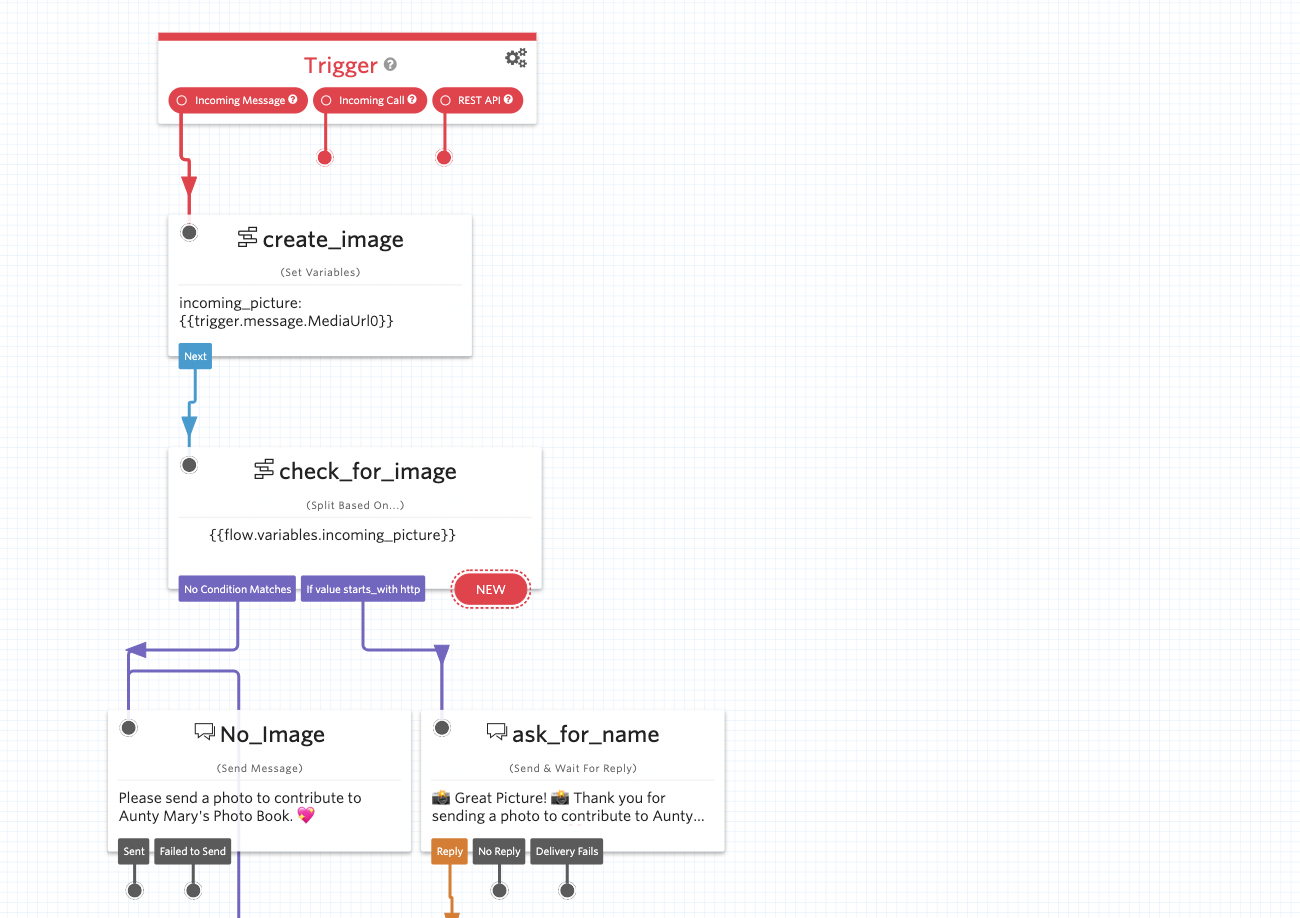
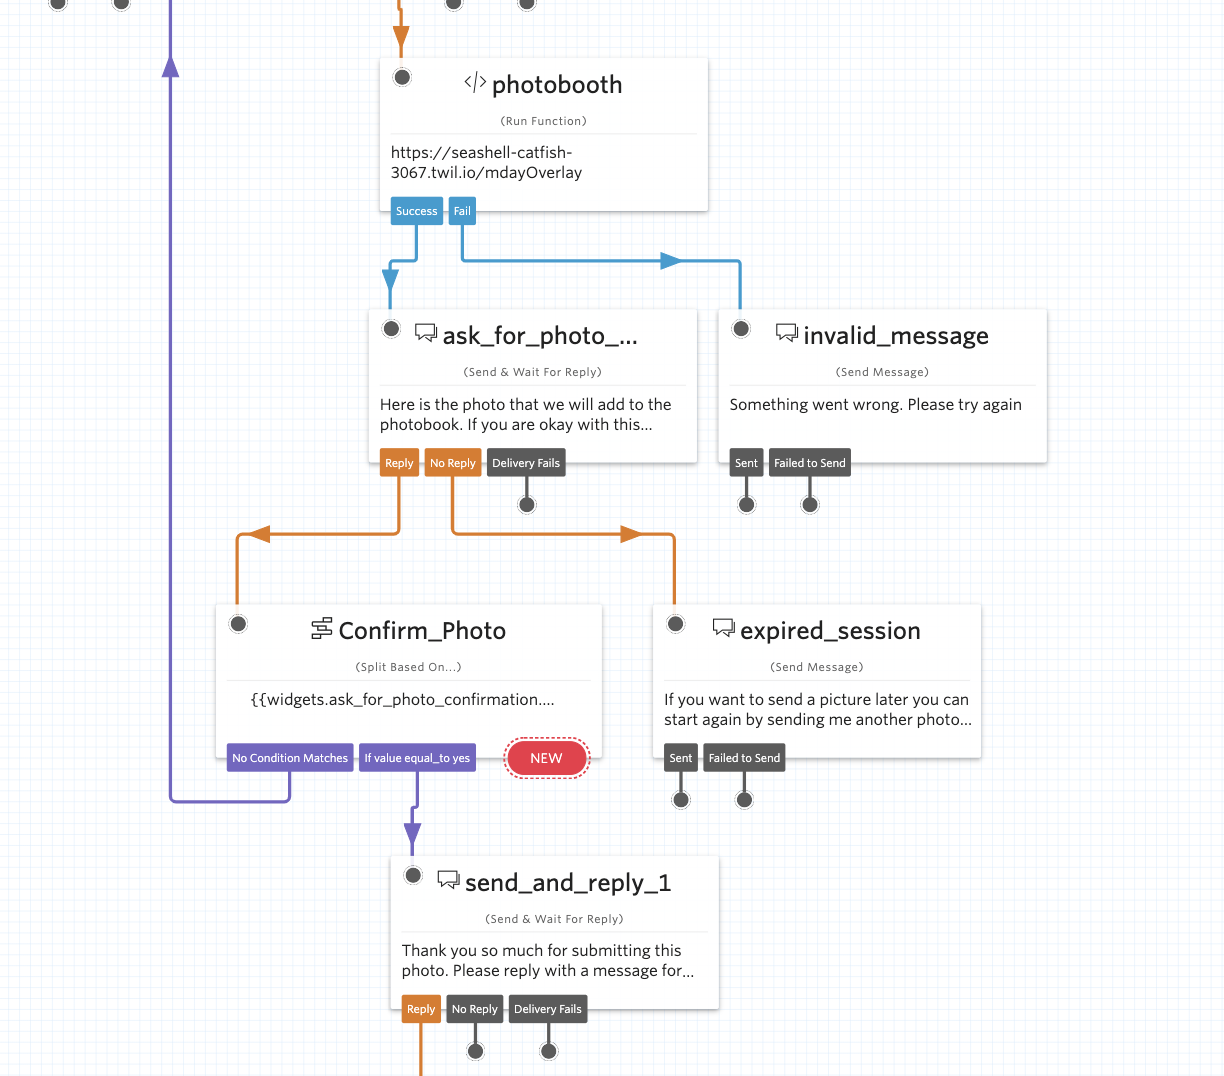
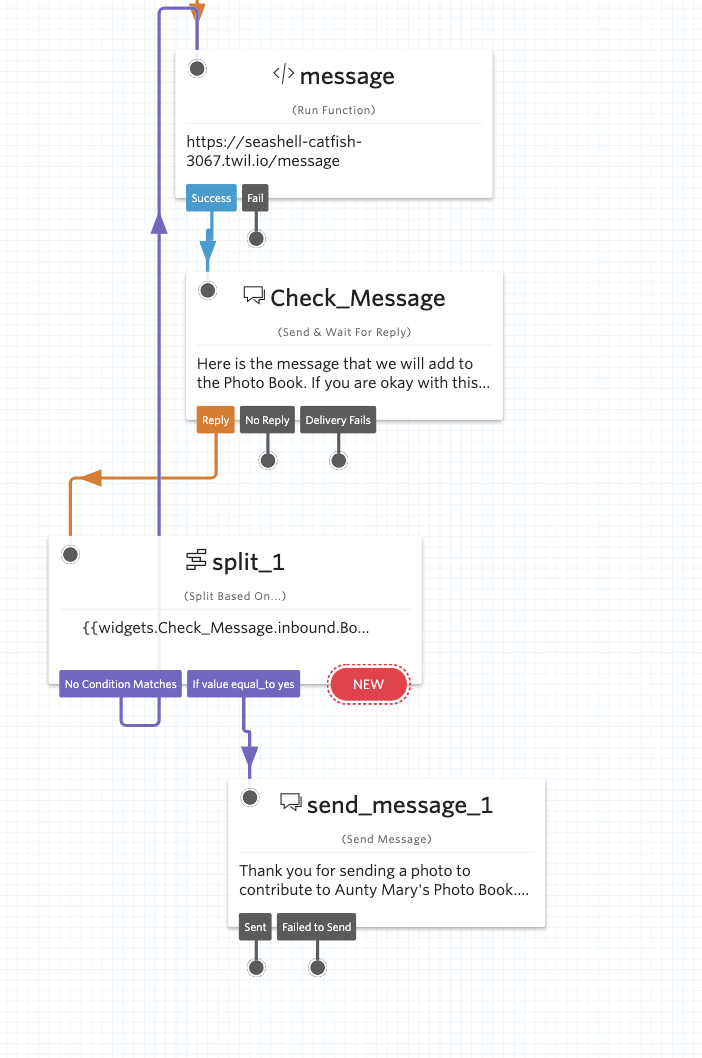
The next thing I needed to do was to create a conversation flow that enabled my friends and family to send a picture and some text such as a note and a caption. Thankfully, the task of making conversational flows has been made easy by Twilio Studio.
If you’ve never used Twilio Studio before check out this video by my colleague, Craig Dennis, talking about what you can do with it.
I created the following conversational flow that enables users to submit a photo, their name, and a personalised message. It calls the Twilio functions that I created in order to perform the image manipulation. You can recreate this studio flow by importing this flow.json file into the Twilio Studio Console.
Step 5: Testing
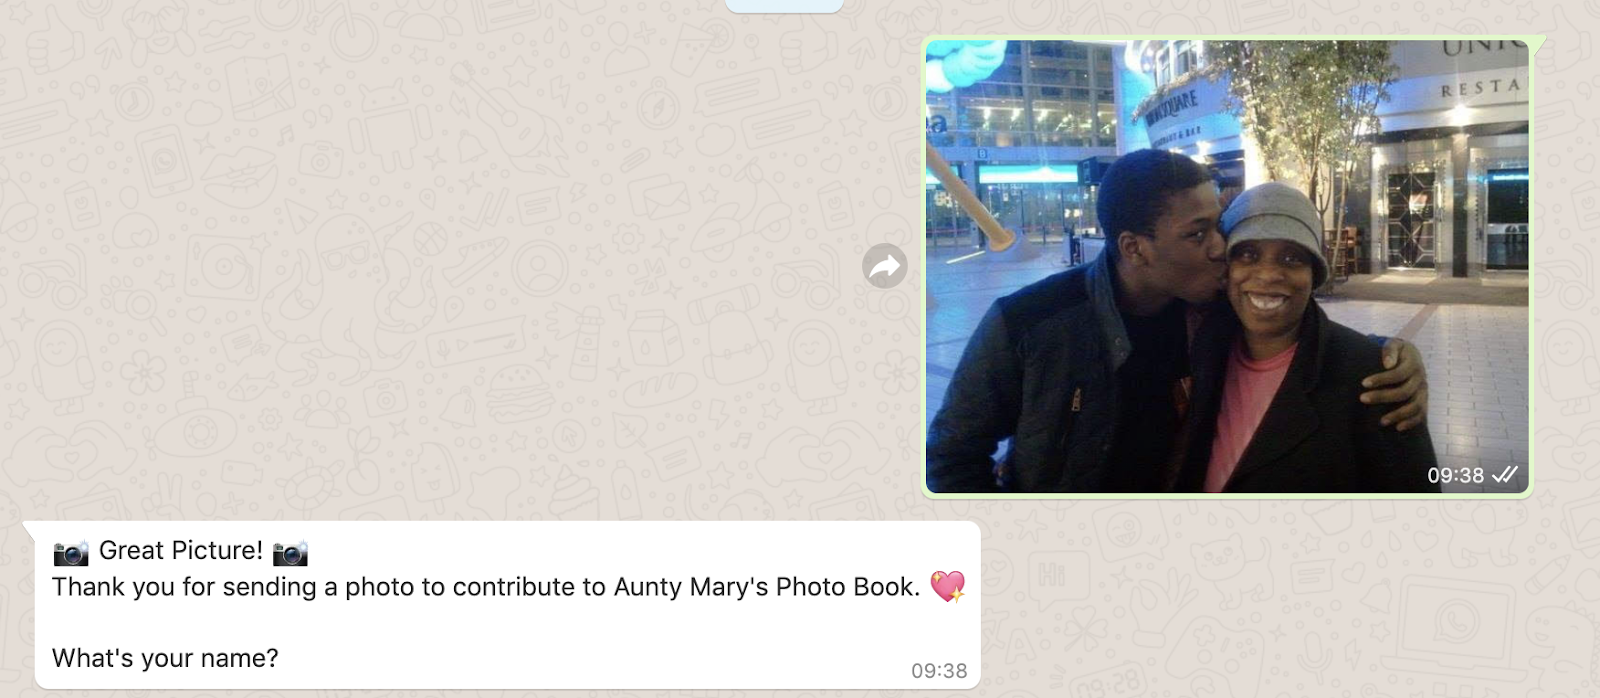
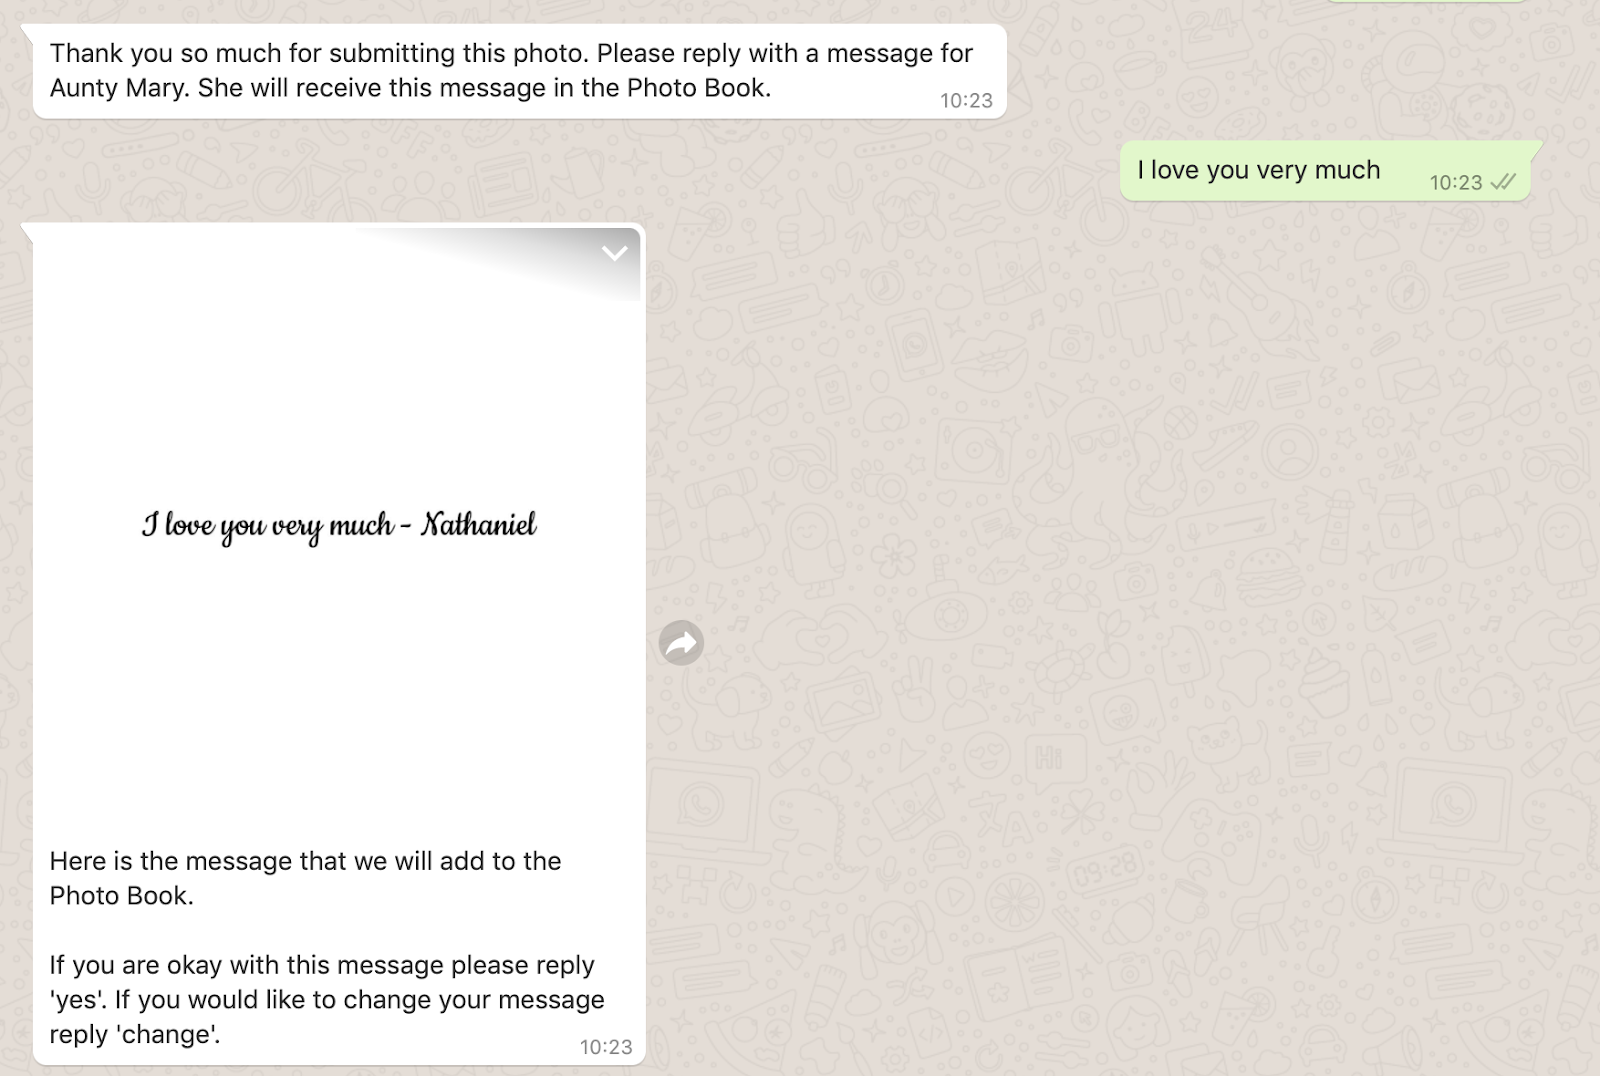
Here’s some screenshots showing the entire conversation flow.

Step 6. Printing a Scrapbook
After sharing my WhatsApp bot with all of my extended family and my mother’s friends, I had soon built up a large collection of photos and messages in my cloudinary media library, ready to print out and stick into a scrapbook. I downloaded the photos from my cloudinary account, printed them and stuck them into a nice little scrapbook I got off Amazon ;-). My mum will never know I almost forgot to get her a gift.
Now it’s your turn
There are so many other ways you can use cloudinary and Twilio WhatsApp to manipulate user images and create fun experiences. Twilio WhatsApp gives you a deep set of tools to interact with users, such as using location data in Twilio Whatsapp to find tasty food or use Autopilot to make your bot smarter with Machine Learning.
I can’t wait to see what you build with Twilio WhatsApp. Let me know what you’re working on at:
- Twitter - @chatterboxCoder
- Email - nokenwa@twilio.com
- GitHub - nokenwa


Related Resources
Twilio Docs
From APIs to SDKs to sample apps
API reference documentation, SDKs, helper libraries, quickstarts, and tutorials for your language and platform.
Resource Center
The latest ebooks, industry reports, and webinars
Learn from customer engagement experts to improve your own communication.
Ahoy
Twilio's developer community hub
Best practices, code samples, and inspiration to build communications and digital engagement experiences.