The Ultimate Guide to OpenAI's GPT-3 Language Model
Time to read:
August 25, 2020
Written by
Reviewed by
Generative Pre-trained Transformer 3 (GPT-3) is a new language model created by OpenAI that is able to generate written text of such quality that is often difficult to differentiate from text written by a human.
In this article we will explore how to work with GPT-3 for a variety of use cases from how to use it as a writing assistant to building a highly sophisticated chatbot. By the end you’ll know how to program GPT-3 to chat with you about your favorite topics. Here is an example short conversation I had with the bot about Python and web development.

How good is it, really?
Do you find it hard to believe that GPT-3 can generate text that is virtually indistinguishable from what a human writer can produce? I’m going to let you judge for yourself with another example.
The following two paragraphs were generated by the GPT-3 engine to describe itself, after I trained it just by showing it the first paragraph of the GPT-3 article on Wikipedia. Note that I am copying the following text verbatim, this is exactly what GPT-3 produced with no editing.
GPT-3 is a deep neural network that uses the attention mechanism to predict the next word in a sentence. It is trained on a corpus of over 1 billion words, and can generate text at character level accuracy. GPT-3's architecture consists of two main components: an encoder and a decoder. The encoder takes as input the previous word in the sentence and produces a vector representation of it, which is then passed through an attention mechanism to produce the next word prediction. The decoder takes as input both the previous word and its vector representation, and outputs a probability distribution over all possible words given those inputs.
GPT-3's performance is on par with the best language models for text generation, which is significantly better than previous GPT models. Microsoft's Turing NLG model can generate text at character level accuracy on a test set of Wikipedia articles, but requires an enormous amount of training data to do so. OpenAI claims that GPT-3 can achieve this level of performance without any additional training data after its initial pre-training period. In addition, GPT-3 is capable of generating longer sentences and paragraphs than earlier models such as Google's BERT and Stanford NLP's Transformer.
Impressive, right?
What we will build
We are going to learn how to work with the OpenAI Playground, a web-based interface that, as its name suggests, allows you to play and prototype solutions based on GPT-3.
We are not going to build a single specific project. Instead, we will implement a few different prototypes for a range of different problems.
Towards the end, we’ll also look at how to transfer work that you’ve done in the Playground to a standalone Python application.
Prerequisites
To follow along with the examples featured in this tutorial the only requirement you need is to have an OpenAI GPT-3 license. At the time I’m writing this, OpenAI is running a beta program for GPT-3, and you can request a beta license directly from them.
If you are interested in writing standalone GPT-3 applications in Python, you will also need to have Python 3.6 or newer installed. This is entirely optional, you can skip the Python section if you are not interested in it.
The OpenAI Playground
I mentioned above that I had to “train” GPT-3 to produce my desired text output. This is surprisingly easy, and can be done in the OpenAI Playground. Below you can see a screenshot of the Playground instance in which I generated the text shown above:
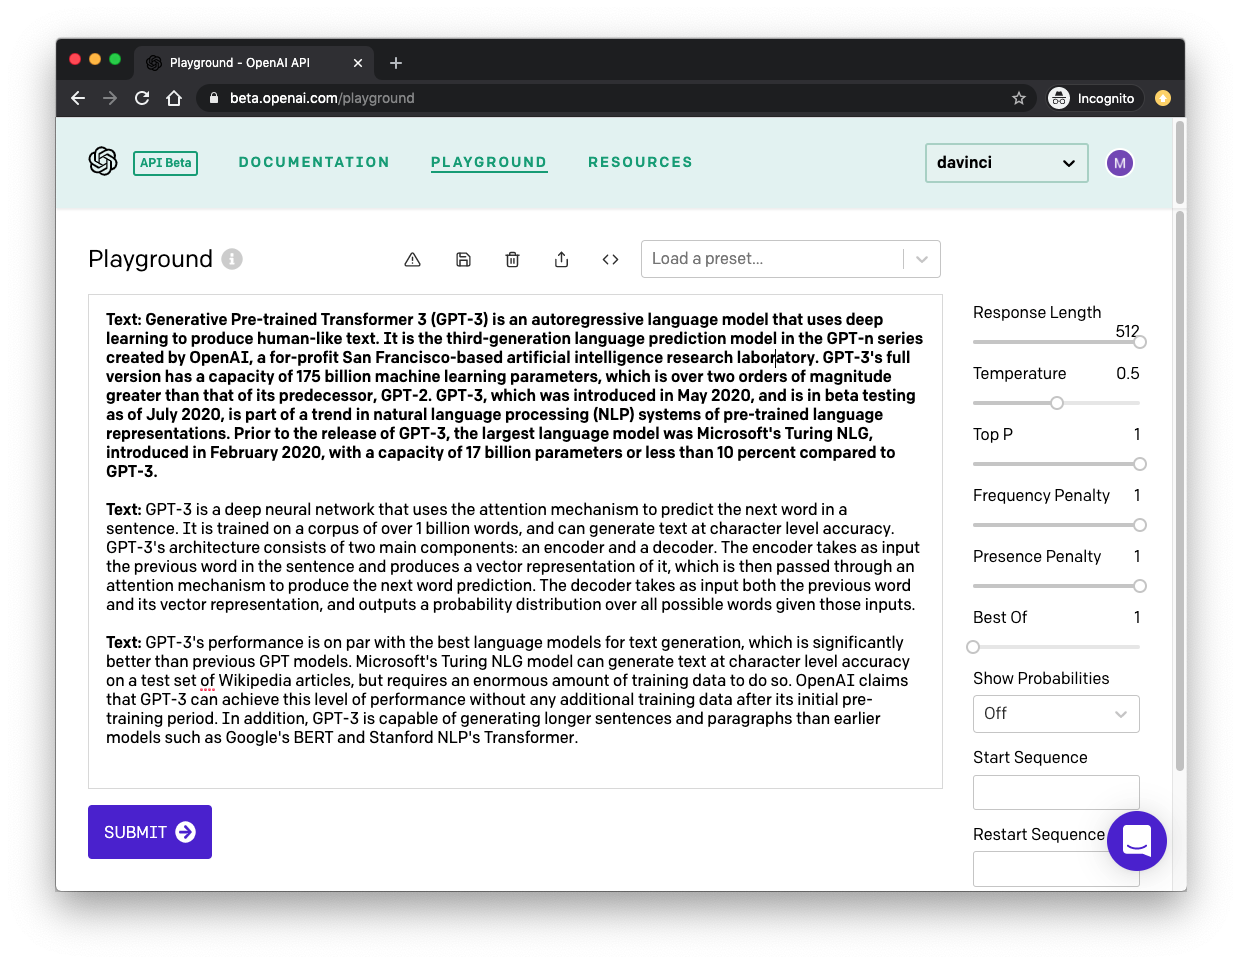
Let me explain the main aspects of this interface.
The sidebar on the right has a few options to configure the kind of output we expect GPT-3 to produce. I’ll go over these settings in detail later in this article.
The large area of text is where you interact with the GPT-3 engine. The first paragraph, which appears in a bold font, is what GPT-3 will receive as input. I started this paragraph with the prefix Text:, and followed it by pasting text that I copied from a Wikipedia article. This is the key aspect of training the engine: you teach it what type of text you want it to generate by giving it examples. In many cases a single example is sufficient, but you can provide more.
The second paragraph starts with the same Text: prefix, which also appears in bold. This second appearance of the prefix is the last part of the input. We are giving GPT-3 a paragraph that has the prefix and a text sample, followed by a line that only has the prefix. This gives GPT-3 the cue that it needs to generate some text to complete the second paragraph so that it matches the first in tone and style.
Once you have your training text and your options set to your liking, you press the “Submit” button at the bottom, and GPT-3 analyzes the input text and generates some more to match. If you press “Submit” again, GPT-3 runs again and produces another chunk of text.
All I’ve done to generate the two paragraphs above was to create my input text, and press the “Submit” button twice!
Working with GPT-3 Presets
Okay, let’s get started! Log in to the OpenAI Playground to familiarize yourself with the interface.
In the top right corner of the navigation bar there is a dropdown to select one of a number of language models:
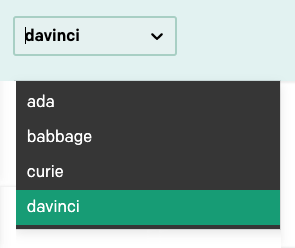
In this tutorial we are only going to use the davinci model, which is the most advanced at this time, so make sure it is the selected one. Once you learn how to work with the Playground you can switch to the other models and experiment with them as well.
Above the text area there is another dropdown with the label “Load a preset…”.
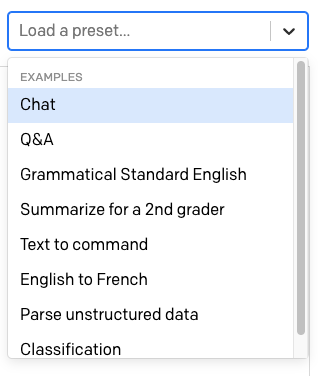
Here OpenAI provides a number of ready to be used presets for different uses of GPT-3.
Select the “English to French” preset. When you choose a preset, the contents of the text area are updated with a predefined training text for it. The settings in the right sidebar are also updated.
In the case of the “English to French” template, the text shows a few English sentences, each with its French translation:
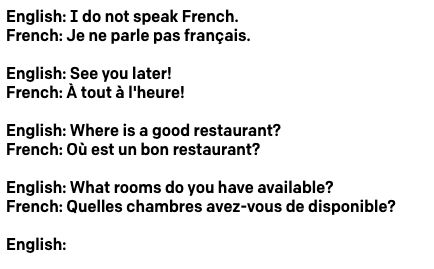
As in my own example above, each line is started with a prefix. Since this application has English lines and French lines, the prefix is different to help GPT-3 make sense of the pattern.
Note how at the bottom of the text there is an empty English: prefix. Here is where we can enter the text we’d like GPT-3 to translate to French. Go ahead and enter a sentence in English and then press the “Submit” button to have GPT-3 generate the French translation. Here is the example that I used:

The preset adds another empty English: prompt for you, so that you can directly type the next sentence you want to translate.
All the presets provided by OpenAI are easy to use and self-explanatory, so at this point it would be a good idea that you play with a few others. In particular, I recommend the “Q&A” and “Summarize for a 2nd grader” presets.
Creating your own GPT-3 Applications
While the presets provided by the OpenAI Playground are fun to play with, you will surely have your own ideas for ways to use the GPT-3 engine. In this section we are going to look at all the options provided in the Playground to create your own applications.
Creating your own GPT-3 based solution involves writing the input text to train the engine and tuning the settings on the sidebar according to your needs.
To follow along with the examples in this section, make sure you reset your Playground back to its default settings. To do this, delete all the text from the text area, and if you have a preset selected, click the “x” next to its name to remove it.

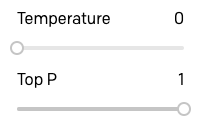
Temperature
One of the most important settings to control the output of the GPT-3 engine is the temperature. This setting controls the randomness of the generated text. A value of 0 makes the engine deterministic, which means that it will always generate the same output for a given input text. A value of 1 makes the engine take the most risks and use a lot of creativity.
I like to start prototyping an application by setting the temperature to 0, so let’s start by doing that. The “Top P” parameter that appears below the temperature also has some control over the randomness of the response, so make sure that it is at its default value of 1. Leave all other parameters also at their default values.
With this configuration, GPT-3 will behave in a very predictable way, so this is a good starting point to try things out.
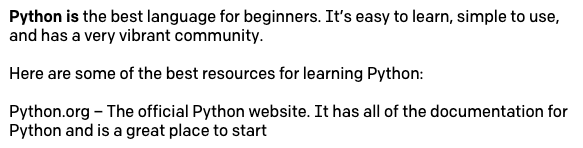
You can now type some text and then press “Submit” to see how GPT-3 adds some more. In the example below, I typed the text Python is and let GPT-3 complete the sentence.

This is amazing, right?
Before we continue, be aware that GPT-3 does not like input strings that end in a space, as this causes weird and sometimes unpredictable behaviors. You may have the inclination to add a space after the last word of your input, so keep in mind that this can cause problems. The Playground will show you a warning if by mistake you leave one or more spaces at the end of your input.
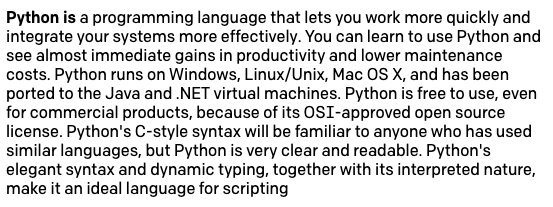
Now raise the temperature to 0.5. Delete the text generated above, leaving once again just Python is, and then click “Submit”. Now GPT-3 is going to take more liberties when it completes the sentence. Here is what I obtained:
When you try this you will likely get something different. And if you try this multiple times, each time you’ll get a different result.
Feel free to try different values of temperature to see how GPT-3 becomes more or less creative with its responses. Once you are ready to continue, set the temperature back to 0 and rerun the original Python is request.
Response length
The text completions in the previous section were really good, but you probably noticed that GPT-3 often stops in the middle of a sentence. To control how much text is generated, you can use the “Response Length” setting.
The default setting for response length is 64, which means that GPT-3 will add 64 tokens to the text, with a token being defined as a word or a punctuation mark.
Having the original response to the Python is input with temperature set to 0 and a length of 64 tokens, you can press the “Submit” button a second time to have GPT-3 append another set of 64 tokens added at the end.
But of course, once again we are left with an incomplete sentence at the end. A simple trick that you can use is to set the length to a value larger than what you need, and then just discard the incomplete part at the end. We will see later how to teach GPT-3 to stop at the right place.
Prefixes
You’ve seen that when I generated the two demonstration paragraphs near the start of this article I’ve prefixed each paragraph with a Text: prefix. You’ve also seen that the English to French translation preset used the English: and French: prefixes on corresponding lines.
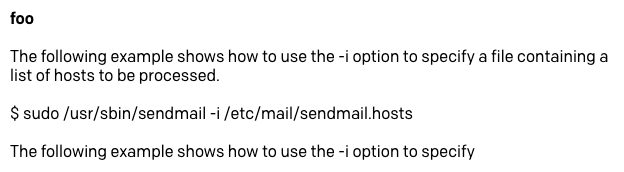
Using a short prefix for each line of text is a very useful tool to help GPT-3 understand better what response is expected. Consider a simple application in which we want GPT-3 to generate names of metasyntactic variables that we can use when writing code. These are placeholder variables such as foo and bar, often used in coding examples.
We can train GPT-3 by showing it one of these variables and letting it generate more. Following the previous example, we can use foo as input, but this time we’ll press enter and move the cursor to a new line, to tell GPT-3 that we want the response on the next line. Unfortunately this does not work well, as GPT-3 does not “get” what we want:
The problem here is that we aren’t clearly telling GPT-3 that what we want is to have more lines like the one we entered.
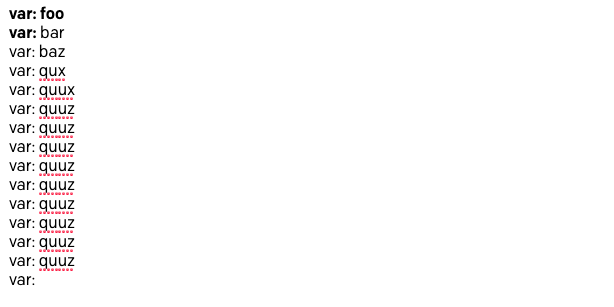
Let’s try adding a prefix to see how that improves our training. What we are going to do is use var: foo as our input, but we’ll also force GPT-3 to follow our pattern by typing var: in the second line. Because the second line is now incomplete when compared against the first, we are making it more clear that we want “something like foo” added to it.
And this works much better:
Stop sequences
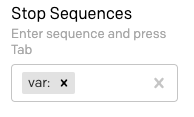
In all the examples we’ve been trying we have the problem that GPT-3 generates a stream of text until the requested length and then it stops, often in the middle of a sentence. The “Stop Sequences” option, which you can find at the bottom of the right sidebar, allows you to define one or more sequences that when generated force GPT-3 to stop.
Following on with the example from the previous section, let’s say we’d like to have only one new variable each time we invoke the GPT-3 engine. Given that we are prefixing every line with var:, and we are priming the engine by entering the prefix alone in the last line of the input, we can use this same prefix as a stop sequence.
Find the “Stop Sequences” field in the sidebar and enter var: followed by Tab.
Now reset the input text to have var: foo in the first line and just var: in the second line, and click “Submit”. Now the result is a single variable:

Type another var: in the third line of the input text and submit again, and you’ll get one more.

Start text
We are making progress in making GPT-3 return the responses we expect, but our next annoyance is that every time we want to request a response we have to manually type the prefix for the line GPT-3 needs to complete.
The “Inject Start Text” option in the settings tells the Playground what text to automatically append to the input before sending a request to GPT-3. Place the cursor in this field and type var:.
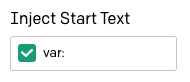
Now reset the text to a single line of text having var: foo. Press enter to have the cursor at the start of the second line and press “Submit” to see the next variable. Each time you submit you’ll get a new one, with the prefixes automatically inserted.

Using multiple prefixes
The variable name generator that we’ve been using in the last few sections follows the simple approach of showing GPT-3 a text sample to obtain more like it. I’ve used this same method to generate the two paragraphs of text that I presented at the beginning of this article.
Another method of interacting with GPT-3 is to have it apply some sort of analysis and transformation to the input text to produce the response. So far we’ve only seen the English to French translation preset as an example of this type of interaction. Other possibilities are Q&A chatbots, having GPT-3 correct grammatical errors in the input text, and even more esoteric ones such as having it convert design instructions given in English into HTML.
The interesting characteristic of these projects is that there is a dialogue between the user and GPT-3, and this requires the use of two prefixes to separately mark lines that belong to the user and to GPT-3.
To demonstrate this type of project style we are going to build an ELI5 (Explain Like I’m 5) bot that will accept a complex concept from the user and return an explanation of it using simple words that a five year old can understand.
Reset your Playground back to the default initial state by clicking on the trashcan icon.

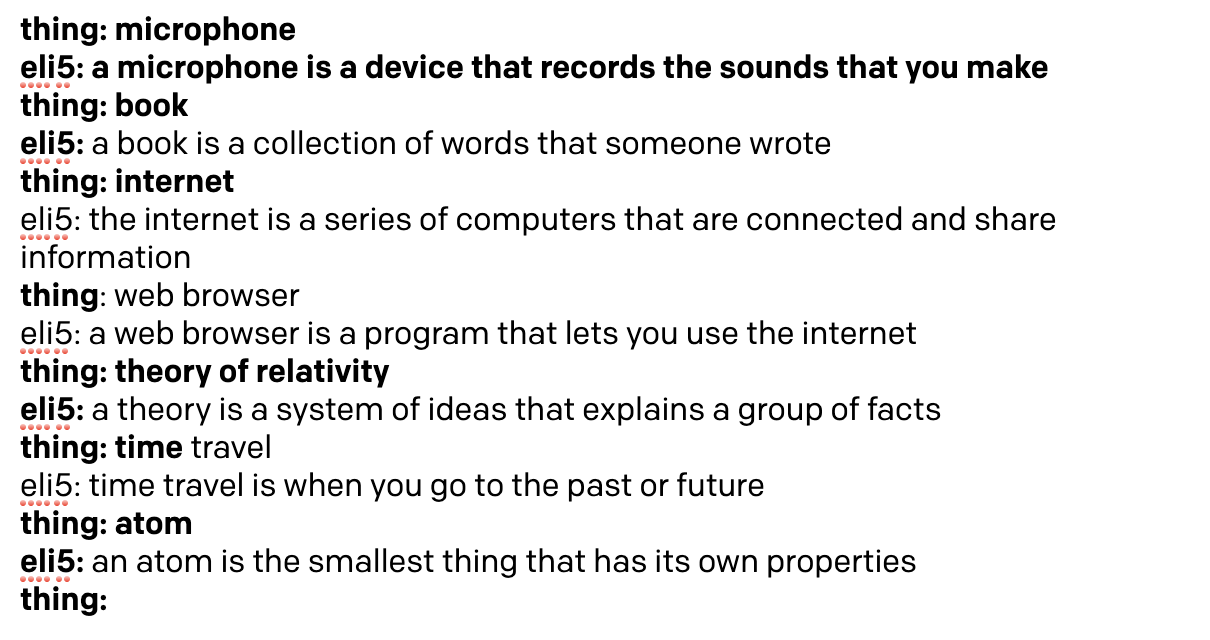
To create the ELI5 bot we are going to show GPT-3 an example interaction. The line that shows the thing that we want explained is going to use the thing: prefix, while the line with the explanation is going to use eli5:. Here is how we can train GPT-3 on this task using “microphone” as our training example:

Easy, right? We have to make sure that we use simple words in the response that we are going to use for training, because we want GPT-3 to generate other responses in a similar style.
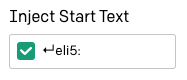
The “Inject Start Text” option can be set to [enter]eli5:, so that the Playground automatically adds the prefix for the GPT-3 line.
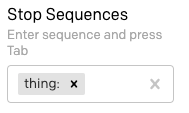
We also need to set a stop sequence, so that GPT-3 knows when to stop. We can use thing: here, to ensure that GPT-3 understands that the “thing” lines do not need to be generated. Remember that in this field you have to press the Tab key to complete the input of the stop sequence.
I’ve set the response length to the maximum of 512, since the stop sequence is how we get GPT-3 to stop. I’ve also moved the temperature slider to 0.25, so that the answers aren’t too embellished or random, but this is an area where you can play with different settings and find what works best for you.

Ready to give our ELI5 bot a try? Here is a first attempt:

That’s pretty good, right? Since we have the temperature set to a non-zero value, the responses that you get might differ slightly from mine.
Restart text
If you started playing with the ELI5 bot from the previous section you may have noticed that you have to retype the thing: prefix every time you want to ask the bot a new question.
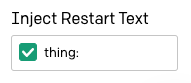
The “Inject Restart Text” option in the sidebar can be used to automatically insert some text after the GPT-3 response, so we can use it to autotype the next prefix. I have entered the thing: prefix followed by a space here.
Now it is a lot easier to play and interact with GPT-3 and have it explain things to us!
The “Top P” option
The “Top P” argument is an alternative way of controlling the randomness and creativity of the text generated by GPT-3. The OpenAI documentation recommends that only one of Temperature and Top P are used, so when using one of them, make sure that the other is set to 1.
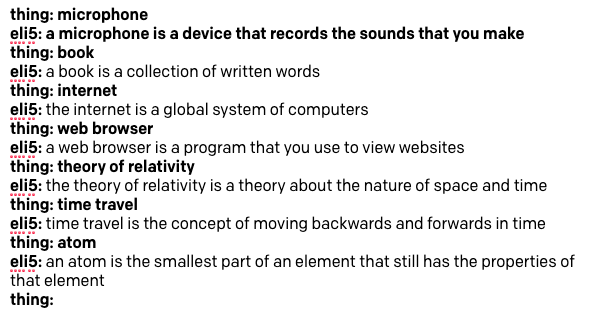
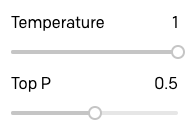
I wanted to experiment and see how the GPT-3 responses varied when using Top P instead of Temperature, so I raised Temperature to 1 and lowered Top P to 0.25:
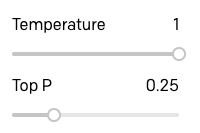
Then I repeated the session from above.
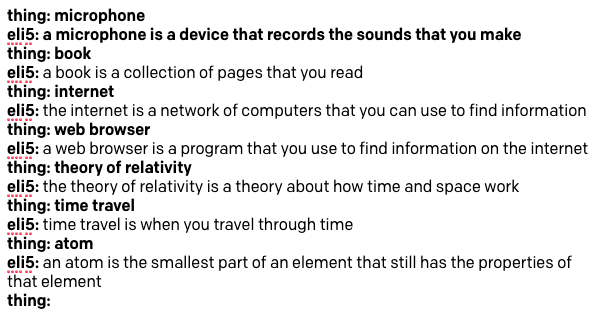
As you can see, there isn’t a huge difference, but I believe the quality of the responses is a bit lower. Consider the answer to time travel, which is a really poor explanation, and also how GPT-3 repeats the concept of finding information in two of the answers.
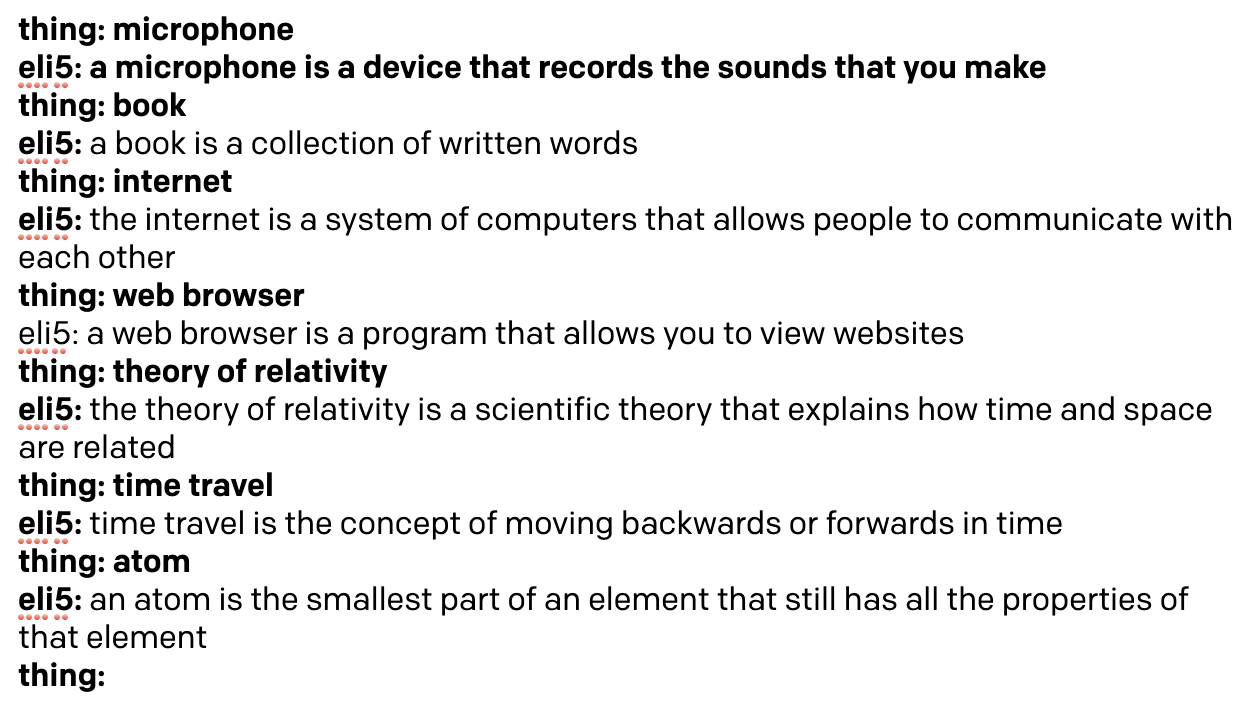
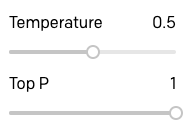
To see if I could improve these answers a bit I raised Top P up to 0.5:
The answers are definitely better:
To complete my investigation of Temperature and Top P I tried the same queries using a Temperature value of 0.5:
Here are the results:
Clearly, for this type of application a 0.5 temperature is a bit much and GPT-3 becomes more vague and informal in its responses.
After playing with several projects and trying Temperature and Top P, my conclusion is that Top P provides better control for applications in which GPT-3 is expected to generate text with accuracy and correctness, while Temperature works best for those applications in which original, creative or even amusing responses are sought.
For the ELI5 bot I’ve decided that using Top P set to 0.5 is what provides the best responses.
Custom presets
By now we have played with most of the configuration options, and we have a first interesting application, our ELI5 bot.
Before we move on to build another project, you should save the ELI5 bot, along with the settings that you found to work the best for you.
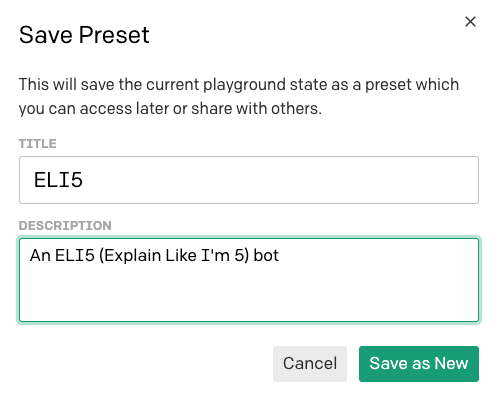
Start by resetting the text to only include the training portion with the definition of a microphone, plus the thing: prefix in the third line. Once you have the text reset to the initial training, use the floppy disk icon to save the project as a preset:

For each saved preset, you can provide a name and a description.
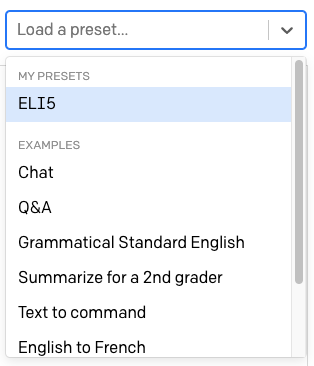
Now the preset appears in the preset drop down and you can recall it just by selecting it.
If you want to share this preset with others, you can use the share button:

To share a preset you will be offered a URL that you can give your friends:

Note that any person who receives this URL must have access to the OpenAI Playground to be able to use your preset.
Frequency and Presence penalties
Let’s have a look at two more of the options we haven’t explored yet. The “Frequency Penalty” and “Presence Penalty” sliders allow you to control the level of repetition GPT-3 is allowed in its responses.

Frequency penalty works by lowering the chances of a word being selected again the more times that word has already been used. Presence penalty does not consider how frequently a word has been used, but just if the word exists in the text.
The difference between these two options is subtle, but you can think of Frequency Penalty as a way to prevent word repetitions, and Presence Penalty as a way to prevent topic repetitions.
I haven’t had much luck in understanding how these two options work. In general I’ve found that with these options set to their defaults at 0, GPT-3 isn’t likely to repeat itself due to the randomization that the Temperature and/or Top P parameters give it. In the few situations where I did find some repetition, I just moved both sliders all the way to 1 and that fixed it.
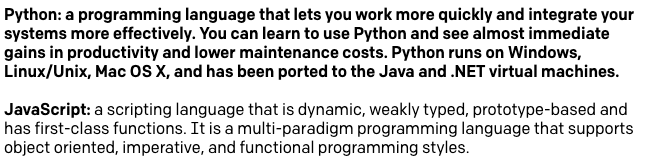
Here is an example in which I gave GPT-3 a description of the Python programming language (that I actually took from its own response), and then asked it to give me a description of the JavaScript language. With Temperature, Frequency and Presence Penalties all set to zero, this is what I’ve got:
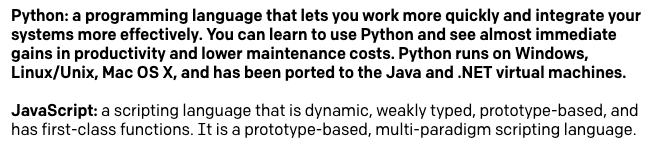
You can see that this description isn’t really that great. GPT-3 is telling us that JavaScript is a scripting language and that it is prototype-based twice each. With the two repetition penalty parameters set to 1 I get a much better definition:
The “Best Of” option
The “Best Of” option can be used to have GPT-3 generate multiple responses to a query. The Playground then selects the best one and displays it.

I haven’t really found a good use of this option, because it is unclear to me how a decision is made on which of several options is the best. Also, when setting this option to any value other than 1 the Playground stops showing responses as they are being generated in real time, because it needs to receive the complete list of responses to choose the best one.
Displaying Word Probabilities
The last option in the settings sidebar is “Show Probabilities”, which is a debugging option that allows you to see why certain tokens were selected.
Load the ELI5 preset once again. Set “Show Probabilities” to “Most Likely” and then run the boot with the word “book” once again. The resulting text is going to be colorized:
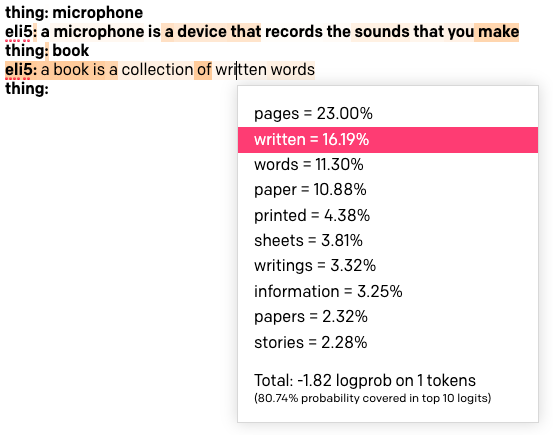
The darker the background of a word the more that word was likely to be chosen. If you click a word you will see a list of all the words that were considered in that position of the text. Above you can see that I clicked the word “written”, which has a fairly light color, and it turns out that it was the second favorite choice after the word “pages”. This word was chosen instead of the favorite one due to the randomization of the Top P and/or Temperature settings.
When setting this option to “Least Likely” the colorization works in reverse, with the darker backgrounds assigned to the words that were selected in spite of not being a likely choice.
If you set the option to “Full Spectrum” you will see both the least and most likely words colorized, with green tones for most likely words and reds for the least likely.

Implementing a Chatbot
Given the large amount of text that has been used in creating the GPT-3 language model, it is possible to build highly advanced bots that can offer a seemingly intelligent conversation about lots of different topics.
As a final project we are going to build a freeform chatbot that you can use to chat with GPT-3 about anything you like. Here is an example chat session about Python and web development that I had with this bot:
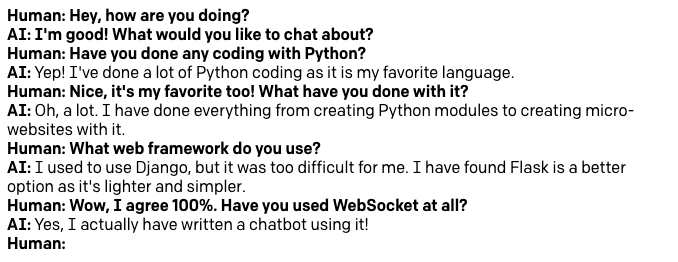
You can see in the screenshot that the training is just the first two lines, in which I entered a made up greeting between a human and the AI. The words that I used here are informal, because I wanted the bot to be fun and interesting to chat with. If you wanted to create a more “serious” chatbot you would have to adjust these lines accordingly.
Reset your Playground back to defaults, and then enter the first two lines above (or similar ones that you like). In the third line add the Human: prefix, leaving it ready for us to enter text.
In terms of settings, this is what I’ve used:
- Response Length: 512
- Temperature: 0.9
- Top P: 1
- Frequency Penalty: 1
- Presence Penalty: 1
- Best Of: 1
- Show Probabilities: Off
- Inject Start Text:
↵AI: - Inject Restart Text:
↵Human: - Stop Sequences:
↵Human:and↵
Most of the above settings should be clear based on the examples in the previous section, but this is the first time I’ve used more than one stop sequence. When using high levels of randomization, either with Temperature or Top P, I’ve found that GPT-3 sometimes responds by generating multiple paragraphs. To keep the chat from getting very large and rambling multi-paragraph responses I’ve added a newline character as a second stop sequence, so that any time GPT-3 attempts to go to a new paragraph the stop sequence causes the response to end there.
Try to chat with the bot about any topics that you like, but keep in mind that at this time the language model does not know about current events because its training set does not include any data from after October 2019. For example, while I’ve found the bot to be very knowledgeable about coronaviruses in general, it knows nothing of the COVID-19 pandemic.
Once you have arrived at the settings that you like the best, reset the text back to the initial training and save the chat as a preset. In the next section we are going to port this chat over to Python.
Migrating from the Playground to Python
OpenAI has made available a Python package to interact with GPT-3, so the task of porting an application from the Playground is not complicated.
To follow this part of the tutorial you need to have Python 3.6 or newer installed on your computer. Let’s begin by creating a project directory in which we’ll create our Python project:
For this project we’ll use Python best practices, so we are going to create a virtual environment in which we are going to install the OpenAI package. If you are using a Unix or Mac OS system, enter the following commands:
For those of you following the tutorial on Windows, enter the following commands in a command prompt window:
Sending a GPT-3 query
The code that is necessary to send a query to the GPT-3 engine can be obtained directly from the Playground. Select the saved preset for the chat that you saved earlier (or your favorite preset) and then click the “Export Code” button in the toolbar:

You will now get a popup that shows a Python snippet that you can copy to the clipboard. This is the code that was generated for my chat preset:
While this is actually very useful and can get us most of the way, there are a couple of things to note.
The “Inject Start Text” and “Inject Restart Text” options are defined as the start_sequence and restart_sequence variables, but are not used in the actual API call. This is because these options from the Playground do not exist in the OpenAI API and are implemented directly by the Playground web page, so we’ll need to replicate their functionality directly in Python.
Also, we’ve seen how we can run several interactions with GPT-3 back to back, where each new query includes the prompts and the responses of the previous ones. This accumulation of content is also implemented by the Playground and needs to be replicated with Python logic.
Using the above snippet of Python code as a base, I have created a gpt3() function that mimics the behavior of the Playground. Copy the code below to a file named gpt3.py:
First of all, in this code I am importing the OpenAI key from an environment variable, as this is more secure than adding your key directly in the code as suggested by OpenAI.
The gpt3() function takes all the arguments we’ve seen before that define how to run a GPT-3 query. The only required argument is prompt, which is the actual text of the query. For all the other arguments I have added defaults that match the Playground.
Inside the function I execute a GPT-3 request using similar code to the suggested snippet. For the prompt I appended the passed start text, to duplicate the convenience of not having to add it manually that we get from the Playground.
The response from GPT-3 is an object that has the following structure:
From this data we are only interested in the actual text of the response, so I used the expression response.choices[0].text to retrieve it. The reason why choices is returned as a list is that there is an option in the OpenAI API to request multiple answers to a query (this is actually used by the “Best Of” setting in the Playground). We are not using that option, so the choices list is always going to have a single entry for us.
After I put the text of the response in the answer variable, I create a new prompt that includes the original prompt concatenated with the answer and the restart text, exactly how the Playground does it. The purpose of generating a new prompt is to return it to the caller so that it can be used in a follow up call. The gpt3() function returns the standalone answer and the new prompt both.
Note that I haven’t used every feature of the API in this code. The OpenAI API documentation is the best reference to learn about all the functionality that is available, so be sure to check that out in case you find something useful for your project.
Creating a chat function
With the support of the gpt3() function from the previous section we can now create a chat application. Put the following code in a file called chat.py:
The only dependency used by this application is the gpt3() function from the previous section, which we import at the top.
The chat() function creates a prompt variable that is assigned the made up exchange that trains GPT-3 on the structure of the chat. Then we enter the chat loop, which starts by asking the user to type their message using the Python input() function. The user message is appended to the prompt, and then gpt3() is called with the prompt and the desired configuration settings. The gpt3() function returns an answer and the updated prompt. We show the user the answer and then in the next iteration of the loop we’ll repeat the cycle, this time using an updated prompt that includes the last interaction.
The chat ends when the user presses Ctrl-C to end the Python script.
Running the Python bot
To test this application you first need to set the OPENAI_KEY environment variable. If you are using Mac OS X or Linux, do it like this:
On the Windows command prompt you can do it like this:
You can find your OpenAI key in the Developer Quickstart page. From the two keys shown in this page, use the one labeled as “Secret”.
Once you have the key configured in your environment, start the chat by typing python chat.py and start chatting with the bot! Below is an example interaction with it:
Working with other languages besides Python
You can adapt the Python example to other languages, but you may not have an OpenAI library available. This is not a problem, because the OpenAI API is a fairly standard HTTP API that you can access through raw HTTP requests.
To learn how to send a request for a given Playground preset you can use the same “Export Code” button, but this time select the “curl” tab to see the HTTP request.
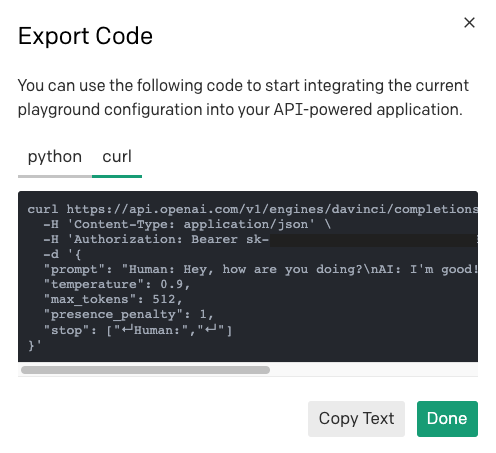
You can use the curl command to understand what the URL, headers and payload need to be, and then translate that to the HTTP client of choice in your programming language.
Conclusion
This was a long journey! I hope you now have a good understanding of the OpenAI API and how to work with GPT-3.
Do you want to learn how to use GPT-3 with Twilio and Python? I have written a GPT-3 SMS chatbot tutorial, and my colleague Sam Agnew wrote a fun Dragon Ball fan fiction GPT-3 tutorial as well.
I’d love to see what cool applications you build with GPT-3!
Miguel Grinberg is a Python Developer for Technical Content at Twilio. Reach out to him at mgrinberg@twilio.com if you have a cool Python project you’d like to share on this blog!


Related Resources
Twilio Docs
From APIs to SDKs to sample apps
API reference documentation, SDKs, helper libraries, quickstarts, and tutorials for your language and platform.
Resource Center
The latest ebooks, industry reports, and webinars
Learn from customer engagement experts to improve your own communication.
Ahoy
Twilio's developer community hub
Best practices, code samples, and inspiration to build communications and digital engagement experiences.