Upload audio files for your Studio IVR with the Twilio CLI Assets Plugin
Time to read: 4 minutes
July 27, 2021
Written by
Reviewed by

When building an Interactive Voice Response, or IVR, system with Twilio you might start off using text-to-speech to read out your prompts. As you move to production you may want to replace the text-to-speech with real recordings.
In this post you will learn how to use the Twilio CLI Assets Plugin to store your recordings in a Twilio Assets service and use them in a Twilio Studio IVR application.
Let's build an IVR
To see this in action, let's put together a quick IVR system in Twilio Studio. To do this you will need a Twilio account. If you don't have one yet, sign up for a free Twilio account here and receive $10 credit when you upgrade.
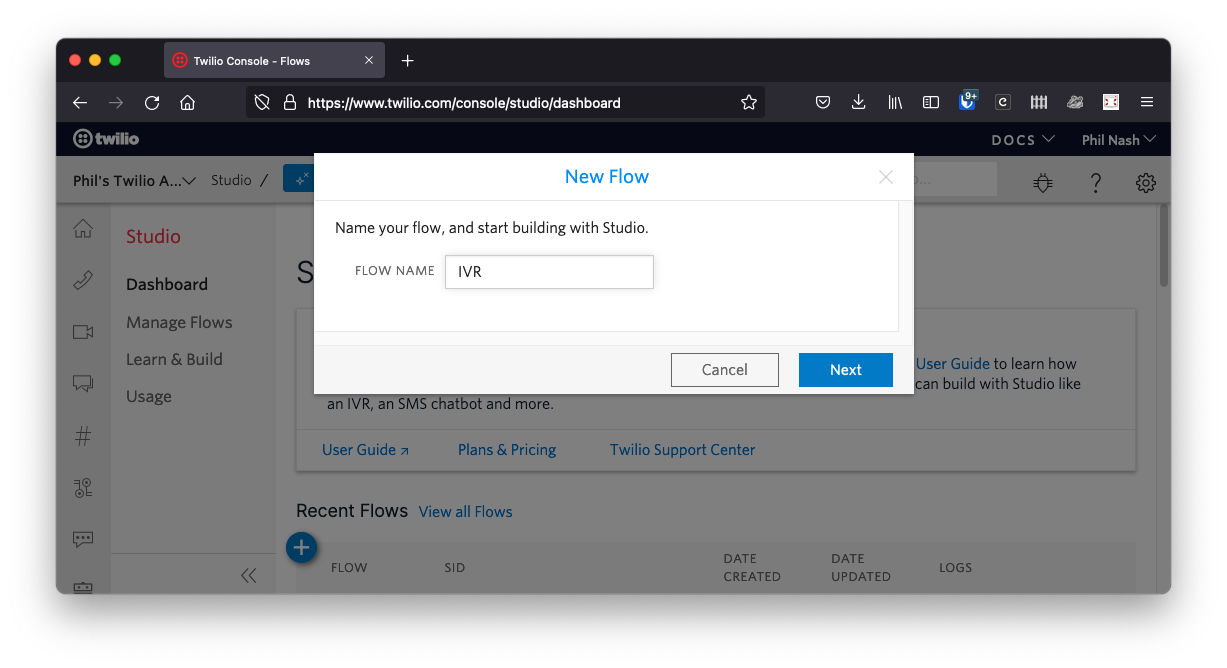
Open the Studio dashboard in the Twilio console and create a new Flow. Give your new Flow a name and click Next.
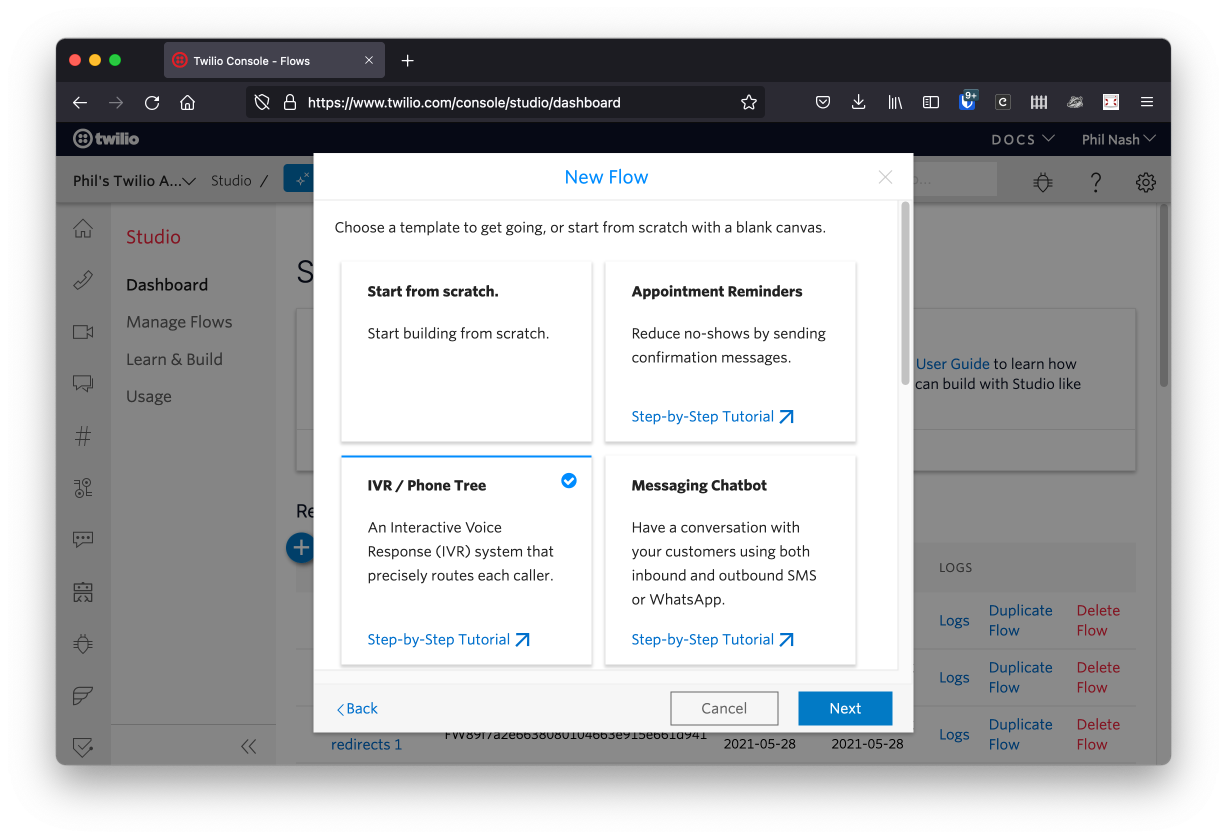
Select the IVR/Phone Tree template and click Next.
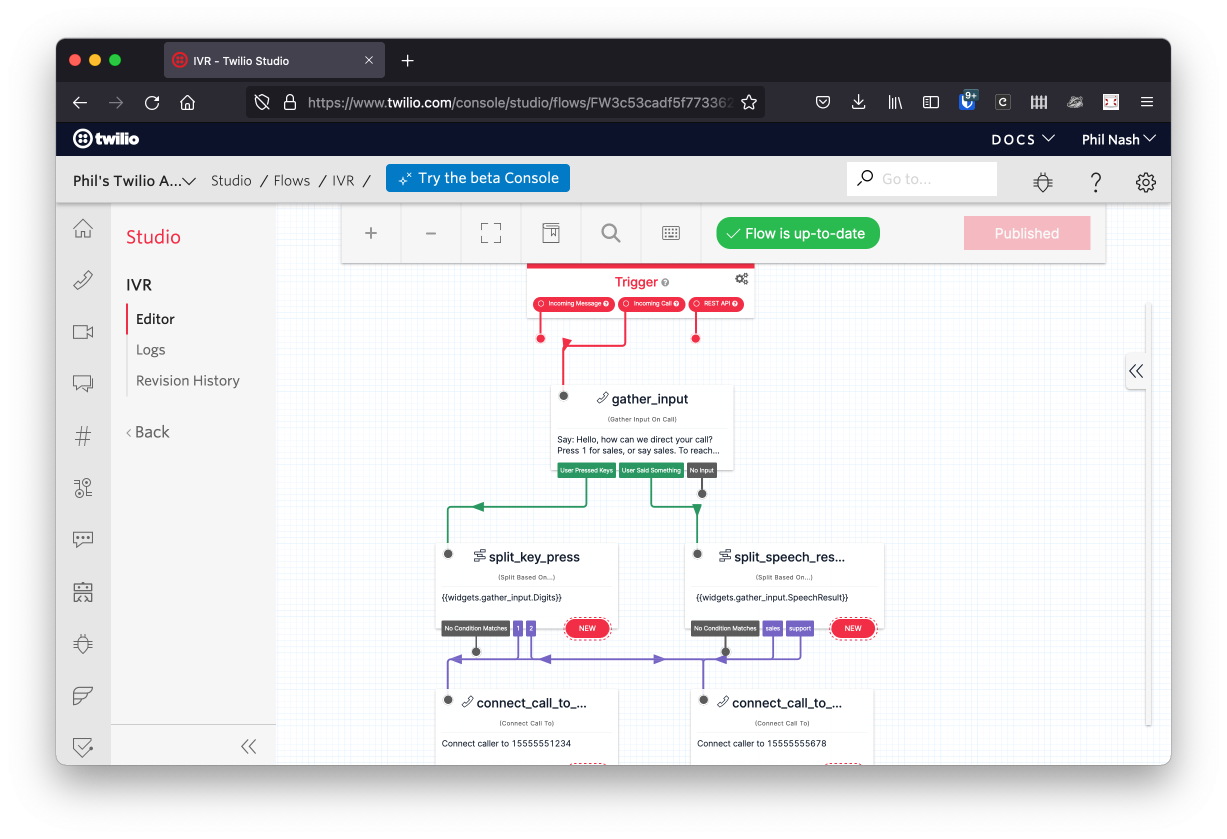
On the next screen you will see your new IVR system. When a call is made that triggers the flow it starts with a welcome message asking for the caller to provide some input; they can either press 1 or say "Sales" to speak to sales, or press 2 or say "Support" to speak to support. Once the caller input is received, Split based on widgets work out whether the next step should be a call to sales or support. Finally, the call is connected to the relevant department. If you want to use this IVR yourself, make sure you edit the Connect Call To widgets to the phone numbers of your own sales and support teams.
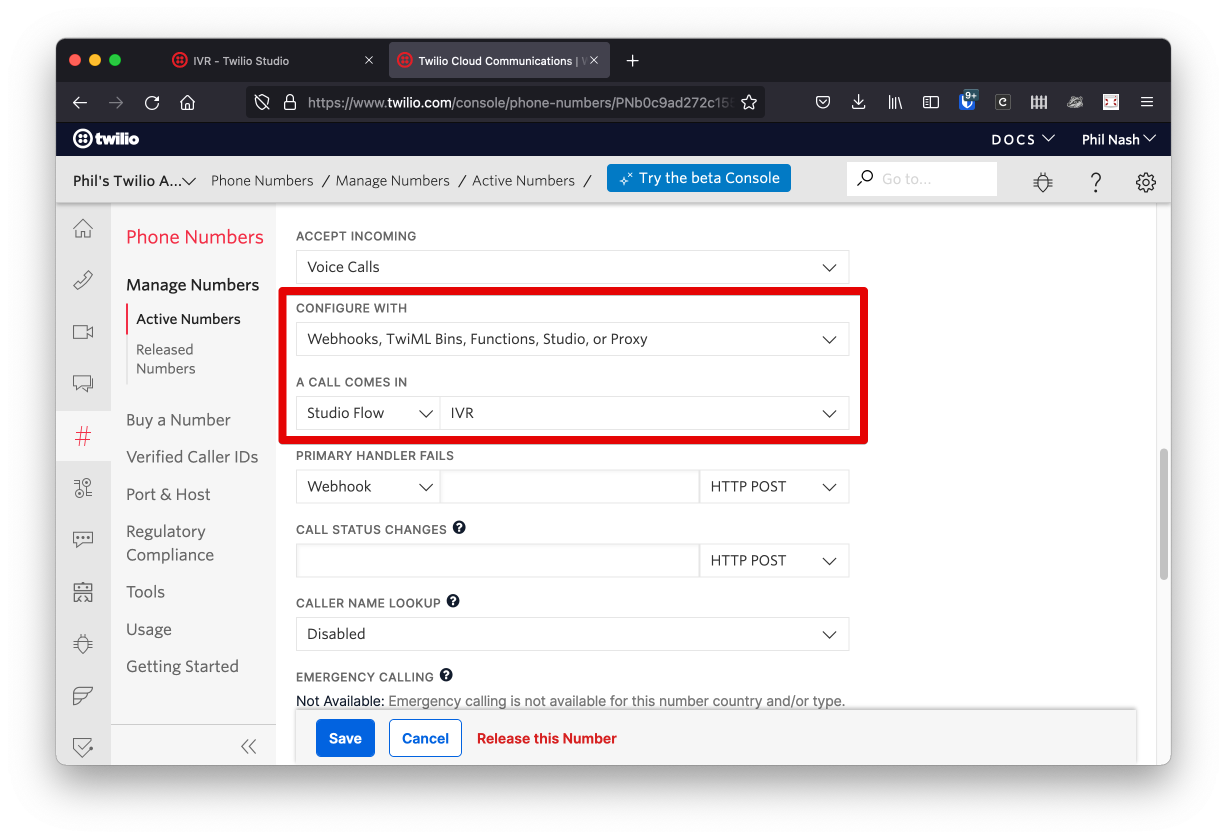
To test this out we need to connect a phone number to the Flow. Head over to your phone numbers and either select one you already own or buy a new phone number. On the phone number configuration screen, under the Voice section, set it to trigger the Studio Flow we just created when a call comes in.
Save the number and give it a call. You will hear the welcome message in the default voice: English with an American accent. We can update that to use one of the other voices, but for this post, let's replace that generated speech with real, recorded speech.
From text-to-speech to real speech
Open your Studio Flow again and click on the Gather Input on Call widget. In the widget configuration you can change how to deliver the message.

Currently it is set to Say a Message and you can change it to Play a Message. When you do so, the text box with the text to say will be replaced with an input that asks for the URL of an audio file to play. Now we will use the Twilio CLI and the Assets Plugin to upload an audio file that we can use here.
The Twilio CLI
The Twilio CLI allows you to use the Twilio API from your terminal or command prompt. If you don't already have the Twilio CLI, follow the instructions in the Twilio CLI Quickstart to install the CLI and then log in to your Twilio account.
Twilio CLI plugins provide additional capabilities for the CLI. The Assets Plugin allows you to manage static assets in a Twilio Assets service from your command line. Install the Assets Plugin with:
When it is successfully installed, start by creating a new Assets service with the command:
Now we need an audio file to upload so that we can use it in our IVR. If you don't have one to hand, you can download and use the one I made for this blog post. It's available in my Assets service here: https://earthy-development-1769.twil.io/welcome.mp3
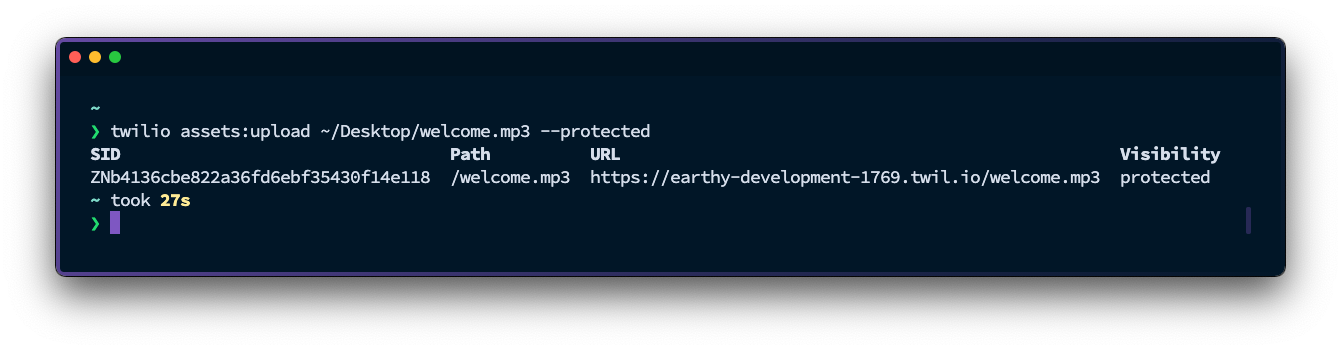
To upload the file use the command:
The --protected flag will ensure that Twilio will only return the file to signed webhook requests. This means that you can use the file from within your Studio Flow or in response to other Twilio webhooks, but no-one else will be able to access the file. If you want the file to be publicly available do not use the --protected flag.
When the upload is complete you will be presented with the URL at which the file can be accessed.
Copy the URL, return to the Studio Flow and enter it into the widget configuration. Save the widget and then publish the Flow. Give your number a call and you will hear your recording in the IVR instead of the text-to-speech.
More uploads
With the Twilio CLI Assets Plugin you can upload and store any kind of static file. In this post we have uploaded an audio file to be used in a voice application, but you could upload any other media you want to. You might want to upload images, videos, contact information as a vCard or other documents, all of which can be used as media in MMS or WhatsApp conversations.
If you have uploaded more files, you can use the plugin to list them and get their URLs with the command:
twilio assets:list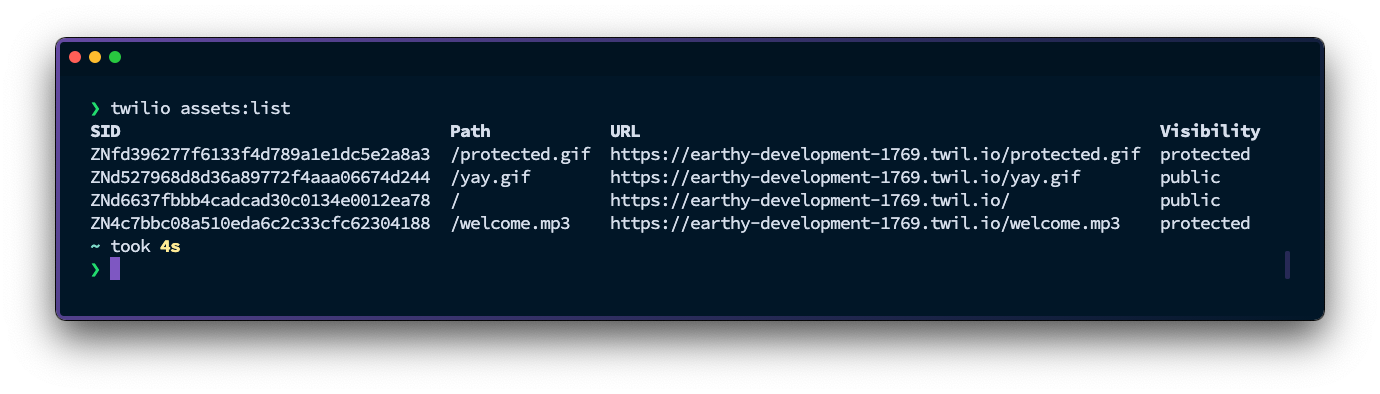
Build and customise your communication flows
In this post we've seen how to build an IVR with Twilio Studio and then customise the IVR with our own voice recordings, hosted in a Twilio Assets service and managed with the Twilio CLI Assets Plugin.
The Assets Plugin is a Twilio Labs production as part of the Serverless Toolkit. For more information, check out this introduction to the Assets Plugin and the documentation on the Assets Plugin.
The code is open source and available on GitHub and if you have feature requests or bug reports I encourage you to open an issue in the GitHub repository. We also accept pull requests.
If you have any other feedback please let me know by email at philnash@twilio.com.
Related Resources
Twilio Docs
From APIs to SDKs to sample apps
API reference documentation, SDKs, helper libraries, quickstarts, and tutorials for your language and platform.
Resource Center
The latest ebooks, industry reports, and webinars
Learn from customer engagement experts to improve your own communication.
Ahoy
Twilio's developer community hub
Best practices, code samples, and inspiration to build communications and digital engagement experiences.