Voice and SMS One-Time Passwords with Python and Twilio
Time to read:
May 25, 2020
Written by

One-time passwords (OTPs) contain numeric or alphanumeric codes that are used to provide an extra layer of security for your applications, by ensuring that a user is authenticated for a particular transaction or a login session. In this tutorial, we’ll be building a simple Flask application that generates and validates OTPs that are delivered to users via Voice or SMS channels using Twilio.
Technical requirements
To follow along, you’ll need the following:
- A free Twilio Account. If you use this link to register, you will receive $10 credit when you upgrade to a paid account.
- Python 3.6 or newer.
- A phone line that can receive voice calls and/or SMS.
Creating a Python environment
Let’s create a directory where our project will reside. From the terminal, run the following command:
Next, cd into the project directory and run the following command to create a virtual environment.
To activate the virtual environment on a Linux or MacOS computer, run the following command:
If you are using a Windows computer, then the activation command is different:
Next, we’ll need to install all the dependencies our project will need:
- Flask: a Python web framework.
- Twilio: A helper library that makes it easy to interact with the Twilio API.
- Requests: A library for making HTTP requests.
- Python-dotenv: A library for importing environment variables from a
.envfile.
To install all the dependencies at once, run the following command:
Creating the Views
Create a main.py file at the root of the project’s directory and add the following code to the file:
Here, we’ve defined two routes, generate and validate. These two routes will render generate and validate templates respectively that we shall be creating shortly. Run the following command from the terminal to start the web server:
To stop the server press Ctrl-C.
Creating the Base Layout
Our application is going to have two templates, one for allowing users to input their phone numbers to receive the OTP code and the other for validating an OTP code. However, before we create those templates, we’ll be creating a base template so that we can provide support for template inheritance and avoid duplicating code.
As it is consistent for Flask applications, our templates will reside in a templates sub-directory. Run the following command from your terminal to create the directory:
Within the templates directory, create a base.html file and add the following code to the file:
Here we’ve defined an HTML5 layout and included Bootstrap and jQuery. The layout uses Jinja2 blocks which serve as a placeholder for giving derived templates the ability to insert their own content. The layout also includes an alert component for displaying notifications based on Flask’s message flashing feature.
Creating the Template For Generating OTP
Within the templates directory, create a generate.html file and add the following code to the file:
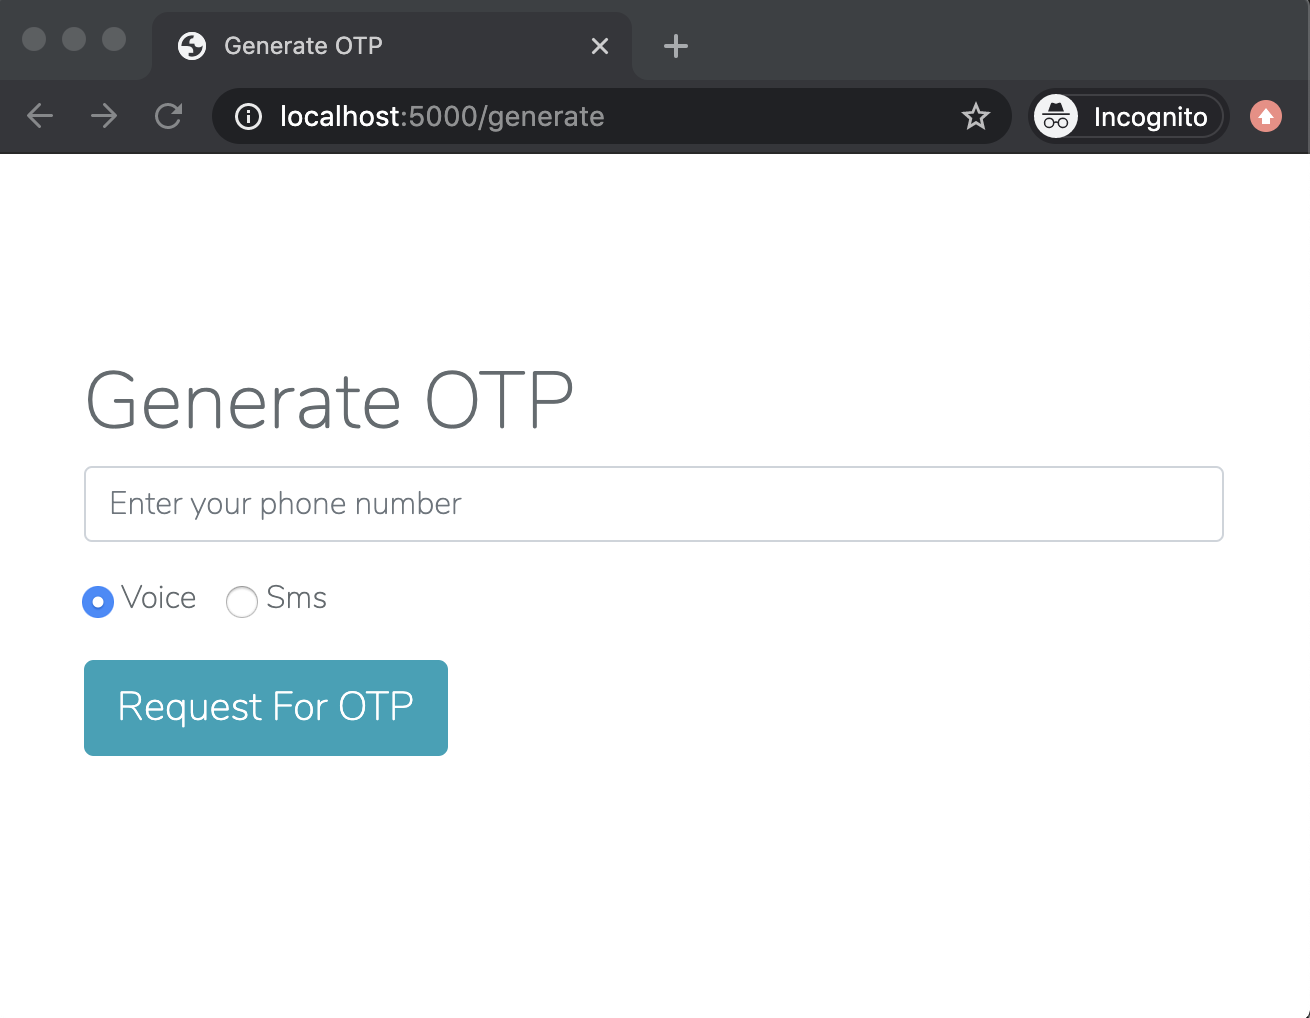
We’ve created a HTML file that extends the base.html layout file we created earlier. The file contains a HTML form for allowing the user to input their phone number as well as select the preferred channel by which they would like to receive the OTP code. The action attribute of the form is set to an empty string. This is done so that the form will be submitted back to the current URL that appears in the address bar.
Start the application as shown in the previous section and then enter http://localhost:5000/generate in your address bar to see how this template looks.

Creating the Template For Validating OTP
Create a validate.html file within the templates directory and add the following code to the file:
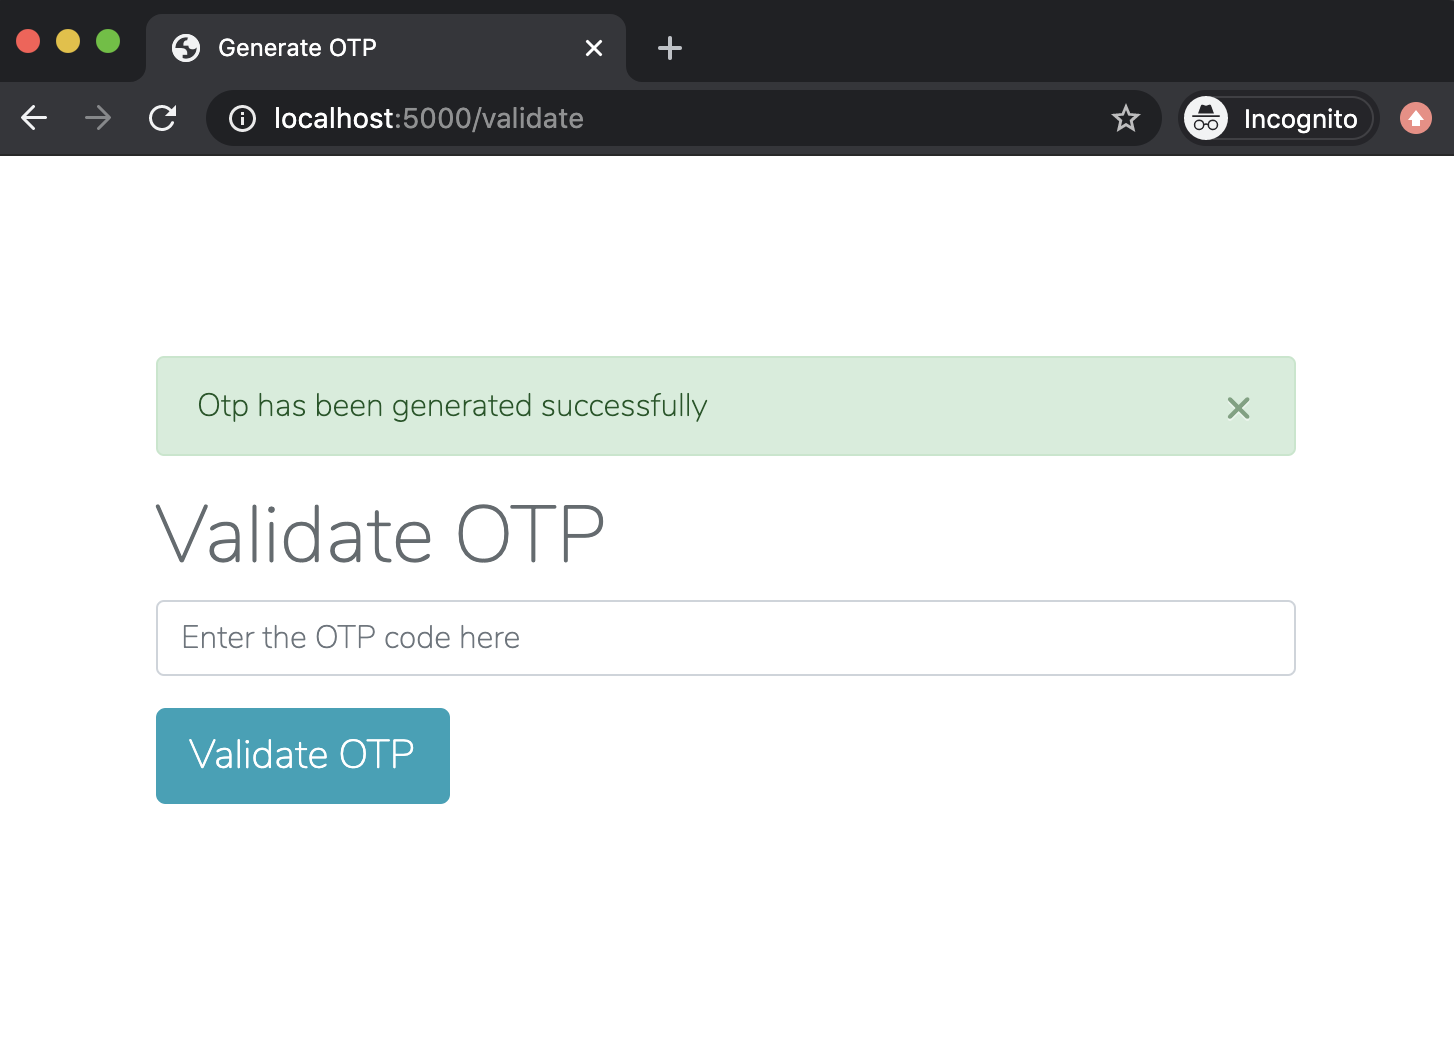
This HTML file also extends the base.html layout and adds a form that allows the user input the OTP code that was received so that it can be validated. The action attribute of the form is also set to an empty string.
Enter http://localhost:5000/validate in your browser’s address bar to see this template.

Setting up Twilio
After you sign up for an account on Twilio, head over to your Twilio Console and set up a Twilio phone number that can make voice calls as well as send SMS messages. This is the number from which the OTPs are going to be sent. You can add a phone number to your account in the Buy a Number page if you don’t already have one.
If you are using a trial Twilio account you will need to verify your own phone number with Twilio before it can receive calls or SMS messages from the Twilio number. You can do that here.
On your Twilio Console, copy your Account SID and Auth Token. We are going to need these values to authenticate with the Twilio service. At the root of the project’s directory, create a .env file and add paste your Twilio credentials, along with the Twilio phone number associated with your account:
For the phone number use the canonical E.164 format.
Generating the OTP
Since we’ve been able to create the views for generating and validating the OTP code, we can add the functionality of generating and validating the code. The responsibility of the actual generation and validation of the OTP code will be delegated to a third-party API called GenerateOTP.
Next, in the main.py, replace the existing import statements and Flask applicaiton instance creation at the top of the file with the following updated code:
Here, we’ve imported all the major dependencies our project will be needing and sets up our project:
- The
load_dotenv()function loads our environment variables from the.envfile. - The
app.secret_keysetting is used to sign the user session in Flask, so that information stored within it is secure. - The
twilio_clientobject will be used for interacting with the Twilio API. generateotp_urlis the base URL for the GenerateOTP API.
Next, edit the generate() function we created earlier with the following code:
Add the following auxiliary functions also in the main.py file.
In the generate() function, we now carry out the necessary checks to ensure the phone number and the channel fields are present in the request when the form is submitted. It’s always a best practice to do server side validation even if validation is still carried out by the client.
To generate the OTP code, the GenerateOTP API needs an initiator_id which serves as an identifier for the particular user the OTP belongs to. In our case, we can use the phone number as the initiator_id. We expect the phone number in the incoming request to be in the canonical E.164 format, so we have to remove the leading plus “+” sign as the GenerateOTP doesn’t accept it as a valid character in the initiator_id field. The formatted phone number is then stored in the Flask user session, so that it can be recalled later when the OTP is validated.
A call is then made to the make_otp_request() function. This function handles making a HTTP POST request to the GenerateOTP API to generate the OTP code.
Once the OTP code has been successfully generated, a call is made to the send_otp_code() function which either routes the notification through a voice call or SMS depending on the channel that was specified by the user in the submitted form.
In the send_otp_via_voice_call() function, the OTP code is passed as a string to the split_code() function. The split_code() function takes the OTP code and adds spaces between each digit in the code so that Twilio pronounces each number instead of pronouncing the whole word. You can read more about this trick here.
Then a call is placed to the provided phone number. The argument is a predefined message format and set of instructions to speak the code in the Twilio Markup Language (TwiML), which at its core is an XML document with special tags defined by Twilio. The send_otp_via_sms() function sends the OTP code via SMS.
Barring there are no validation or other issues, a message is flashed to the user with a success category and then a redirect is made to the validate endpoint. If there are errors, a message is also flashed to the session but with a danger category and a redirect back to the generate endpoint to give the user a chance to try again.
Validating the OTP
Now that we’ve handled the logic for generating the OTP code, let’s handle the corresponding logic for validating the OTP code. In the main.py file, edit the validate() function we created earlier with the following code:
Add the following auxiliary function also in main.py:
Here, similarly to what we did with the generate() function, a validation check is carried out to ensure the otp_code is present in the form submitted with the request. The phone number of the user is retrieved from the user session and then a call is made to the GenerateOTP API to validate the OTP code that was received. Depending on the status of the validation, the appropriate response is sent back to the user.
Testing
From the terminal, run the following command to start the application
Navigate to the http://localhost:5000/generate URL to see the OTP request page.
Enter your phone number in the canonical E.164 format. For example, for a number in the United States use for format +1AAABBBCCCC, where +1 is the country code, AAA is the area code and BBB-CCCC is the local phone number. Specify the channel by which you would like to receive the OTP and click the “Request For OTP” button. Once you receive the OTP, you can go ahead and enter it in the validate page to see if it is valid or not.
Conclusion
In this tutorial we’ve learned how to build a simple Flask application for generating, validating as well as delivering OTP codes via voice call or SMS. The source code for this tutorial can be found here on Github.
If your needs are more complex, consider using the Twilio Verify service, which provides a robust user verification system that works over SMS, phone and email. Learn how to implement Twilio Verify in a Flask application.
Dotun Jolaoso
Website: https://dotunj.dev/
Github: https://github.com/Dotunj
Twitter: https://twitter.com/Dotunj_

Related Resources
Twilio Docs
From APIs to SDKs to sample apps
API reference documentation, SDKs, helper libraries, quickstarts, and tutorials for your language and platform.
Resource Center
The latest ebooks, industry reports, and webinars
Learn from customer engagement experts to improve your own communication.
Ahoy
Twilio's developer community hub
Best practices, code samples, and inspiration to build communications and digital engagement experiences.