Build an Auto-Translating Chat App with Twilio WhatsApp
Time to read:
October 16, 2023
Written by
Reviewed by
With numerous languages spoken worldwide, many individuals who speak English as a second language prefer to use their native tongue in their daily interactions. Having a chat application that can seamlessly translate messages from the sender’s native language to the recipient’s preferred language would prove invaluable, for both social media users and businesses catering to international customers.
This article aims to equip you with the knowledge of leveraging the Twilio Programmable Messaging API, WhatsApp, and the Google Cloud Translation API to build your own language translation chatbot. Using this application, users can have natural conversations without language barriers, while the app does the heavy lifting by translating messages on the other end of the conversation. By following the guidelines presented, you'll gain the ability to facilitate multilingual communication through your chat application.
Prerequisites
- Node.js version 14 and above.
- A Twilio account to send and receive WhatsApp messages. Go to the signup page to get started.
- A Google Cloud account to implement the translation feature.
Getting started with Express JS
Express, a powerful web framework for Node.js, will be used in this project for the creation and handling of web requests. It serves as an excellent tool for setting up the server and managing routing.
To get started with the project, create a folder called language-translating-chat-app, and initialize a package.json file with the command below:
Install express as a dependency by running the command below:
Open up the newly created project directory on your preferred text editor and create a file called app.js in your project folder and add the following lines of code:
The code above imports and then instantiates express into the application. A port number is then specified for the server to listen on.
Define a route for the app. A route is a way of telling express how to handle different web requests based on the path and method you provide. For this project, only one route is needed: a POST request to the root path (/). This is where Twilio will send WhatsApp messages from users.
Use the code below to define a route for a POST request.
In the code above, app.post() takes three arguments namely: Path, Middleware and Callback function.
The callback function takes two parameters: req (request) and res (response). You will use the req.body.Body property to access the body of the message sent by Twilio and use the res.send() method to send back a response to Twilio. For now, you will just log the request body to the console and send back an empty response.
Finally, start the server and listen for incoming requests on the port number defined earlier using the app.listen() method. Copy the code below to start the server.
Test your code by running node app.js in the terminal. If everything works fine, you should see the message “Server is running on port 3000” in your terminal.
Configuring the Twilio webhook
Webhooks are automated messages sent between apps when something happens. This project leverages the power of webhooks to direct Twilio where to send data whenever a significant event occurs, such as receiving a WhatsApp message. To enable this functionality, you need to connect your server’s URL with Twilio. This allows WhatsApp messages to be sent as POST requests. To do this, you will use a tool called ngrok.
ngrok is a service that creates a secure tunnel between a local server and the internet. It provides a temporary URL that can be used to access an application from anywhere. To use ngrok, install and download it. Once installed, start up your Node.js application, then run the ngrok service in the terminal with the command below.
This command will start ngrok and create a tunnel for the app running on port 3000. It will also display the temporary URL that can be used to access your app. It should look like the image below.
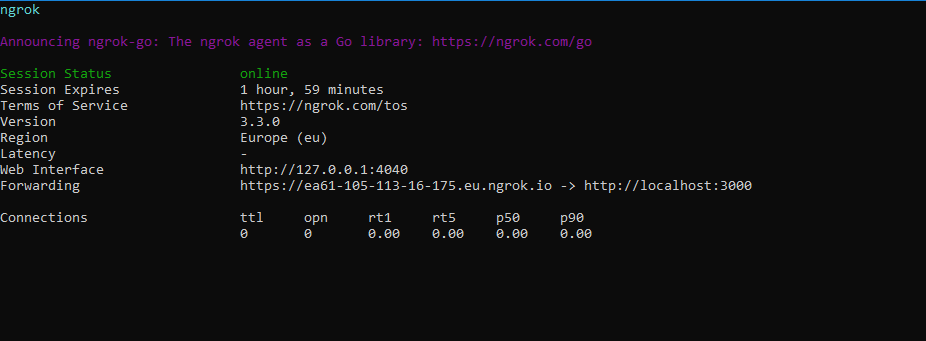
In your Twilio console, you will need the Forwarding URL that begins with https, for example, the URL https://ea61-105-113-16-175.eu.ngrok.io in the image above will be used for configuration purposes in the next section.
Setting up Twilio programmable messaging
Twilio Programmable Messaging is a service that allows you to integrate messaging into your platform using other APIs like SMS, Whatsapp, Facebook Messenger, and others. For this project, you will use the Whatsapp sandbox on Twilio to enable messaging.
To get started, go to your Twilio console and navigate to the Programmable Messaging section. Click on Whatsapp and select Sandbox from the left menu. This will take you to the sandbox configuration page.
On this page, scroll down to the When a message comes in section and paste the ngrok URL you copied from the terminal in the text box designated for POST requests. It should look like the image below.

Click on Save at the bottom of the page. This will save the webhook configuration and allow Twilio to send WhatsApp messages.
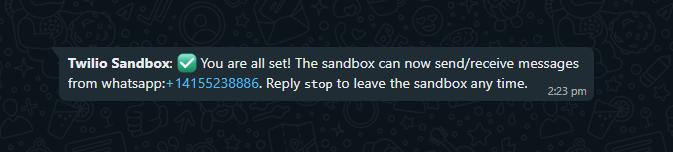
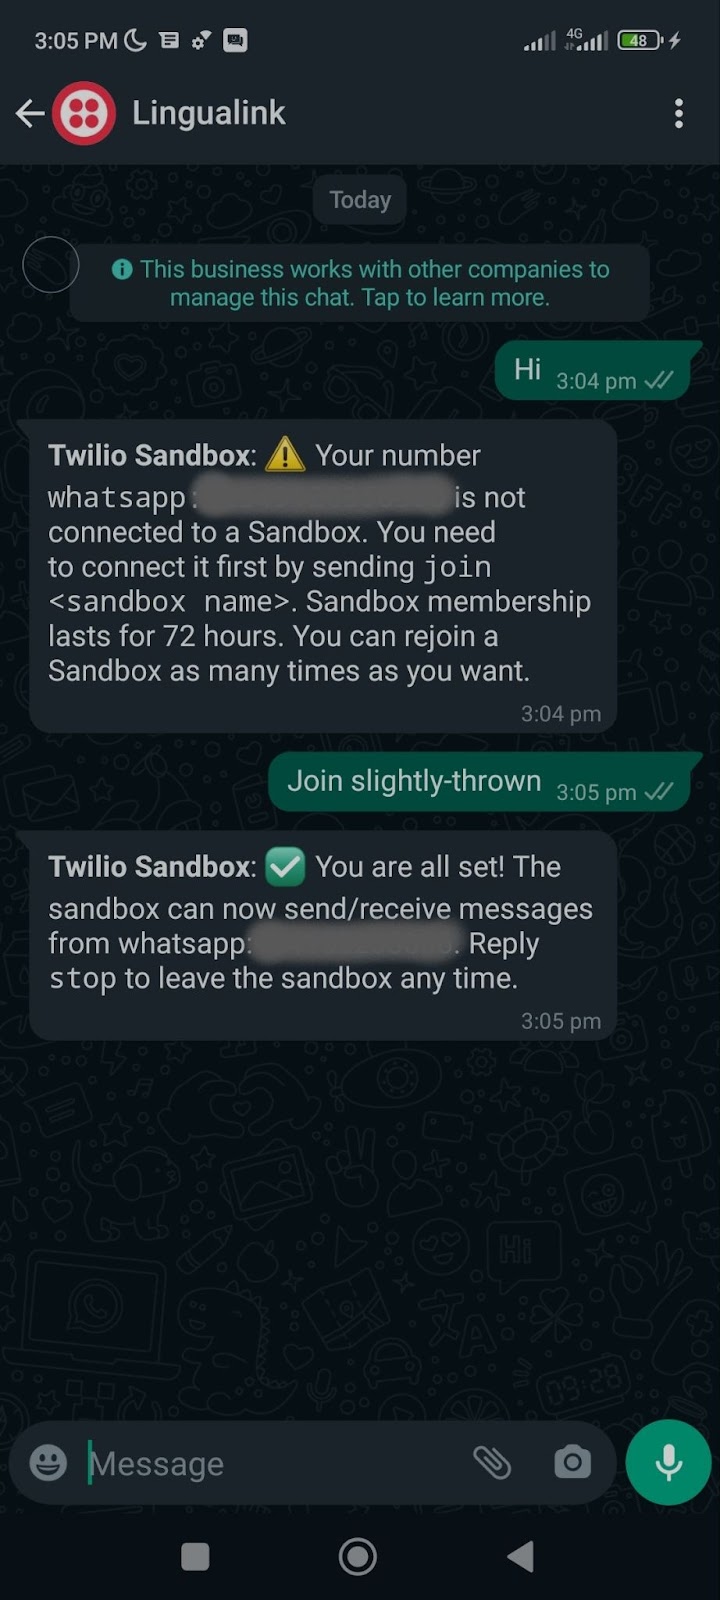
To test the app, join the Twilio sandbox by sending a WhatsApp message with the word "join" followed by a two-word code that is displayed on the sandbox configuration page. For example “join ******”.
If all goes well, you should receive a confirmation message from Twilio saying that you have joined the sandbox. It will look like the image below.
You can send any message you like to the sandbox number. Keep an eye on the terminal to see if your message gets logged.
Connect to Google Cloud
To connect to Google Cloud, you can create a new project or select an existing project on the Google Cloud console. Make sure to enable billing and Cloud Translation API for the project.
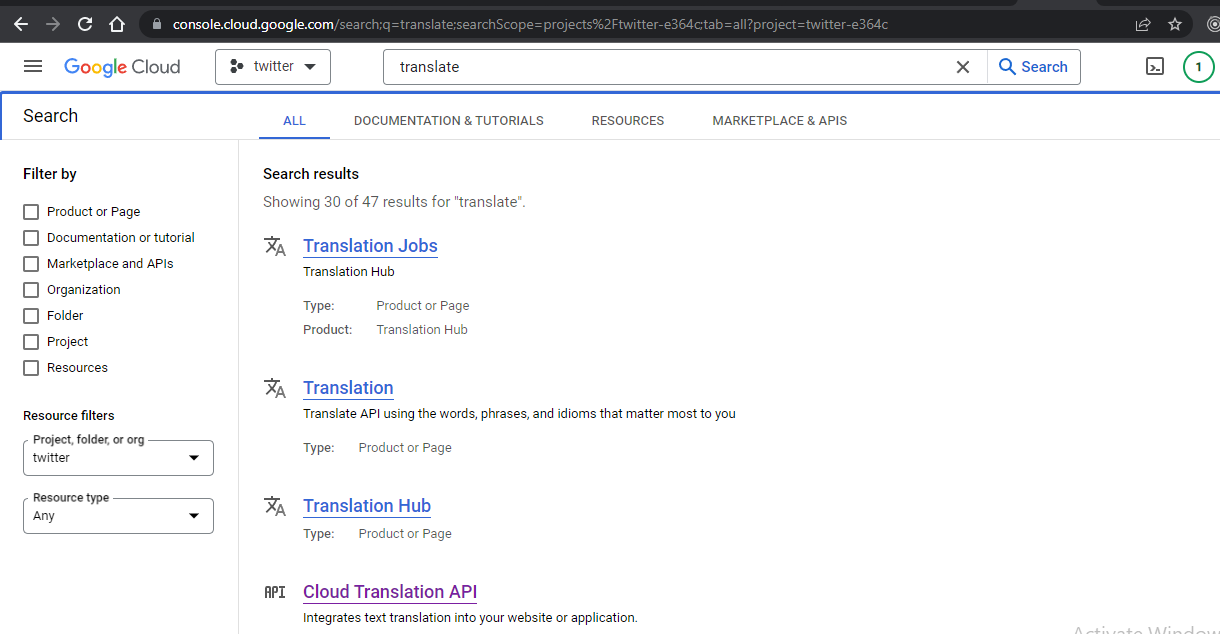
To create an API Key, go to the API and services section, and type “Translate” in the search box. Click on the Cloud Translate API link, as seen in the image below.
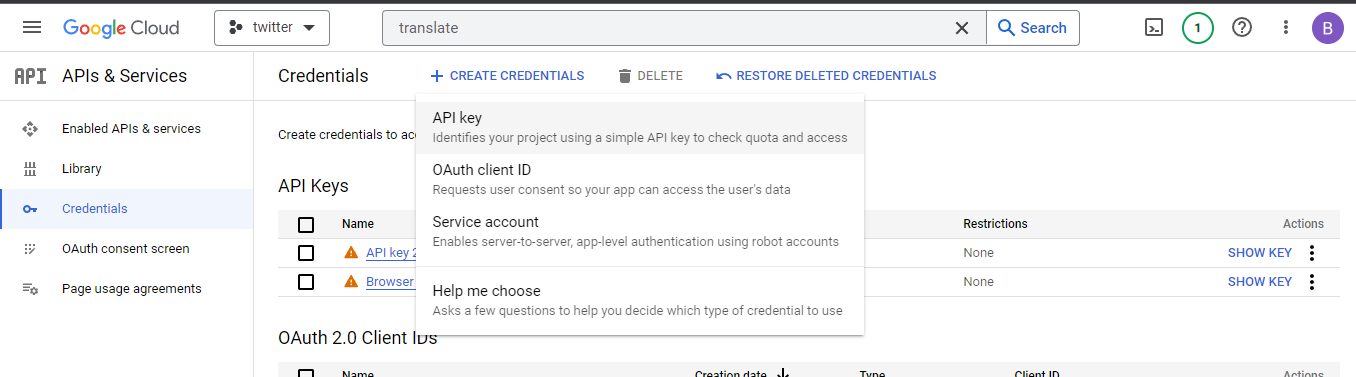
Click on the Enable button to enable the API for your project. Go back to the API and services section and select Credentials from the side menu, click on the Create button, and select the API key option.
An API key will be generated for you. Save the Google API key as an environment variable by creating a file named .env in the root directory of your application and add the code below:
Ensure you replace <YOUR_API_KEY> with your actual API key.
Implementing translation
To add the translation functionality to your code, you need to understand how the application works. Here are the steps that a user must follow to use the app:
- The user messages the Twilio sandbox number and receives a welcome message.
- When the user sends another message, they will receive an instruction on how to use the app. The instruction is as follows:
- The default language for all users is English. To change the current language, the user will enter
/lang <language>. - This command changes the language to the one specified by the
<language>parameter. The parameter must be in the ISO 639-1 format. For example, to switch to French, the user sends/lang fr. - To save a WhatsApp contact, the user will send a message in this format:
whatsapp:<receiver's number>. The user only needs to send their message in this format once, unless they want to change their receiver.
- The default language for all users is English. To change the current language, the user will enter
Now that you’re up to date with how the application works. Follow the steps below to get started with adding the translation API to the project.
Install the Google Cloud Translate package using the command below.
In your app.js file, add the code below to the top of the file (where you initialized the express package) to import the Translate package and create an instance with your project ID.
Then, create a file called helperfunctions.js in the root directory of your application and copy the code below inside the file.
In the code above, the setReceiver function takes in a user and receiver parameter and saves their data as a key-value pair inside pairs.json, a JSON file yet to be created. In the second function, the getReceiver retrieves the receiver’s value from the JSON file.
Next, create a pairs.json file in the root directory of your project and add an empty object to the file like so:
The JSON file will serve as local storage for the user's data. For this tutorial, you’ll be storing the user's preferred language in a JSON file for the sake of simplicity. For production applications, you should use a database to store persistent data.
Update the main route’s (/) callback function inside the app.js file with the following code:
In the code above, a check is performed to see if the first word in the WhatsApp messages starts with "whatsapp:+". If it does, it’s saved as the receiver’s number, which is the to variable.
If it does not pass the check, the baton is passed to the getReceiver function. This function checks if there is a designated receiver assigned to the sender's number. If no receiver is found, the getReceiver function will return a null value.
Connecting Twilio to the application
Go to your Twilio Console, and copy your accountSID and authToken values from the main page. Open the .env file you created earlier, and save these values as environmental variables like so:
Install the dotenv package using the command below. This package will enable you to load environment variables from your .env file.
Copy the code below at the top of the helperfunctions.js file to import the Twilio library and instantiate the TwilioClient package.
Create a JSON file called languages.json and add an empty object inside like so:
In the helperfunctons.js file, create a getter and setter function to update the languages.json file when a user updates their preferred language:
In the helperfunctons.js file, create a new function to handle sending messages using the code below.
The code above will send a request to the Twilio API and return a promise with a message object. The message object contains information about the message, such as its SID, status, date, etc. Update the module.exports object in the helperfunctions.js file with the following to import the new functions you just created.
Using the code below, import all your helper functions into the app.js file. Ensure you add this next to the other import/initialize statements at the top of the app.js file.
Write an IF block inside the route’s callback function to check if the user wants to switch languages. Add this code to the bottom of the route’s (/) callback function:
The code above extracts the language from the body of the message and checks if the language’s length is greater than 2. This check is done because the ISO_639-1 format is always two letters.
The setLanguage function is then called to save the language to the JSON file. At the end of the code, a confirmation message is sent to the user to confirm that their language has been successfully sent.
To alert the user that someone has added their number to the application, add an IF block to detect when a new number is being saved. Copy the code below to the bottom of the route’s (/) callback function:
Add another IF block that checks if the to variable is null. If it’s null, a message is sent to the user. This message prompts them to provide a valid number. Copy the code below to the bottom of the route’s (/) callback function:
Lastly, add an ELSE block to send the message to the receiver. Before it is finally sent to the receiver, it is passed into the translate method. Copy the code below to the bottom of the route’s (/) callback function:
In your app.js file, include a try and catch code block inside the callback function in the POST request to handle edge cases that might occur. The catch block will notify the user whenever something goes wrong in the application. Use the code below to update your application.
Congratulations! You have successfully integrated translation functionality into your WhatsApp application.
Testing the application
To test this application you need two Whatsapp numbers to send and receive messages. To get started, run your application on your terminal with the following command:
Then, navigate to Whatsapp on your device and click on the Twilio contact number you saved previously. If you have not joined the Twilio sandbox, enter the “join *****-****” command to connect to your sandbox. Check the image below for reference.
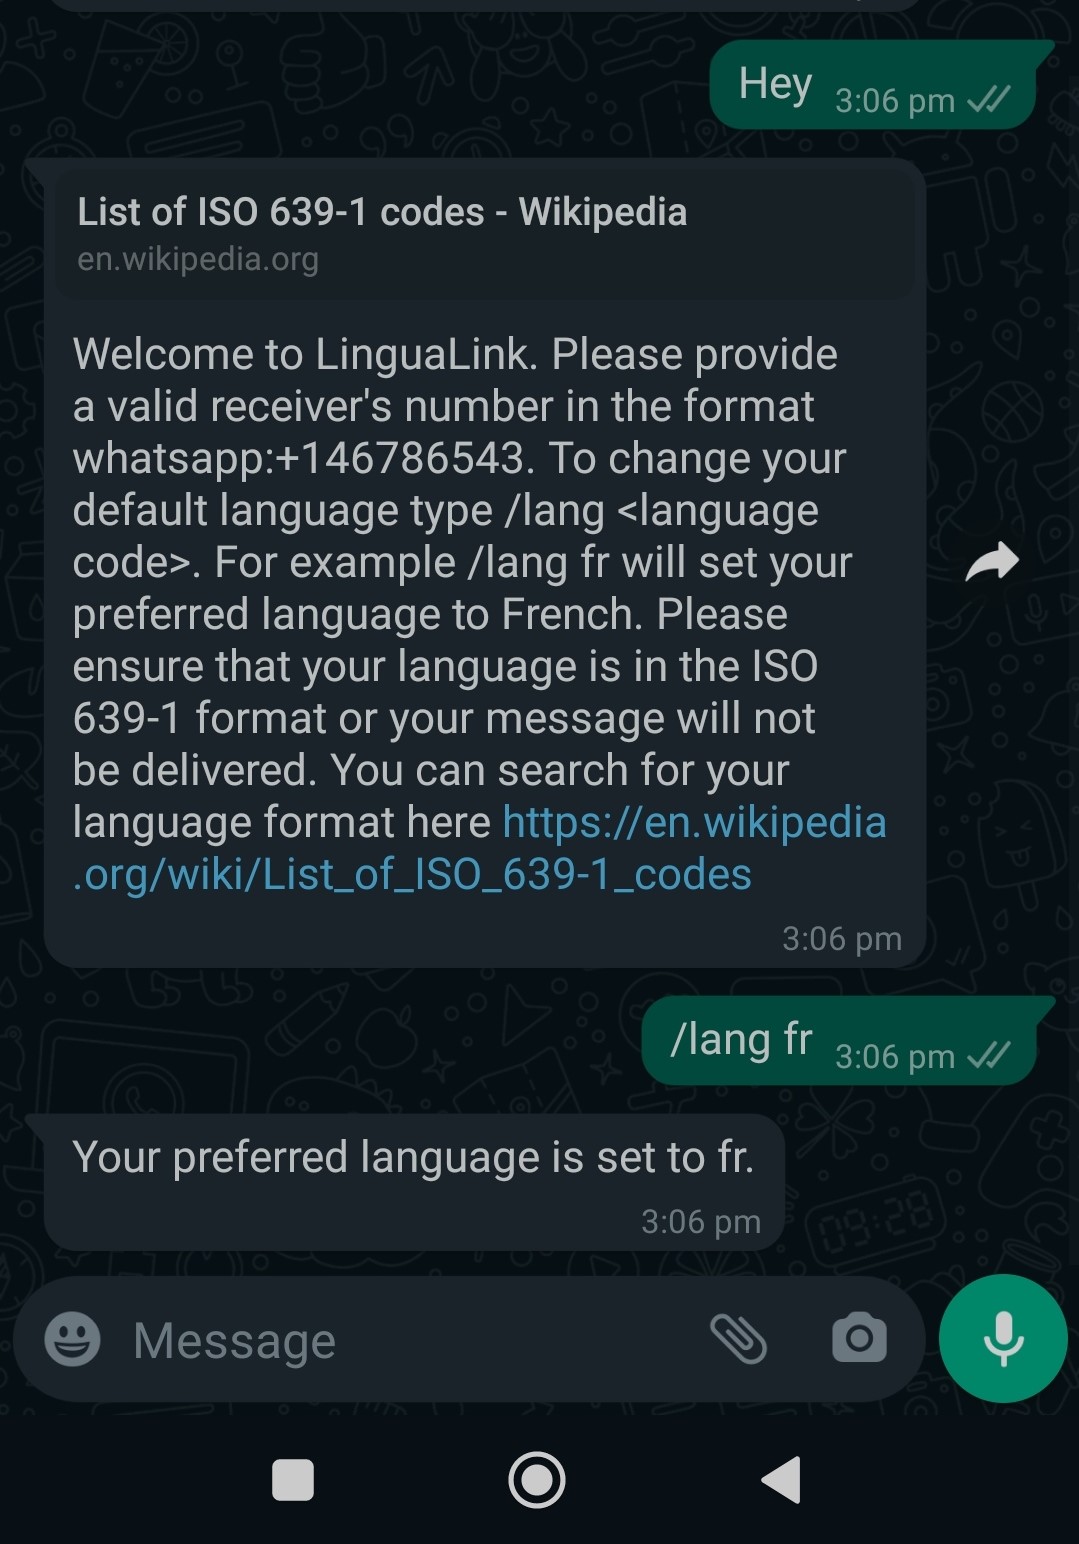
Next, type in any message and send it. You will receive an instruction message on how to proceed with the application.

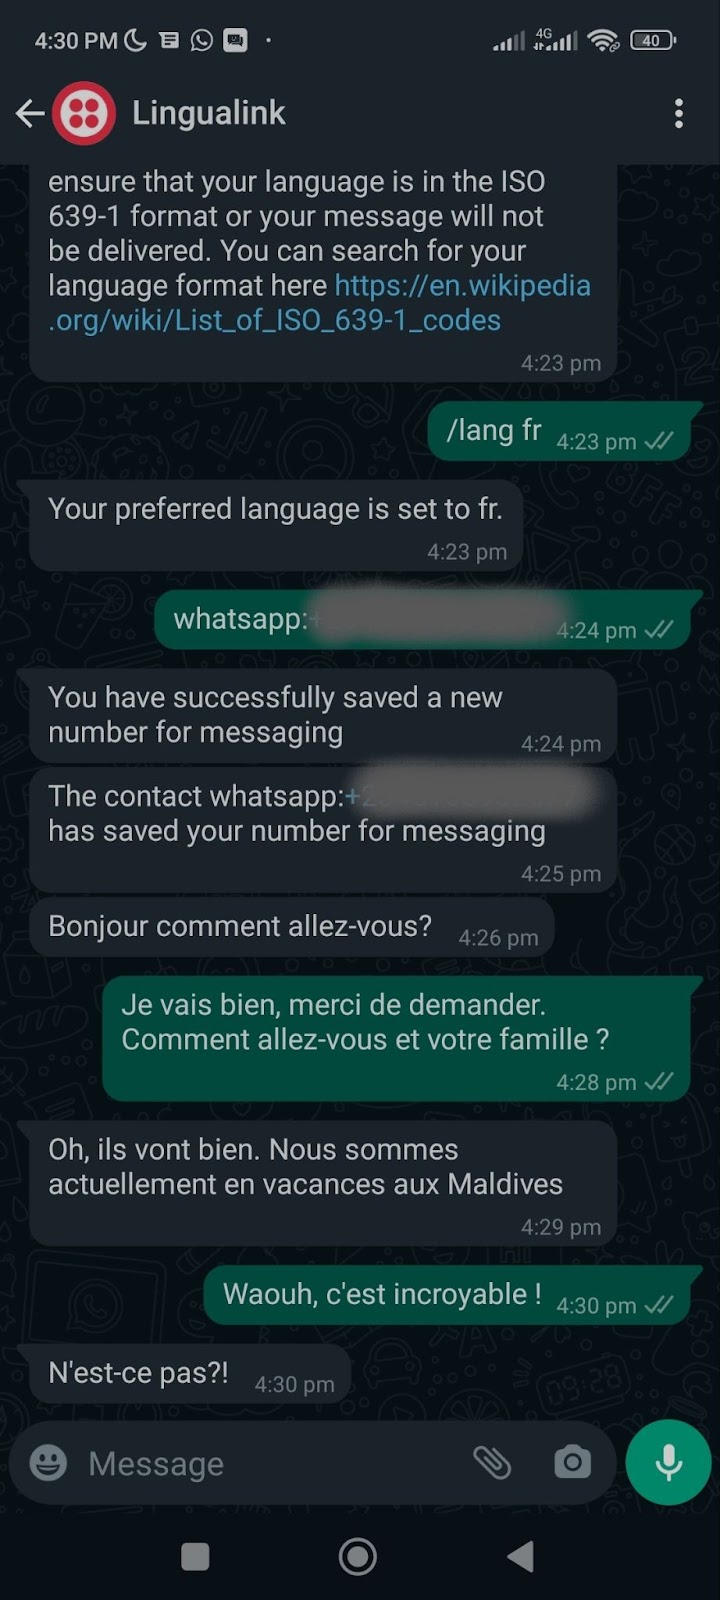
Set your language preference to any language of your choice. If you don’t select any language, the application will set your default language to English. In the image below, the language is set to French using the ISO-639-1 format.
Use the “whatsapp:number” command to set your receiver’s number (The second Whatsapp number you are using to test).
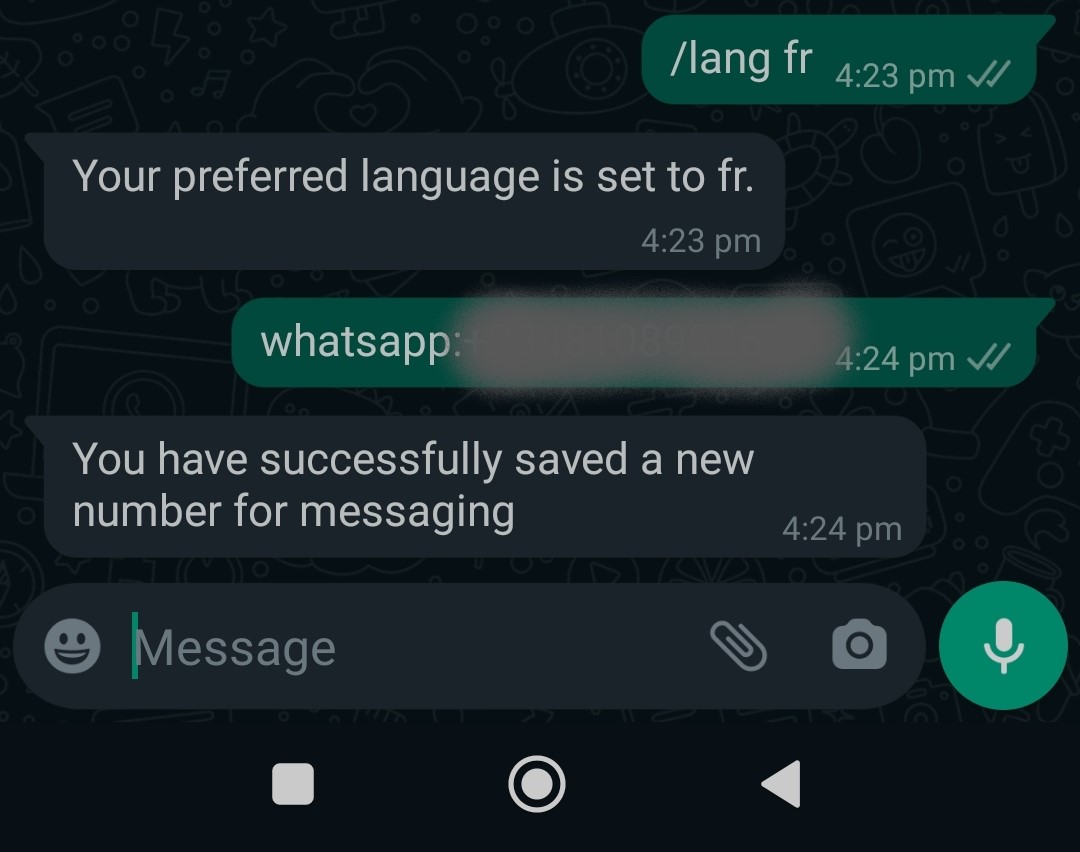
Repeat the steps above for your second number. The receiver will receive a message whenever their number is saved on the application.
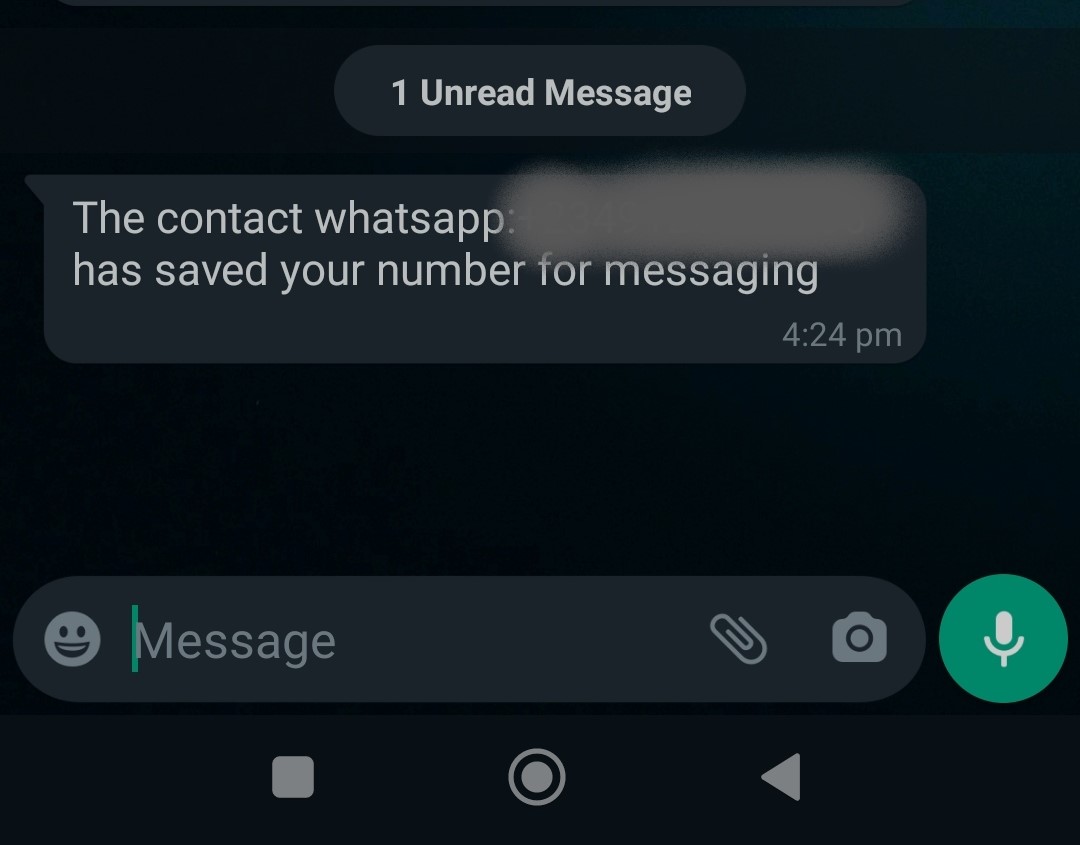
In this scenario, the sender's language preference is set to French, while the receiver's default language is English. So, when the sender sends a message in French, the receiver will receive the message in English, as it will be automatically translated from French to English. Check out the images below for illustration.

Conclusion
In this article, you have gained valuable insights into building a language-translating chat application using Twilio and WhatsApp. You leveraged the Twilio API and Google Cloud Translate API for sending and receiving translated WhatsApp messages. This simple application can be further improved by adding a dropdown menu to select a language and upgrading your Twilio account to add more Whatsapp numbers to the sandbox.
I trust you found this article enjoyable and obtained new and practical knowledge. Make sure to explore other Twilio APIs to further improve this application and put it to the test with your friends.
Happy coding!

Related Resources
Twilio Docs
From APIs to SDKs to sample apps
API reference documentation, SDKs, helper libraries, quickstarts, and tutorials for your language and platform.
Resource Center
The latest ebooks, industry reports, and webinars
Learn from customer engagement experts to improve your own communication.
Ahoy
Twilio's developer community hub
Best practices, code samples, and inspiration to build communications and digital engagement experiences.