How To: Build a New Year’s Resolution Bot with Twilio Studio
Time to read:
December 19, 2017
Written by
This post is part of Twilio’s archive and may contain outdated information. We’re always building something new, so be sure to check out our latest posts for the most up-to-date insights.

Welcome to our second post in the mini-series on getting started with SMS chatbots! Today you’ll learn some of the basics of building a bot while working in a friendly, no code required, visual builder called Twilio Studio.
Today’s tutorial shows how to build a New Year’s Resolution Bot that will help users commit to their New Year’s resolution and stay on track. To make a New Year’s resolution truly official, the Resolution Bot will get users to sign a contract. A contract requires:
Name of the individual committing to the resolution.

The resolution itself.

A completion date to achieve it by.

A signature to make it official.

🎗 Reminders to ensure Resolution Success!
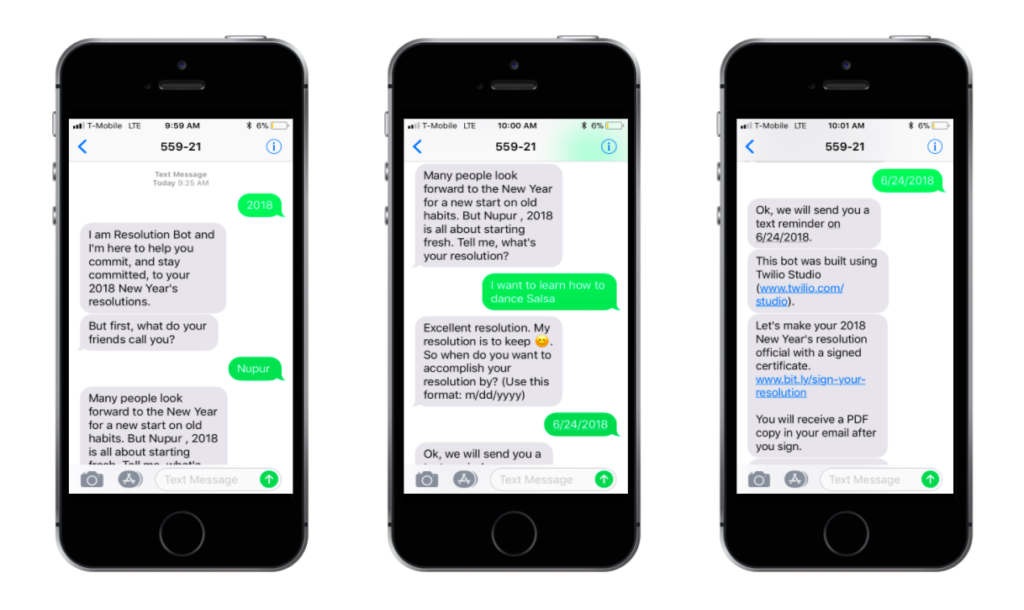
But first, let me take a selfie make sure to try out the working version of Resolution Bot if you haven’t already.
Getting Started
Let’s go over what you’ll need for this tutorial:
- A Twilio account
- A phone number registered with Twilio
- A HelloSign account — We’re going to need this to send the HelloSign contract to the user’s email.
- A Zapier account that we’ll be using to integrate Google Calendar.
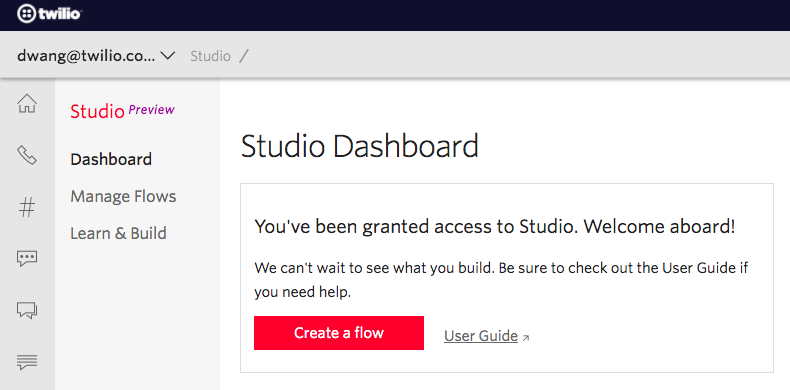
Before we begin, let’s take a moment to explore what the Studio Dashboard looks like when you open it for the first time:
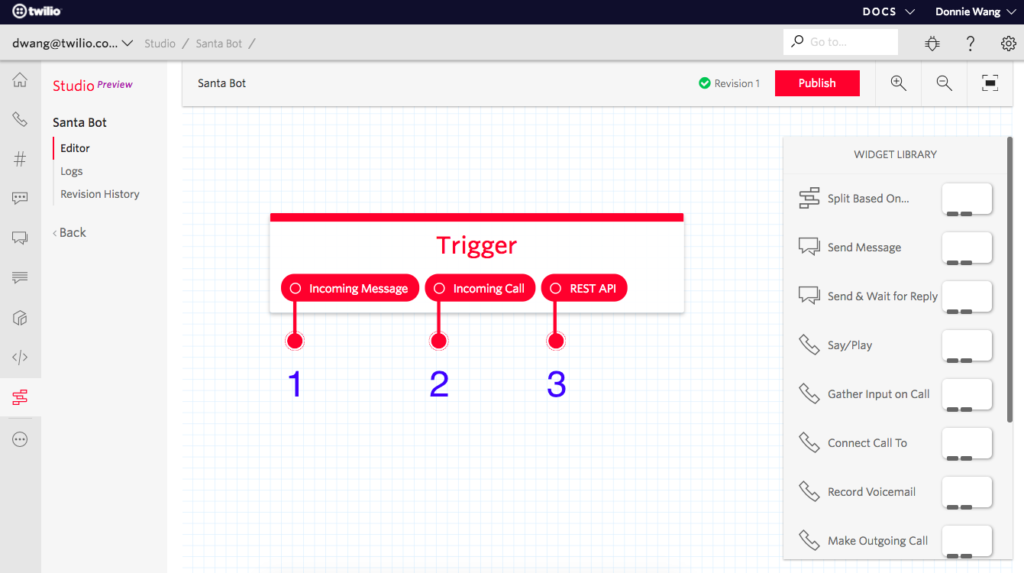
The Trigger box helps trigger a Flow’s start. There are 3 ways to start a Flow:
- Incoming message: The flow gets triggered when a user texts in.
- Incoming phone call: The flow gets triggered when a user makes a phone call.
- REST API (Inbound request): The flow can be triggered programmatically. We’ll save this for another tutorial.
The Widget Library is a list of actionable widgets to build your bot. These widgets are simple drag-and-drop building blocks that can be dragged onto the center of the canvas to build your bot.
Now that we’ve got that out of the way, let’s look at creating the Resolution Bot.
Building the Resolution Bot
Step 1: Send the user a text message requesting their name
The first thing we need for our Resolution Bot contract is the user’s name.
- Drag the Send & Wait for Reply widget (this widget allows you to collect a user’s input based on their response to your message) onto the canvas and give it a name. I strongly recommend renaming your widgets to be descriptive of the main action they’re performing—in this case, Name.
- In the Message Body field, type in a prompt asking the user to reply back with their name.
- Connect it to to the Incoming Message dot of the Trigger widget.
Congratulations! You’ve just set up the first step to build the Resolution Bot!
Both Steps 2 and 3 are similar to Step 1 — we’re going to continue asking questions and collecting answers.
Step 2: Ask the user for their New Year’s resolution
The next thing we need for the contract is the user’s New Year’s resolution.
This question needs to be triggered as soon as we get the response to the question in Step 1.
- Drag and drop another Send & Wait for Reply widget onto the canvas and name it. I’m going to name it Resolution.
- Connect it to the Reply dot of your first widget Name—this will trigger the Resolution widget upon receiving a response to the Name widget.
- In the Message Body field, type in a prompt asking the user to reply back with their New Year’s resolution.
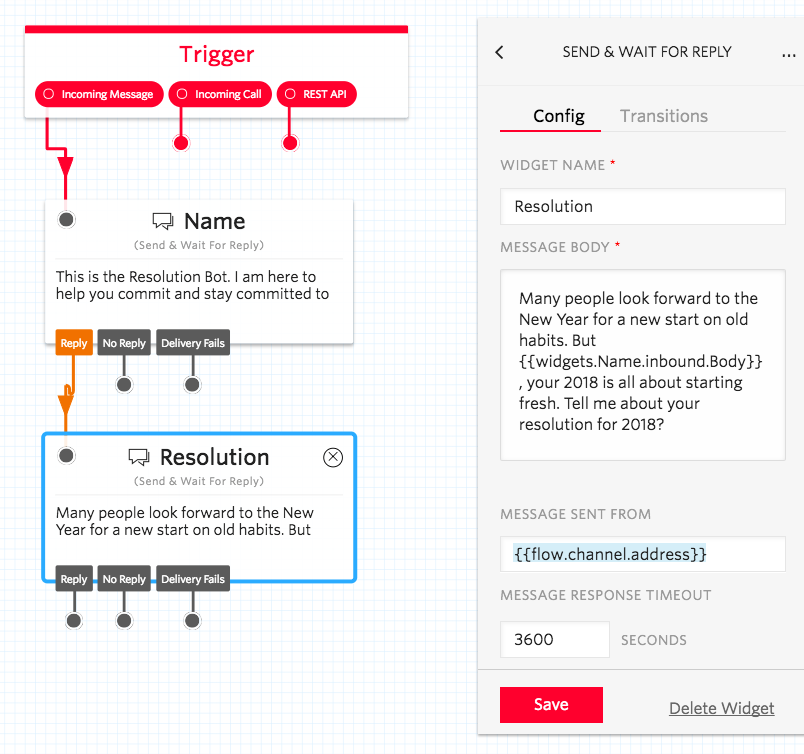
NOTE: In the image above, you’ll notice the use of two open curly braces to activate a dropdown list. Studio supports the Liquid template language, which is a fancy way of saying “a way to help you load dynamic content throughout your flow.” So by typing two open curly braces, we want to tell Studio that we’d like it to automatically populate this text based on something.
More specifically, we want to use the user’s name in a new message. We can do this by adding in a variable that represents the reply (message body) we got back (inbound) from the previous step (Name). Therefore the name of the variable we want is {{widgets.Name.inbound.Body}}. Begin typing it and you’ll see the autocomplete options pop up like magic!
Two down, three to go. Resolution Bot, here we come!
Step 3: Ask the user for the completion date
Now that you have collected the name and resolution, the next thing you need for your contract is the completion date to achieve the resolution by.
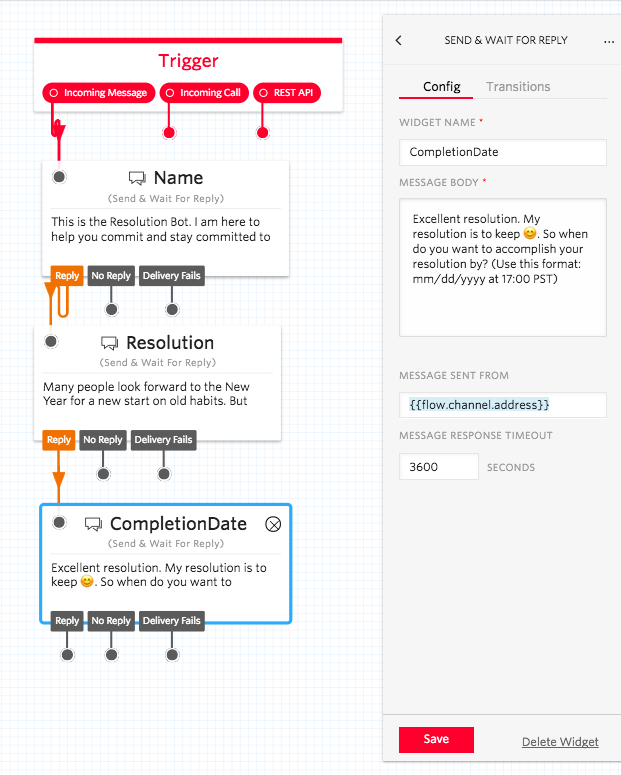
- Similar to Steps 1 and 2, drag and drop the Send & Wait for Reply on to the canvas and give it a name. I’m going to name it CompletionDate.
- Connect it to the Reply dot of the widget Resolution—to trigger it upon receipt of the response to the Resolution widget.
- In the Message Body field, type in a prompt asking the user to reply back with their Completion Date.
You’re halfway through. Just two more steps to go! ;)
Step 4: Create and send the contract
Let’s send a message to the user informing them that they’ll receive the contract to sign now and a reminder on the completion date.
To do that, you must:
- Drag and drop the Send Message widget (this widget allows you to send a message to a user) onto the canvas.
- Connect it to the Reply dot of the widget CompletionDate.
- In the Message Body field, type in a prompt informing the user that you’ll be sending a contract for them to sign as well as a reminder on the CompletionDate.
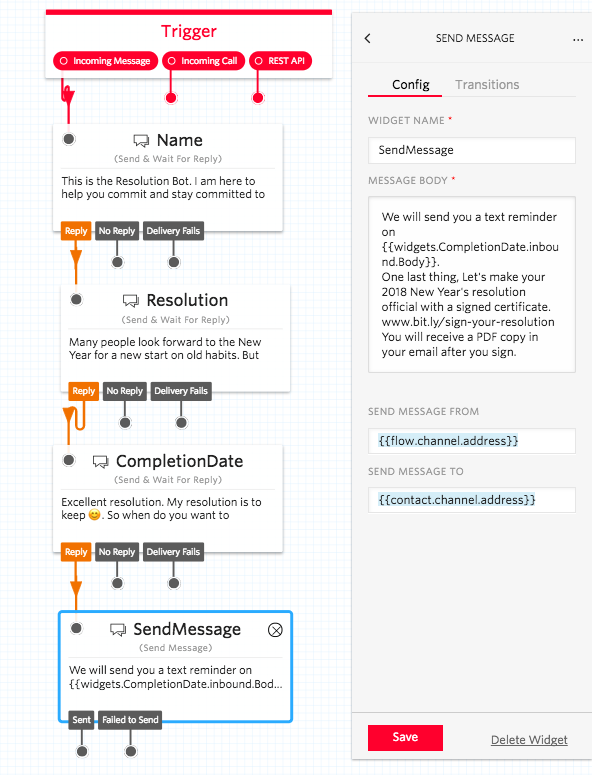
NOTE: The bitly link you see in the Message Body is the link to the HelloSign contract. As soon as the user clicks on the link, they’ll get redirected to HelloSign where they can submit their signature and receive the signed contract in their inbox. To learn how to build the HelloSign Contract, follow the instructions below:
- Go to HelloSign.com, and click on Templates on the Menu on the left.
- Choose Create a Link.
- Upload the certificate (make sure to have this ready) you’d like your users to sign. Add the Role (in this case, Resolutioner) that needs to sign.
- Drag and drop the signature and signing date fields from the top menu.
- Give your certificate a name (Certificate of Resolution).
- A pop up appears with a link. Copy paste the link on bitly to get the shortened version of it.
- Paste the bitly link in the Message Body of your SendMessage widget.
Congratulations! You’re on the last leg. Just one more step to go. :)
Step 5: Send the user reminders to achieve their resolution🎗
To remind the user about their resolution on their calendar, you’ll need to integrate Google Calendar with Studio. In order to make that connection we’re going to use two things:
- An HTTP Request widget, otherwise known as a webhook. If you don’t already know what this is, don’t worry too much about it. It’s basically the connection that makes it possible for our app to talk with another app so that they can pass each other information. This is what’s known as a POST request.
- Google Calendar via Zapier: The easiest way I’ve found to make a connection to Google Calendar is to set up a simple Zap. A Zap will manage the flow of information between our flow and Google Calendar. Our Zap will basically say “When I get a new Resolution, send the Resolutioner reminders every month as well as on their chosen Completion Date.”
Step 5a: Here’s how you do the HTTP Request part:
- Drag an HTTP Request widget onto the canvas.
- Connect it to the Sent dot of the SendMessage widget—this triggers it after the SentMessage is sent.
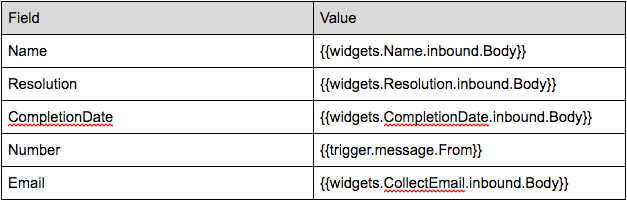
- Equip our HelloSign contract with the information we want to share—the user’s name, their resolution, and the completion date. To do this, we’ll give our widget the following HTTP Parameters shown in the table below. Refer to the gif to see how to enter them:
Step 5b: Google Calendar via Zapier (Do it yourself)
Our HTTP widget is almost set. It’s just missing one piece of information—the address, or url, of a Zap. For this part, you’ll need to use Zapier. For this final section, refer to the documentation shared by Zapier below:
Essentially, you’ll need to create two Zaps.
First Zap: To set up monthly reminders for the resolution as well as a reminder on the Completion Date on Google Calendar (See the gif below)

We’ve now made the connection between our Studio flow and our new Zap.
IMPORTANT: Let’s now test our flow by hooking it up to one of our registered phone numbers and sending it a message. This will pass our Zap some test data that it needs to know if it’s doing its job correctly:
- Click on the Trigger widget at the top of your flow.
- In the right inspector panel, click on the link, Use your flow with a phone number.
- In the popup that appears, click on “Let’s do this now”.
- A page with all your active phone numbers will open. Click on a phone number to connect to our Santa Bot flow.
- Under Messaging, when a message comes in, configure your number to use a “Studio Flow” in the first drop-down, and select “Resolution Bot” in the second dropdown.
- Save those changes.
- Try out your flow by texting your number! 🙌 Make sure to go through the step.
Second Zap: To send the user reminders via text
- Set up text reminders to the user. (See gif below)
What Next?
If you had fun building the Resolution Bot, you’re going to love building the Santa Bot. Try it now!
Send any feedback, or tell us what you’re building, by joining the Studio community Slack channel or by emailing studio-feedback@twilio.com.
We can’t wait to see what you build with Twilio Studio!

Related Resources
Twilio Docs
From APIs to SDKs to sample apps
API reference documentation, SDKs, helper libraries, quickstarts, and tutorials for your language and platform.
Resource Center
The latest ebooks, industry reports, and webinars
Learn from customer engagement experts to improve your own communication.
Ahoy
Twilio's developer community hub
Best practices, code samples, and inspiration to build communications and digital engagement experiences.