Building Reusable iOS Components in Swift
Time to read:
June 29, 2018
Written by

Keeping it DRY (Don’t Repeat Yourself) is every software developer’s priority in seeing a product through to completion. It not only helps make debugging easier, but also provisions easy testing and writing less code whilst achieving more. More than once, I’ve found myself building reusable components to reduce the repetitiveness in my code. For instance, building an iOS application will involve building multiple table view controllers. This means one will end up writing the same pieces of code in a couple of places that feed the table view controllers with data. Why not just build a wrapper and reuse it throughout the app as a plugin?
Hopefully by the end of this article I’ll convince you to start building reusable components in Swift for iOS application development. To demonstrate reusable components, we’ll build a dummy app that simulates a company providing employees with meals and then soliciting a feedback form from the employees.
Prerequisites
For the tutorial today, you will need:
- A Mac running the latest point release of macOS Sierra or later.
- The latest version of Xcode 9.0 and above.
NB: At the time of writing this tutorial, the latest Xcode version was Xcode 9.0 using Swift 4.0.
Flow of the Application
The general flow of the app will be:
- Present a user with the meal items for the day (lunchtime!).
- When a user taps a meal item, take them to the ratings view.
- On the ratings page, the user can rate all the meals.
- The user can submit a rating.
If we were to build an administrative portal, more functional requirements would definitely be needed. For now though, focus on the consumers of the application and come up with reusable components that can achieve more with less code.
Getting Started with Reusable Components
First, we’ll set up the model. Open Xcode and start a new project. Then create a new Swift file, name it Meal and paste in the code below:
Value types are safer to use than reference types (classes), so we make a struct.
Our meal struct houses the name, rating and optionally the image of the meal.
We’ll create our meal list view by employing a table view and its binding table view controller.
Find the main storyboard. Delete the default view controller scene. From the object library, pick a table view controller and drag it into the canvas/storyboard.

Highlight the table view controller scene and make it the initial view controller from the attributes inspector.
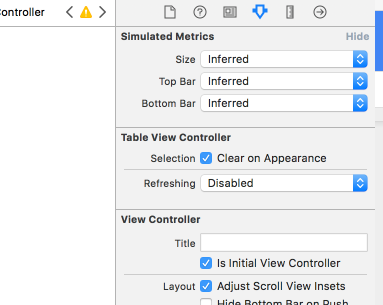
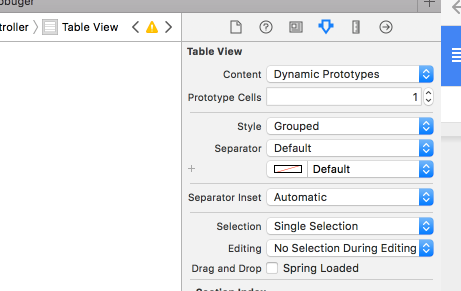
We can group the table view to make it more appealing:
Let’s create a controller for our table view.
Create a Cocoa Touch file and subclass it to a UITableViewController, naming it MealsTableViewController. Now, clear all enclosing functions in the file except for the viewDidLoad() function. The file should look like:
A Reusable List View Through Composing Types
Since we are using a reusable dynamic cell, we ought to provide it with the number of rows it’s going to render and the contents of each cell. The first technique we’re going to employ is composing of types.
When building applications, we end up using multiple dynamic table views and consequently have to repeat code for our table view data source. We can make a generic class that provisions a datasource for all the table views we are building. We would only have to provide it with data and use it as a plugin.
Create a new swift file and name it ListViewDatasource. Type – or paste – the following lines of code:
Above, we have bundled the logic of manufacturing the number of rows and the cells at each indexPath in the ListViewDataSource.
The beauty of this approach is we can reuse this functionality whenever we want to render a list of items. If you are displaying more than just text in your cells it can be a little complex, but it all whittles down to the same logic.
Note that NSObject is the root class of most Objective-C class hierarchies, from which subclasses inherit a basic interface to the runtime system.
In our MealsTableViewController update the lines of code to match:
We have a meals container that will hold the meals. We have also declared our data source as the ListViewDatasourceand made an instance of the same.
From the viewDidLoad function we also communicate to our table view. It now depends on the ListViewDatasource as its data source for the content that needs to be displayed.
Our setUpMeals function supplies the meals.
Finally, we render the meals. Remember in our ListViewDatasource we declared a list of strings which will supply the number of rows and the content of each cell. We get that list from our meal items by mapping the meal objects to a list of meal names. Once we have the meal names, we then channel them to our generic datasource through the list property. After that, we just reload the table view to reflect the content. At this point, we should be able to build the project without any problems.
This sums up our first approach to making reusable components, composing types.
Reusable Rating Component as a Nib File
Next up, we are are going to build the rating component. We’ll bundle it as a nib file and reuse it when rating the various meals in the ratings view. When a user clicks on a meal item on the meal items table view, they will be taken to the meals ratings view. From there, they’ll be able to rate the meals.
With this design, all ratings can take place in the ratings view at the same time:
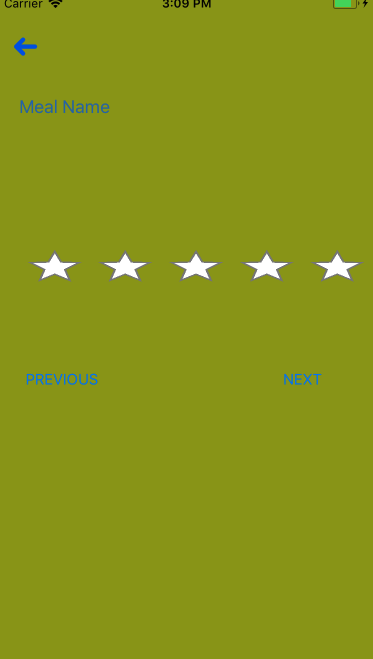
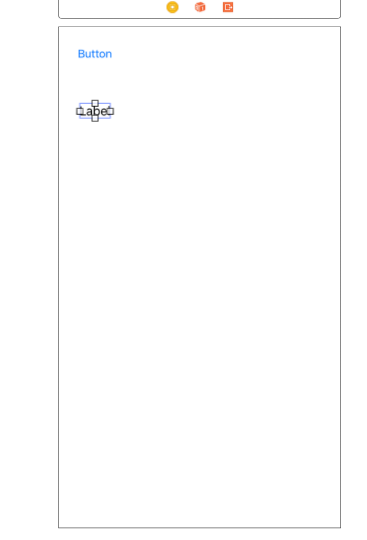
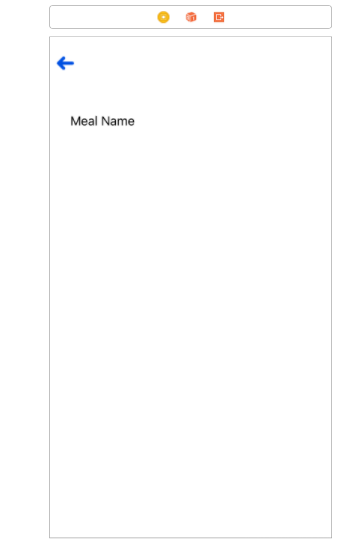
Drag a view controller from the object library onto the main storyboard. Drag a button and a label and place it as below:
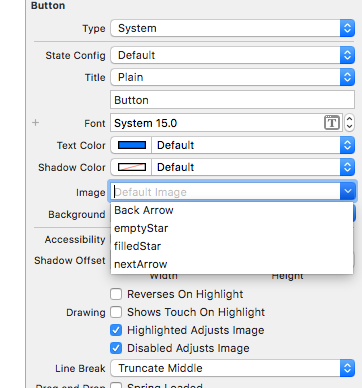
In this case, our button will let us return to the main meal items view. Find a suitable back arrow image and add it to the application assets. We can now configure our button with the image:
For now, use Meal Name as the placeholder text in the label and later populate it with the meal item name. These operations will leave you with this:
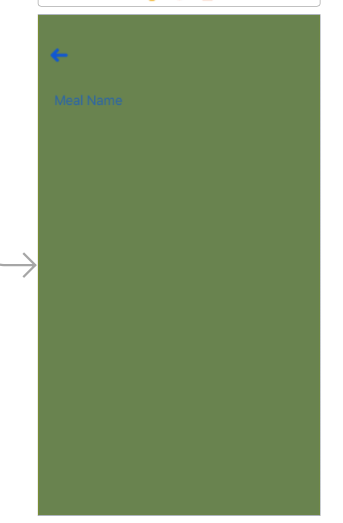
In the above scene we can change the background color. For example, here’s a nice color:
Next, we will build our ratings component with the next and previous button actions. Create a new nib file (File > New > View) and name it RatingsView. The layout of the nib view will match the following:
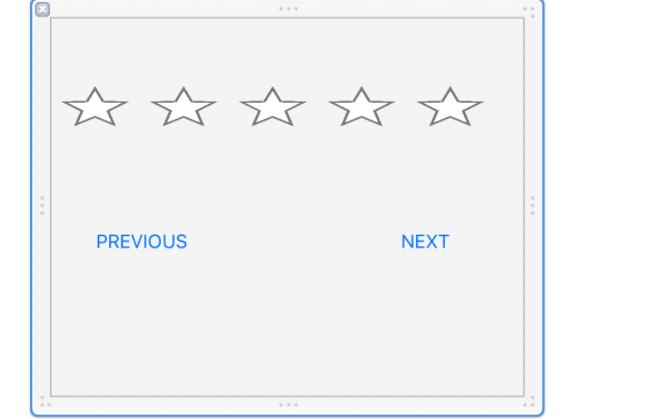
The stars are five buttons stacked in a horizontal stack view, configured with an image instead of plain text. Additionally, add a previous and next button to the screen.
Reusable Rating View
Create a Swift class named RatingView subclassing the UIView. Besides the view outlets, update your file to look like this:
In the above code snippet, our rating property holds a number that will represent a submitted rating. We have used a key-value observer for listening for a new rating so we can update the state.
The updateState() method consumes the rating value to toggle the states of the rating buttons. The setUpButtons() is our binder for the various rating event states. Finally, the button tapped function will update the rating property for a given meal.
Now that we have our rating component as a nib file, we need to load it in the ratings view controller so we can reuse it when rating the meals.
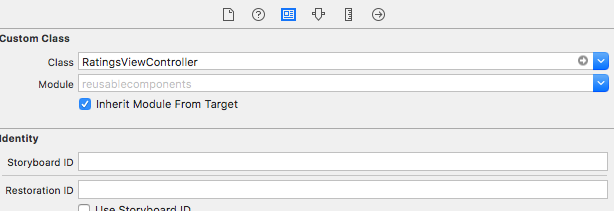
Create a new Cocoa Touch file subclassing it to a UIViewController, and name it RatingsViewController. This is the controlling class for our ratings view.
You can bind the ratings view with this class:
Create an outlet for the label we had on the ratings view and name it mealName.
Our end goal is to have the user switch between meals and rating. To do this, we will load three copies of our nib file and use them to switch between meals. We’ll animate them accordingly depending on the number of meals on the MealsTableViewController.
To this end, add the following lines of code:
The currentratingView, nextratingView, and previousratingView properties will be the containers that hold the ratings view for the various meals as we switch, depending on the number of meals.
One thing we forgot about is the communication between the rating component and the ratings view. Modify the RatingView.swift file to look like the following:
Note that we introduced a delegate for communicating with the parent view; RatingViewController.
Next up, we are going to load our nib files and assign them to our currentratingView, nextratingView and previousratingView. This activity can be housed within the viewDidLoad View Controller lifecycle method. We will also point the RatingViewController as the delegate to the rating view nib files. Our updated viewDidLoad will now resemble the code snippet below.
This operation will necessitate the need to put in place constraints for the views on the RatingViewController. Therefore, inside the RatingViewController we can build two helper functions that will assist with the positioning. We can add the code snippet below:
The two methods above, activateTopConstraint and activateLeftConstraint, will also be handy in helping us animate the rating views during the rating process.
We can employ these methods in our viewDidLoad function to position the rating cards:
Now this code provisions for us to create a bindView method that will consume the the mealItems list and update the mealName label outlet.
To employ the above method, we can add it at the end of the viewDidLoad function.
The last step is to update our delegate methods for the rating cards whenever a user taps on the next meal item in the meal items list during the rating process. We can also employ constraint animations for the same to achieve a slide show effect.
We loaded three copies of the rating nib files, then pointed them to the ratings view controller as the parent view.
We have the delegate methods, nextButtonTapped() and previousButtonTapped(), that will switch the rating views depending on the number of meal items. At this point, you should be able to build and run – and test – the app.
Click on one of the meals and it should segue you to the ratings view. Click on next after rating a meal and you will notice the nice slideshow effect.
Reusable Components
We have just built a reusable plugin as a nib file and reused it as needed in a food rating application. You’ve gained insight into how to bundle a reusable component using a nib file, and then you reused the component.
These aren’t the only ways to build reusable components though. There are a few more techniques, including Swift Generics and delegate patterns, that come in handy when writing reusable components. We’ll save those ones for next time.
The source code for this project can be found in this repository on Github.
That’s all for now. I’m Kayeli, an iOS Engineer currently working at Homie. Reach me on Instagram @nedozkayeli.


Related Resources
Twilio Docs
From APIs to SDKs to sample apps
API reference documentation, SDKs, helper libraries, quickstarts, and tutorials for your language and platform.
Resource Center
The latest ebooks, industry reports, and webinars
Learn from customer engagement experts to improve your own communication.
Ahoy
Twilio's developer community hub
Best practices, code samples, and inspiration to build communications and digital engagement experiences.