Increase User Engagement by Sending Out Periodic Emails with Laravel, PHP, and SendGrid
Time to read:
February 21, 2020
Written by
This post is part of Twilio’s archive and may contain outdated information. We’re always building something new, so be sure to check out our latest posts for the most up-to-date insights.

In this tutorial, we will look at how we can send out periodic emails in a Laravel application using Twilio SendGrid.
Prerequisites
In order to follow this tutorial you will need:
- Basic knowledge of Laravel
- Laravel installed on your local machine
- Composer globally installed
- MySQL set up on your local machine
- SendGrid Account
Project setup
Start off by creating a new Laravel project for your application. This can be done either by using the Laravel installer or Composer. For this tutorial, the Laravel installer will be used. If you don't have the Laravel installer already installed, head over to the Laravel documentation to see how to. If installed, open up a terminal and run the following command to create a new Laravel project:
Next, you need to install the Sendgrid PHP Library which will be used for communicating with the SendGrid service. Open up a terminal in your project directory and run the following command to get it installed via Composer:
After the successful installation of the SendGrid library, head to your SendGrid dashboard to retrieve your API key. It will be used to authenticate requests made with the library.
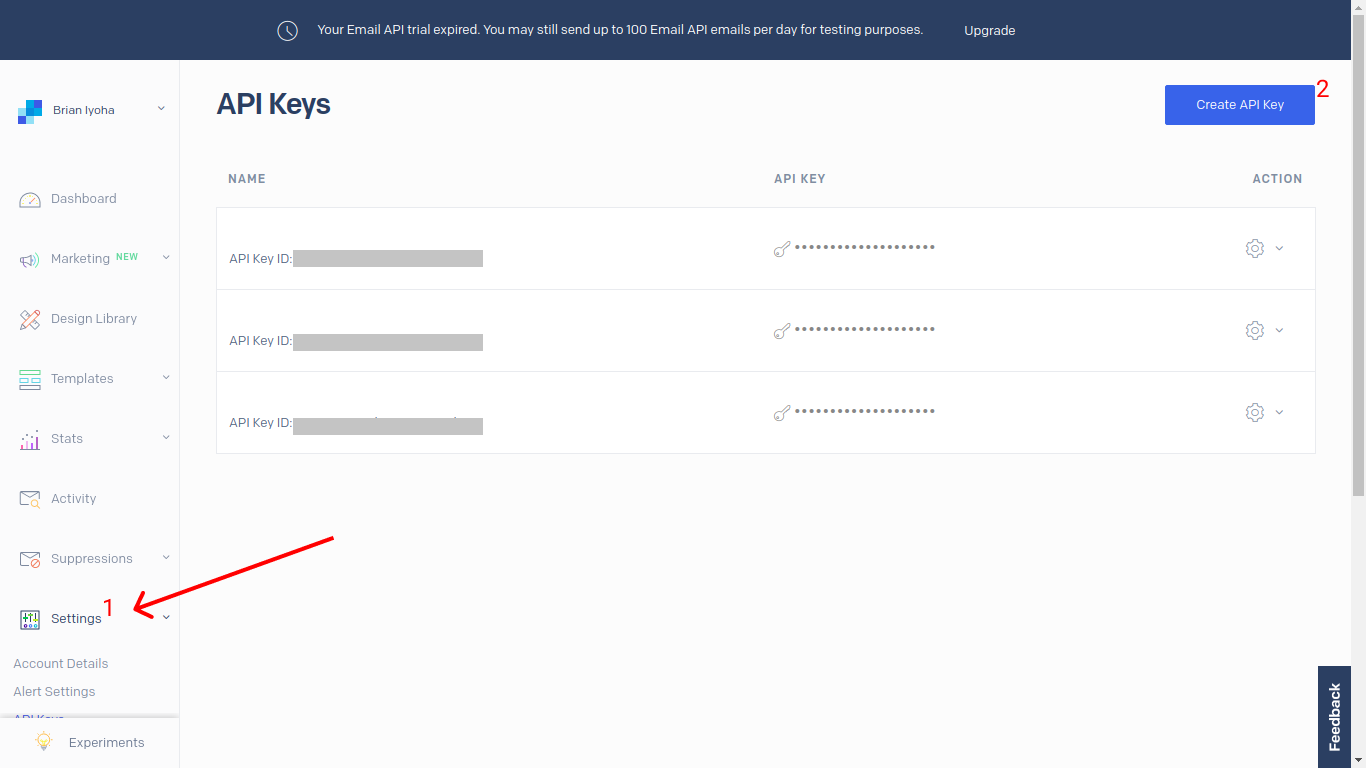
NOTE: If you don't have an API key yet, you can easily create one from the settings page.
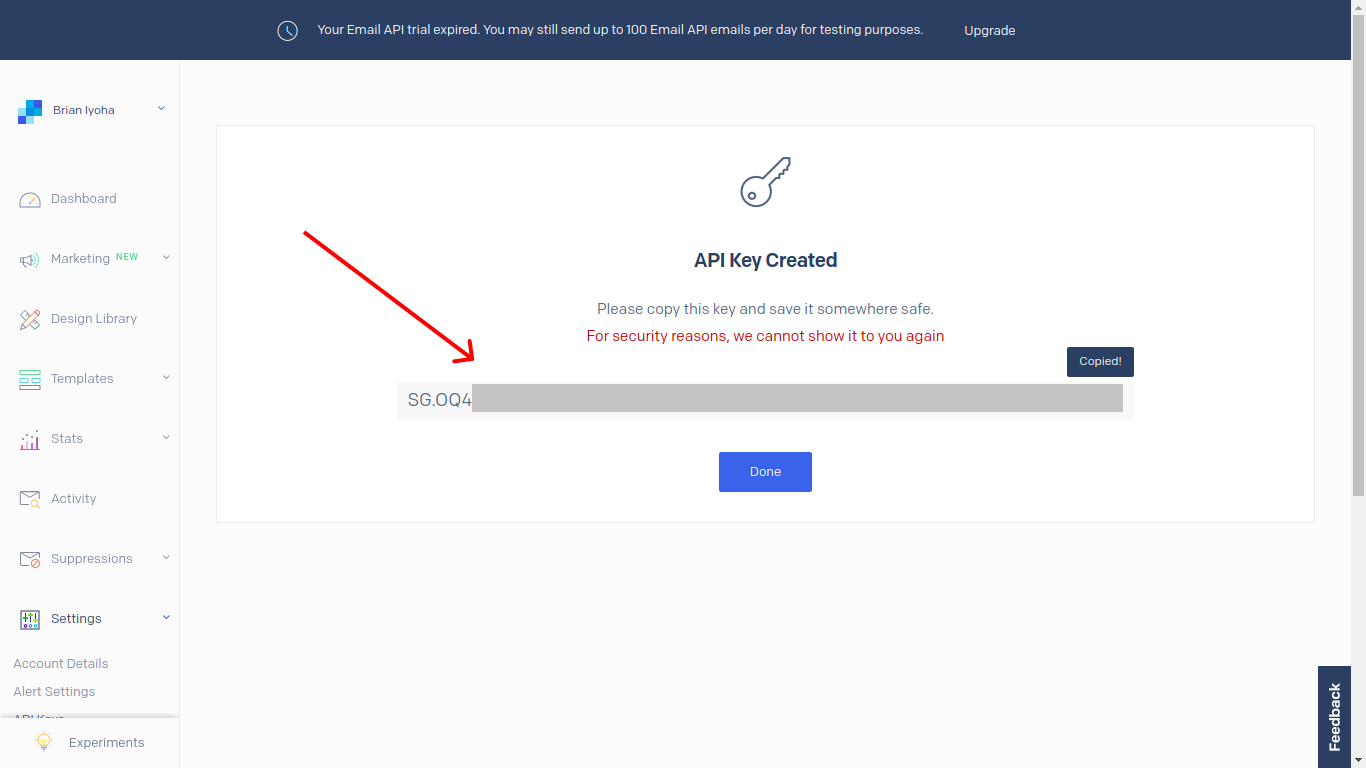
NOTE: Remember to keep a copy of your API key in a safe place as you won't be able to retrieve it later.
Next, open up your .env file to add your API key to your environmental variables. Add the following at the end of the file:
Setting up Database
The next step is to set up your database for the application. This tutorial will make use of the MySQL database. If you don't already have it installed on your local machine, head over to their official download page to download and install.
To create a database for your application, you will need to login to the MySQL client. To do this, simply run the following command in your terminal:
NOTE: Add the -p flag if you have a password for your MySQL instance.
Run the following command to create a database:
Next, update your .env file with your database credentials. Open up .env and make the following adjustments:
Mocking Users Data
Since you will be sending out emails to your application users, you will need to already have their data stored in your database. For this tutorial, we will make use of the default scaffolded Users migration located in the database/migrations folder.
Although this migration already exists, it isn't yet committed to your database. To commit the users migration, run the following command:
This will create a users table in your database alongside the listed fields in the up method of the migration file.
Seeding the Users Table
As mentioned earlier, you will need some sample user(s) data to actually send emails to. You can easily seed your database with fake data by using seeders. To generate a Seeder class, open up a terminal in your project directory and run the following command:
This will generate a UsersTableSeeder seeder class in database/seeds/. Open the newly created file (database/seeds/UsersTableSeeder.php) and make the following changes:
NOTE: You have to swap out the email faker for real email addresses that you want to test your application with.
Run the following command to seed your database with the data in the seeder class:
Scheduling Mails
Now that you have some sample user data in your database, it's time to schedule emails to send at appointed times. In Laravel, there are several ways of scheduling a task and in this tutorial, we will make use of an artisan command.
First, create a new artisan command by running the following command in your terminal:
This will generate a new Console command class in app/Console/Commands/SendMails.php. This file will house the needed logic for sending out emails via SendGrid. Now open the just newly created SendMails file and make the following changes:
NOTE: Be sure to add the MAIL_FROM_ADDRESS env variable with the approved sender email from your SendGrid account.
At creation, there are two properties and a method already present in the class; $signature, $description, and the handle() method. The $signature property is used to identify the command from the artisan console. In this case, to run this command you will have to do something like:
The $description property, as the name indicates, is used to describe this command when the artisan list command is executed, while the handle() method is called whenever the sendmails:send command is executed.
The handle() method is used to send out emails to all registered users using the SendGrid SDK. First, the data needed for sending out emails is prepared using the helper classes in the SendGrid SDK. Next, a new Mail object is created using the SendGrid\Mail\Mail class which receives five (5) arguments, namely from, to, subject, plainTextContent, and htmlContent.
You can see null is passed into the to parameter because this mail is meant to be sent to multiple users while concealing who the other recipients are. To ensure this mail is sent to each user individually, you have to make use of a personalization object. A personalization object helps you create multiple options for each receiver of an email.
In this case, a personalization object is created for each user and then added to the Mail object using the addPersonalization method available in the Mail class. Finally, the $email (Mail object) is then passed into the send() method from the SendGrid SDK, which is used to send out the mails using the options set in the Mail object.
Scheduling The Command
At this point, you would have successfully created a custom artisan command to send out emails to your users. Next, let's actually schedule the mail. To do this, open up the app/Console/Kernel.php file and make the following changes:
The custom command (sendmails:send) has been added to the schedule() method and is set to fire daily using the daily() frequency option. Next, you need to register a cron job to run the scheduler every minute which will, in turn, run your scheduled tasks in the shedule() method. If you know how to add a cron job on your server then go ahead and add the following:
If not, then open up your terminal and run the following:
This will open your server's crontab file. Next add the following to the file:
Testing
At this point, you should have successfully created a custom artisan command and also scheduled it to run daily. Testing the application can be broken down into:
Testing the custom artisan command works - To do this simply open up a terminal in your project directory and run the following command:
Testing the scheduled command works - To allow you test this command, you will have to adjust your schedule frequency to run the command every minute using the everyMinute() option. So replace the daily() frequency option with everyMinute() :
Then proceed to run the following command in the terminal to run the scheduler:
You should get a mail after testing either of the steps.
NOTE: Remember to replace your schedule method with your desired frequency after testing the scheduled command.
Conclusion
Now that you have finished this tutorial, you have learned how to send out emails using Twilio SendGrid in a Laravel application, while also learning how to build and schedule a custom artisan command. If you would like to take a look at the complete source code for this tutorial, you can find it on Github.
I’d love to answer any question(s) you might have concerning this tutorial. You can reach me via
- Email: brian.iyoha@gmail.com
- Twitter: thecodearcher
- GitHub: thecodearcher

Related Resources
Twilio Docs
From APIs to SDKs to sample apps
API reference documentation, SDKs, helper libraries, quickstarts, and tutorials for your language and platform.
Resource Center
The latest ebooks, industry reports, and webinars
Learn from customer engagement experts to improve your own communication.
Ahoy
Twilio's developer community hub
Best practices, code samples, and inspiration to build communications and digital engagement experiences.