Building Facebook Messenger Bots with Python in less than 60 minutes
Time to read:
December 18, 2017
Written by
This post is part of Twilio’s archive and may contain outdated information. We’re always building something new, so be sure to check out our latest posts for the most up-to-date insights.

Chatbots are magical. Bots can be an amazing product that allow people to create new experiences, from reporting personal news to delivering women’s healthcare information. When I first learned about bots, I never imagined I would be able to make one on my own. However, I quickly dug into the Facebook Messenger documentation and began learning how with a bit of Python 3 and Flask, one could get a bot up and running in no time.
We’ll cover everything from the basics of how bots work to building our own basic Facebook Messenger bot. Specifically, we’ll be making a basic version of Black Girl Magic Bot, a Facebook Messenger bot that sends users images, playlists, and generally uplifting messages to remind them just how amazing they are. If you’re interested into digging the code for the bot, you can fork it and play with it via GitHub.
Development Environment Setup
To make this bot, you need to make sure you have a few things installed:
Once you have downloaded the above files, you need to install the following libraries:
Coding Our Bot
Using Flask, we can create an endpoint – a fancy way of referring to a website url. For example, in http://twilio.com/try-twilio the endpoint is “/try-twilio.” When a user sends us a message, Facebook will send that data to our endpoint, where we will send a response back to Facebook to show the user.
To begin, we’ll create a basic Flask app called app.py. If you have not used Flask web framework before, you should look at their introduction to understand how the framework works.
When the above code is run from the command line by typing python3 app.py you will get a message that states something similar to this:
If you navigate to the link given from running the app (in this example http://127.0.0.1:5000/) in a browser, you will see a page load that says “Hello World!” With just these few lines of code, we’ve created a web application that displays “Hello World” to any user who goes to the specified link. To build this bot, we will build off of this basic structure in order to handle a user’s request and return a response to them.
From Basic Flask app to Bot
To handle sending messages back to a user who communicates with our bot, we’ll be using the PyMessenger library to handle sending responses to users.
Since we now have the necessary Python libraries installed, it’s time to write our bot.
For the purposes of the bot we’ll make in this guide, we’ll stick to using a small Python list with a few responses.
To make the bot, we first need to handle two types of requests, GET and POST. In our case, we will use GET requests when Facebook checks the bot’s verify token. Expanding on our basic Flask app, we will go to our receive_message function in app.py and add the following lines of code:
In this section, you might be wondering: what exactly is “hub.verify_token”? This refers to a token we will make up and also provide to Facebook that they will use to verify the bot only responds to requests sent from Messenger. We will discuss later in this article how to set up this variable.
If the bot is not receiving a GET request, it is likely receiving a POST request where Facebook is sending your bot a message sent by a user. For this purpose, we will follow the if statement from above with an else that will take the data sent by Facebook and give us the message the user sent us:
With these initial steps written, we move on to handle verifying a message from Facebook as well as generating and sending a response back to the user. Facebook requires that your bot have a verify token that you also provide to them in order to ensure all requests your bot receives originated from them:
Once we know what we are sending back to the user, we need to write a method that actually sends this message to the user. The PyMessenger library makes this easier for us by handling the POST requests per the Messenger API.
Now that we have all these code fragments, we can put them all together to make our bot.
Make your Bot on Facebook
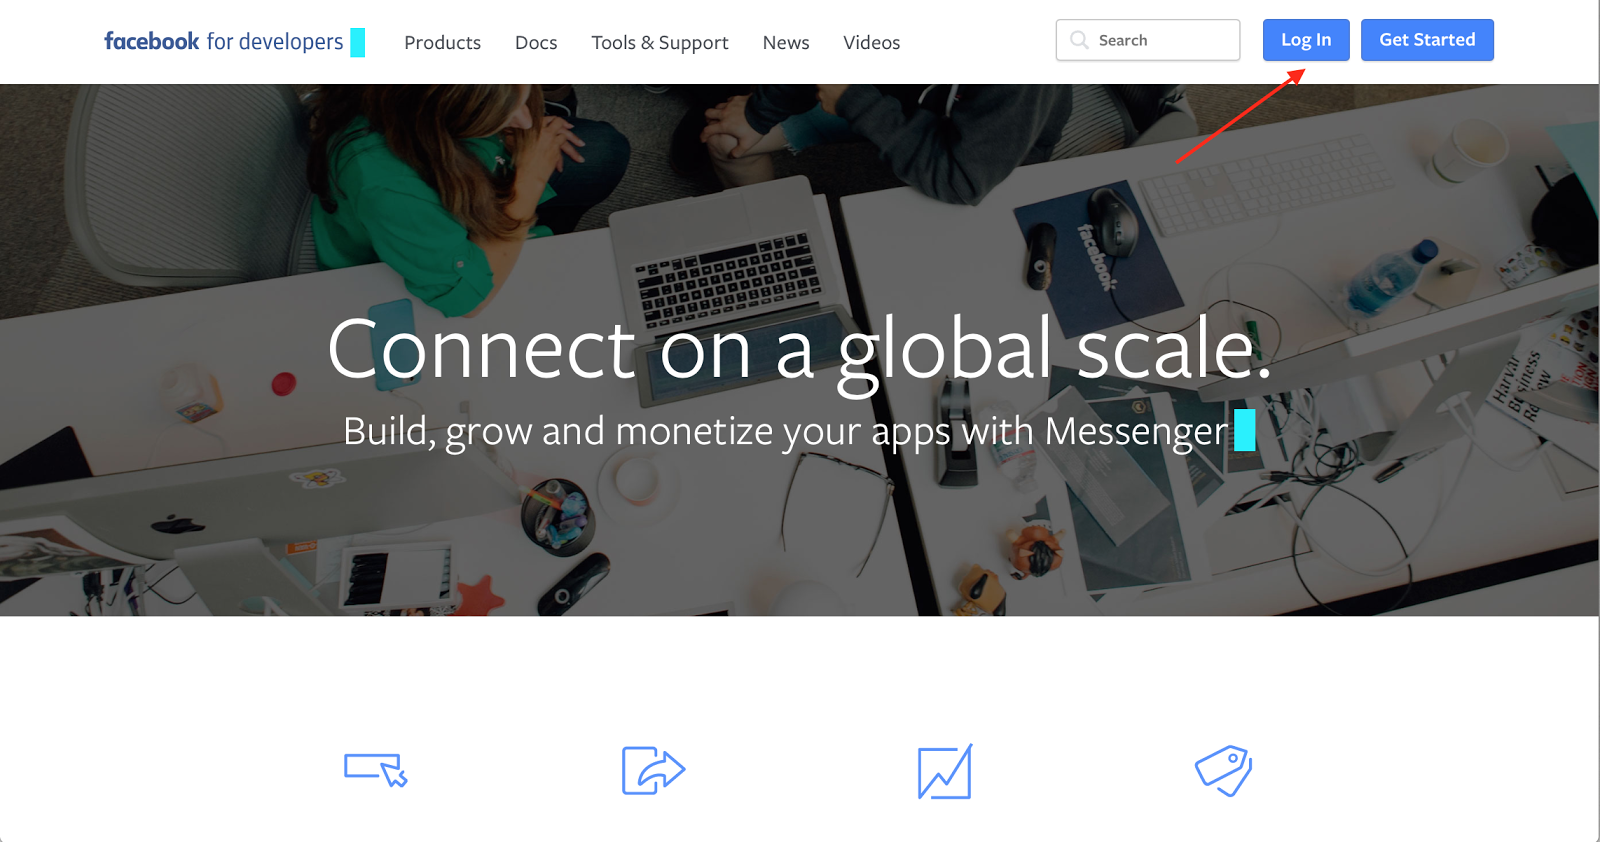
We’ve written most of the code for the bot, but now we need to connect it to Facebook and make it available publicly. In order for people to message your bot, you need to create a Facebook page (and Facebook account if you do not already have one). Once you’ve made a page, go to the Facebook for Developers website and make a developer account.
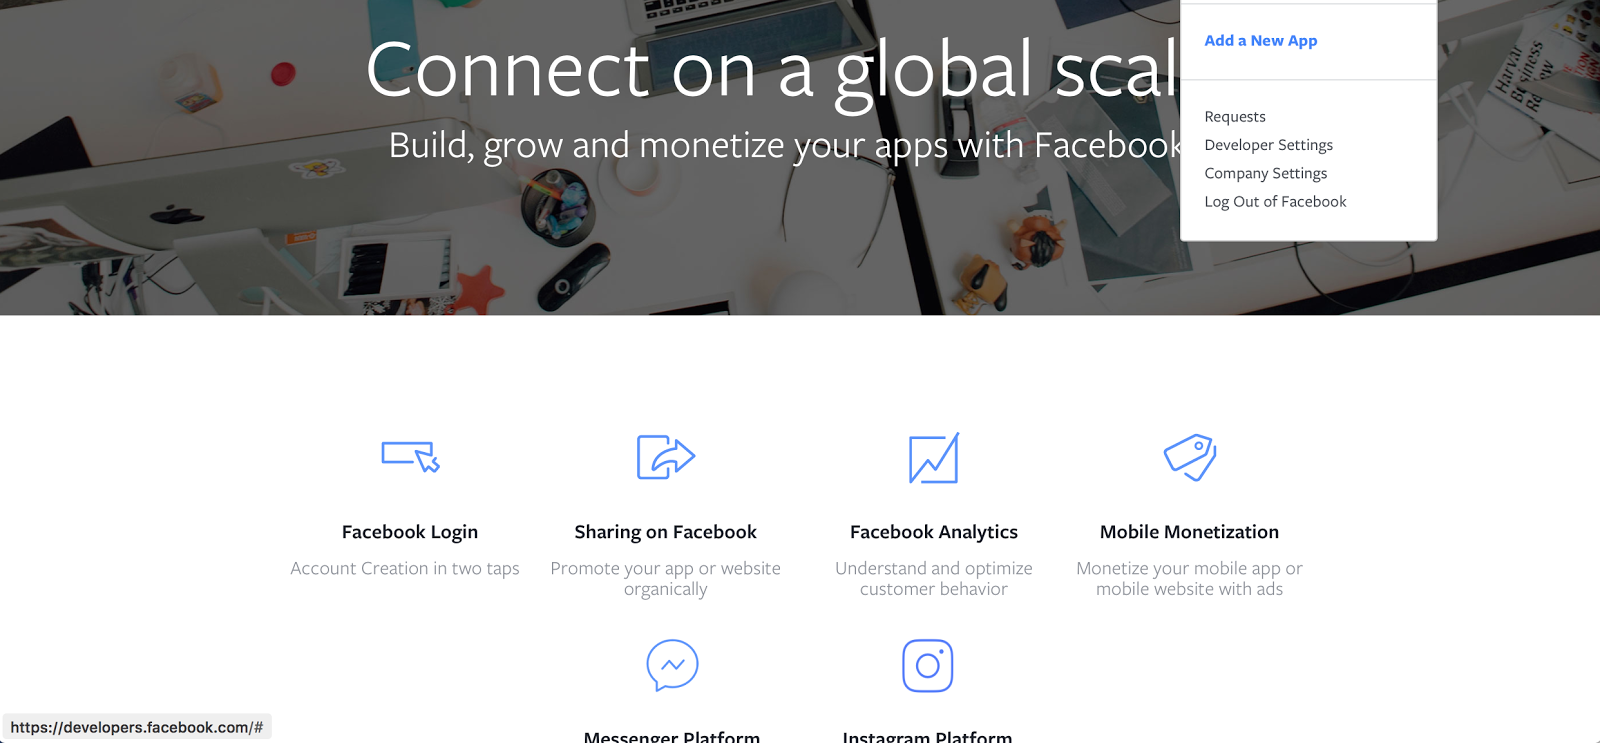
Next, click “Add a new App” from the pane on the top right of the page and choose a name for your App (ex. BlackGirlMagicBot) and provide your email.
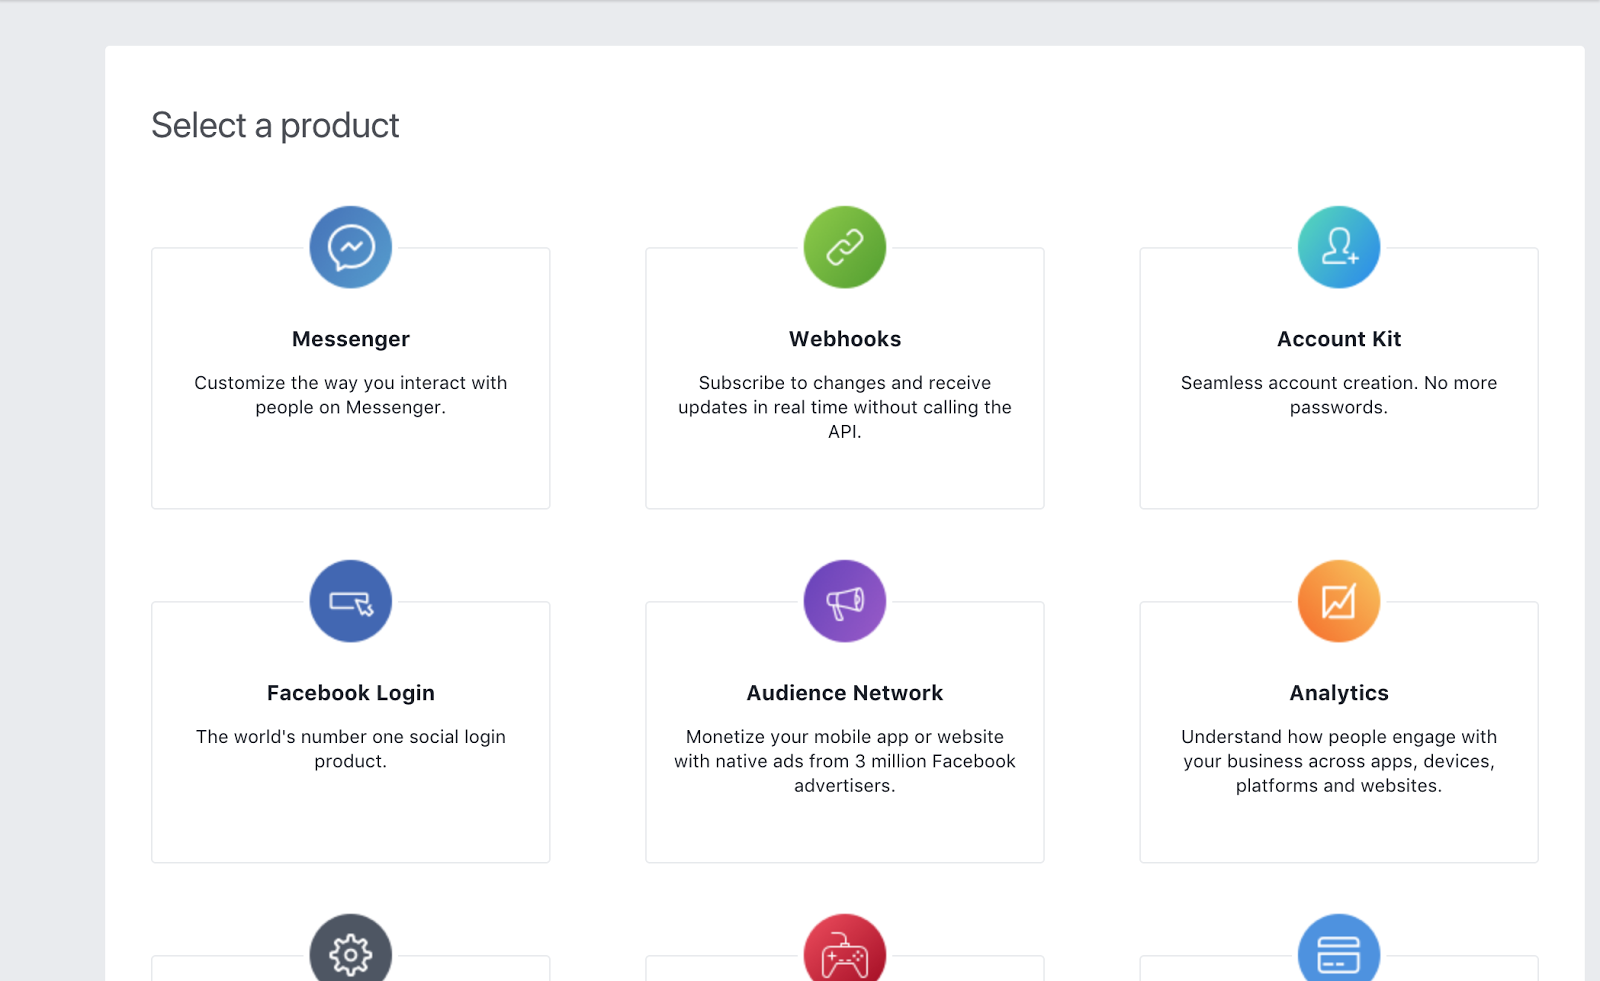
Next, when prompted on the next page for the type of product you are building, click the “Set Up” button on the Messenger option.
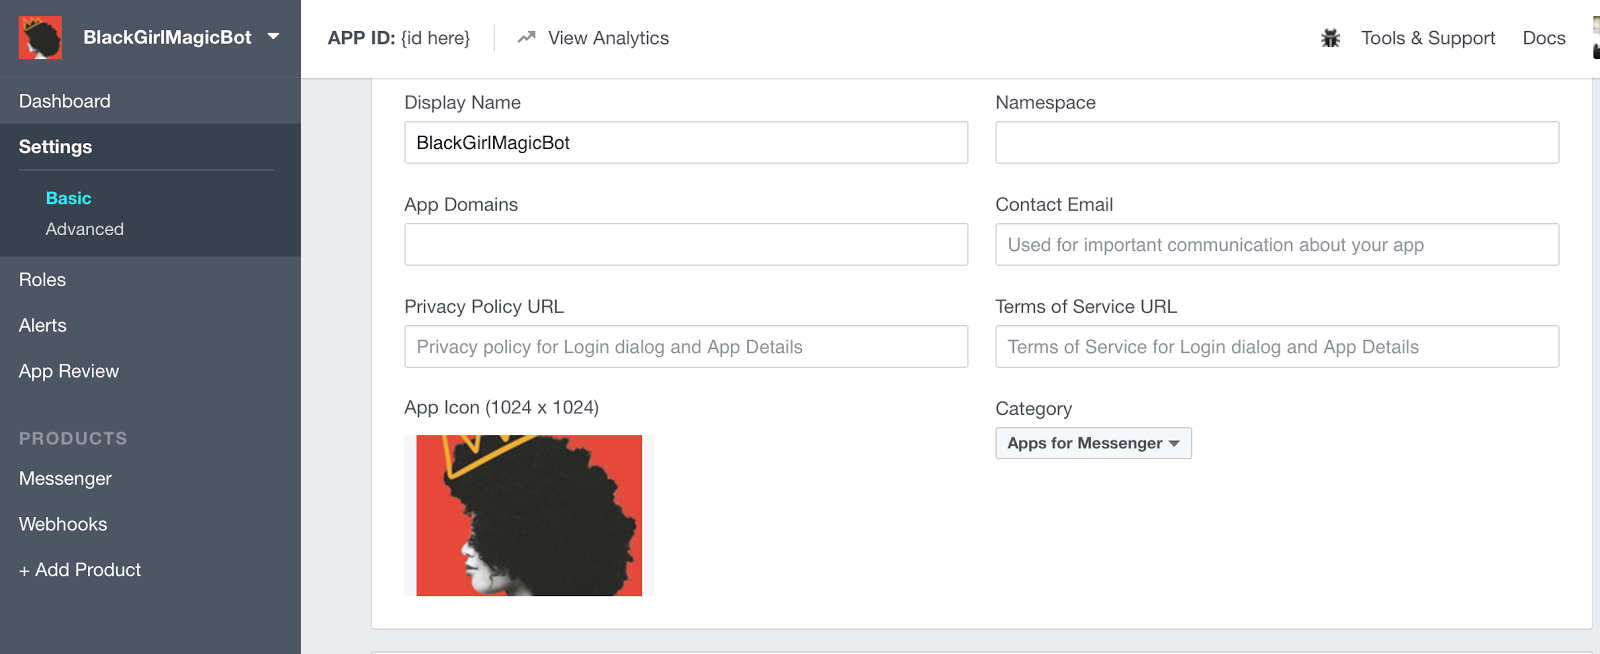
Go to your your app’s settings page on the left-hand side and fill out the Basic Information in the Settings tab. That should look like:
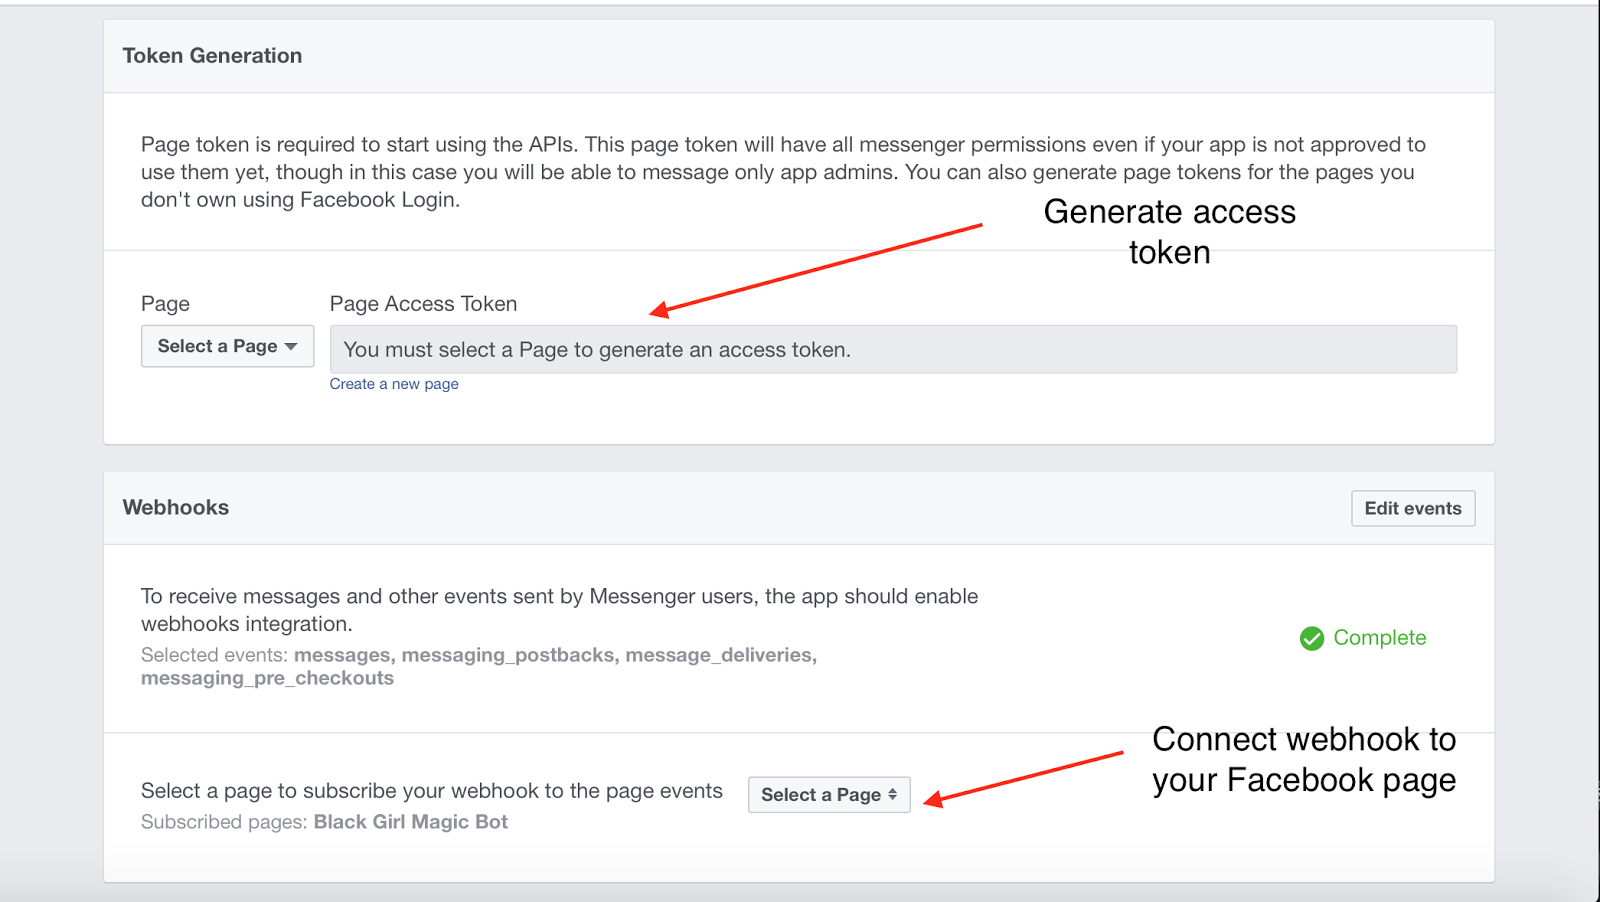
Next, we’ll get the information we need for our bot to follow Facebook’s guidelines. Generate the Access Token for the Facebook Page in the Messenger tab.
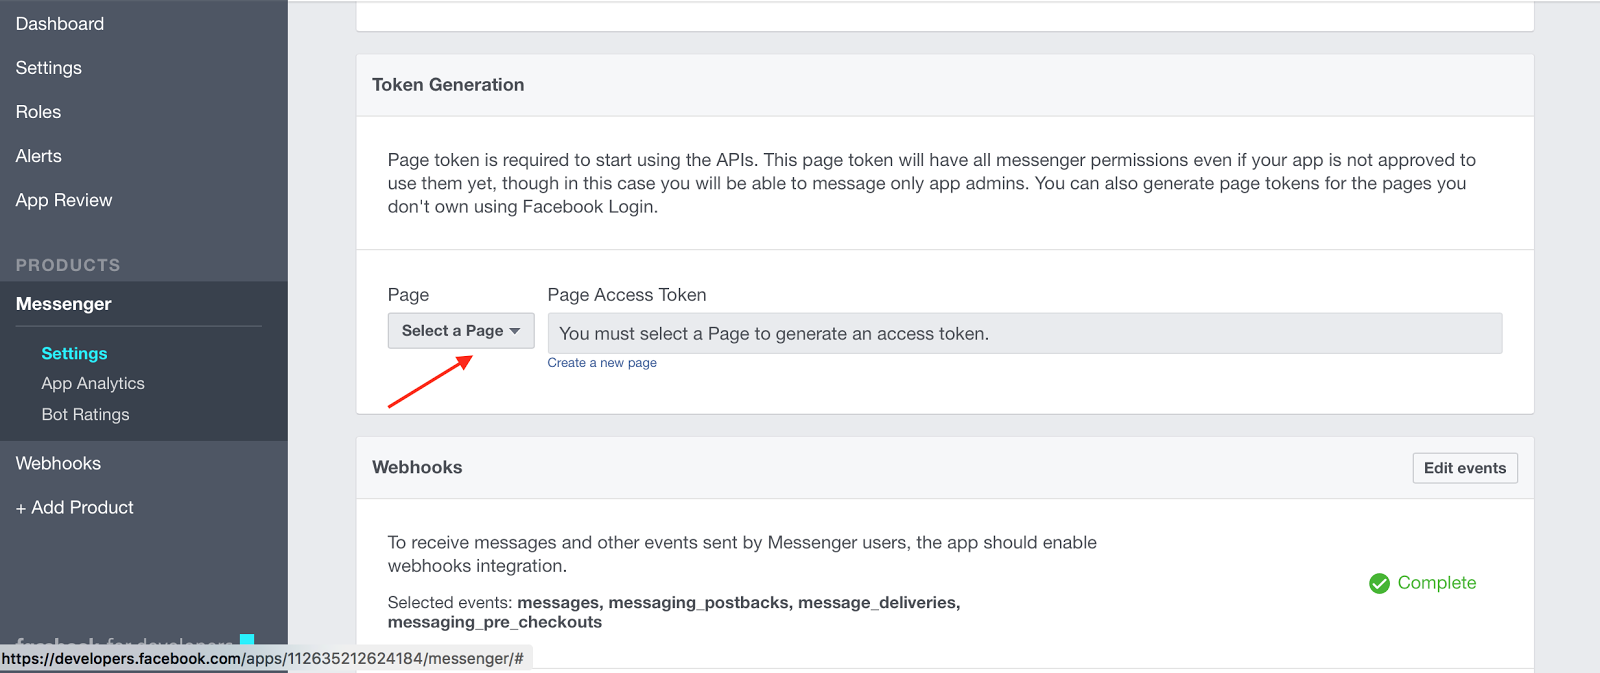
The tab can be found in the left-hand corner of the page. Once there select your page from the dropdown menu and a page access token will automatically be generated.
Go back to the app.py file and supply the access token where the current ACCESS_TOKEN placeholder text is located.
Hosting
Now that we have our code written and the required Facebook sections filled out, we need to host our code somewhere. For this tutorial we’ll be using ngrok, a nifty tool that allows us to run code on our computer locally but make it accessible to anyone. This link will work as long as we keep the program and ngrok running on our computer. It is important to note that ngrok is meant for basic testing and should not be used to host your program when released publicly.
To get started with ngrok, follow the instructions here.
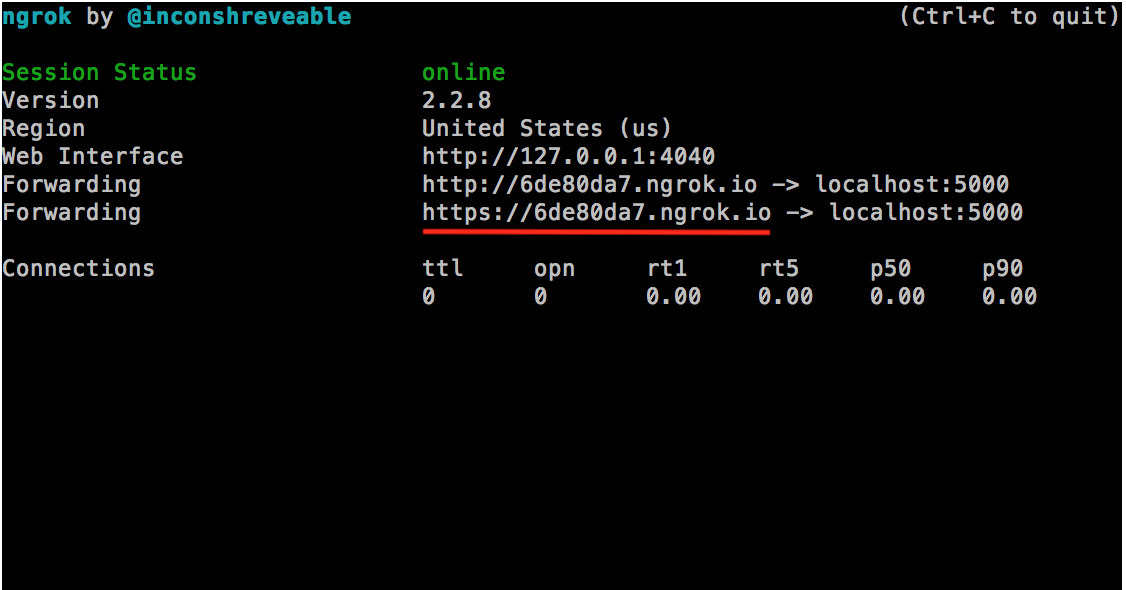
Now, in order to get our bot running publicly with Ngrok, we need to first run the app — open a Terminal window and run your app with python3 app.py. Once your Flask app begins running, look for the digits (or port number) at the end of the link that you see.

Now, open a second terminal window or tab and type “ngrok http [number]” where number is the last digits in the website code generated (in this example where the link provided by flask is “http://127.0.0.1:5000/“, you would type “ngrok http 5000”). Once you do this, a screen will appear with a link after the “Forwarding” section — make sure to copy the link that begins with “https.” This link is what we can provide to Facebook when someone sends the bot a message.
Go back to the Facebook developer screen and supply this link so that when our page receives a message, Facebook knows where to send the message to. Click the Webhooks tab and click on “Edit Subscription.” You should see a screen like this below:
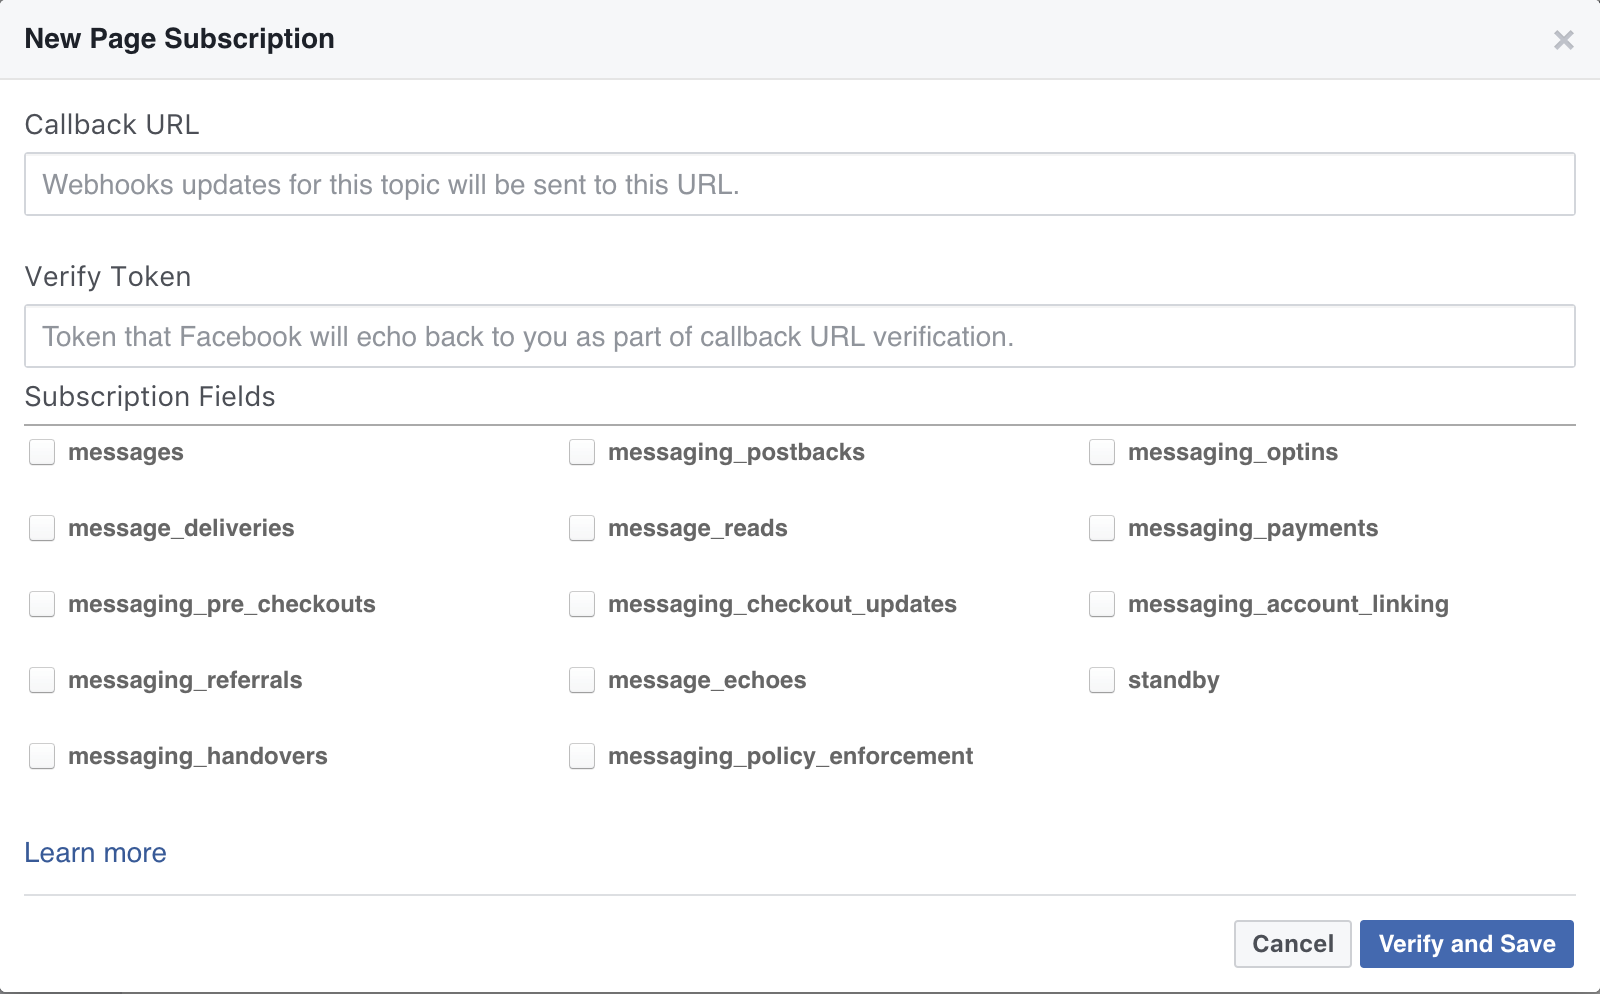
For the Callback URL, copy and paste the link created by ngrok into the field.
Remember the VERIFY_TOKEN placeholder we currently have in our app.py file? To protect your bot, Facebook requires you to have a verify token. When a user messages your bot, Facebook will send your bot the message along with this verify token for your Flask app to check and verify the message is an authentic request sent by Facebook. Choose a string you want to use for your verify token and replace the placeholder in the app.py file with your code (ex. “TESTINGTOKEN” could be your verify token, but I’d recommend something harder for someone to guess) and place the same token (minus the quotation marks) in the Verify Token field.
For the subscription fields, be sure to check the messages, messaging_postbacks, message_deliveries, messaging_pre_checkouts boxes.
When you’re finished, click “Verify and Save.”
Now, on the same Messenger Settings page, we need to hook the webhook to our Facebook page. Select your page and then click “Subscribe” to finish the process.

After this step is the last part of making our bot… testing it.
Testing the Bot
Now that we have finished writing code and setting up our Facebook app, it’s time to test this bot. If you visit your Facebook page, you’ll be able to test the bot by sending it a message. If you have everything correctly set up, you should get a message back from your page.
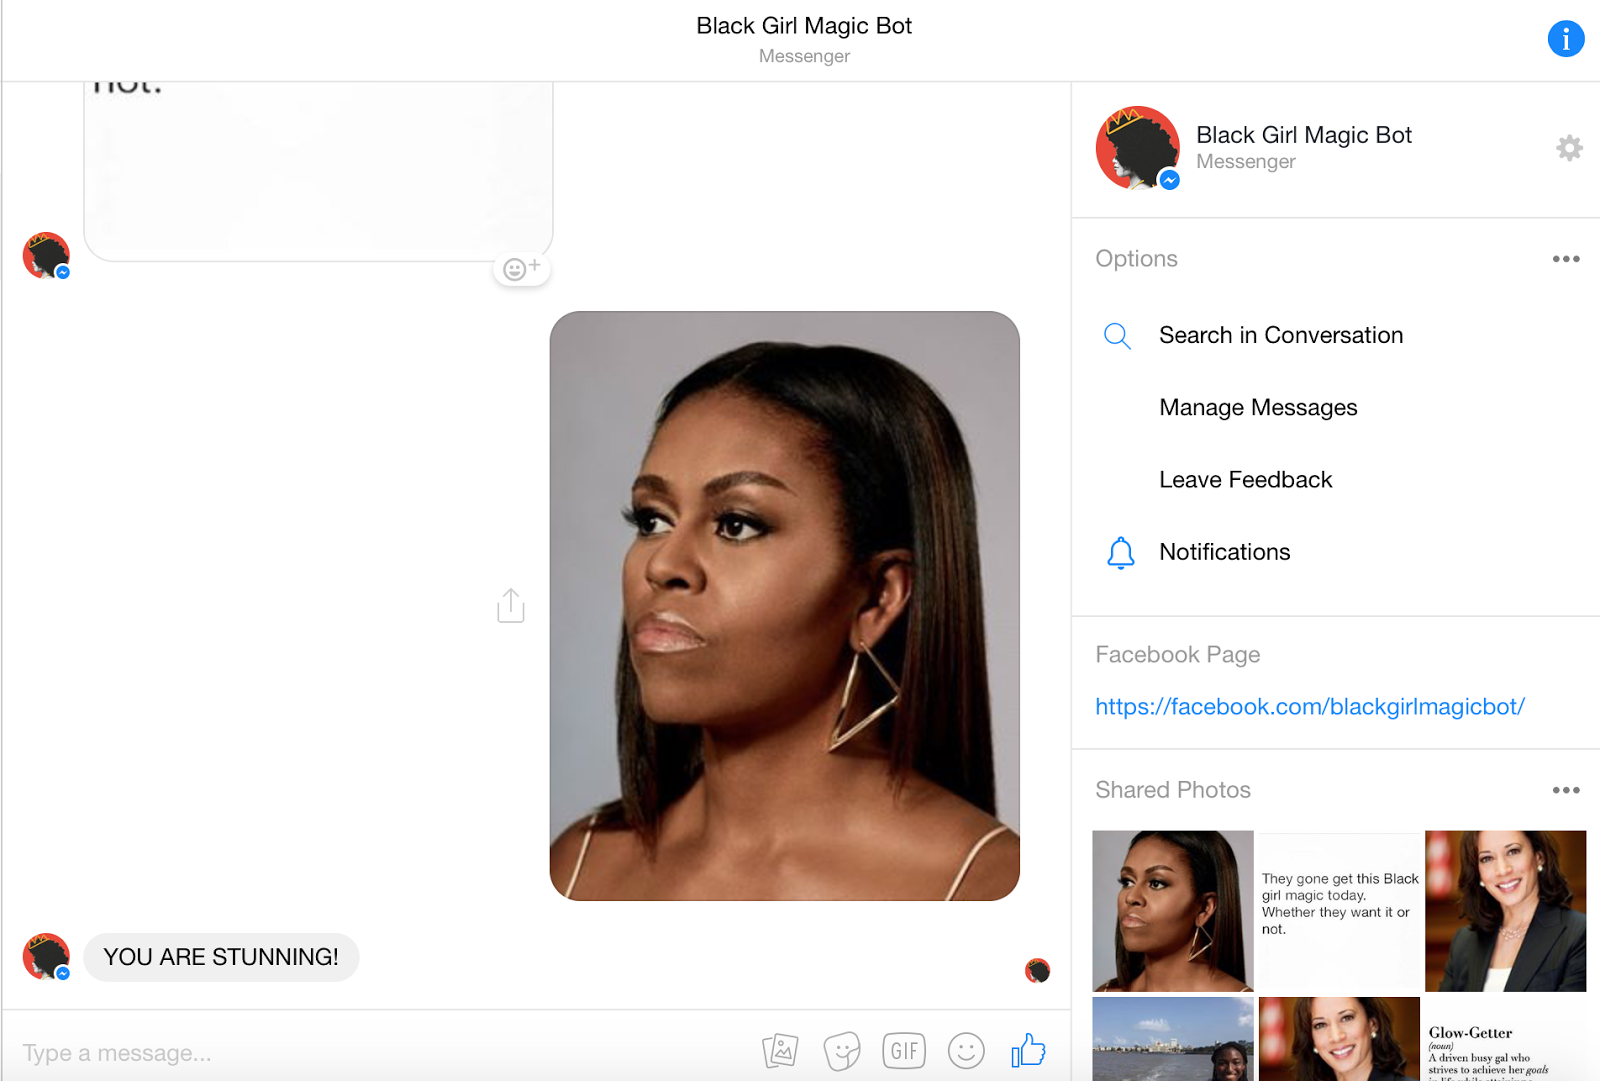
The Black Girl Magic bot is correctly sending users a variety of messages that we added whenever the user sends a message.
What’s next?
Congrats! You’ve made your first Facebook Messenger bot. Now, you can start creating bots to help users do a variety of tasks. While in this tutorial we run the bot locally using Ngrok, in the next tutorial, we’ll discuss hosting the bot via Heroku. Once you’re ready, you can finish the Facebook Messenger approval process and get your bot approved to send messages to all users. With the future of bots, the possibilities are endless. I’ve been excited to see how they can help users and look forward to what bots people make next.
I hope you’ve enjoyed learning how to make a bot in Python. If you enjoyed this post, you can follow me on GitHub @wessilfie.


Related Resources
Twilio Docs
From APIs to SDKs to sample apps
API reference documentation, SDKs, helper libraries, quickstarts, and tutorials for your language and platform.
Resource Center
The latest ebooks, industry reports, and webinars
Learn from customer engagement experts to improve your own communication.
Ahoy
Twilio's developer community hub
Best practices, code samples, and inspiration to build communications and digital engagement experiences.