Adding Push Notifications to your iOS app with Swift and Twilio Notify
Time to read:
June 09, 2016
Written by
This post is part of Twilio’s archive and may contain outdated information. We’re always building something new, so be sure to check out our latest posts for the most up-to-date insights.

Notify makes it easy to send cross-platform notifications to your users. From in-app push notifications on Android and iOS to SMS fallbacks, Notify takes care of the heavy lifting.
Let’s build an iOS app that can receive and react to push notifications sent by the Apple Push Notification Service (APNS) and Twilio Notify.
Tools and Agenda
There are a few things you will need in order to run all of the code in this tutorial:
- An Apple Developer account
- Xcode version 7.3
- Node.js installed
- A free Twilio account
- Access to Notify – Request early access here
- An iOS device – push notifications don’t work in the simulator
To send push notifications we will need to:
- Create a Twilio Credential and a provisioning profile for your Apple developer account
- Configure a Node.js server to authenticate our iOS app
- Create a Binding for Twilio to send notifications to your device
- Write code to register your device with APNS
- Write code to receive notifications from APNS
- Bask in the glory of having a working app that you can modify to fit your needs
Configuring the server
We will build off the iOS Quickstart for Twilio Notify which uses Node.js on the server side to authenticate the iOS app.
Begin by cloning this repository for the Node server in your terminal:
To send notifications on iOS, make sure you have your Apple push credentials configured with Twilio Notifications.
Follow this guide and make sure you have your certificate key and private key ready. Afterwards you should have a Twilio Credential of type APN with your certificate and private key as seen in this screenshot.
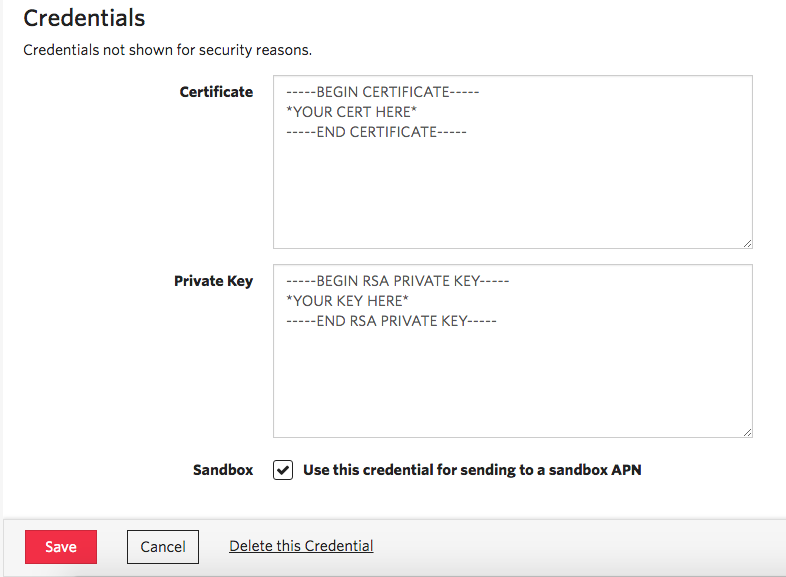
Make sure “Use this credential for sending to a sandbox APN” is checked.
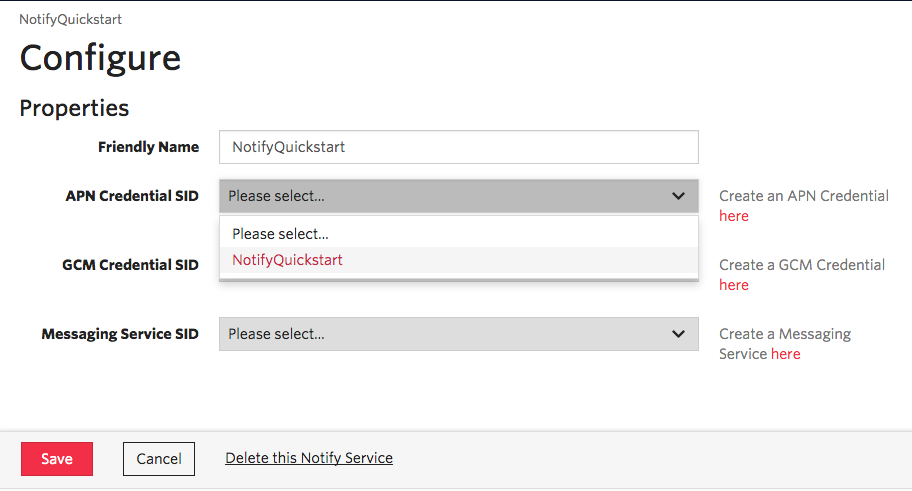
We need a Twilio Service Instance SID to configure our Node server. Head to Services, click Create Service and under APN Credential SID, choose the push credential you just created and hit Save.
Next, grab your Account SID and Auth Token from your Twilio Console.
Open config.json and replace following variables with these values you just gathered:
- TWILIO_ACCOUNT_SID
- TWILIO_AUTH_TOKEN
- TWILIO_CREDENTIAL_SID – This can be left blank, but is in the config file.
- TWILIO_NOTIFICATION_SERVICE_SID
Now run the Node server by entering the following in your terminal in the Node quickstart directory:
Setting up the iOS app
We can now move on to setting up our iOS app. I have a barebones project already written that you can use to get started with a full storyboard.
Start by cloning this repository:
Next open the Xcode project:
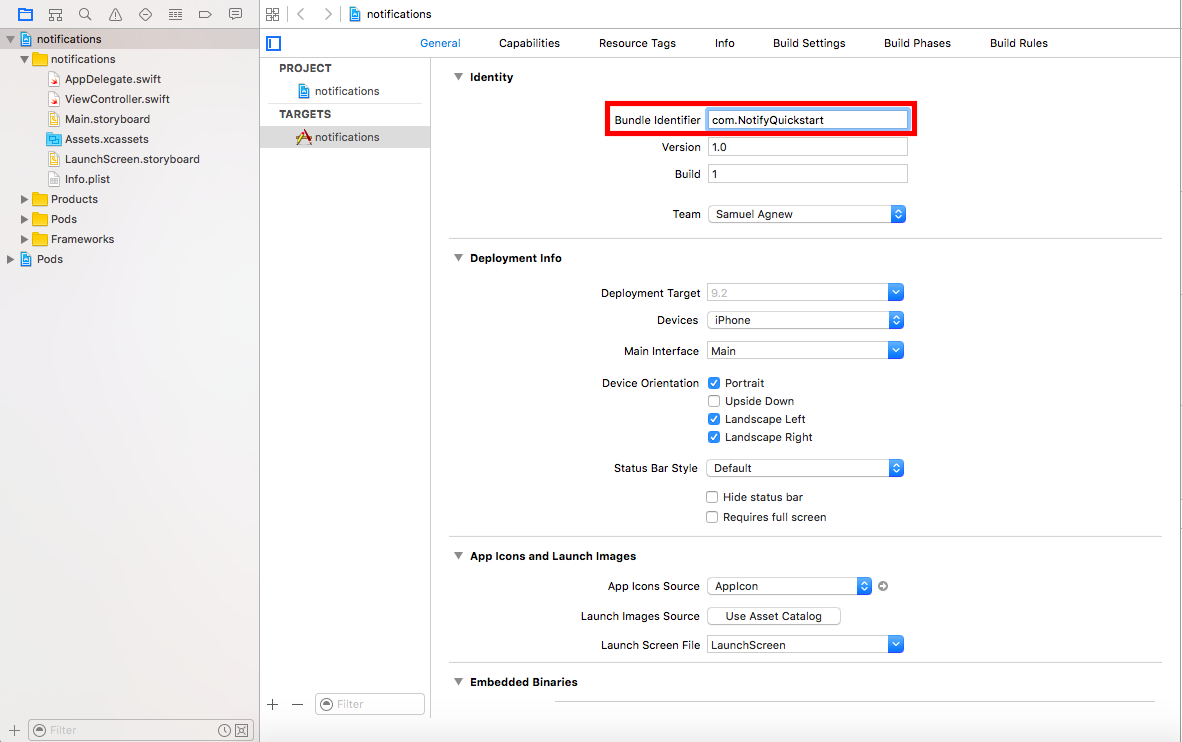
In order for push notifications to work, you’ll have to make sure the bundle identifier in Xcode matches the provisioning profile you made in your Apple developer account. I used the name NotifyQuickstart for mine, but you can use anything you want.
Creating a Device Binding
We need to have a function that makes requests to the Node.js server in order to register the device. A “Binding” represents a unique device that can receive a notification.
In ViewController.swift replace the empty registerDevice(identity: String, deviceToken: String) function with the following:
In this code we created an NSURLSession that will send an HTTP request to our Node server in order to register the device.
Now we need to call this function whenever the register button is tapped. Modify didTapRegister(sender: UIButton) to contain the following code:
Now when the button is tapped, the device will be registered and Twilio will be able to send notifications to it.
Before running the app, we’ll need some code to register the device with APNS and to receive the notifications.
Registering a Device with APNS
The code for receiving notifications on the iOS app lives in your AppDelegate.swift.
We need to register the device with APNS, which will happen every time the app launches.
Open AppDelegate.swift and replace the empty application(application: UIApplication, didFinishLaunchingWithOptions launchOptions: [NSObject: AnyObject]?) function with the following:
This will cause iOS to prompt you to enable push notifications with a popup alert on the first launch.
If you want access to the notification, it will arrive in JSON format and contains the message body as a String that in the didReceiveRemoteNotification function.
In AppDelegate.swift again, replace ‘application(application: UIApplication, didReceiveRemoteNotification userInfo: [NSObject : AnyObject])’ with the following code to finish things off:
With this function we are ready to run the app and start receiving notifications.
Running the app and receiving a notification
Push notifications don’t work in the simulator so we need to run the app on a real device. This means that the Node server will be inaccessible to our iOS app as it is currently running on localhost.
We will use ngrok to make the Node server available outside of our development environment so that the mobile app can see it.
After installing ngrok, in a new terminal window run the following command and take a note of the forwarding URL generated.
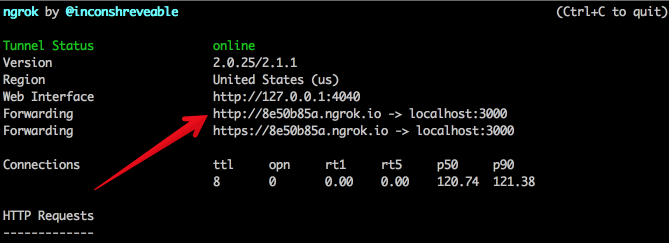
Now open ViewController.swift and for the serverURL variable, replace the placeholder value with your ngrok URL. Make sure to keep “/register” at the end of the URL as that will be the route on the Node server that our iOS app will send requests to.
Run the app on your device and you will get a prompt that asks if you want to receive notifications. Make sure you allow push notifications when this comes up. If you miss this prompt you can head to your settings, select “Notifications” and find the NotifySwiftQuickstart app to allow notifications.
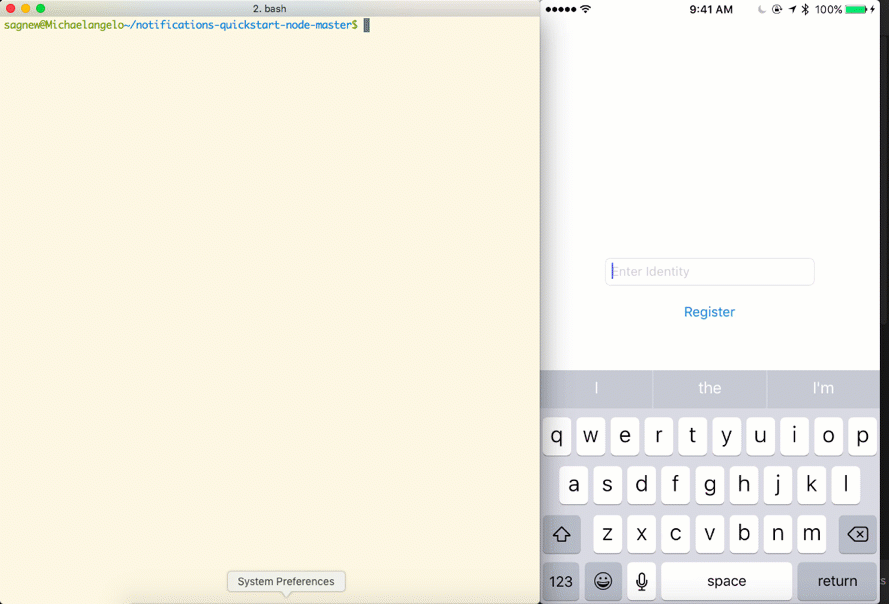
You should see a simple UI where you can enter an identity for the user. When you click the button, you will create a Binding which uniquely identifies a user on a certain device, running your application.
Navigate back to the node quickstart in your terminal so we can send a notification to the app. The code for this app lives in the notify.js file. To send a notification to your iOS mobile app run this file, using the identifier you entered in the node app:
You can see it in action here. I even locked my phone before sending the notification.
Notifications at your fingertips
Push notifications are useful in anything from games to social media to alert users when new information is available and you are now equipped to send them with Twilio Notify in your iOS applications.
Let’s take a moment to celebrate:

If you’re more of an Android fan you can check out this post my buddy Marcos wrote on push notifications for Android.
I can’t wait to see what you build, so contact me via the following channels and let me know how you’re using Twilio Notify:
- Email: sagnew@twilio.com
- Twitter: @Sagnewshreds
- Github: Sagnew
- Twitch (streaming live code): Sagnewshreds


Related Resources
Twilio Docs
From APIs to SDKs to sample apps
API reference documentation, SDKs, helper libraries, quickstarts, and tutorials for your language and platform.
Resource Center
The latest ebooks, industry reports, and webinars
Learn from customer engagement experts to improve your own communication.
Ahoy
Twilio's developer community hub
Best practices, code samples, and inspiration to build communications and digital engagement experiences.