Build Voice Mail with SMS and Email Notifications Using Twilio Studio, Functions, and SendGrid
Time to read:
September 17, 2020
Written by
Reviewed by

I am a big fan of serverless Twilio Studio and Twilio Functions because of their flexibility.
Studio provides you a canvas, letting you drag and drop communications flows into place – how perfect is that? And Functions lets you run Node.js without worrying about setting up a server or hosting.
One common telephony requirement we see is the need to build out voicemail, should a dialed party be unable to answer the call. Often, you can improve the system by forwarding any recordings over email or SMS. So, let’s get our Bob Ross on and walk through building a solution!
Prerequisites
In order to follow this tutorial, you will need:
- A Twilio account and active number. If you don’t have an account, go ahead and create one now.
- If you want transcribed voicemails sent to you via email, you’ll also need a Twilio SendGrid account, with a verified sender.
SendGrid Account
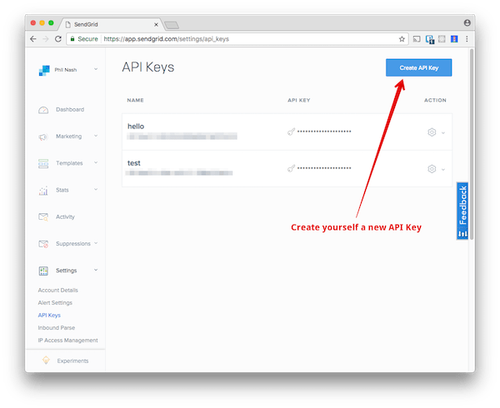
In order to use the SendGrid API to send emails we need a SendGrid API key.
Create a SendGrid account (if you don't have one already), confirm your email address, then head to the API Keys area in the SendGrid dashboard and create an API Key with Full Access.
Verified Sender
You also need to verify one of your emails to send from it with SendGrid. To do this, go to the Senders page under Marketing, click “Create New Sender”, fill out the information, then go to that email inbox and click the link in the verification email.
Build our Twilio Functions
Now let's write our two Twilio Functions. The first Function will initialize a SendGrid mail client to email you a transcribed voicemail recording and URL.
Configure
To make requests with SendGrid's API, we need a way to authenticate. To do this, we'll use your SendGrid API Secret.
Open up your Twilio console and head to the Functions configure section.
Add a new environment variable called SENDGRID_API_SECRET and paste in your API Key Secret (begins with SG).
- Open up your Twilio console and head to the Functions overview section.
- Under Overview, click the blue “Create Service” button.
- Give it the service name, “OutsmartingVoiceMail”
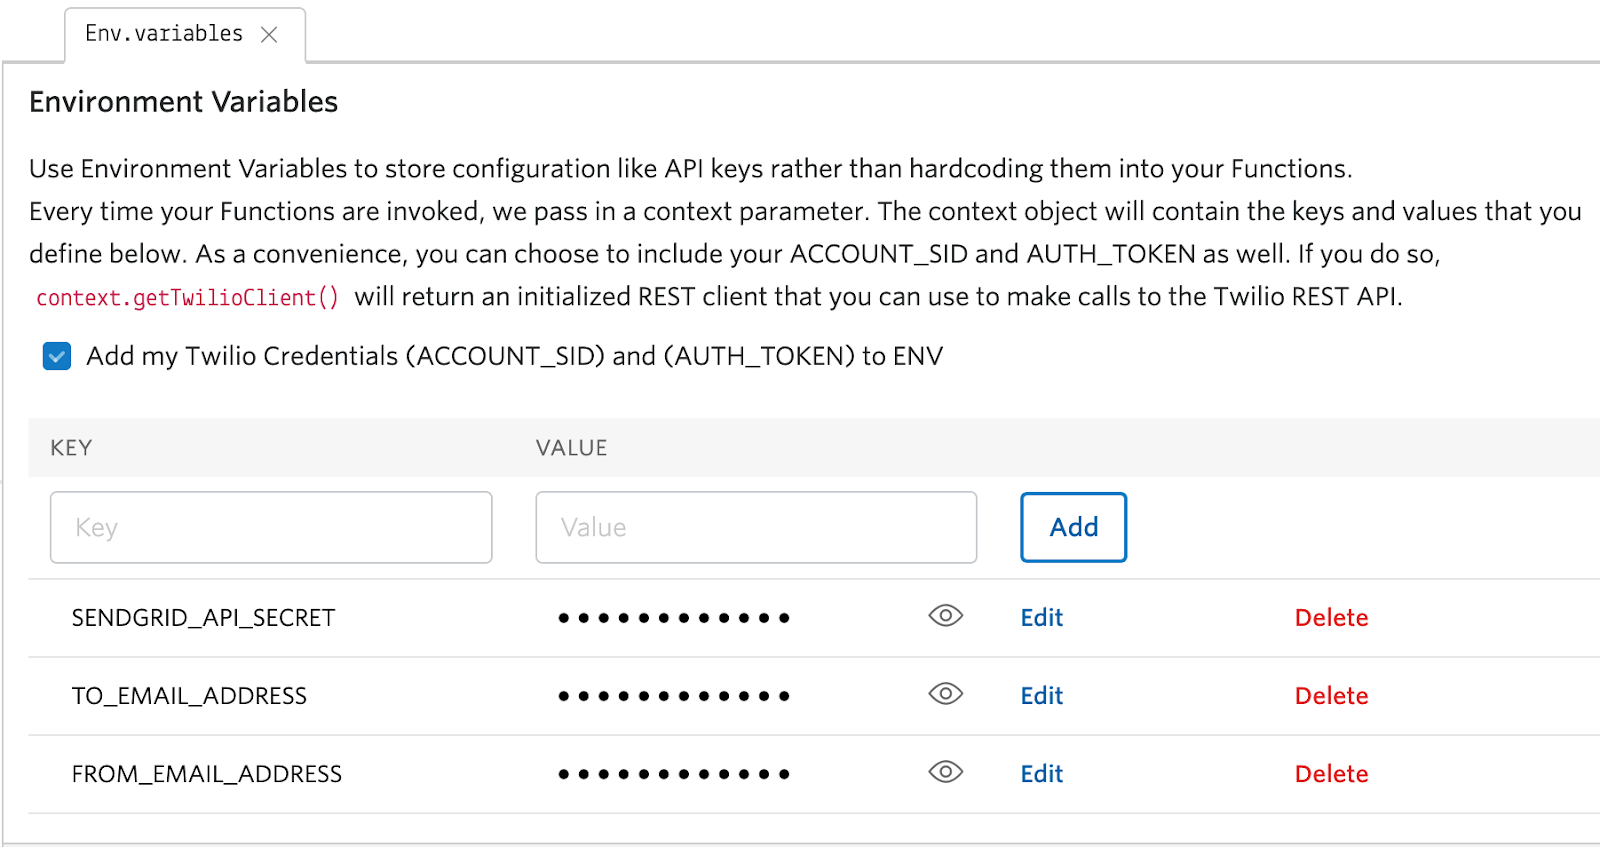
- Under Settings -> Environment Variables, add a new environment variable called
SENDGRID_API_SECRET, paste in your API Key Secret (begins withSG) you saved from the step above, then click Add.
We also need to create environment variables for the email addresses you’ll be sending to and from. - Create a
TO_EMAIL_ADDRESSvariable, enter the email to receive your voicemails, then click “Add”. - Create the variable
FROM_EMAIL_ADDRESS, enter one of the verified sender emails in your SendGrid account, then click Add. It’s best to use two of your personal emails when testing. Emails from a company domain (e.g.@twilio.com) will be blocked if not verified properly.
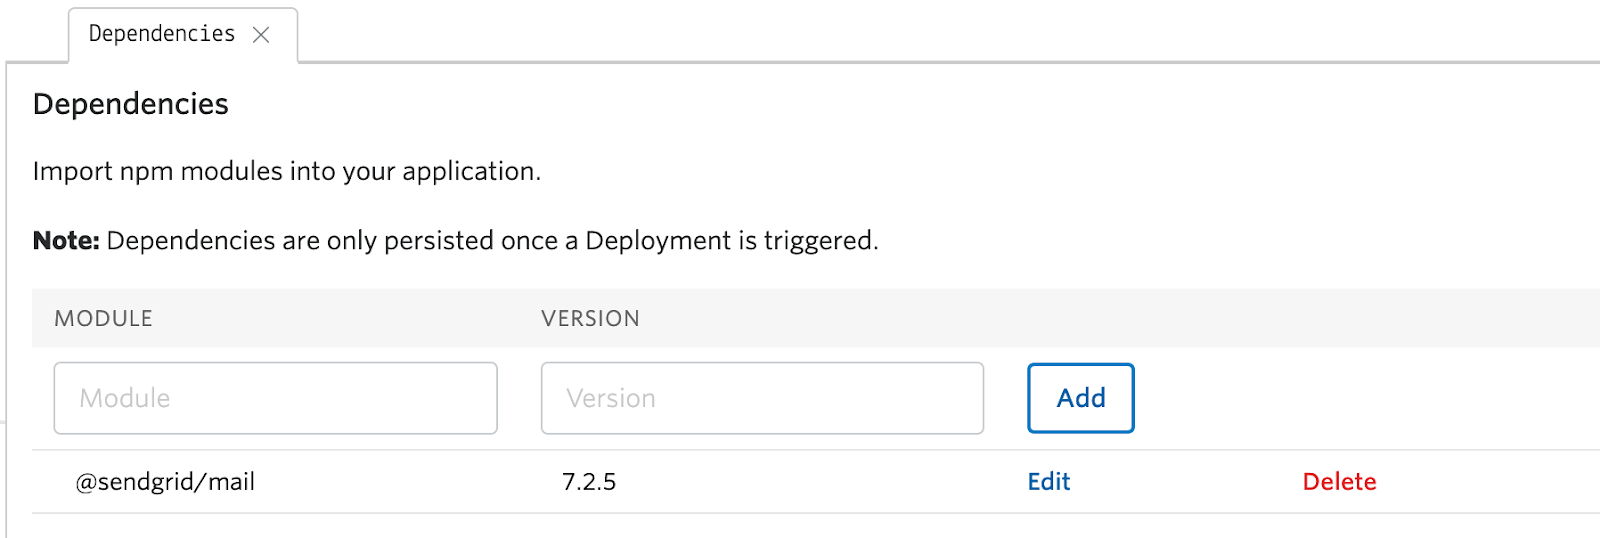
In addition, to the Environment Variables, we need to include the @sendgrid/mail library in our Dependencies, under Settings, Dependencies.
- Add `@sendgrid/mail` and the version 7.2.5, then click Add.
Write the Functions
Forward Voicemail via Email
In the forwarding to email function, we’ll send an email with a recording link when a caller leaves a new recording.
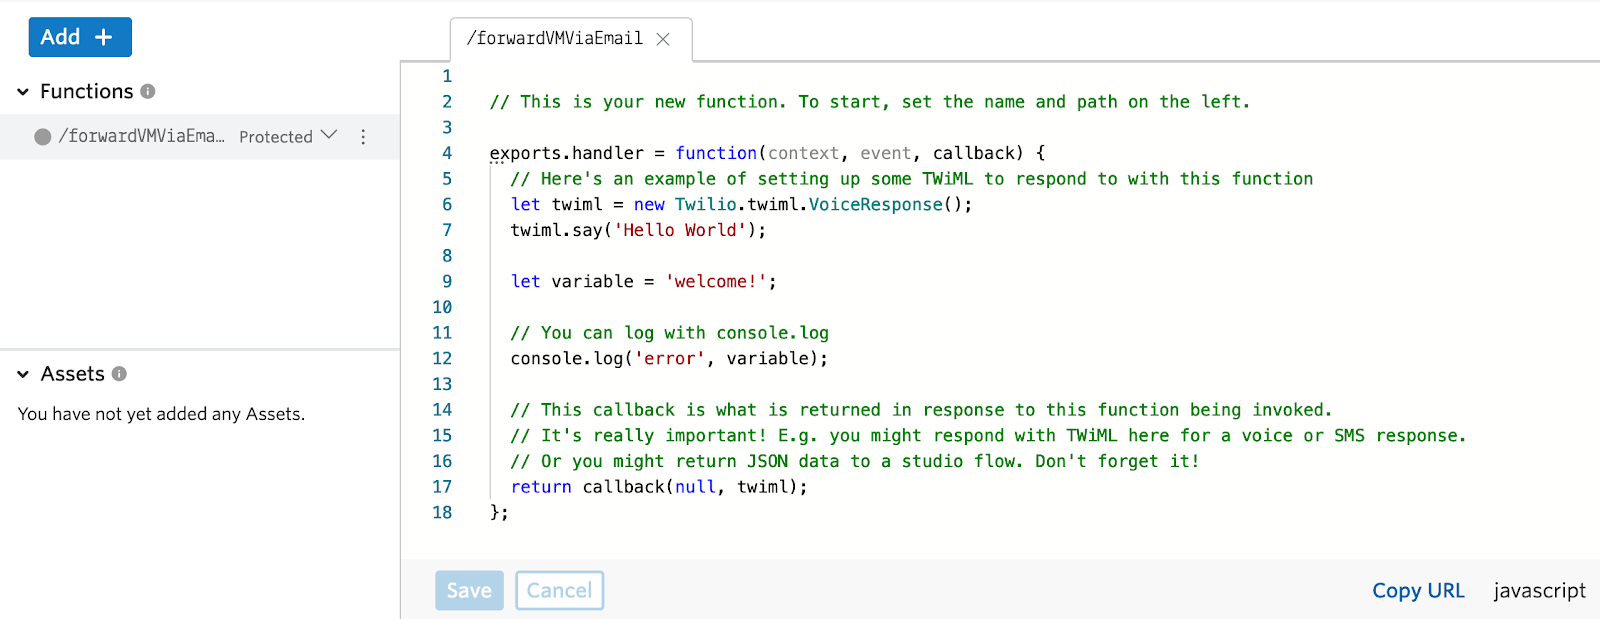
- At the top left of the screen, click the blue “Add” + button and select “Add Function”. You can leave the Function at the default, “Protected”. Protected means that only requests from your account with the proper X-Twilio-Signature can successfully execute the Function.
- Add a name and path for your Function, I used
/forwardVMViaEmail.
How your Function works
There’s a bunch of code there, and it might not be immediately obvious what we’re doing. Here’s the play-by-play on how it works.
- At the top of your Function, we initialize the
@sendgrid/mailmodule which will help us craft a mail request to SendGrid. - We then call Twilio's
handlerfunction, which is required for all Twilio Functions. For more information about how the handler function works and what thecontext,event, andcallbackarguments are used for, check out the docs here. - Next, we build the SendGrid request per the guidelines in the docs here.
- Since Twilio Functions are written in JavaScript, we use the SendGrid Node.js library.
- The first thing we do when building our request is use the
setApiKey()method which will authenticate our request. Inside it, we place our API Secret, which we pull from the Function context. - Next, we build our message parameters. Again, we pull our
toandfromemails from context, and we also reference a couple variables,urlandFrom, from the event argument of our Function. - Finally, we call the
send()method to send the request to SendGrid for delivery. Inside the promise handler, we print a message to let us know the request was accepted, then we embed our empty Function returncallback()which is required in every Twilio Function. We add acatchstatement so we can know what’s wrong if SendGrid fails our request.
Forward Voicemail via SMS
In the forwarding voicemail to SMS function, we’ll send an SMS with a recording link when a caller leaves a new recording.
- At the top left of the screen, click the blue “Add” + button and select “Add Function”. You can leave the Function at the default,
Protected. - Add a name and path for your Function, I used
/forwardVMViaSMS.
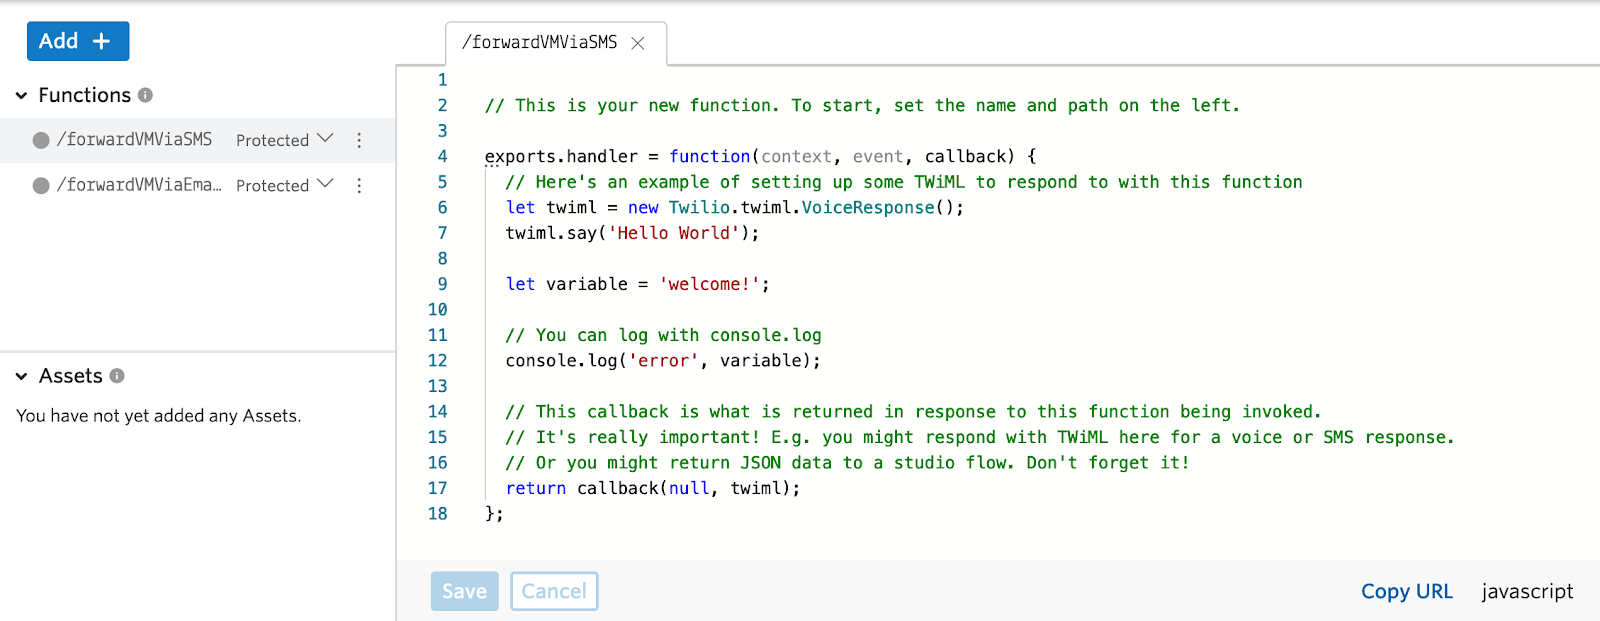
How your Function works
- This Function initializes the Twilio Node helper library so we can call the /Messages resource to send an outbound SMS.
- We pass in the
from, which is a Twilio number in our account, to send the SMS from. - We pass in the
to, which is the mobile number we will send the SMS to. - We pass in the
body, which will contain our transcription and a link to listen to the recording. Note, email is optimal for long voicemail transcriptions as a single SMS can have a maximum size on most carriers of 1,600 bytes (usually 10 segments). An SMS is charged per segment, you can get more details on what a segment is here, Programmable SMS - API Basics and Best Practices. - The
.thenand.catchare called based on the resulting success or failure.
Studio Flow
Instead of walking through the creation of each widget in my Studio Flow, you should import my JSON representation of the flow. You can download it here, or further into the steps.
I’ll explain the flow in turn.
Import the Studio Flow
- To get started, go to the Manage Flows Studio page, then click either the red “Create new Flow” button (if this is your first Flow) or the red plus (‘+’) sign (if it’s not your first Flow).

Or
- Next, give your first Flow a name.
I called mine `studioLeaveVoicemailBlog` – either way, click “Next”. Scroll down and select “Import from JSON” from the menu, and click “Next” again. - Remove the initial `{}` and replace the content of the edit box with the JSON that can be downloaded here, and click Next.
You should see the Studio canvas rendered out for you, as below.
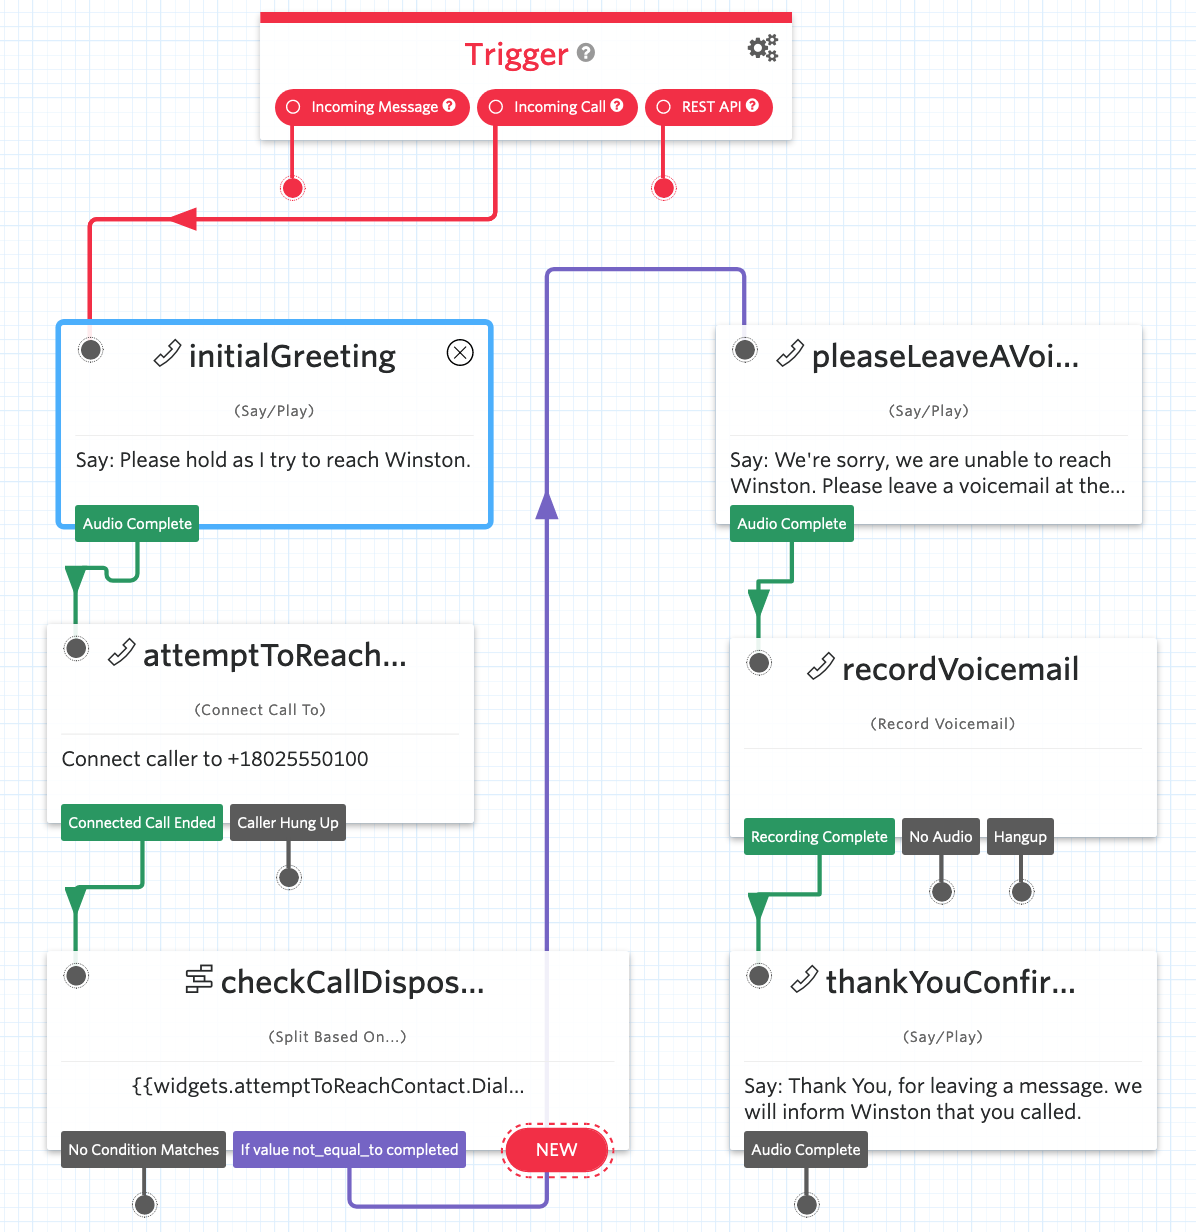
1. Customize the widgets in the imported flow for your unique environment.
- Edit the “initialGreeting” widget with your custom message, and click ‘Save’.
- Edit the “attemptToReachContact” widget with the phone number you would like the incoming calls directed to and click ‘Save’. Note that the timeout for this widget is how long Twilio should attempt to ring this number (+ or - 5 seconds) before returning a `DialCallStatus` of `no-answer`.
- Edit the “pleaseLeaveAVoicemail” widget with your custom message, click save.
- Edit the “recordVoicemail” widget so the “Transcription Callback URL” points to either the Voicemail or SMS Function URL, based on how you want to be notified about the voicemail.
You can find the URL by visiting the Functions we created above, selecting the correct service and Function and clicking the three vertical dots and choosing Copy URL. Click Save.!Copy a URL from Functions
- Edit the “thankYouConfirmation” widget with your custom message, click save.
1. Click the red “Publish” button to publish the changes to your flow.
Congratulations! You successfully imported and updated the Studio Flow.
The Studio flow we just created, “studioLeaveVoicemailBlog”, demonstrates how we can use metadata returned by the “Connect Call To” widget (we named “attemptToReachContact”), to determine if the call was successfully answered. Studio exposes a lot of valuable metadata, viewable under the Studio execution logs.
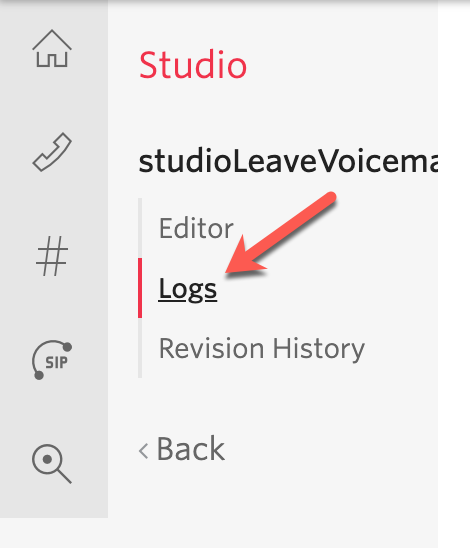
You can view this information by clicking on an execution SID, then a widget name, and expanding Widget & Flow Properties.
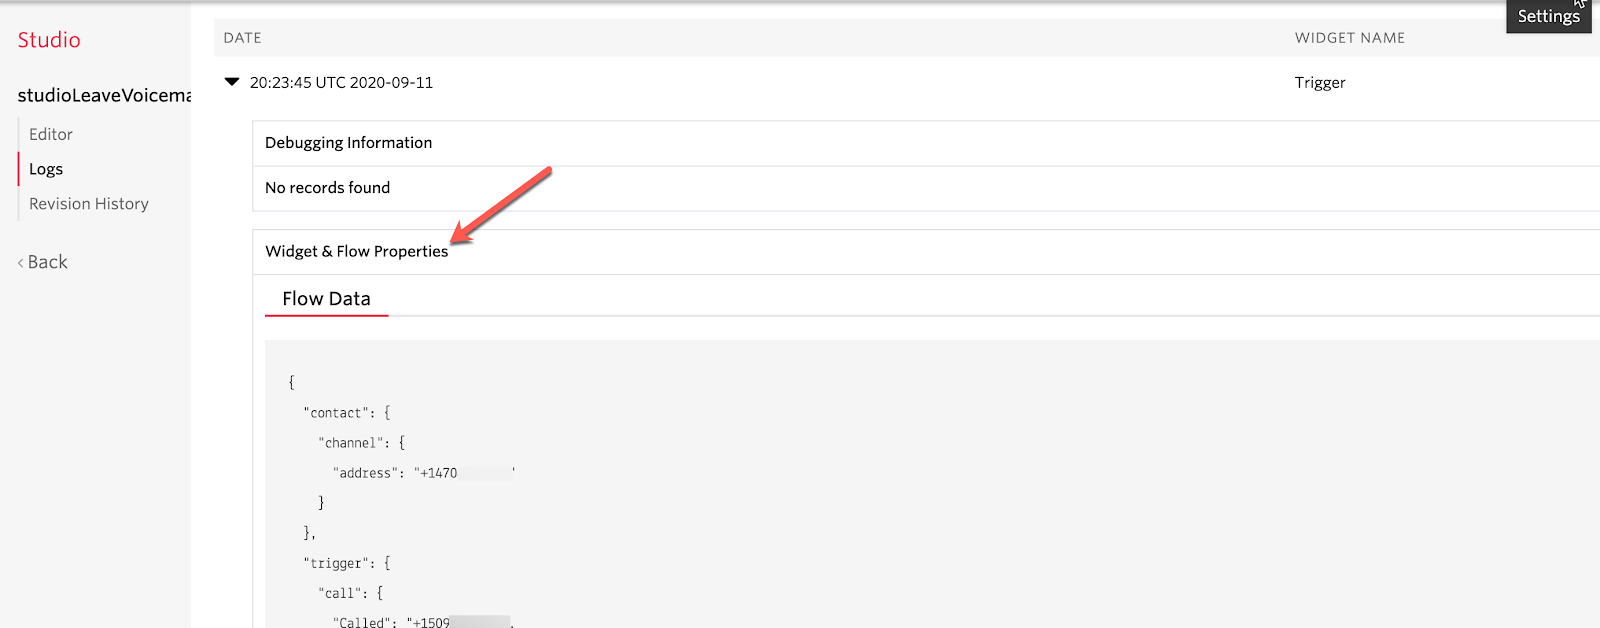
You can access this information from within your Studio Flow by using liquid syntax, i.e. enclosing the variable in {{...}}. If the dialed party timeout setting of the “Connect Call To” widget expires before the call is answered or the dialed party is busy, Twilio will capture this in the DialCallStatus attribute (accessible in our Studio flow as {{widgets.attemptToReachContact.DialCallStatus}}) associated with this widget by reflecting no-answer or busy. If the call is answered, DialCallStatus is set to completed so we don’t need to record a voicemail since the call was answered.
Configure your Twilio number & test it out!
Now that your Studio flow is built, let’s configure a Twilio number to test it out.
First, visit the Phone Numbers console to get started.
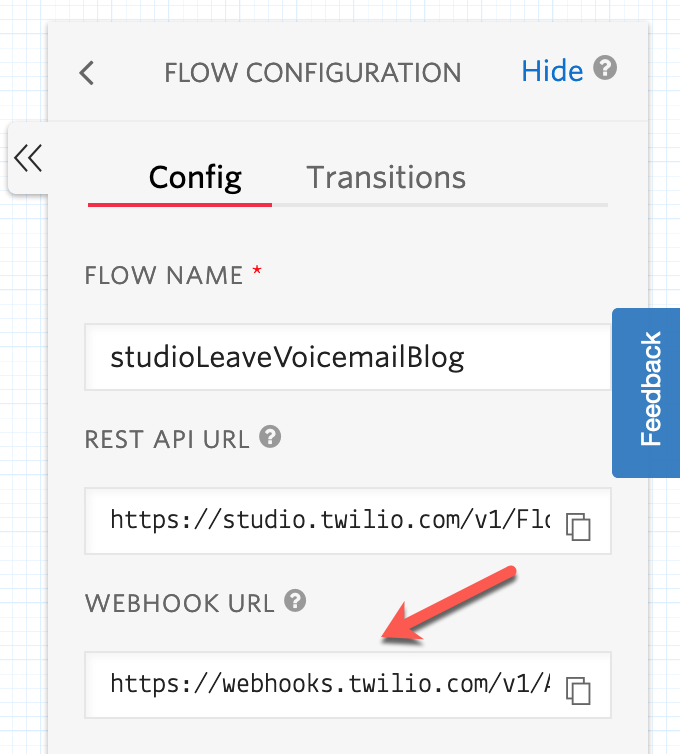
If you’re not familiar with how to configure a Twilio number for incoming calls, just click on the number you want to use for your “studioLeaveVoicemailBlog” Studio flow in your Active Numbers here, then scroll down to the “A CALL COMES IN” dropdown in the Voice section and select Studio Flow. Then, select your new Flow in the Select a Flow dropdown to the right. Follow the same process for “PRIMARY HANDLER FAILS”. Under “CALL STATUS CHANGES”, copy the Webhook URL under your Studio Flow Trigger Widget and paste it into the edit box. (The last two steps are there to avoid stuck executions which you can read more about when productizing your app.)
After that, click “Save” at the bottom, and you’ll be all set to test by placing a call to your Twilio number.

Building Voice Mail with SMS and Email Notifications Using Twilio Studio, Functions, and SendGrid
That’s a wrap! I hope you leave with a firm understanding of setting up voicemail call routing within Studio and leveraging Twilio Functions to further extend what’s possible.
In my next blog post, we will add additional intelligence called “Human detection”. We’ll make sure voicemail is centralized on Twilio, in case the dialed parties voicemail picks up and a caller’s message is initially recorded in a different place.
But if this is all you needed, I hope it worked for you! I can’t wait to see what you build – maybe it will even be a future Twilio blog post?
Alan Klein is a Principal Solutions Engineer based in Atlanta, GA Office. Alan is a Serverless solution champion and Programmable Voice and Elastic SIP Trunking SIP Expert at Twilio. He's currently focused on furthering his knowledge in Node.js and front-end development and sharing his knowledge with others. You can reach him at aklein [at] twilio.com or on Twitter at @SystemsEng.
Related Posts


Related Resources
Twilio Docs
From APIs to SDKs to sample apps
API reference documentation, SDKs, helper libraries, quickstarts, and tutorials for your language and platform.
Resource Center
The latest ebooks, industry reports, and webinars
Learn from customer engagement experts to improve your own communication.
Ahoy
Twilio's developer community hub
Best practices, code samples, and inspiration to build communications and digital engagement experiences.