Building Python web apps with Flask
Time to read:
March 24, 2017
Written by

DISCLAIMER: In the time since this post was published, the Spotify API changed to no longer allow unauthorized requests. Some of the code involving use of the Spotify API will not work as-is included in the post.
When getting started with web development in Python, Flask is a great choice due to its lightweight nature. There is already a solid “Hello World” style quickstart in the Flask docs, so let’s walk through building an application with more functionality.
We are going to build a Flask app using the Twilio REST API that will receive SMS messages containing a song title and respond with a phone call playing a clip of that song from Spotify.
Setting up your environment
Before moving on, make sure to have your environment set up. Getting everything working correctly, especially with respect to virtual environments, can be relatively confusing for developers new to Python.
Run through this guide to make sure you’re good to go before moving on.
Installing dependencies
Now that your environment is set up, you’re going to need to install the libraries needed for this app. We’re going to use:
- Flask for our web framework
- Requests to grab data from Spotify
- Twilio’s Python library to interact with the Twilio API.
Navigate to the directory where you want this code to live and run the following command in your terminal with your virtual environment activated to install these dependencies:
Requesting data from other APIs
Let’s start by writing a module to interact with the Spotify search API, which is just a URL that returns some JSON.
Create a file called spotify.py and enter the following code:
What we’re doing here is sending a request using the requests module to the URL corresponding to Spotify’s search API, parsing the JSON response, and grabbing the URL associated with the preview of the first track in our search.
Setting up your Twilio account
Before being able to respond to messages, you’ll need a Twilio phone number. You can buy a phone number here.
Your Flask app will need to be visible from the Internet in order for Twilio to send requests to it. We will use ngrok for this, which you’ll need to install if you don’t have it. In your terminal run the following command:
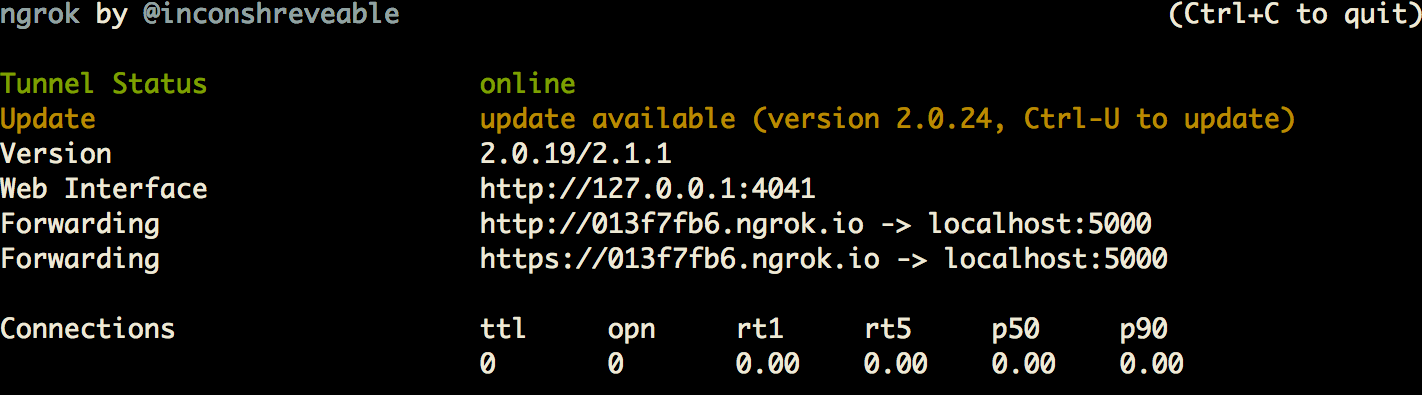
This provides us with a publicly accessible URL to the Flask app. Configure your phone number as seen in this image:

You are now ready to send a text message to your new Twilio number.
Building the Flask app
Now that you have a Twilio number and are able to grab a preview URL from Spotify, which links to an MP3 of a given song, you want to allow users to text a phone number to provide us with a search query.
Let’s create our Flask app. Open a new file called app.py and add the following code:
Make sure to replace “YOUR_NGROK_URL” with your actual Ngrok URL in the code for placing the phone call. If you are using Python 2, you also might have trouble with the song_title = urllib.parse.quote(request.form['Body']) line. Replace it with song_title = urllib.quote(request.form['Body']) and things should work better.
We only need two routes on this app: /sms to handle incoming text messages and to place a call using the Twilio REST Client, and /call to handle the logic of that phone call.
Run your code with the following terminal command:
Now text your Twilio number and get a phone call with the song of your choice!
What just happened?
With this app running on port 5000, sitting behind our public ngrok URL, Twilio can see your application. Upon receiving a text message:
- Twilio will send a
POSTrequest to/smswith the number the message came from, the number it was sent to, and the body of the message. - The
inbound_smsfunction will be called. - A request to the Spotify API will be made, receiving a JSON response that then gets parsed to acquire a “preview URL” to an MP3 file.
- A call is made with the Twilio Rest Client, with the track title being sent through URL parameters.
- Twilio makes another
POSTrequest, this time to the/callroute to play the song that the user texted.
Feel free to reach out if you have any questions or comments or just want to show off the cool stuff you’ve built.
- Email: sagnew@twilio.com
- Twitter: @Sagnewshreds
- Github: Sagnew
- Twitch (streaming live code): Sagnewshreds


Related Resources
Twilio Docs
From APIs to SDKs to sample apps
API reference documentation, SDKs, helper libraries, quickstarts, and tutorials for your language and platform.
Resource Center
The latest ebooks, industry reports, and webinars
Learn from customer engagement experts to improve your own communication.
Ahoy
Twilio's developer community hub
Best practices, code samples, and inspiration to build communications and digital engagement experiences.