How to Add Live Support Chat to Your Web Application with JavaScript
Time to read:
June 30, 2017
Written by
This post is part of Twilio’s archive and may contain outdated information. We’re always building something new, so be sure to check out our latest posts for the most up-to-date insights.

Do you need live customer support chat in your web application but don’t know how to go about building it? You’ve landed in the right place. Twilio Programmable Chat can help you create the support functionality that you envision for your business.
Let’s walk step-by-step through quickly coding a multi-party chat application.
Demo App and Code
You can create your own version of the project to get started by clicking on “Remix” button on the demo app.
Starting from Scratch
If you want to start from a blank project instead of using the Glitch Remix feature, follow along with these steps.
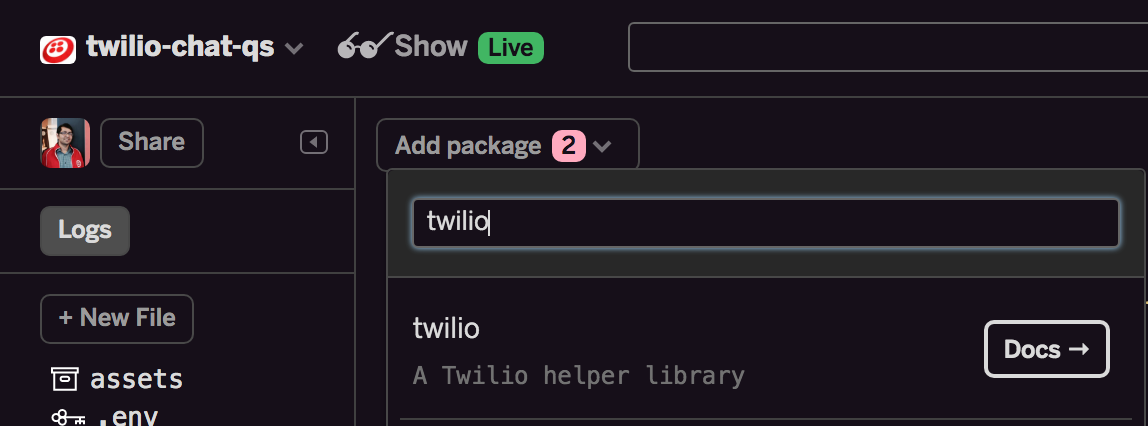
Head over to Glitch and you will set up with a new environment. Open up package.json – a file which provides information about your project. Click the “Add package” button and add the twilio, http, path and request modules. Glitch will install the modules as soon as you click on each search result.
Now click server.js on the sidebar and then delete the contents of the file. While some of it is useful, we’ll start fresh. Include the following packages in our project, which we do using require in Node.js.
Time to set up our Express application. The express module is installed by default.
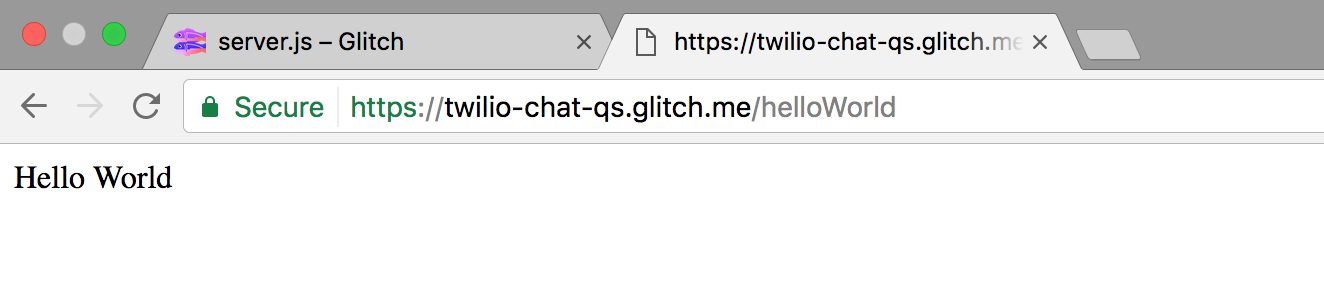
Test the server by adding a “/helloworld” endpoint, shown in the following highlighted lines:
Go to your browser and test this endpoint by going to “/helloWorld”.
(In my case https://twilio-chat-qs.glitch.me/helloWorld).
You should see “Hello World” as a response
Now that we have the server up and running, we can get to building the chat application.
What will our chat app look like?
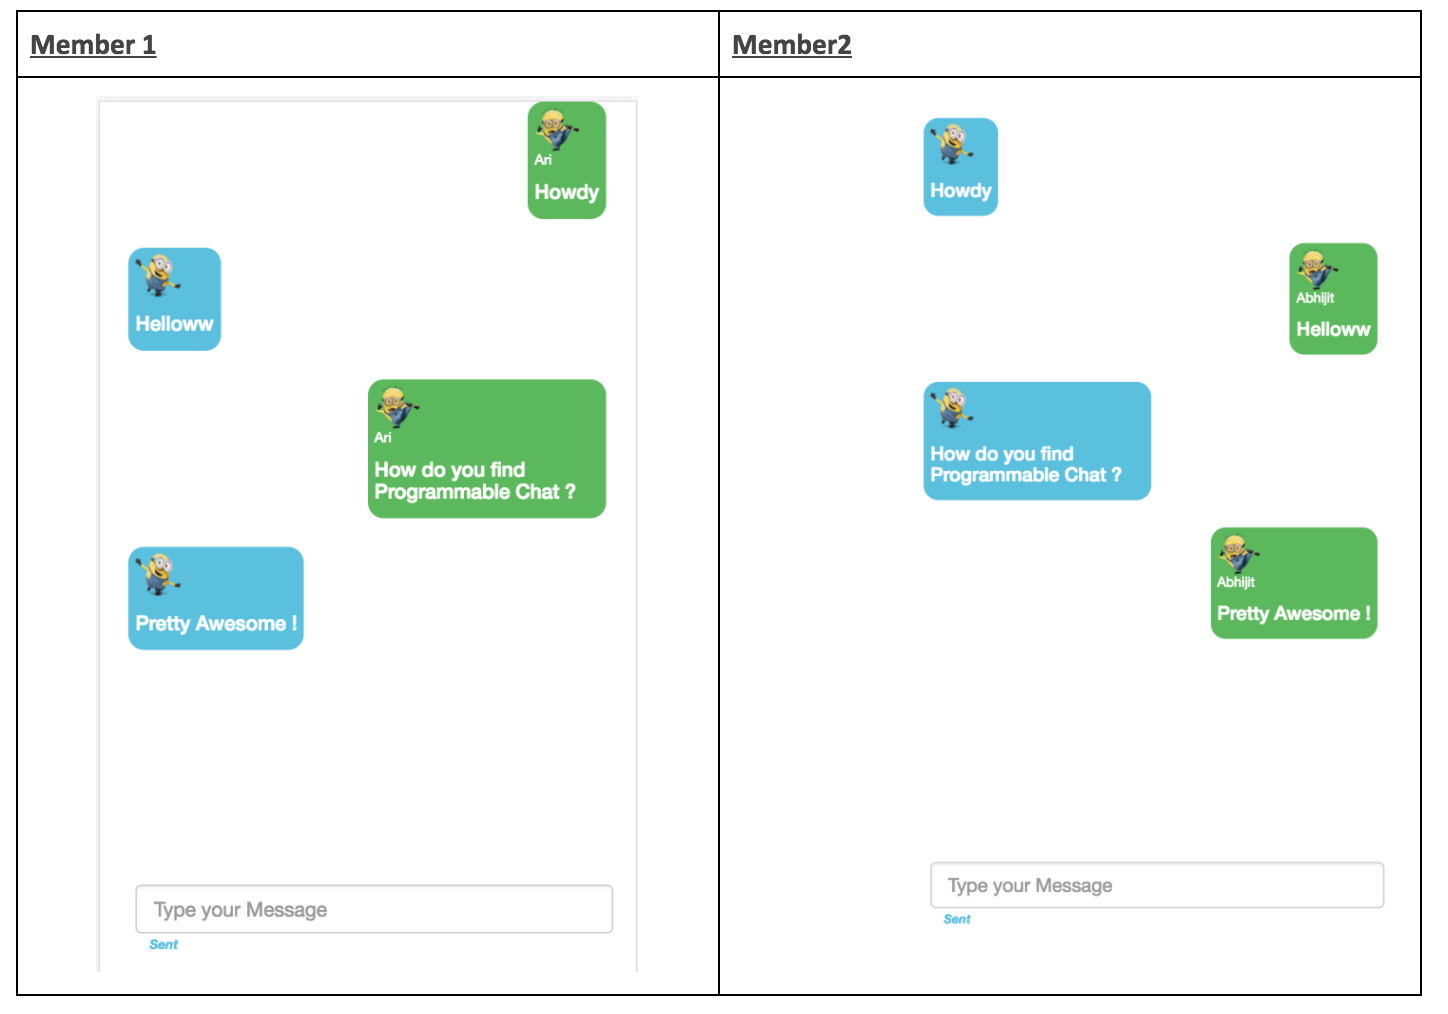
The screenshots of the Login and Chat modules below show what we will build.
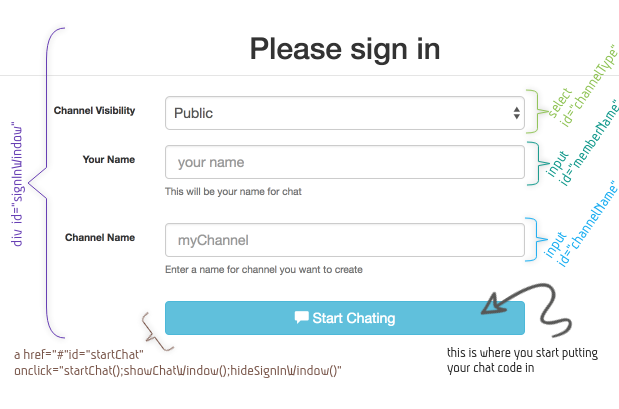
Login Module
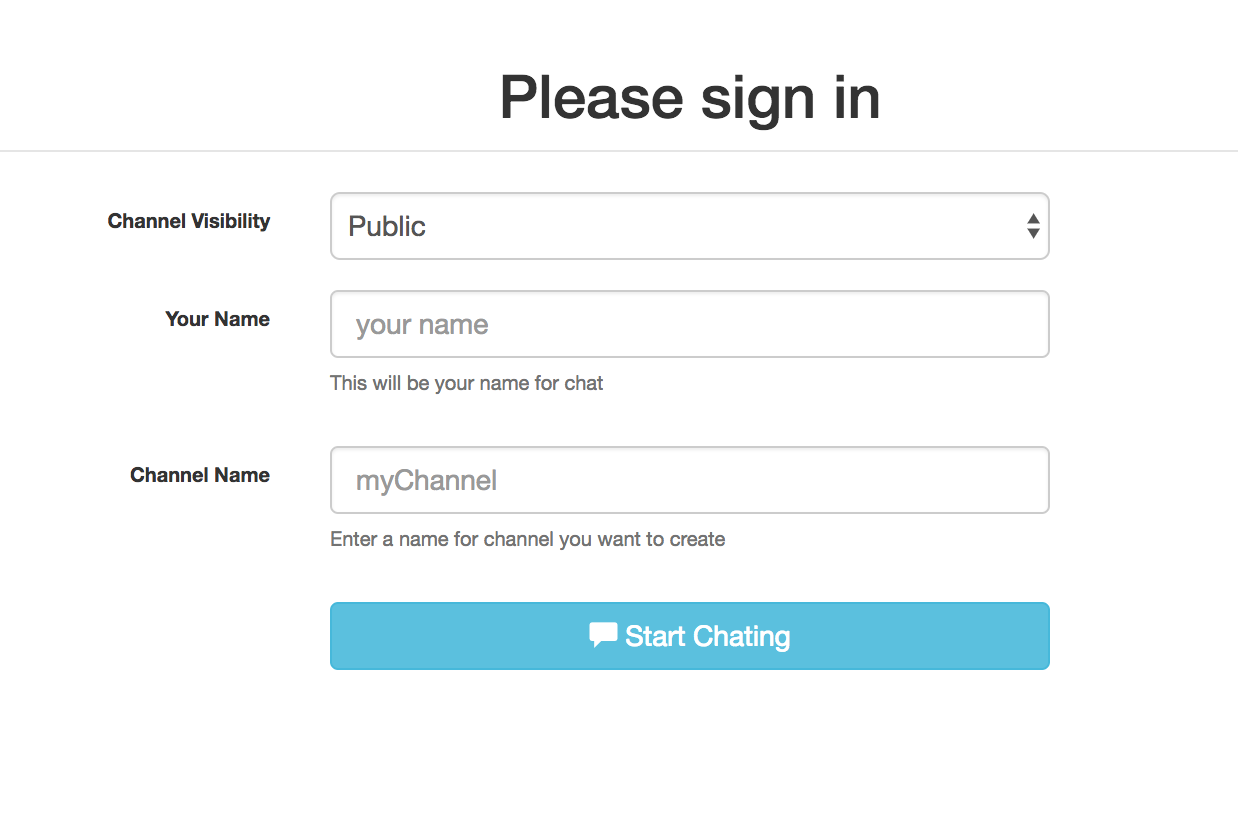
The Login module collects information for identifying:
- chat member
- chat channel
This module can be built with a higher level of authentication using Passwords, LDAP or Authy Phone Verification etc. But in this example, we are just going to let the user put in their information and start chatting.
Chat Modules – Showing Two Participants.
Application Components
A complete secure chat app typically has 2 components
- Server, that vouches for the identity of clients and grants them specific permissions to perform various functions in a chat
- Chat clients (web or mobile), that act as the User Interface for communication
Let’s set up the server component for access and authentication of chat clients to Twilio. The below diagram shows the flow for authenticating a chat client by requesting an access token from your server. The server obtains this token from Twilio by authenticating itself as a valid instance of Twilio Programmable Chat Service.
Access tokens are the way to grant permissions and authentication to chat clients when using Twilio Programmable Chat. You need the following information to generate an access token:
- Twilio Account SID. Go to your Programmable Chat dashboard. In the top right-hand corner, click Show API Credentials. (You will not use the Auth Token. More on that below.)
- Chat Service SID. Each Twilio Programmable Chat app has its own channels, conversations, message history and participants. You’ll need a Chat Service SID to identify which Chat app you’d like to use. On the Chat dashboard, click Manage Your Programmable Chat Service Instances, create a new IPM Service
- Twilio API Keys. If you’ve worked with Twilio before, you may be used to copying the AUTH_TOKEN along with the ACCOUNT_SID. The problem with a single authentication token is that if it gets compromised (e.g. you accidentally commit it to a public repo) then you have to change it in all of your Twilio apps. Instead, we’ll create a set of API keys for use by this app only. Visit your API keys dashboard, and create a set of API Keys
- Identity. Since a Twilio Chat Client can be an app on multiple devices, you should assign an identity, representing a user of chat, and endpoint, representing a device/app for that user. If you want to allow a user to log in from multiple devices and apps, design your endpoint accordingly.
Once you have these values , go to .env file in your project and fill in the values.
Twilio uses these credentials to create a secure token to pass to the client. We will dive into the code as needed.
Go to server.js and add the code shown below.
Client Component for enabling Users to Chat
We’ll create a very basic user interface for the chat clients. Since there are multiple UI frameworks available, I will keep it simple and leave further polishing to you.
In our example, we used Bootstrap Builder to quickly put together a page for the user to enter their name, a channel name and channel privacy. You can grab the getting started template here.
The login module screen is formed of the following elements in chat.html:
- A drop down to collect information on Channel Visibility
- A unique identifier to be associated with a chat member
- Name of the Channel
- An actionable link, in the form of a button, to consume information from above 3 elements and pass it to the server component to get authentication token and initialize chat client. The button also serves the purpose of hiding login module and surfacing up the chat module (since this is a one-page app)
Our chat modules and chat window:
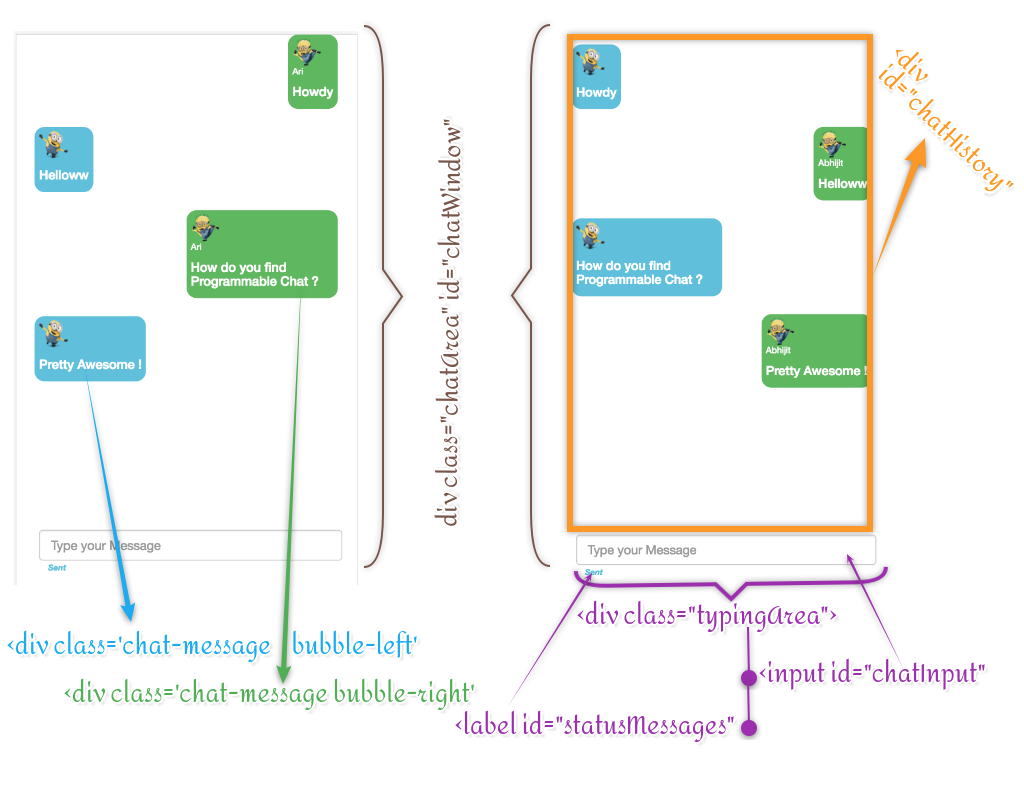
Here’s what our chat messages will look like.
Chat messages are added dynamically, so the static HTML elements are those for chat window.
chatHistory is where we will dynamically add HTML elements to display the new/old messages using chat’s listener events and JavaScript.
Now that we have the skeleton ready, we can get it working with Twilio Programmable Chat.
To use the Javascript SDK, include this code in your webpage:
On click of the button to start chat (in chat.html) the login module is hidden and the chat module is shown.
Get an authentication token in chat.js by passing the memberName.
Also handle getTokenAndSetupChat in chat.js:
Next initialize the chat client in chat.js.
Get a channel for the chat instance:
If a channel already exists, join that channel:
If a channel does not exist, create and join channel:
Again in chat.js, on joining a channel, retrieve chat history.
Listen to relevant event handlers (more about channel events are mentioned at the end of this document). For brevity sake, I am keeping this simple by listening to only the minimum set of events required for creating our functional chat application.
Show the user interface message about joining of channel:
With above three steps, the overall code in the getTokenAndSetupChat in chat.js flow would look like below:
Start Chatting
We can now use Twilio Programmable Chat powered chat client sitting in your webpage to start sending, receiving the message. These are the steps to do that
Listen to “typingArea”, and when a user presses enter, send the message out:
Send a message:
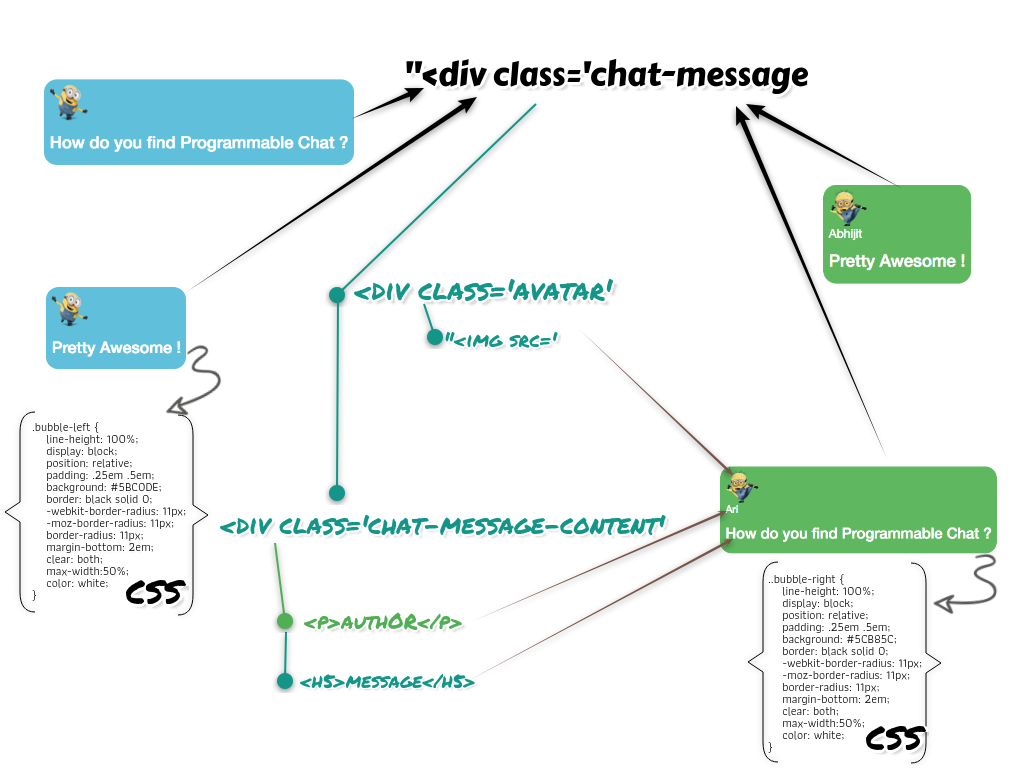
We can also display messages on the chat history area. This is where you dynamically add HTML content into the ‘#chatHistory’. For better presentation, we are going to align messages from the chatting member on the left and messages received from everyone else on the right.
We will include the following information on each message:
- An avatar
- Message Sender ( empty if it’s the window of member itself)
- Actual Message
As shown in the images above, we have added a bit of CSS to make these messages look a bit better. The full CSS is available here.
That’s it really, you have your multi-party chat app ready and functional.
Some of the features that we have not added for the sake of simplicity of this tutorial, but you can easily add, are inviting other members and accepting invites. The code snippets for these part are shown below.
Invite Others to Your Channel
Join Channel
Authenticated members joining existing channels:
You can also listen to invites and perform join as an action to invite:
Handling Channel Events
JavaScript SDK provides events that are triggered by various actions allowing your app to perform relevant actions in the UI(example: listening for new messages on the channel appending it to the conversation).
Events available currently are
- Member events:
memberInfoUpdated,memberJoined,memberLeft,memberUpdated—> Perform UI actions to show members joining, leaving, updating status etc - Message events:
messageAdded,messageRemoved,messageUpdated—> Show messages on the conversation window - Typing events:
typingEnded,typingStarted—> Indicate when a member is typing - Channel attribute event:
updated—> Update the conversation window if admin changes channel details
What’s Next?
You’ve built your basic web chat app and are ready to add some sweet new features. Here are a few more resources to help you get there:
- Roles and Permissions
- Message Read Statuses
- User Presence
- Push Notifications
- Integrating other channels like SMS by intercepting messages using webhooks.
- Using Taskrouter to create a contact center chat experience between agents and customers
- Add a Bot Engine to this chat application
Thanks for reading! If you build something cool using Programmable Chat, or if you have any questions, I’d love to hear about it. Please drop me a line on Twitter – @abhijitMehta or email me at amehta@twilio.com.


Related Resources
Twilio Docs
From APIs to SDKs to sample apps
API reference documentation, SDKs, helper libraries, quickstarts, and tutorials for your language and platform.
Resource Center
The latest ebooks, industry reports, and webinars
Learn from customer engagement experts to improve your own communication.
Ahoy
Twilio's developer community hub
Best practices, code samples, and inspiration to build communications and digital engagement experiences.