Email Address Verification in FastAPI using Twilio Verify
Time to read:
May 07, 2021
Written by
Reviewed by

Most web applications accept the user’s email address during the sign up process. To keep the creation of fake accounts under control, it is always a good idea to confirm that the user can receive email on the provided address.
Twilio Verify is an easy to use service for user verification through numeric codes that can be sent via SMS, voice call or email. In this tutorial you’ll learn how to implement an email verification flow in a FastAPI application.
Tutorial requirements
- Python 3.6 or newer. If your operating system does not provide a Python interpreter, you can go to python.org to download an installer.
- A Twilio account. If you are new to Twilio click here to create a free account now and receive $10 credit when you upgrade to a paid account. You can review the features and limitations of a free Twilio account.
- A SendGrid account. Click here to create a free account, which allows you to send up to 100 emails per day.
SendGrid configuration
To configure an email verification solution you have to connect your Twilio and SendGrid accounts. In this section you will make all the necessary preparations in the SendGrid side.
Creating a dynamic template
The first step is to create an email template that the Twilio Verify service can use when emailing verification codes to users.
From the SendGrid dashboard, click on “Email API” on the left-side menu, and then on “Dynamic Templates”.
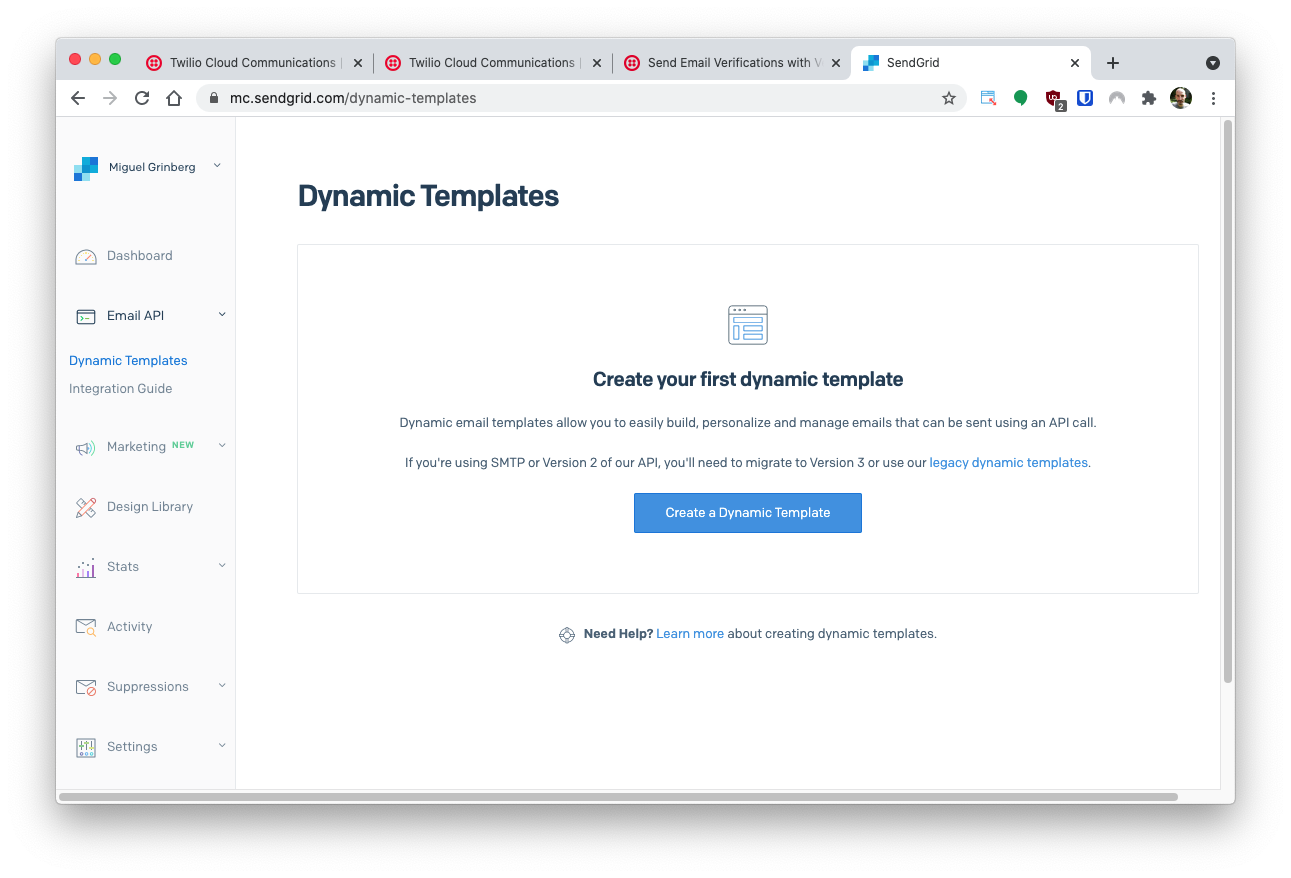
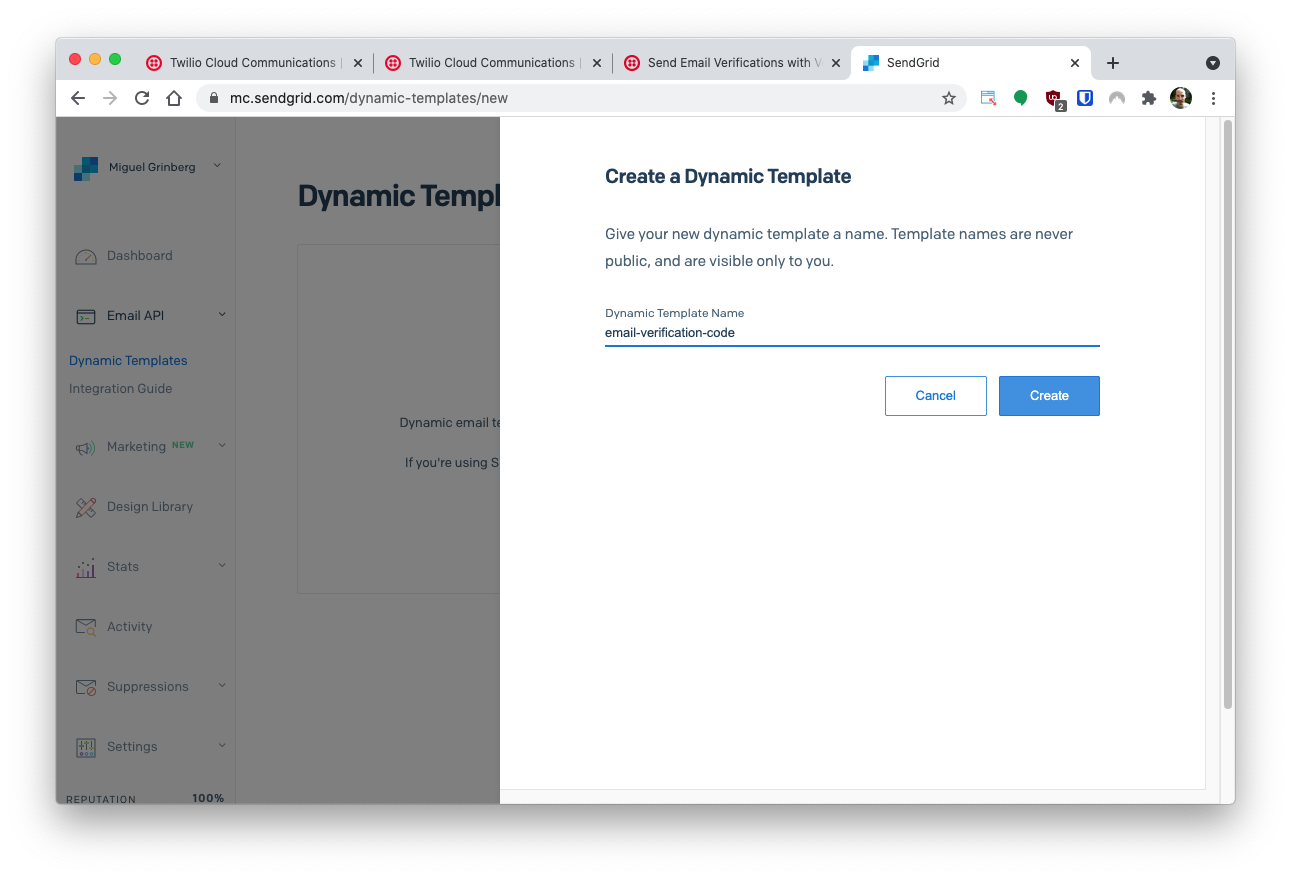
Click the “Create Dynamic Template” button to create a new template. You will need to give your new template a name. Feel free to use any name that you like. For this tutorial I have used the name email-verification.
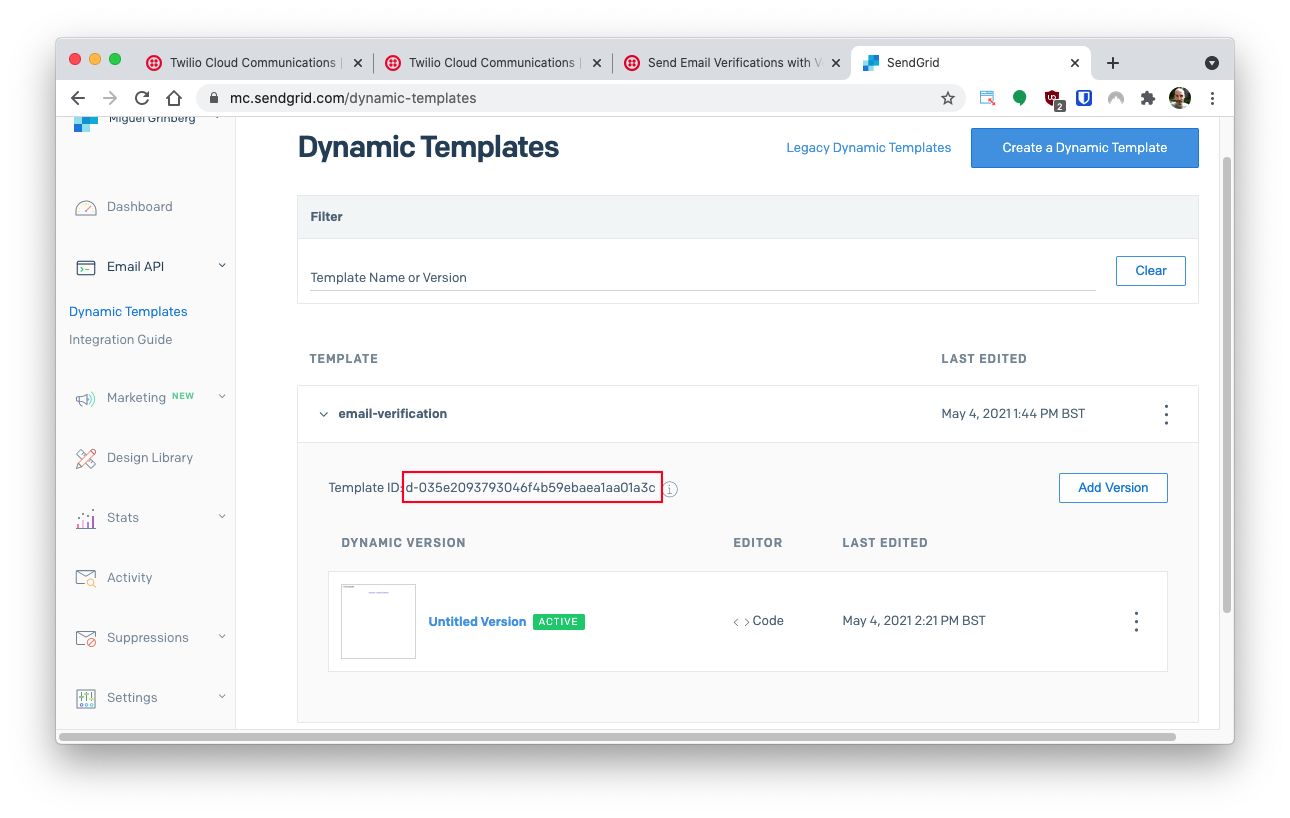
Clicking on the "Create" button will redirect you to the Dynamic Templates page where you will see the newly created "email-verification" template. Click on it to expand the details as shown in the screenshot below:
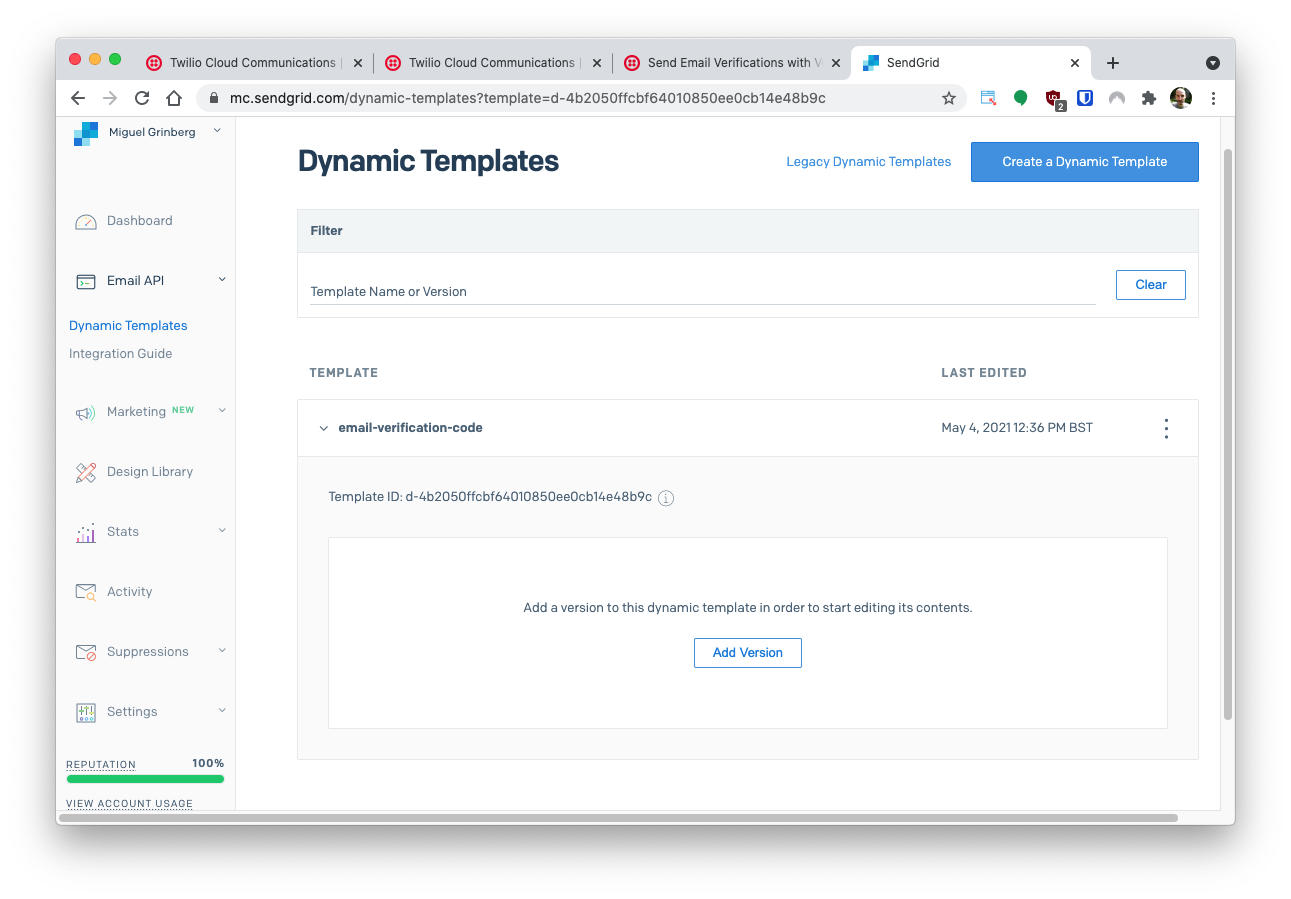
Click the “Add Version” button to create a first version for the template, and you will be offered a choice of pre-made templates to choose from. For the needs of this tutorial, you can select the “Blank Template”, but if you are familiar with HTML you can try one of the more interesting options.
The next prompt will ask you to select an editor for your template. Select the “Code Editor” option to have direct access to the HTML code of the email body.
You will notice that the blank template isn’t really blank, as it comes with a footer with unsubscribe links. Leave those links alone and add the following HTML line to insert a paragraph with the email body above them, right after the <body> element tag:
Below you can see how this paragraph fits within the email in the code editor:
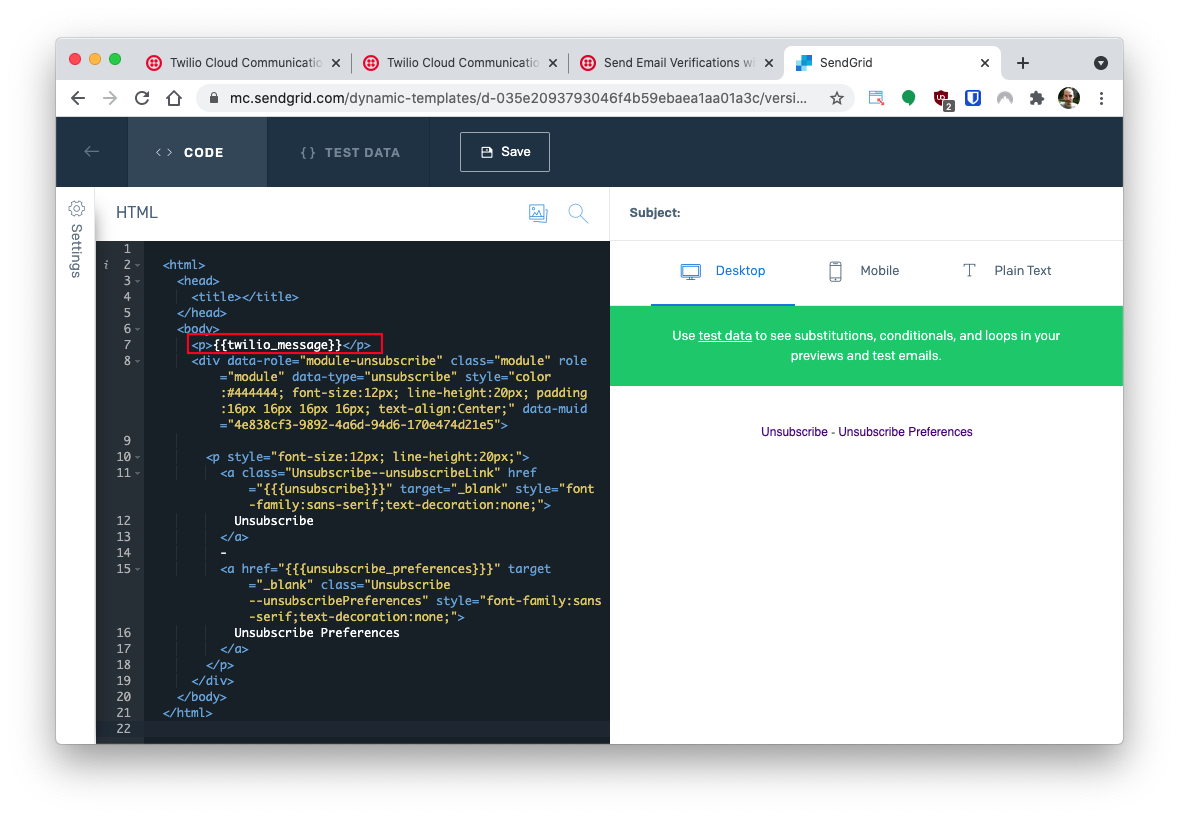
In this template, {{twilio_message}} is a placeholder that will be replaced with the text of the email by Twilio. The email will read something like “Your verification code is: xxxxxxxx”.
There are a handful of placeholder variables that you can use to design the email body if {{twilio_message}} does not work for your needs. See the documentation to learn about them.
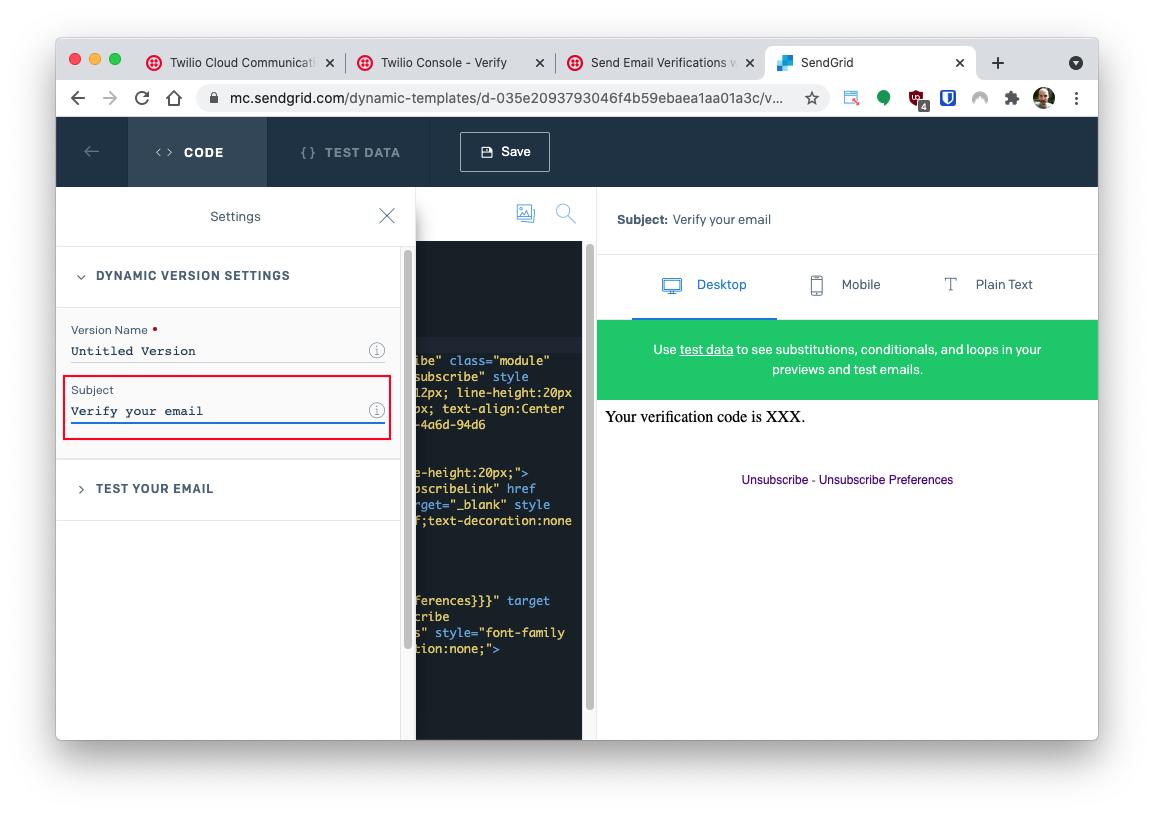
If you’d like to see how the email will look with actual data, you can click on the “Test Data” tab on the top of the page and enter an example value for the twilio_message variable in JSON format. For example, you can enter the following:
Once you are happy with the template, click the “Settings” vertical button on the top-left corner of the page and enter a subject for your email.
Click the “Save” button in the navigation bar and return to the Dynamic Templates page by hitting the back arrow button in the top left corner of the page.
Your new email template will have a “Template ID” assigned to it, which you will need later when configuring the Twilio account. You can see where to find it in the screenshot below.
Creating an API key
The second part of the SendGrid configuration is to create an API key that Twilio can use when sending verification emails to users.
From the dashboard, select “Settings” and then “API Keys”. In the API Keys page click the “Create API Key” button.
You will need to give your API key a name. Once again you are free to use any name that you like. I have used email-verification. From the three options below the name, select Full Access.
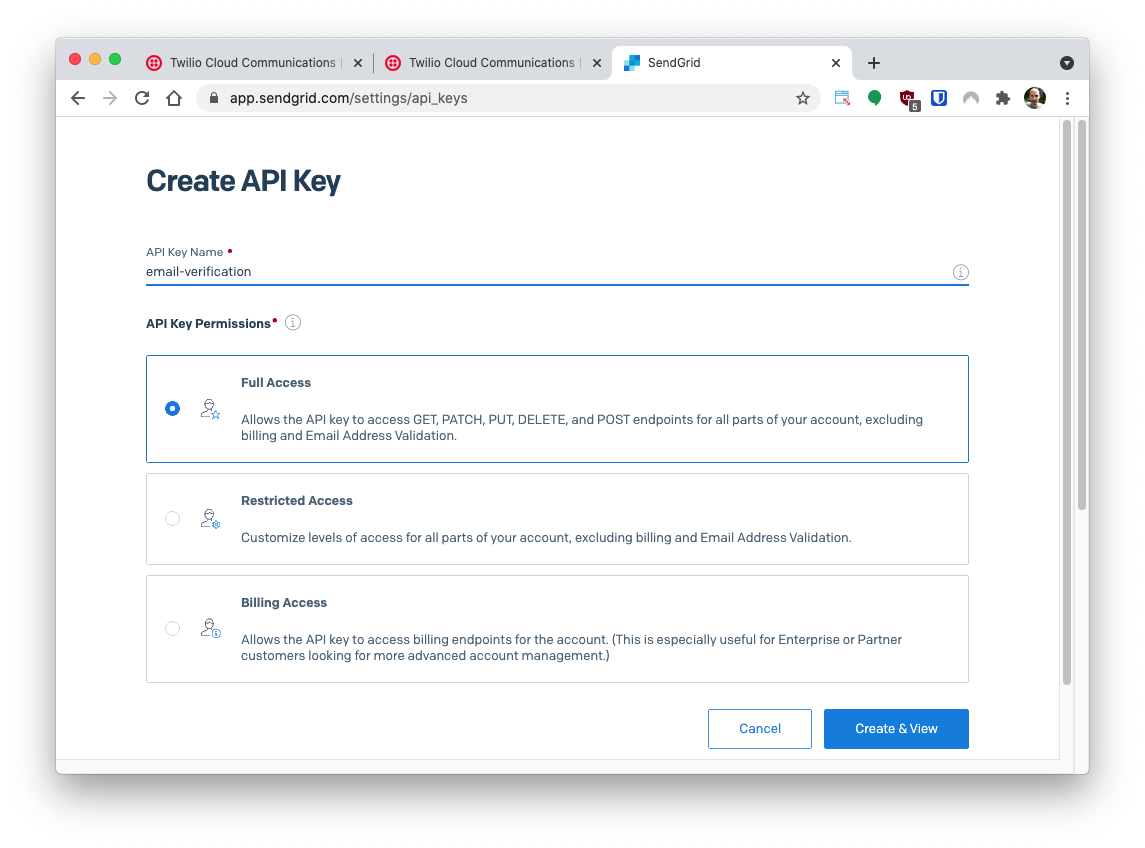
Click the “Create & View” button to create the key. In the next page your API key will be displayed. This is the only time you will be able to see your key, so copy the key and paste it in a text document to keep it handy until you need it in the next section.
Twilio configuration
The Twilio Verify service will send email through the SendGrid API key and dynamic template configured in the previous section. You will now move to your Twilio account to complete the configuration and link your Twilio and SendGrid accounts.
Creating an email integration
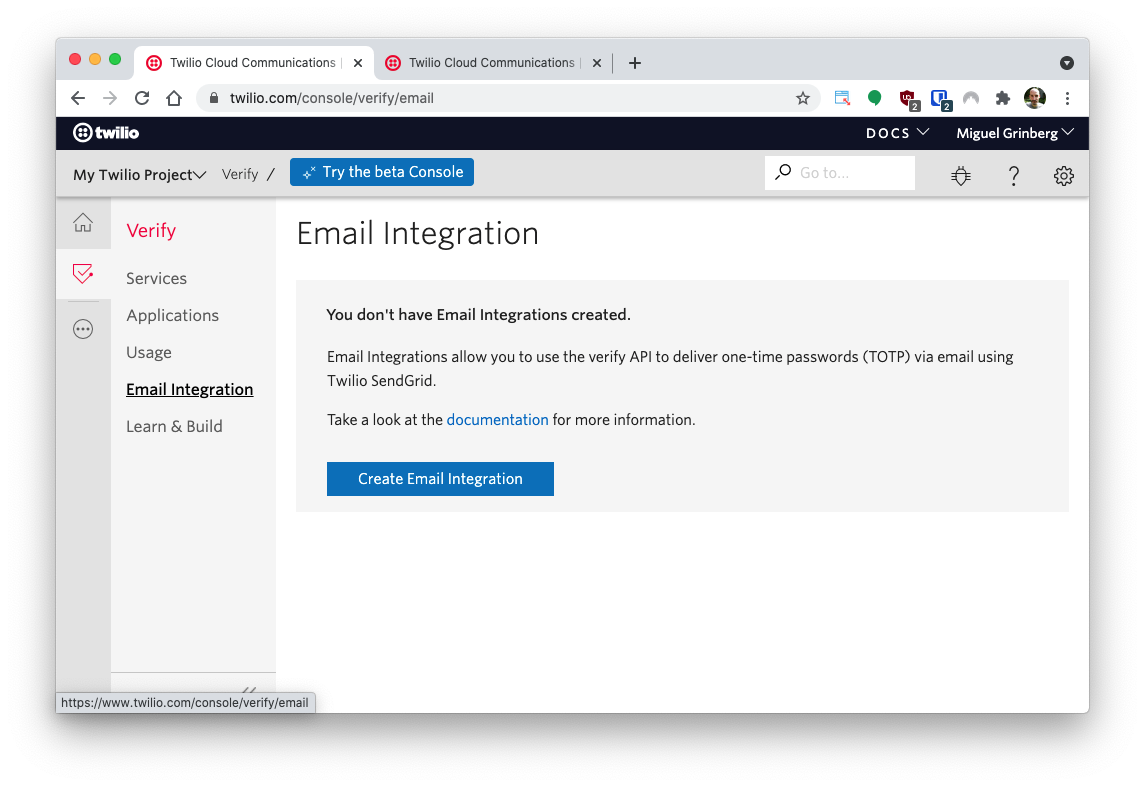
From the Twilio Console, click the “All Products & Services” button and find “Verify”. Then click on “Email Integration” in the Verify menu.
Click the “Create Email Integration” button to create a new email integration. If you already have one or more email integrations, click the “+” sign to add one more.
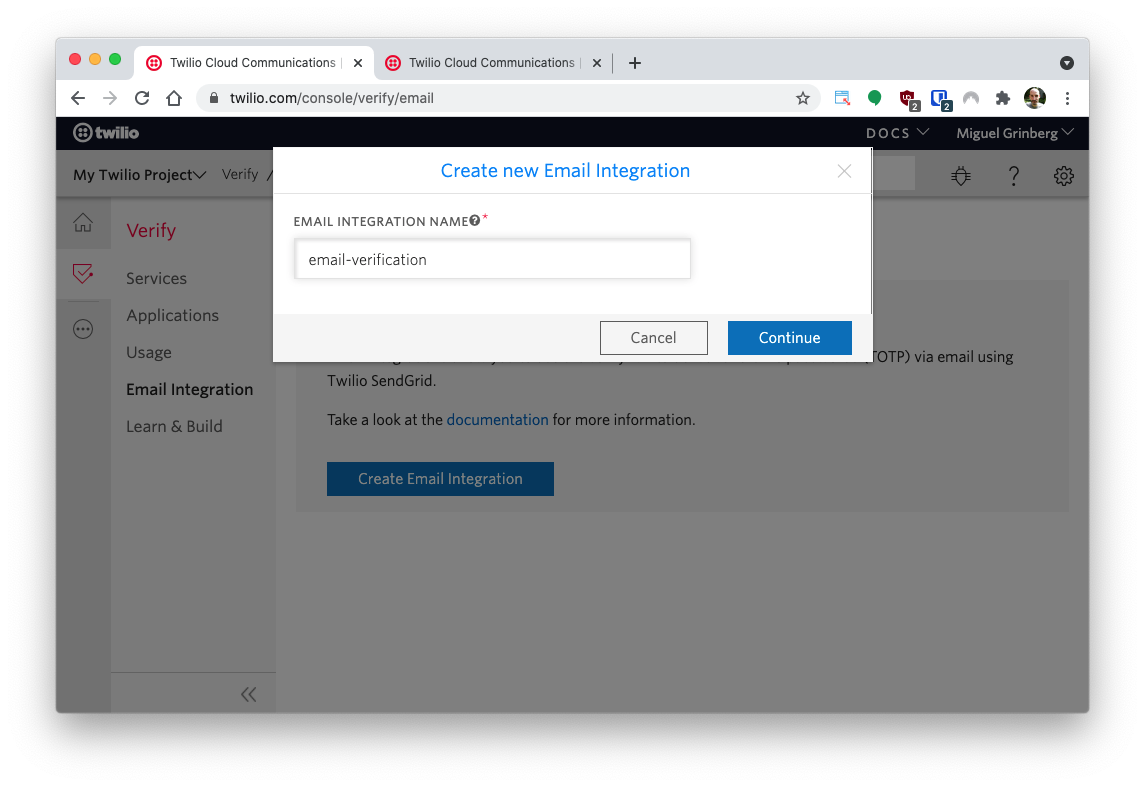
You will be prompted to give your email integration a name. I’ve used email-verification.
After you provide the name, you will have to enter the details of your SendGrid account. You will need to provide the following information:
- Your SendGrid API key, created in the previous section.
- The Template ID of the dynamic template, created in the previous section.
- An email address to use in the “From” field of the verification emails.
- A name to use in the “From” field of the verification emails. You can enter your website or company name in this field.
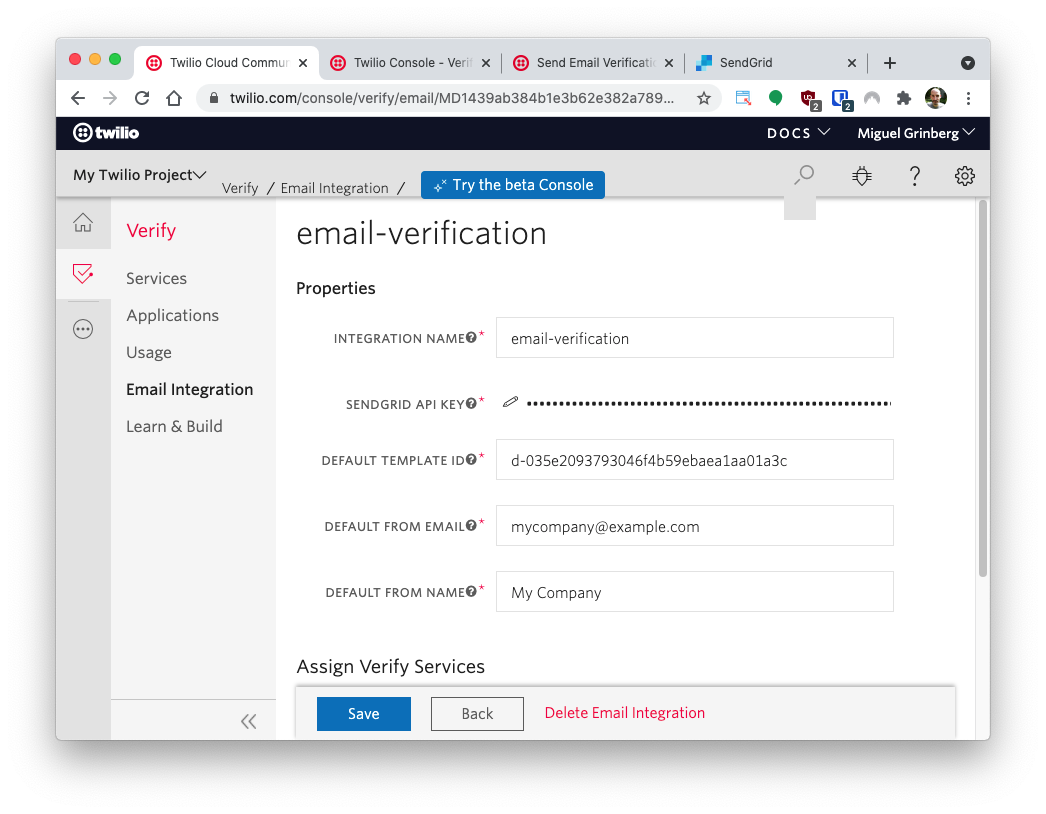
Once you complete the fields indicated above, click “Save” to store the email integration.
Creating a Verify service
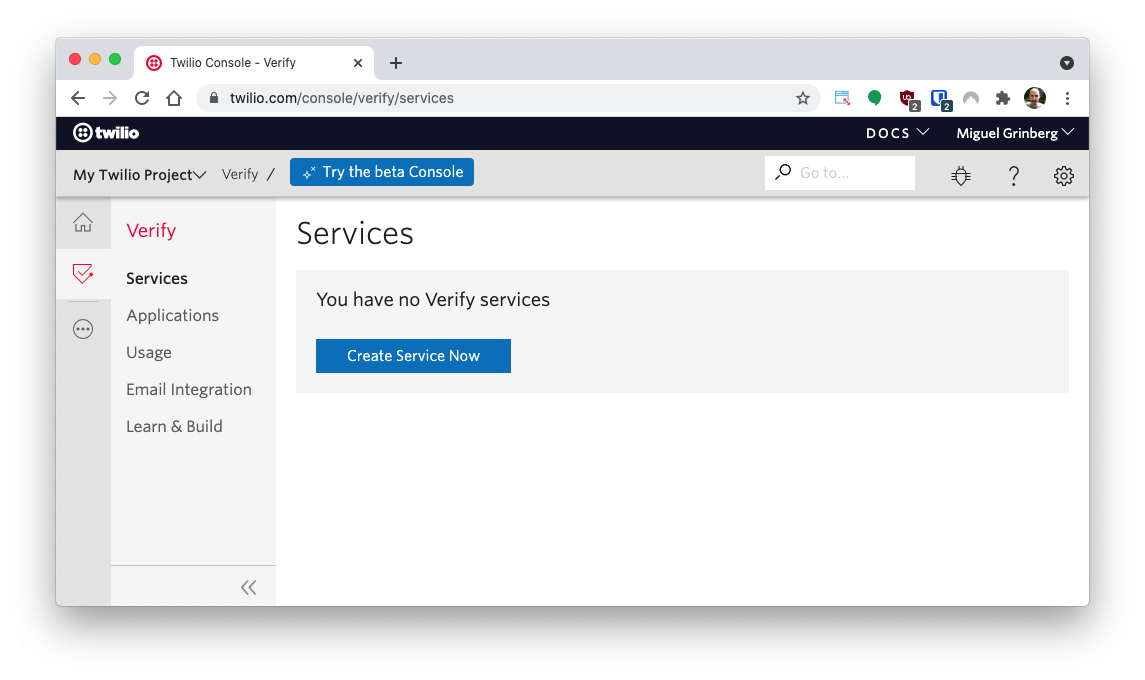
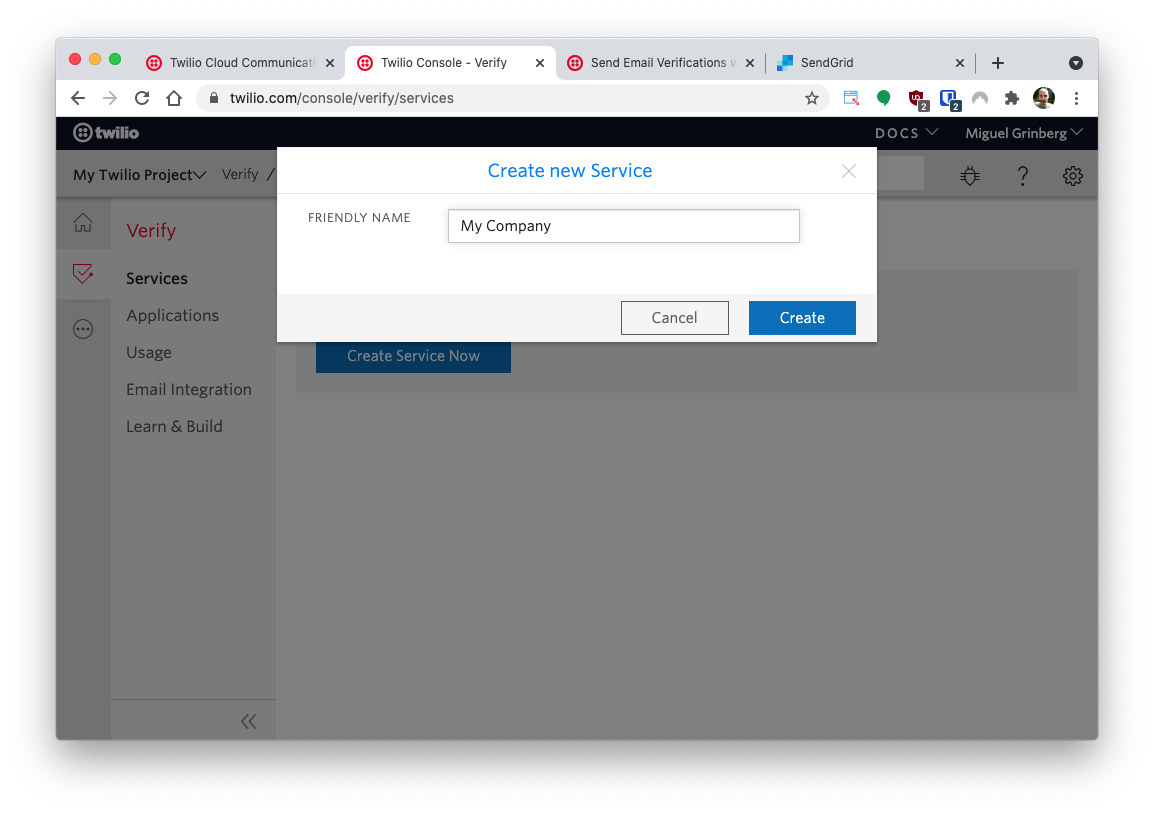
Select “Services” from the Verify menu, and then click the “Create Service Now” button. Note that if you already have one or more Verify services in your account, you will need to click the “+” button to add a new service.
Give the service a friendly name. This name will appear in the verification emails that are sent out to your users, so it is a good idea to use your website or company name. For this tutorial I’ve used the name My Company.
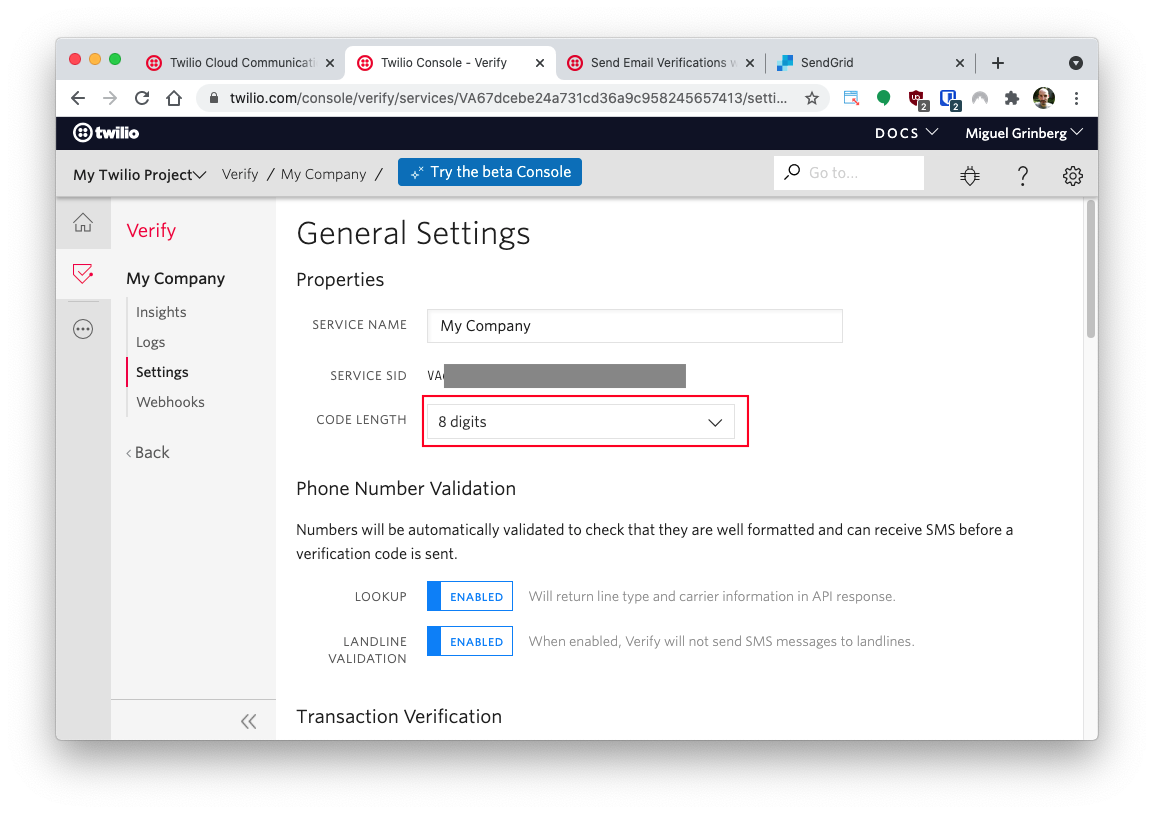
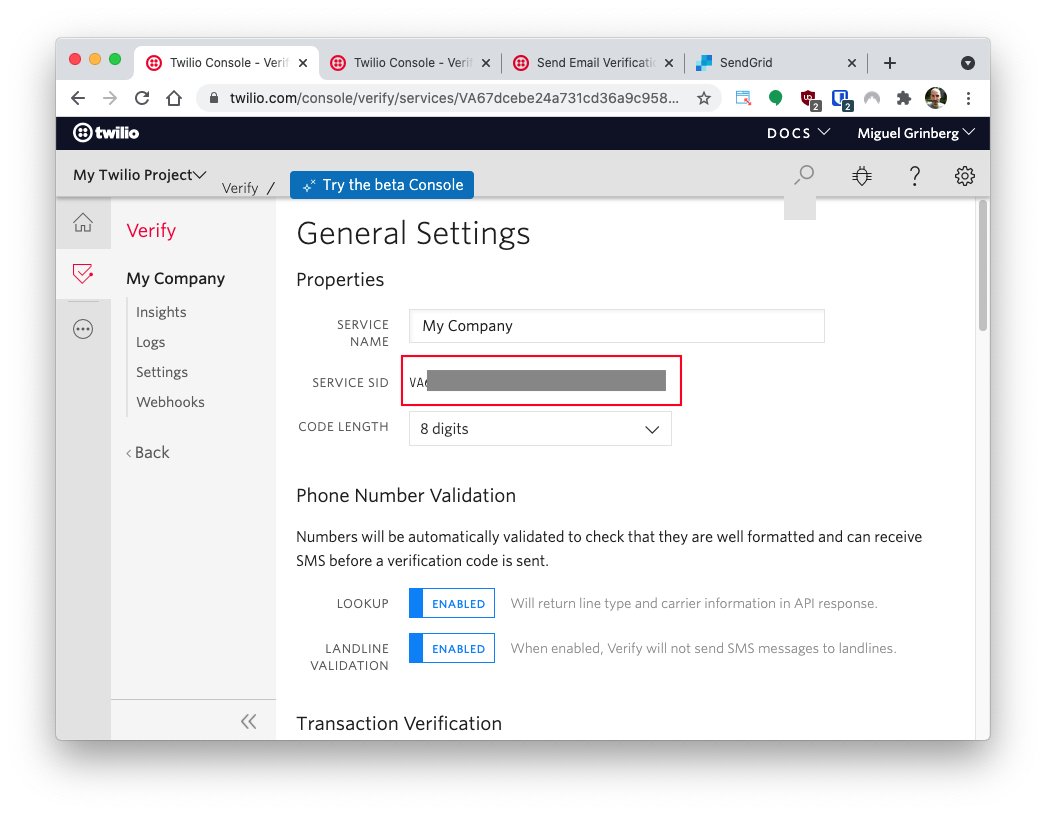
You will now have a list of configuration settings that you can edit on this service. Near the top of the page you will see a dropdown that configures how many digits are used in the verification codes. I’ve chosen 8 digits, as shown below.
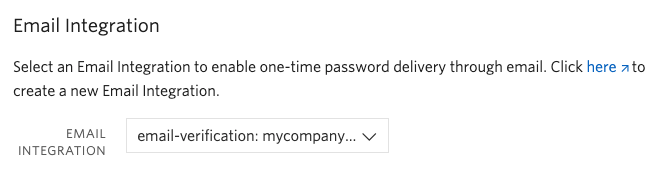
Scroll down to the “Email Integration” section and select the email integration that you created above in the drop down.
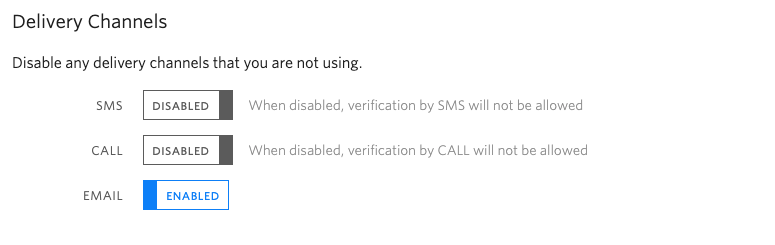
Keep scrolling down to the bottom to find the “Delivery Channels” section. Since you are only going to use emails in this example, it is a good idea to disable the other two channels.
Click the “Save” button to record your changes. Congratulations, your email verification service is now fully configured and you are ready to start coding the FastAPI application!
Project setup
In this section you are going to set up a brand new FastAPI project. To keep things nicely organized, open a terminal or command prompt and find a suitable place to create a new directory where the project you are about to create will live:
Creating a virtual environment
Following Python best practices, you are now going to create a virtual environment, where you are going to install the Python dependencies needed for this project.
If you are using a Unix or Mac OS system, open a terminal and enter the following commands:
If you are following the tutorial on Windows, enter the following commands in a command prompt window:
With the virtual environment activated, you are ready to install the Python dependencies required for this project:
The six Python packages that this project uses are:
- The FastAPI framework, to create the web application.
- python-dotenv, to import the application configuration from a .env file.
- aiofiles, to give FastAPI the ability to serve static files.
- python-multipart, to give FastAPI the ability to process form data.
- uvicorn, to serve the FastAPI application.
- Twilio Python Helper library, to work with the Twilio APIs.
Defining application settings
To send verification emails with Twilio Verify, the FastAPI application will need to have access to your Twilio account credentials to authenticate. The application will also need to know the ID of the Twilio Verify service you created above.
The most secure way to define these configuration values is to set environment variables for them, and the most convenient way to manage your environment variables in a FastAPI application is to use a .env file.
Open a new file named .env (note the leading dot) in your text editor and enter the following contents in it:
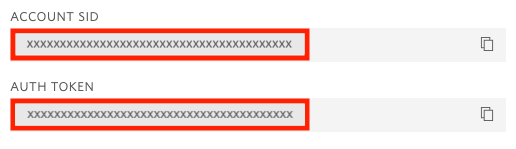
You will need to replace all the xxxxxxxxx with the correct values that apply to you. The first two variables are your Twilio “Account SID” and your “Auth Token”. You can find them in the dashboard of the Twilio Console:
The TWILIO_VERIFY_SERVICE variable is the “SERVICE SID” value assigned to the service. You can find this value in the configuration page for your service.
To incorporate these three variables into the FastAPI application, create a file named config.py with the following contents:
FastAPI relies on the BaseSettings class from pydantic to manage its configuration. Subclasses of BaseSettings automatically import variables defined as attributes from environment variables, or directly from the .env file with its dotenv integration.
You will learn how to work with the Settings class in the next section.
Email verification with FastAPI
You will now code the FastAPI application.
Base FastAPI application
Below you can see the first iteration of the FastAPI application. This version just returns the main page, which presents a web form where the user can enter the email address to verify.
Open a new file named app.py in your text editor or IDE and enter this code in it:
The settings variable will import the configuration variables that you stored in the .env file in the previous section. The app variable represents the FastAPI application. The client variable is an instance of the Twilio client library, which will be used to send requests to the Twilio API. Note that the Twilio client is initialized with the credentials loaded from the configuration, which are required to authenticate when sending requests.
The @app.get(‘/’) decorator defines an endpoint that is mapped to the root URL of the application. The implementation of this endpoint returns a response that is loaded from a static file named index.html.
For this endpoint to work, you need to create the HTML file. Open a new file named index.html in your editor or IDE and enter the following HTML code in it:
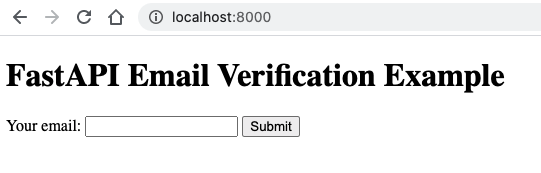
This HTML page creates a form with a single field that prompts the user to enter an email address.
Running the server
The application is not complete yet, but it is functional enough to be tested. Make sure you have the app.py, index.html, and .env files created earlier in your project directory, and then start the application using the following command:
Uvicorn is the recommended server to run FastAPI applications. The --reload will make uvicorn watch your source files and automatically restart the server when changes are made. You can leave the server running throughout the rest of the tutorial.
To make sure that your application is running, you can now open a web browser and type http://localhost:8000 in the address bar. The browser should load the main page of the application, which looks like this:
Handling form data
If you try to submit the form, FastAPI will return a “Method not allowed” error message. This is because the form submission hasn’t been implemented yet.
In the <form> element in index.html, the form is defined with the method attribute set to post and no action attribute. This means that the form will be submitted with a POST request to the originating URL, which in this case is the root URL of the application.
The endpoint that handles the form submission will have the following structure. You can add it at the bottom of app.py, but note the lines that start with # TODO, which indicate parts of the function that haven’t been built yet.
On this second endpoint, the @app.post(‘/’) decorator is used to define a handler for POST requests. The web form has a single field named email, so this is given as an argument into the function. FastAPI will parse the form data and extract the value of this field passed by the client and send it to the function in this argument.
You will complete this endpoint in the following sections.
Sending a verification code
When the handle_form() function is invoked, the application will have an email address to verify, so the Twilio client instance created earlier can be used to send the email to the user, except for one small problem.
The problem is that the Twilio helper library for Python does not support asynchronous applications. Since this library will be making network requests to Twilio servers, it will block the asyncio loop if used directly in the asynchronous function. To avoid blocking the loop, all the Twilio related work can be encapsulated in a function that executes inside an executor to keep the application running smoothly.
Below you can see an updated version of the handle_form() function from app.py with the logic to run the send_verification_code() function in an executor.
The run_in_executor() method from the asyncio loop allows you to run a blocking function in a separate thread or process so that the loop does not block. The first argument is the executor that you’d like to use, or None if you are okay using a default thread executor. The remaining arguments are the function to run and its positional arguments.
Let’s now have a look at the implementation of the send_verification_code() function. Note that this is standard synchronous code, so this function is not defined with the async keyword. Add this function to app.py:
The function uses the instance of the Twilio client created in the global scope to create a verification resource. The status of a newly created verification resource is “pending”, so the function uses an assert statement to confirm the object is in the expected state.
At this point Twilio will use your SendGrid API key and template to send an email to the provided address, including a randomly generated numeric code.
Sending a response
In the previous section the handle_form() function was left in an incomplete state. After the verification code is sent through the executor, the server needs to return a response to the client’s web browser.
The most accepted practice when handling a form submission is to respond with a redirect, which avoids a number of potential issues including double form submissions and confusing warnings presented to the user by the browser. This is known as the Post/Redirect/Get pattern, or PRG.
For this application, the browser now needs to display a second form, in which the user types the code received by email as verification. This second form will be implemented under the /verify endpoint, so that is where the redirect needs to be issued. Here is the complete implementation of the handle_form() function. Make sure you update your version in app.py.
The response will instruct the browser to immediately redirect to the /verify URL. One interesting aspect of this application is that the email address from the user is going to be needed again when the code needs to be verified. To avoid losing this address, the function adds a session cookie and stores this address in it before returning the response.
Accepting the code
The user now received an email with the numeric code, so the browser needs to present a second web form in which the user can type the code and verify the email address.
A GET request to the /verify endpoint will simply return the HTML page with the form. Add this endpoint to app.py:
This endpoint references a verify.html file. Create this file in your project directory and enter the following contents in it:
Verifying the code
The logic to verify a code requires making another call to a Twilio API, so once again an auxiliary synchronous function that will run inside an executor is needed. Add the following function to app.py:
The check_verification_code() function accepts an email address and a numeric code and sends them to the Twilio Verify service for verification. If the check is successful, the status of the returned verification check resource is set to approved. If the code is not the correct one, then the status of the returned resource is pending. The function checks the status and returns True when the provided code was correct or False otherwise.
When the user submits a code for verification the browser will issue a POST request to the /verify endpoint. Below you can see the handler for this request. Add this function to app.py.
This endpoint accepts two arguments. The email argument comes from the cookie that was set earlier, while the code argument comes from the form submission. These are passed to the check_verification_code() function, which needs to run in an executor so that it does not block the async loop.
If the code is verified successfully, then the response from this endpoint is a redirect to a /success URL. If the code does not verify, then a redirect to the /verify endpoint is issued. This is the endpoint that shows the form that accepts the code, so this allows the user to type a new code.
Here is the implementation of the /success endpoint. This handler goes at the end of app.py.
This is a short handler that renders an HTML page. Create the success.html file and copy the following contents to it:
This page notifies the user that the verification was successful, and includes a link to the main page, in case the user wants to verify another email address.
Testing the application
And now you have arrived at the moment you’ve been waiting for. The application is complete and ready to be tested. Make sure your app.py is updated with all the functions shown above and that you have the config.py, .env, index.html, verify.html and success.html files also in your project directory.
If you left uvicorn running from the start of the tutorial, the server should have restarted on its own every time you made an update to the source files so you are ready to go. If you are not currently running the server, you can start it with the following command:
Open your web browser and navigate to http://localhost:8000. In the form, enter your email address. Click the submit button and in just a moment, you will receive an email with a verification code. Enter the code to have your email verified!

Conclusion
Congratulations on learning how to verify email addresses with FastAPI and Twilio Verify! The techniques that you learned in this article can be applied to other frameworks, in particular those that are also based on asyncio such as Quart, Sanic, and Tornado. For an in-depth discussion on working with Twilio in your asynchronous applications, check out Using the Twilio Python Helper Library in your Async Applications on this blog. Would you like to learn more Twilio tricks for FastAPI? Here is an article on how to send an SMS.
I’d love to see what you build with Twilio and FastAPI!
Miguel Grinberg is a Principal Software Engineer for Technical Content at Twilio. Reach out to him at mgrinberg [at] twilio [dot] com if you have a cool project you’d like to share on this blog!
Related Resources
Twilio Docs
From APIs to SDKs to sample apps
API reference documentation, SDKs, helper libraries, quickstarts, and tutorials for your language and platform.
Resource Center
The latest ebooks, industry reports, and webinars
Learn from customer engagement experts to improve your own communication.
Ahoy
Twilio's developer community hub
Best practices, code samples, and inspiration to build communications and digital engagement experiences.