Send Email Notifications to Subscribers with SendGrid and Node.js
Time to read:
December 12, 2021
Written by
Reviewed by

Introduction
Sitting at your device all day waiting for a price drop on a product can be a cumbersome task. An email notification system will ensure that you never miss out on your most coveted item. Whether you’re looking for the hottest pair of shoes or a couch for your living room, it can all be automated to your benefit and make technology work for you.
In this article, you will learn how to build an email price notification system. To do this, you’ll use the Sneaks API to track sneaker prices and deliver SendGrid email alerts whenever the price of a particular sneaker decreases.
Prerequisites
Here is what you will need to follow along with this article:
- Node.js installation
- A free SendGrid account
- An email address to test out this project
Configure Your Environment
In this section, you will first configure your environment by setting up your SendGrid account, and building the scaffolding for your email notification system.
Generate your SendGrid API key
Start off by logging into your SendGrid account and heading to the API Keys section. Click the blue “Create API Key” button on the top right.
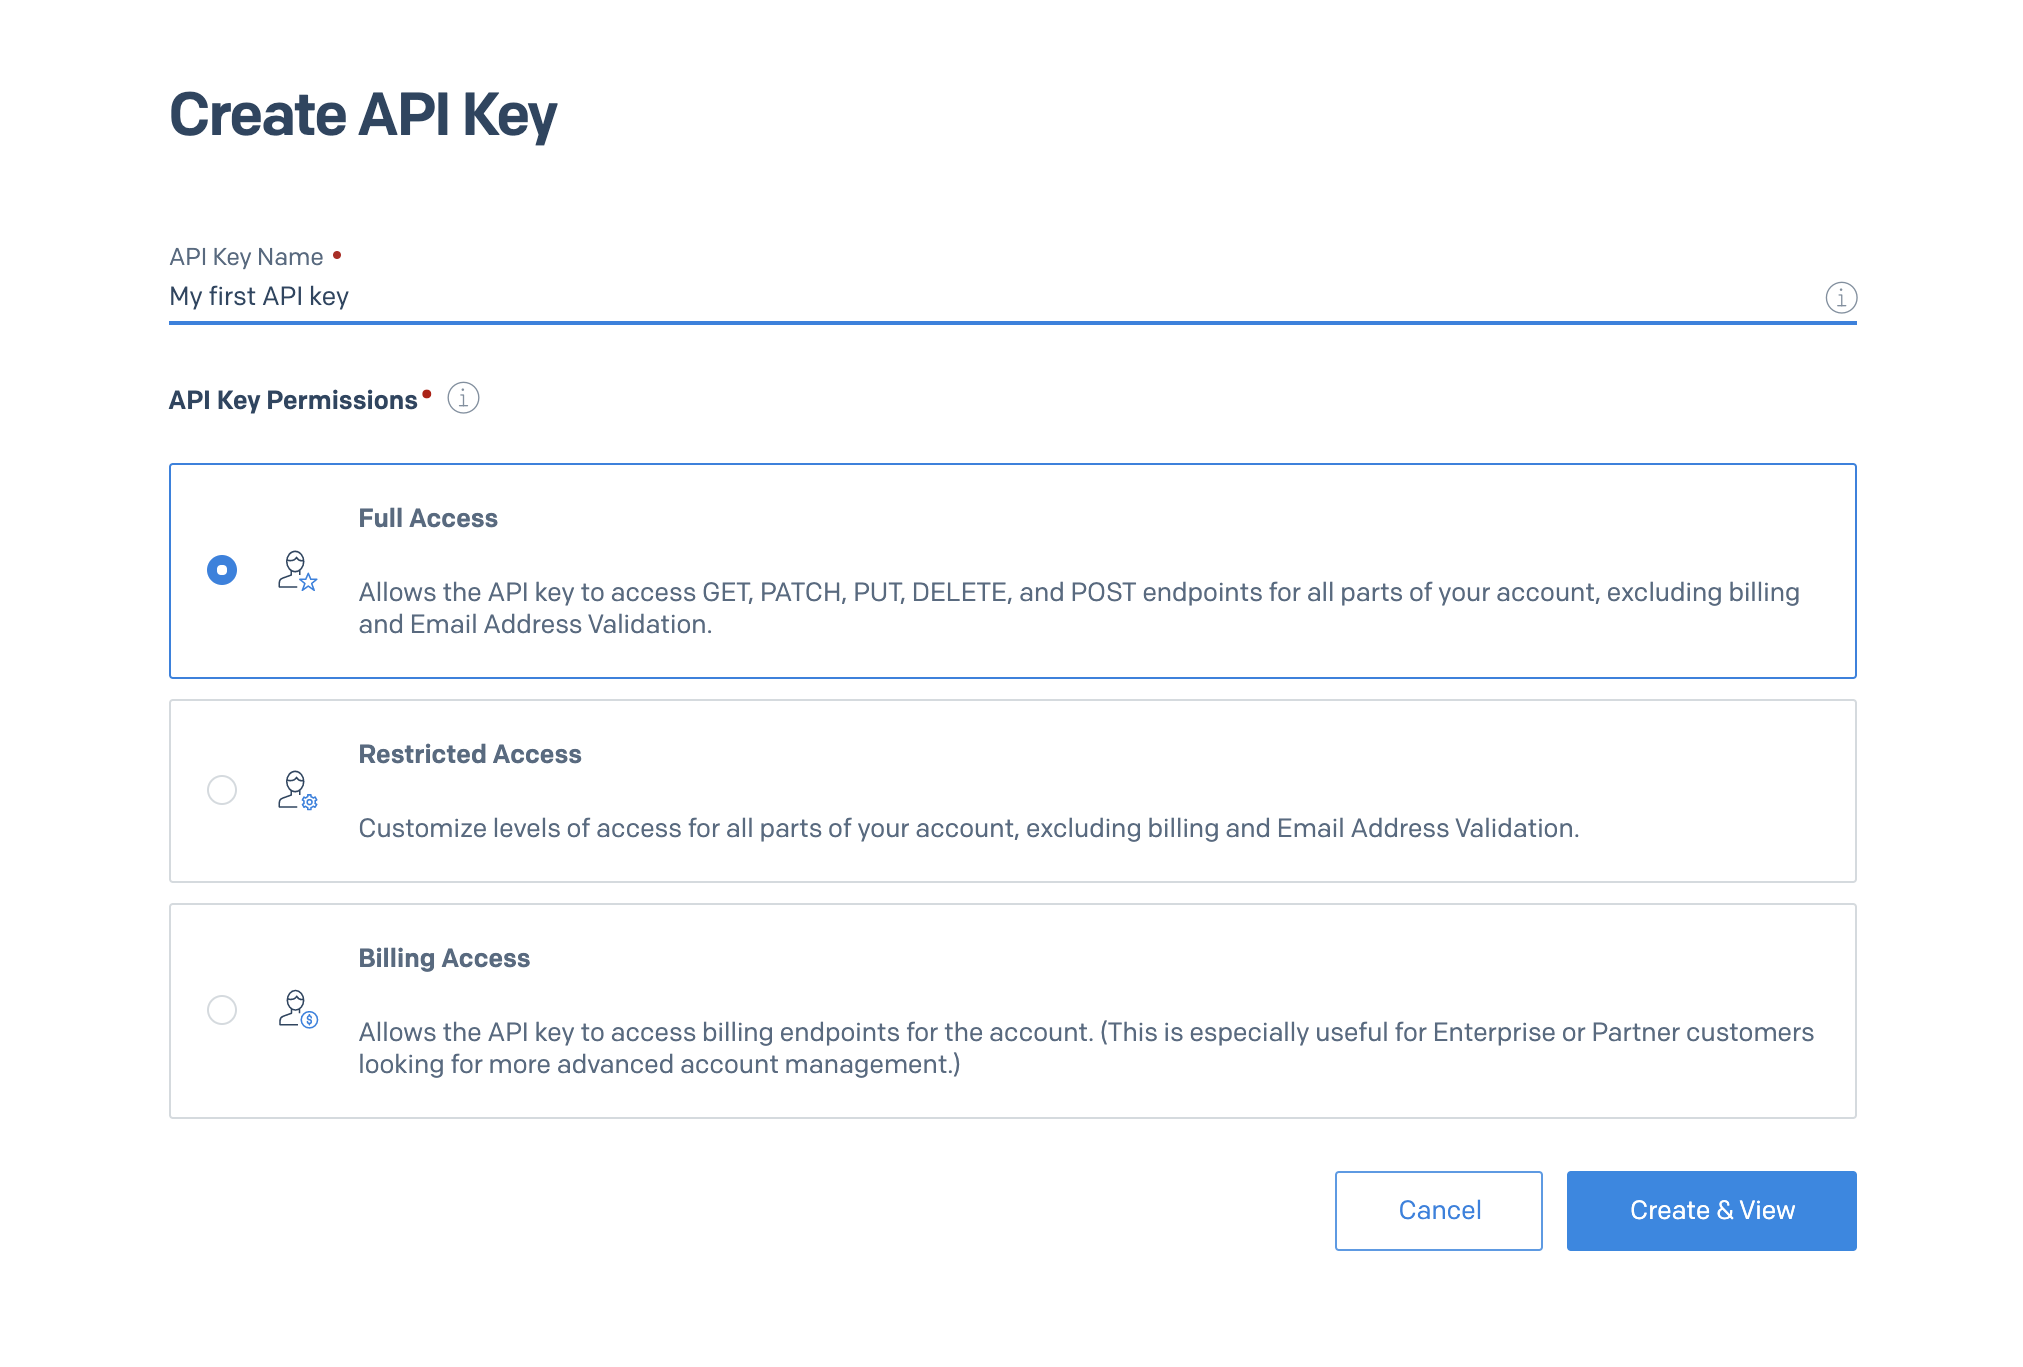
Choose whatever name you’d like for your API key and click the blue “Create & View” button. Copy your API key and store it in a safe place.
Create your project structure
The next step is to build the scaffolding for your Node.js project in your preferred directory. Inside your terminal or command prompt, navigate to your preferred directory and enter:
The next step is to initiate a brand new Node.js project and to install the dependencies required for this project:
You will need the `@sendgrid/mail` package which allows you to use the Twilio SendGrid API to send and receive emails. `dotenv` is used to access environment variables, which is where you will store your SendGrid API key needed to interact with the API. The `sneaks-api` package is used to track sneaker prices. The `fs` package will allow us to interact with our subscribers database which we will simulate using a JSON file. Lastly, the `node-schedule` package is used to schedule the price checker.
Simulate subscribers and build a scheduler
Because you’re building a price notifier that alerts subscribers to a price change of a given product, you’ll need some subscribers to send the alerts to. Normally, in a production app, you would use a database to store your subscribers but in this case you’ll create some fake subscribers and store them as objects in a JSON file. Copy and paste the following code into the subscribers.json file:
Helper functions
Right below your main function is where you’ll place your helper functions. These helper functions will help your code be a bit more modular and will make your code easier to read.
The getSneakerMap() function takes in the list of subscribers, iterates through them and uses the sneaksApiFunctionWrapper() to grab all the sneaker objects from the sneaks-api. These objects will be placed in a map where its key values are its style ID. Add this function before the main() function in index.js.
Test Your Notifier
Now that your index.js file has been built, it’s time to test it out!
Head over to your terminal and navigate to your project directory. Paste in the following command:
This command will run the index.js file and will notify the emails in the subscribers.json file if there was a price drop on their sneakers. But before you execute this command, change the existing prices in the subscribers.json file to a higher value and the emails to your own email to ensure your notifier works and that you’ll receive an email.
Now run the command in your terminal and in a few seconds you’ll see an email regarding the price drop in your inbox.
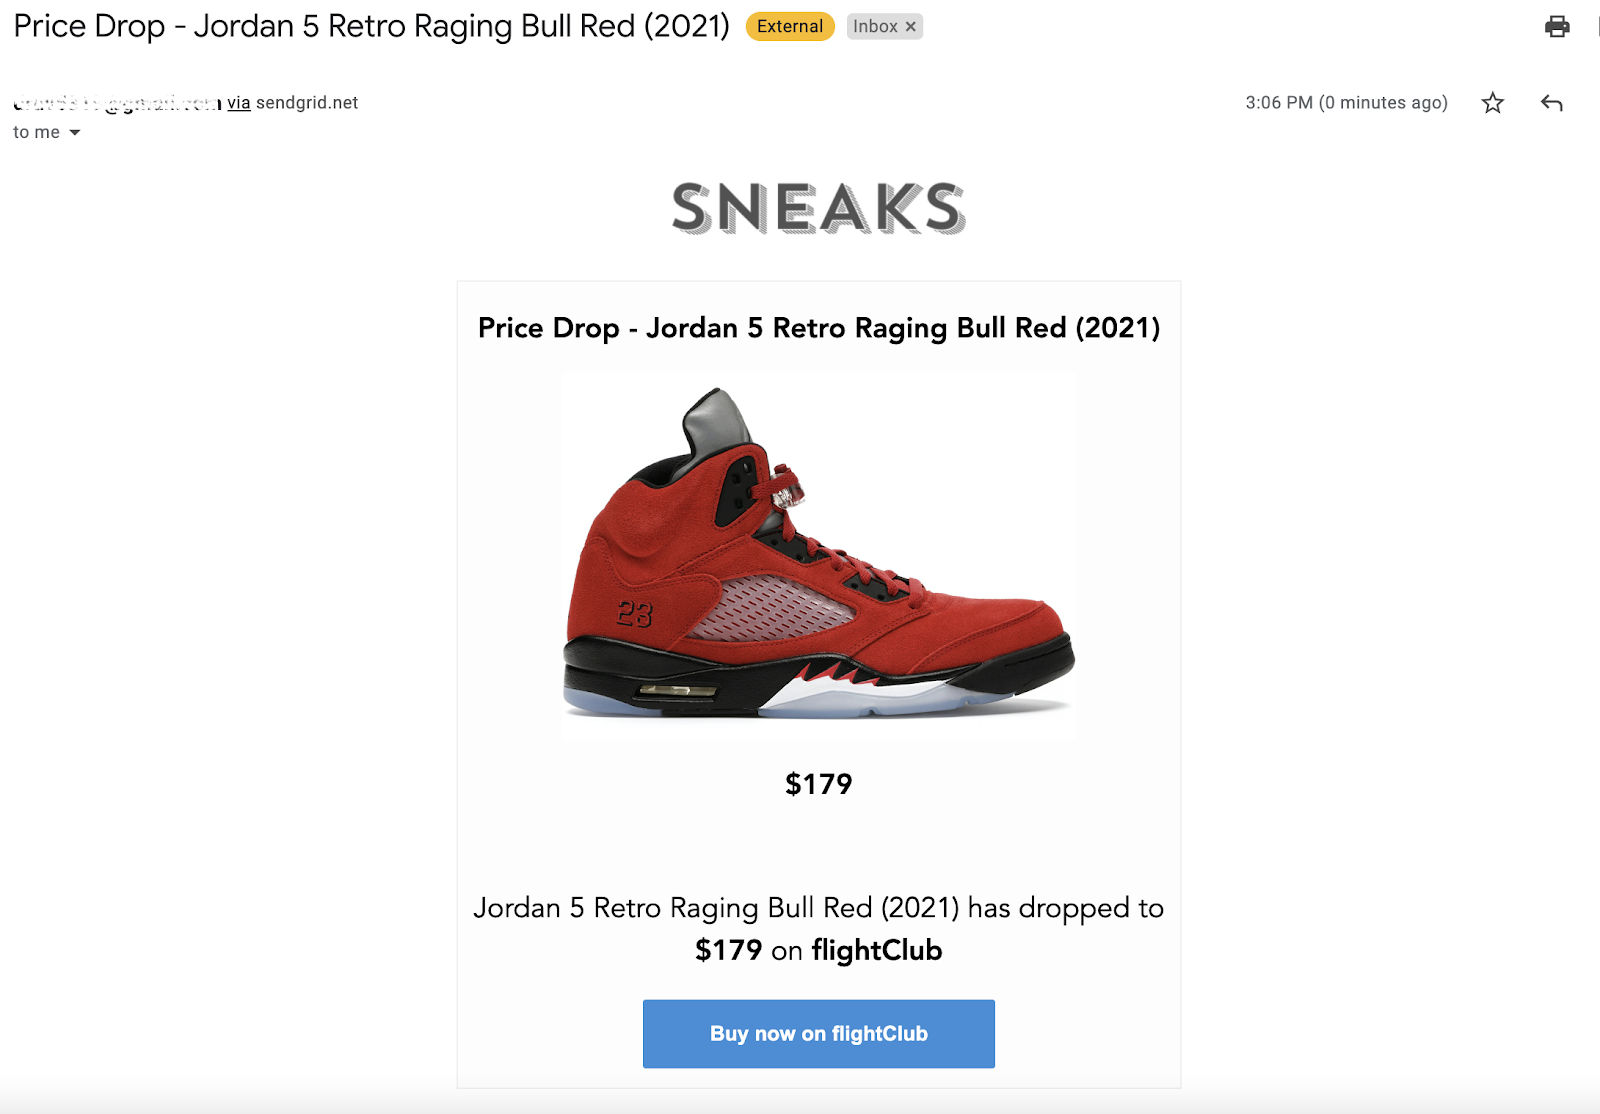
Taadaa! Now it’s time to put your notifier to use!
Create your scheduler
Your main function needs to run automatically on a schedule to send out alerts whenever the price drops for a subscriber’s tracked sneaker - For this, you will use the node-schedule package to schedule time-based jobs. For a deeper dive on this, check out How to Send Recurring Emails in Node.js with SendGrid.
In your index.js file, replace the main function with the following:
The highlighted lines show that the main function here is wrapped with another function called `scheduleJob()` which uses a cron expression as a parameter. The cron expression used is `*/10 * * * *` and instructs the function to have it run every 10 minutes.
Save the file, run the script again with `node index` in the terminal and you’re done! This script will continuously run and will check if a sneaker price has dropped from the subscribers list every 10 minutes.
Summary
Keeping tabs on prices adds another item to your already long to-do list. An email notifier can let you know when your desired price is reached and ready to be in your hands. With Node.js, and SendGrid, you are one step ahead of price volatility. In an ever-changing market, an email notification can be the bridge between you and your most coveted item.
Want to continue building the notifier? Expand your notifier by connecting it to an actual database or utilize SendGrid’s marketing features to use email lists and to provide a way for users to unsubscribe to a sneaker. To have better control of your scheduler, implement a Node.js process manager such as PM2 and Forever which runs your script as a daemon and ensures your application is running 24/7.
Happy Building!
Dhruv Patel is a Developer on Twilio’s Developer Voices team. You can find Dhruv working in a coffee shop with a glass of cold brew or he can either be reached at dhrpatel [at] twilio.com or LinkedIn.
Related Resources
Twilio Docs
From APIs to SDKs to sample apps
API reference documentation, SDKs, helper libraries, quickstarts, and tutorials for your language and platform.
Resource Center
The latest ebooks, industry reports, and webinars
Learn from customer engagement experts to improve your own communication.
Ahoy
Twilio's developer community hub
Best practices, code samples, and inspiration to build communications and digital engagement experiences.