Add Emoji Reactions to Video calls using Twilio Data Track API
Time to read:
January 20, 2021
Written by

During these unprecedented times, Video conferencing has become the prime medium of social interactions. Fortunately, with Twilio Programmable Video API you can make a fully functional video conferencing application in no time. If you find this too good to be true, I urge you to go check out our basic Video Chat Tutorial to experience the magic of Twilio APIs yourself.
If you have already implemented the basic Video Chat application, in this article, we will take your experience to a next level by adding real time Emojis using Twilio Data Track API.
By the end of this tutorial, you will be able to not only express yourself by using your favourite emojis but also understand the nuances of Data Transfer between participants in Twilio Programmable Video rooms.
Tutorial requirements
This article is an extension of the Video Chat Application tutorial, so we will be reusing the code of that base video application. The application uses vanilla JavaScript, HTML, CSS and Flask (Python Framework) as backend.
Below are the requirements to run the application on your system:
- Python 3.6 or newer. If your operating system does not provide a Python interpreter, you can go to python.org to download an installer.
- A free or paid Twilio account. If you are new to Twilio, get your free account now! This link will give you $10 of Twilio credit when you upgrade.
- A web browser that is compatible with the Twilio Programmable Video JavaScript library (see below for a list of them). Note that this requirement also applies to the users of the application.
Supported web browsers
Since the core video and audio functionality of this project is provided by Twilio Programmable Video, we'll need to use one of the supported web browsers listed below:
- Android: Chrome and Firefox.
- iOS: Safari.
- Linux: Chrome and Firefox.
- MacOS: Chrome, Firefox, Safari and Edge.
- Windows: Chrome, Firefox and Edge.
Please check the Programmable Video documentation for the latest supported web browser list.
Installing and running the base application
This tutorial will go over the implementation in detail, and augment new features over the base Twilio Video Call Application. So you can clone that to your system and follow along.
You can find the basic video chat application here: https://github.com/miguelgrinberg/flask-twilio-video/tree/only-video-sharing
However if you are interested in downloading the complete project instead of building it step by step, you can get the entire application here: https://github.com/abhimanyu-bitsgoa/twilio-videocall-emoji-datatrack
Setting up a Twilio account
Before starting with the code, let’s set up your Twilio account. This application needs to authenticate against the Twilio service using credentials associated with your account. Therefore, you’ll need your Account SID, an API Key SID and its corresponding API Key Secret. Please review “Setting up your Twilio account” section of the video calling tutorial for more information about obtaining these credentials.
The base application code includes a file named .env.template which includes the three configuration variables needed. Make a copy of this file, change the name to .env (dot env), and edit it as follows:
Creating a Python virtual environment
Once you have downloaded the code, we will create a virtual environment where we can install our Python dependencies.
You can navigate to your project directory and issue the following commands depending upon your System’s Operating System:
On Unix or MacOS, open a terminal session and enter:
On Windows, open Command Prompt and enter:
The last command uses pip, the Python package installer, to install the Python packages (dependencies) used by this application. These packages are:
- The Twilio Python Helper library, to work with the Twilio APIs
- The Flask framework, to create the web application
- Python-dotenv, to import the contents of our .env file as environment variables
- Pyngrok, a Python wrapper for ngrok, which will let us expose the development version of our application temporarily on the Internet
Running the base application
We are almost ready to run our application. But before doing that, we must specify environment variables for our Flask web application.
A clean way of doing that is to leverage the Flask’s dotenv support that reads the environment variables directly from a .flaskenv file. Hence simply create a file named .flaskenv in your project directory and add the following:
This will automatically set the environment variables to the values specified whenever you run your Flask Application.
We are now ready to run our application. Now let’s bring up the web server:
Your application is now up and accepting any incoming local connections on address http://localhost:5000/. Keep this terminal open to keep our web server running. Open your browser and go to this web address to confirm that the application is up.
However, we will like this local server to be accessible via a public IP so that we can invite remote participants to our call. One easy way is to use ngrok, which will furnish a temporary public URL for our application so that people over the Internet can access it. Hence, open a second terminal window and after activating your Python virtual environment, run the following:
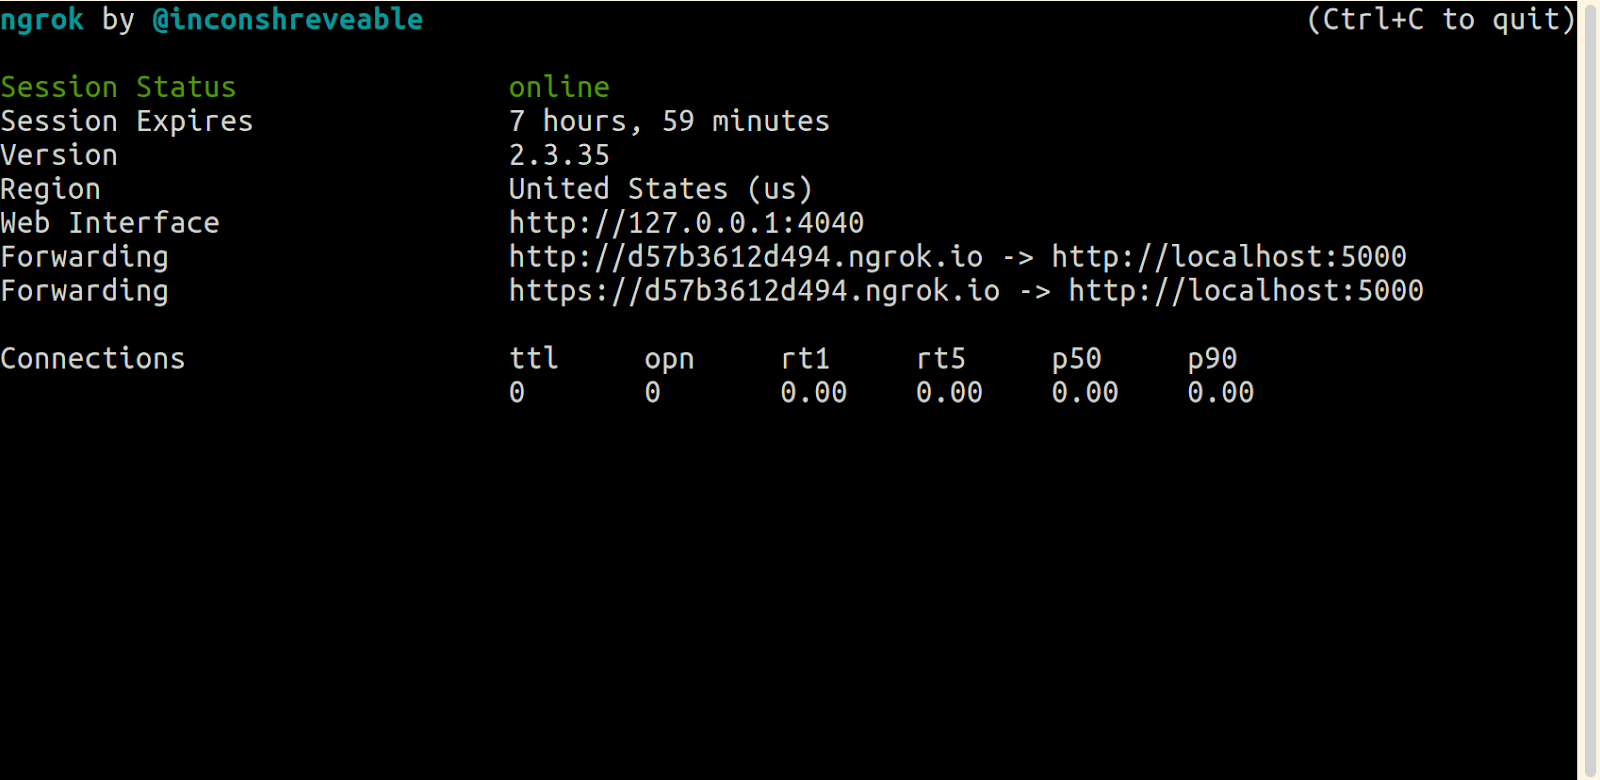
Ngrok will assign a public URL to your local server, which you can see in the lines that start with “Forwarding”. Since many browsers don’t allow microphone and camera access on unencrypted connections we will use the URL with https://. Make sure that you can access the application when you enter this URL in the address bar of your browser.
If you’d like to understand this setup in a more detail you can head over to the Video calling tutorial.
Designing the user interface
Since this tutorial builds upon the base Video Chat Application, we will update the existing index.html and styles.css files to reflect our changes.
Adding a button panel and emoji placeholder
Below is the updated index.html file for this project. The lines that have been added or changed from the base project are highlighted.
As you can observe, we have added a new <div> element called emojiPanel which defines all the emoji buttons that we have in the application. Additionally, we have another DIV with id datalocal, which is currently an empty <div> element that will be inflated with the selected emoji when we click a button from the emojiPanel.
We will look into this just after having a look at the updated static/styles.css file. Just like the HTML file the changes and the additions from the base application are highlighted:
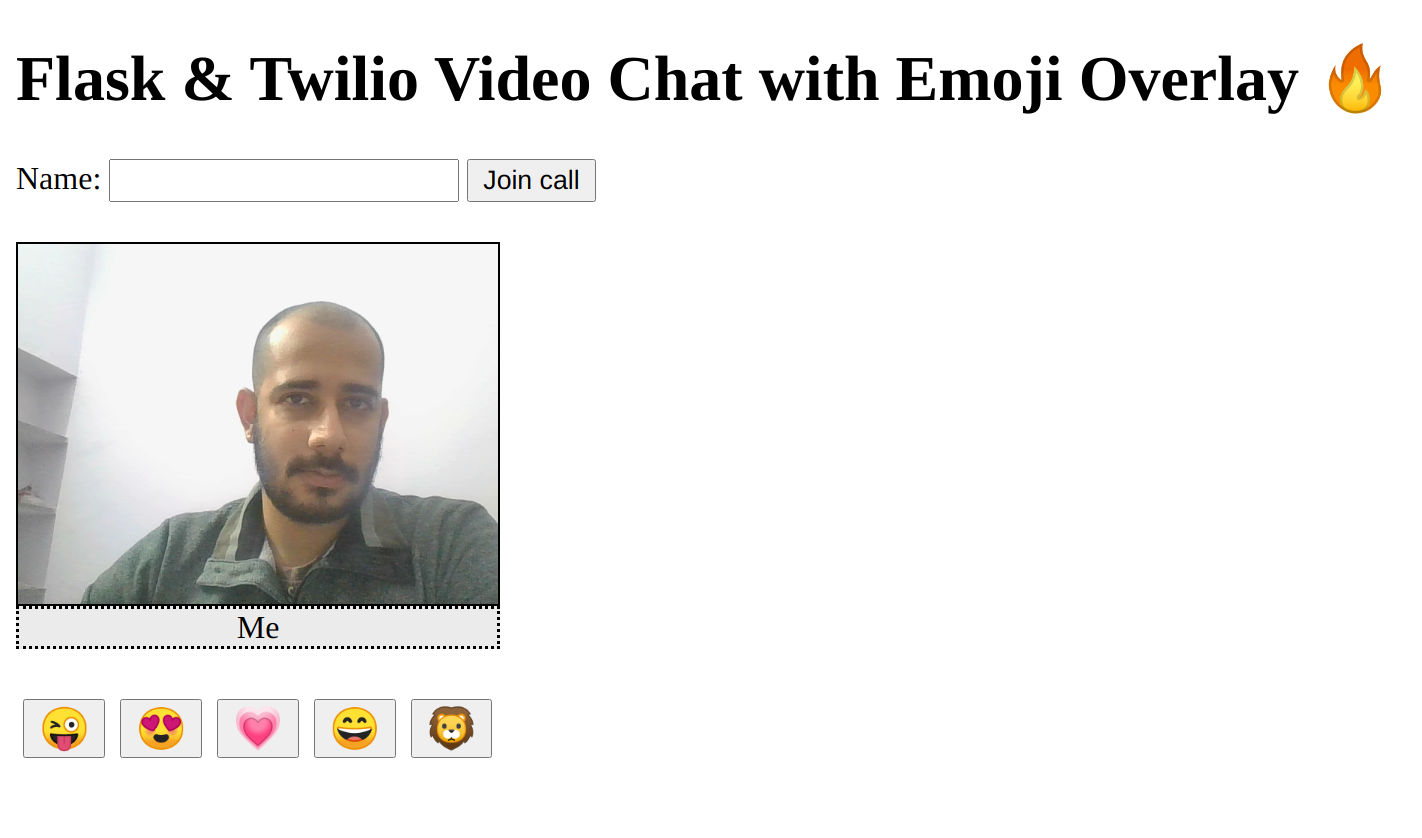
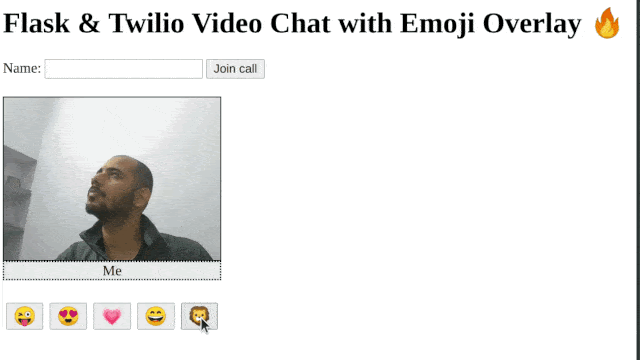
After the following changes your application layout should look like this:
You will notice that if you click the emoji buttons nothing happens. Let’s add functionality to them.
Overlaying emojis over the video
We need to handle the click event on the Emoji buttons that we created in the last section. Add the following code to static/app.js from your base application:
In activateEmojiButtons() function we are iterating over all the elements with class as emojibuttons and attaching a click event handler function emojiButtonHandler().
The emojiButtonHandler() function extracts the display text on the button, which is the corresponding emoji and passes it to another function called addToLocalDataLabel(...).
Once we pass the emoji string to addToLocalDataLabel(...), the function finds the <div> element with id = “datalocal” and adds the emoji to it. This is the placeholder that we created in the index.html file. So now whenever we press a button, we can see an emoji overlay on our video feed.
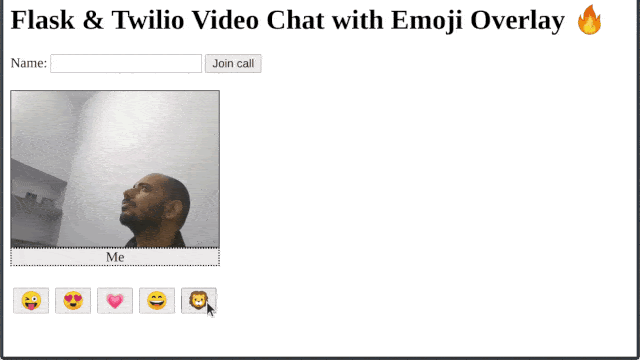
You can refresh the page in your browser to load these changes and try it out. The result will look something like this:
Powering application with the Twilio Data Track API
Twilio tracks can be simply visualised as communication channels that facilitate back-and-forth information transfer between the participants and the video room. In the base Video Call application we have added video and audio tracks. Now we need to add a Data Track to exchange emojis between the participants.
Local data track creation and publication
Let’s add the following code to static/app.js file to create the local data track:
We have used the addLocalData() function to create a local data track.
We are storing the local data track in the dataTrack global variable for later use in the application’s lifecycle. The next step is to publish this local data track to the room so that remote participants can access it.
This will just require a small change in the connect() function defined in static/app.js. Just add the highlighted lines at the position indicated by the below code snippet.
Sending emojis to the video room
Now that we have created and published the data track to the room, let’s put our emoji data inside this track so that it can be received by other remote participants. Hence, we will add a new function called sendDataToRoom(...) in static/app.js.
Since we want the data to be transmitted whenever we click the emoji button, this function should be called from within the emojiButtonHandler(...) function that we have already implemented. The code addition highlighted in the snippet below:
The sendDataToRoom(...) function uses a send(...) call on the local data track object to send the emoji in a JSON string format to the room participants.
Receiving emojis via remote data tracks
We have already seen how to create a local data track, publish it and send our emoji to the room where all the remote participants can see it. Now, we will be receiving this emoji data via remote data tracks. All the data tracks that have been published in the room by participants can be accessed by calling the remote data track API.
The good news is, our base application already has the code in place to handle remote participant’s connection and publication to the room. We will just need to alter a few functions to accommodate our data track.
Let’s begin with a tiny style change in the participantConnected(...) function. We will just set the class attribute of labelDiv to nameLabel. This will add styling to the Remote participant’s name, similar to ours. To do this, just add the highlighted line in participantConnected(...) function as shown below:
Let’s now look at the new trackSubscribed(...) and trackUnsubscribed(...) functions and add data track handling to them. Replace the two functions with the following code:
Just like the base application, our intent is to subscribe to all the tracks published by the remote participants and do it every time a new participant connects to the video room. However, this time, we need to attach a <div> element so that any incoming emoji data can be overlayed upon the video. This is taken care of inside the attachRemoteDataTrack(...) function, which we will discuss in a moment.
The track.on(...) function adds an event handler addToRemoteDataLabel(...) to the remote data track’s receive event. This will ensure that we call the handler function each time we receive data from the fellow remote participants. This function will be used to overlay the emojis on the sender’s video feed. We will have a look at this handler function moving ahead.
In the trackUnsubscribed(...) function we are conveniently removing the corresponding data placeholder for a user participant upon their disconnection and unsubscribing from their data track.
After understanding the high level changes, let’s dig deeper into the two auxiliary functions that we need, attachRemoteDataTrack(...) and addToRemoteDataLabel(...). You can add their implementation to the static/app.js file.
Let me ask you a question. Let’s say you received an emoji via a remote data track. How will you display it on top of the corresponding sender’s video feed?
The answer lies in Track SID. Each remote data track is uniquely identified by a track SID inside a room. Therefore, in the attachRemoteDataTrack(...) function when we are attaching a <div> element to our container for the emoji display, we are also setting its id attribute to the corresponding track’s SID.
So whenever we receive our data in the form of an emoji, we can conveniently search for the corresponding <div> element with the matching track SID to display it. This is exactly what we are doing inside the addToRemoteDataLabel(...) function.
Your application can now successfully send and receive the emojis. Refresh your browser and reconnect to test this functionality.
Adding CSS Animations
Upon running your application at this point, you will be able to send and receive emojis but there is still a bit of polishing required. Currently, your emojis don’t disappear automatically, they stay on the video feed. Ideally, we want the emojis to disappear shortly after they are displayed. We will take care of this with CSS Animations.
You can add the following code to the styles.css file for this project. The emoji class was added earlier, while the appear class is new. The changes and the additions for these two classes are highlighted.
From our earlier discussion we understand that, emoji class attribute is associated with the <div> element where emojis will be displayed. Once the user presses an emoji button, the emoji should appear on the <div> and then disappear shortly. The newly added appear class defines a set of animations that will be used while displaying the emoji.
Further, we have used the transition property to define a smooth transition effect whenever we change any property of the <div> element having the class emoji.
The idea is to add this custom class appear, to the emoji <div> element, and this will force a smooth transition effect. Once the emoji is displayed we will strip away the appear class and then the Emoji will be invisible to the user as the base emoji class has opacity set to 0.
To add and remove classes dynamically from a <div> we need to have a JavaScript function like the one below. You can add the following code to your static/app.js:
This function accepts the <div> element that we want to operate on and a class that we will first add (appear transition) and then remove (disappear transition) to render a smooth animation effect. We are setting a timeout of 1 second for the animation to play. After the timeout, we will strip away the appear class, making the emoji disappear.
You need to call this animateDataLabel(...) function whenever you have a new emoji to display. That essentially means, adding it to addToLocalDataLabel(...) and addToRemoteDataLabel(...) functions. The updated functions are shown below:
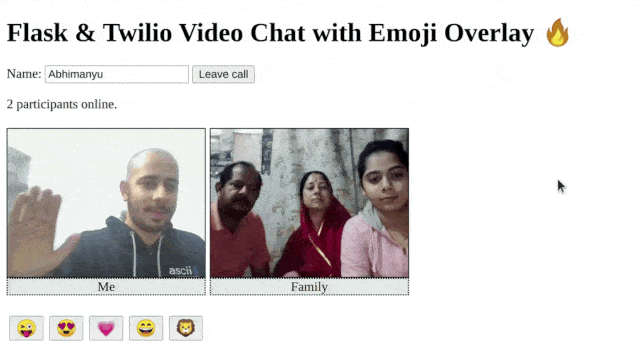
The resultant emojis will look like this:
Congratulations! You now have made an awesome video conferencing application with emoji reactions!
Have fun expressing yourself!

Conclusion
I hope that you found this tutorial interesting and useful in enhancing the quality of your Video interactions. The code for this application is available in the twilio-videocall-emoji-datatrack repository on Github.
I will love to see what you are building! Feel free to connect with me on Twitter at @abshekha


Related Resources
Twilio Docs
From APIs to SDKs to sample apps
API reference documentation, SDKs, helper libraries, quickstarts, and tutorials for your language and platform.
Resource Center
The latest ebooks, industry reports, and webinars
Learn from customer engagement experts to improve your own communication.
Ahoy
Twilio's developer community hub
Best practices, code samples, and inspiration to build communications and digital engagement experiences.