How I Built a Real-Time SMS Translation App (without Setting Up a Backend Server)
Time to read:
October 08, 2020
Written by
Reviewed by

Having an interest in communicating with a distant cousin in Germany, whose native language I don’t share, I decided to build a real-time SMS translation app so that we could text each other.
Thanks to Twilio Functions, Twilio Programmable SMS, and the Google Cloud Translate API, this app was easy to build, and it’s super fun to use!
Here’s the gist: I send a text to my Twilio phone number. A webhook captures this message and makes a POST request with the message details to my Twilio Function. Inside the function, the message body is translated, and the translation is forwarded to my recipient’s phone number. When they reply, this same process happens in reverse.
Requirements
I needed the following things before getting started:
- A Twilio account and phone number
- The Twilio CLI
- The Twilio Serverless Toolkit plugin
Using the Serverless Toolkit
For this project, I relied on the Serverless Toolkit for a lot of the heavy lifting. The Serverless Toolkit is the CLI for Twilio Functions. You can do all of the work for this app in the Twilio Console as well, but I find it easier to develop locally first, so I opted to use the toolkit.
After installing the toolkit, I ran the following command to create a new function service. A service can be thought of as a complete project - it contains all the functions, assets, dependencies, and environments that support a single app.
This command created a new directory inside my parent folder called text-translation.
Inside this new folder are several files and subdirectories, including one called assets and one called functions. I chose to delete all the subfolders and stock files inside both of those subdirectories.
Then I created a new file inside the functions folder called receive-message.js. This file will house my Twilio Function.
Inside functions/receive-message.js, I created the shell for my function:
My new function, receive-message, works like an API endpoint that I can make GET or POST requests to. When I set up my webhook, I will direct it to this function.
Twilio Functions can have different visibility statuses: public, protected, or private. In this case, I want my function to be protected. A protected status ensures that only requests with a Twilio signature will be successful. This still allows the function to be accessible via webhook but not exposed to the public.
Luckily, Twilio makes it pretty easy to change the visibility status of my function: I edit the name to include a .protected extension before the file extension so it looks like this: receive-message.protected.js
Connecting to the Google Cloud Translate API
Before I was able to start building out the function, I had to get set up with the Google Cloud Translation API and install Google’s Node.js client library.
After installing the package, I needed to get my Google Cloud credentials. This was a bit of a process, but the full instructions can be found in Google’s Setup Quickstart documentation. The end result of this process was a .json file containing my API credentials. I downloaded this file and saved it inside the assets/ folder in my project’s root directory.
Because this file contains API credentials, I wanted to make sure I kept this data secret. Assets have the same visibility status options as functions. By adding a .private extension before the file extension, you can make any asset private and inaccessible via the web: my_credentials.private.json
Back in my function file, I needed to import the package and create an environment variable that pointed to the .json file with my credentials:
Line four in this code snippet created a new environment variable called GOOGLE_APPLICATION_CREDENTIALS and assigned to it the path to my credentials file.
The Google Cloud Translate API will automatically find any environment variable with this name when a new client is initialized.
Building Out the Function
Once my setup was complete, it was time to finish building the function.
Below the environment variable declaration, I created a Twilio Client, which is used later to forward the translated SMS message:
Then I added a few more variables for the various phone numbers I needed to keep track of:
It’s a good idea to validate that the sender of the incoming message is an approved participant, so below my variable declarations I added this quick check:
All the details of any SMS message sent from a webhook to a Twilio Function can be accessed through the event object. If the sender, whose number is available in event.From, is neither myself nor my friend, the function will terminate and nothing else will happen.
Then, I add one final variable to set the recipient for the forwarded message, a value that’s dependent on the sender:
Beneath all of the existing code, I created an async function called getTranslation() that will handle the translation of the message body:
This function first creates the Google Cloud Translate client.
Then it sets the target language: If the message is from me, it should be translated into my recipient’s native language, in this case German. If the message is from my friend, it should be translated into English. Google’s API accepts only predetermined and supported language codes for this value.
Next, this function calls the translate() method on the Google Cloud Translate client, and passes to it both the message body to be translated and the target language. event.Body will provide the actual content of any message that the function receives.
Finally, below the getTranslation() function declaration, I call this function and use the returned value to generate a new SMS message that gets sent to the proper recipient (the value assigned to the to variable).
Trying It Out
When I was first testing out the app, I set the friend value to another number where I could receive SMS messages: my Google Voice number. This allowed me to send messages back and forth to myself and ensure everything was going smoothly.
I used the Serverless Toolkit to start a local server and create an ngrok tunnel to this local server at the same time. The ngrok tunnel provides me with a secure URL to which I can direct my webhook during development.
When this command is run, it displays the ngrok URLs to every asset and function in the service. With my receive-message URL now in hand, I opened up another command prompt tab and used the Twilio CLI to set up the webhook:
Now I was ready to go!
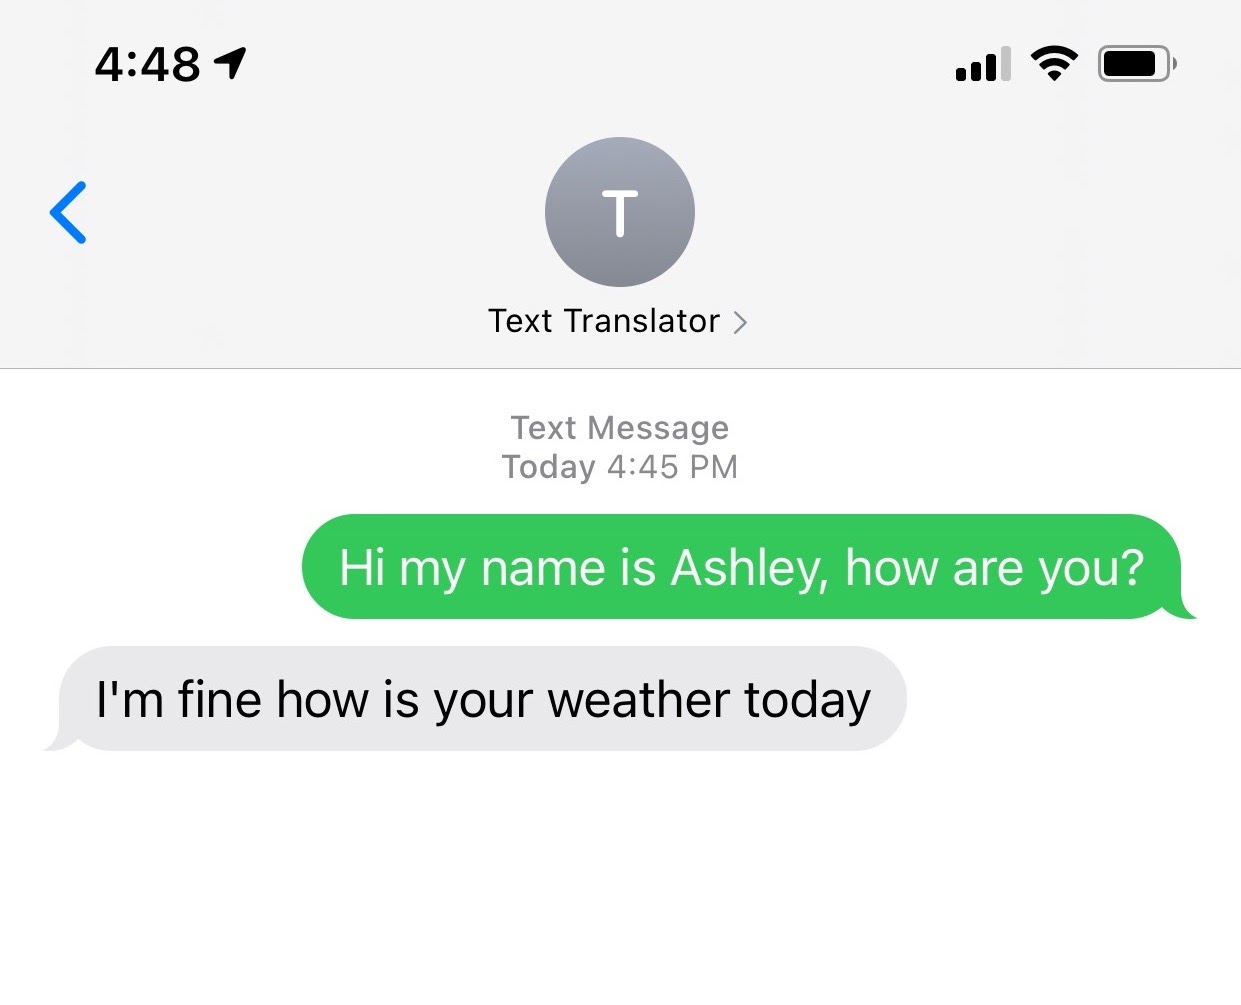
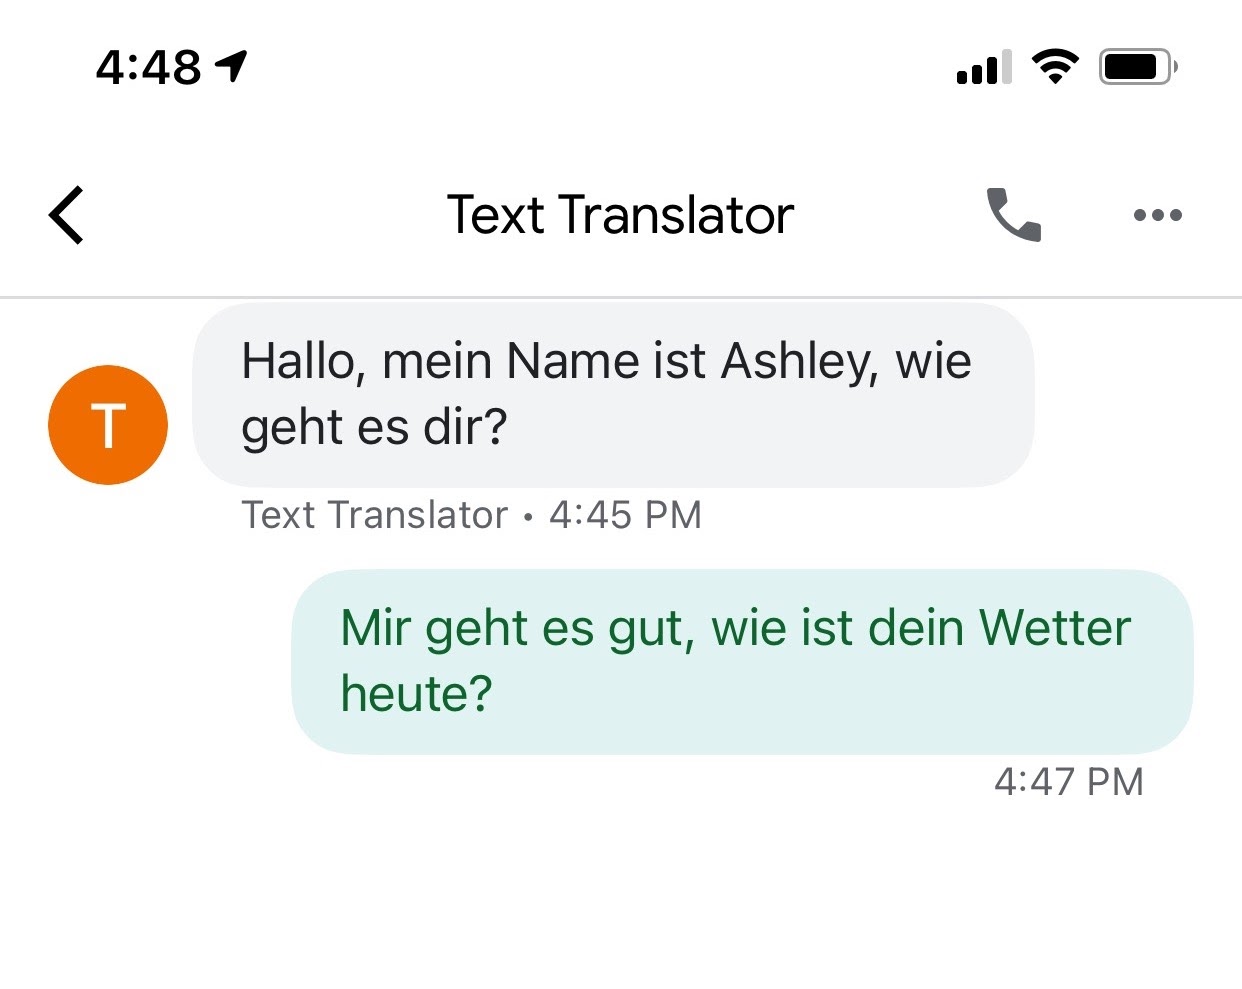
I sent an SMS message to my Twilio phone number and received it, translated to German, at my Google Voice number. I replied in German (by looking online for how to say something) from my Google Voice to my Twilio number, and received the message at my personal number in English:
Deployment
Now that I knew everything was working, it was time to deploy!
I made sure to update the number stored in the friend variable to my cousin’s phone number. Then, after closing down my ngrok tunnel and my local server, I used the Serverless Toolkit to deploy my service:
This command took several seconds to complete, but when it did, it displayed the URLs to every asset and function in my service, similar to when I started my local server. Again, I copied the receive-message function URL, and then updated my webhook to reflect the correct url:
That was it!
Next Steps
As I think about how to expand this app, I might consider building out a way to set my recipient’s number and target language in real-time, instead of hard-coding it. This way I could use the app to communicate with many people instead of just one. In the meantime, I’m having a great time texting with my cousin :)
Ashley is a JavaScript Editor for the Twilio blog. To work with her and bring your technical stories to Twilio, find her at @ahl389 on Twitter. If you can’t find her there, she’s probably on a patio somewhere having a cup of coffee (or glass of wine, depending on the time).


Related Resources
Twilio Docs
From APIs to SDKs to sample apps
API reference documentation, SDKs, helper libraries, quickstarts, and tutorials for your language and platform.
Resource Center
The latest ebooks, industry reports, and webinars
Learn from customer engagement experts to improve your own communication.
Ahoy
Twilio's developer community hub
Best practices, code samples, and inspiration to build communications and digital engagement experiences.