Building STIR/SHAKEN verification Into Your Voice CAPTCHA IVR
Time to read:

There is a lot of progress being made in the battle against spam and robocallers. But – one of the techniques spammers still abuse is CallerID, known as CallerID spoofing. CallerID spoofing falsifies where the call originates on the public telephone network allowing the fraudster to impersonate identities – and vulnerable victims like you and me answer the phone.
Currently in beta, Twilio announced Programmable Voice and Elastic SIP Trunking now perform STIR/SHAKEN verification on all incoming calls in the United States to your Twilio local phone numbers when a STIR/SHAKEN identity header is present. The percentage of calls with the identity header will continue to rise over the coming year. You can read more about the technical implementation details under How to make trusted calls and protect against unlawful spoofing using STIR/SHAKEN.
Due to the rise of robocalling, some customers have been forced to place a Voice CAPTCHA on their Phone numbers to protect employees from being spammed.
In this post, I’ll show you how to use serverless Twilio Studio and Functions to create a supercharged Programmable Voice CAPTCHA IVR. Callers with STIR/SHAKEN fully attested CallerID gets the VIP treatment, bypassing the CAPTCHA.
Prerequisites
In order to follow this tutorial, you will need:
- A Twilio account and active number. If you don’t have an account, go ahead and create one now.
App Overview and Set Up
Write the Twilio Function
Our Twilio Function’s purpose is to return random digits of a length you define in a visual Studio Flow representing your IVR. The data is returned as a JSON object with two keys, digits and spoken.
The Studio flow we build after will have a couple widgets dedicated to handling the function. The Studio Split Based On Widget evaluates digits while the Say/Play Widget uses Text to Speech (TTS) to speak out spoken, which is a comma separated string of digits that are read out as single digits rather than a large number.
- Open up your Twilio console and head to the Functions overview section.
- Under Overview, click the blue Create Service button.
- Give it a service name such as "IVRCaptcha". Click the Next button.
- At the top left of the screen, click the blue Add + button and select Add Function. You can leave the Function at the default, “Protected”. Protected means that only requests from your account with the proper
X-Twilio-Signaturecan successfully execute the Function. In our case, only Twilio Studio will access our Function directly. You can read more about validating requests from Twilio on the Docs. - Rename the path for your Function. I used
/IVRCaptchaas seen in the screenshot below:
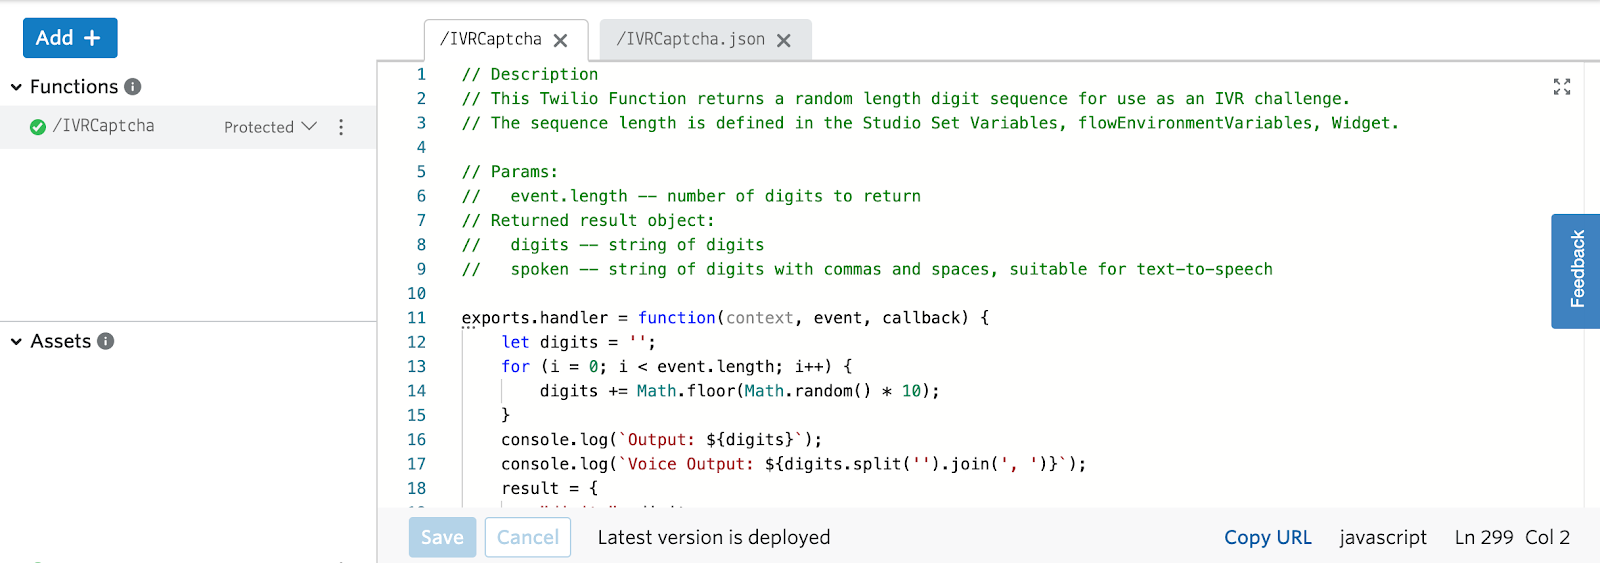

Remove the existing boiler plate code to copy and paste the code below. Make sure to click save and the blue Deploy All button at the bottom left.
Verify in the Function logs that the deployment was successful. This Function is well documented, so you can dive into the details and understand what's happening in the code.
How this Function works
This Twilio Function's one purpose is to generate a random string of digits to challenge all non-verified STIR/SHAKEN callerIDs. The length is defined in the Set Variables Widget within the Studio flow that we will create next.
Studio Flow
Instead of walking through the creation of the Studio Flow widget by widget, we will import the JSON representation of the flow which you can find here. I’ll explain the flow in turn.
Import the Studio Flow
- To get started, go to the Manage Flows Studio page, then click either the red Create new Flow button if this is your first Flow, or the red plus (+) sign if it’s not your first Flow. Here are some screenshots of what your Studio Flow dashboard may look like:
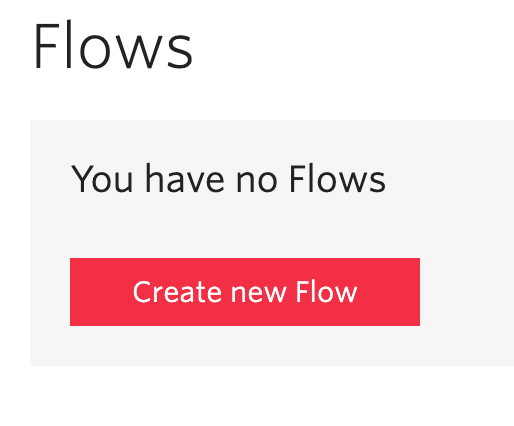

Or
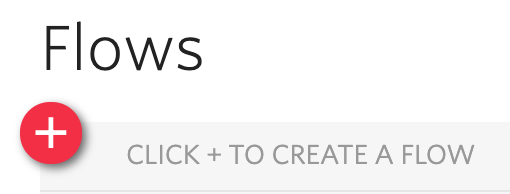

- Give your Flow a name. I called mine "SHAKENSTIRIVR-Captcha". Scroll down and select Import from JSON from the menu and click on the Next button.
- Replace the contents of the edit box with the JSON that can be downloaded here, and click Next.
You should see the Studio canvas rendered out for you, as shown below:
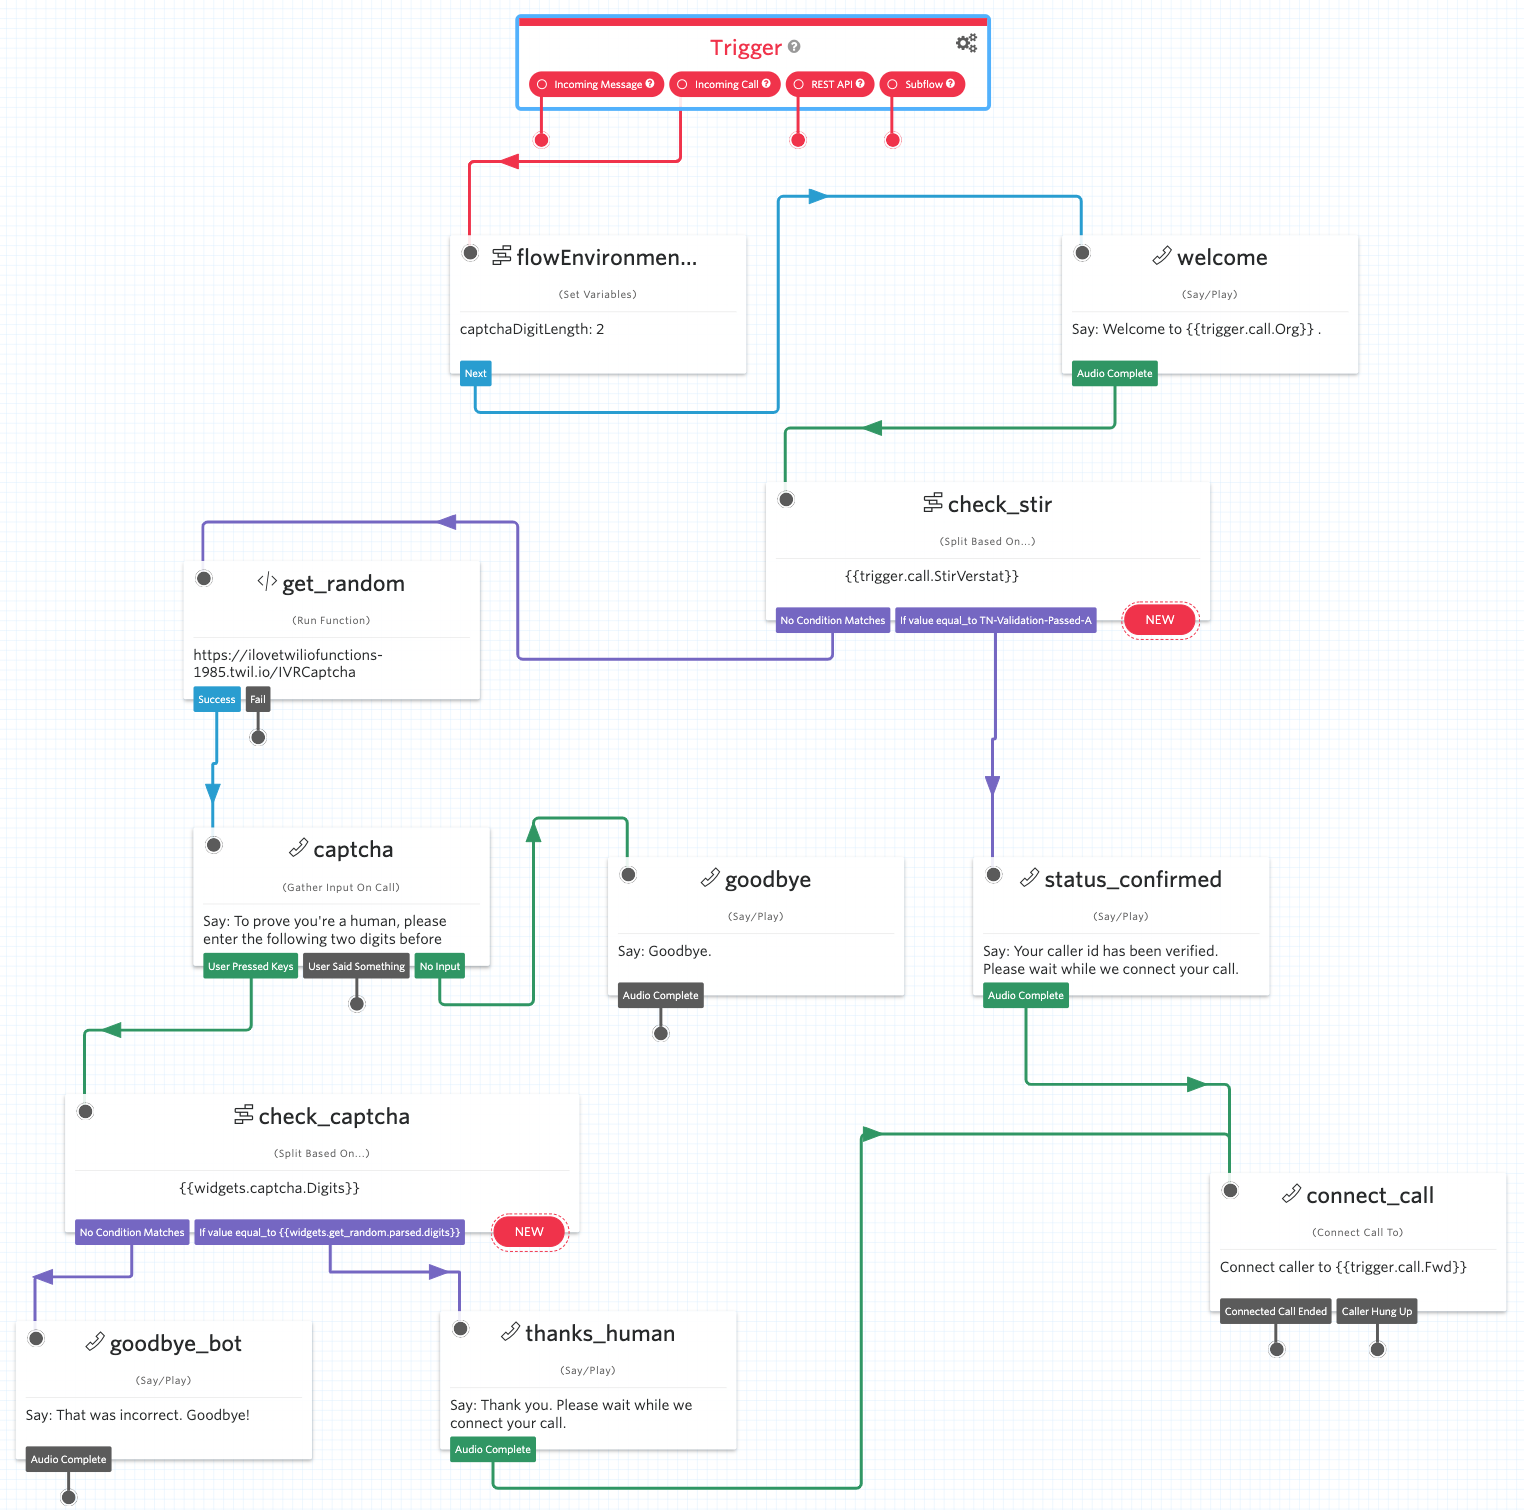

- You may want to edit the Set Variables Widget named
flowEnvironmentVariablesto set thecaptchaDigitLength. For our example, we will leave it at a 2 digit challenge but a 1 digit challenge may suffice for your needs. Click Save. - Edit the
get_randomRun Function Widget and update the Function it points to by selecting the Functions Service called "IVRCaptcha" in our case. Then the Environment which defaults to "ui" for all Functions created via the UI, and finally the Function, "/IVRCaptcha". Click Save.
You will see an existing Function Parameter which obtains its value from the earlier Set Variables Widget and tells our Twilio Function how long of a random digit string to create and return back to Studio. Studio is able to incorporate this information back into our flow by intelligently parsing the returned JSON. You can find out more about how the Run Function works in the Twilio Docs.
- Edit the
captchaGather Input on Call Widget and adjust the Stop Gathering After field to match the number of digits you entered for the digit challenge in step # 4 above. Click Save. - Don’t forget to Publish your flow!
What is this Studio Flow doing?
The Studio flow first sets the length of our CAPTCHA challenge and welcomes the caller to the *organization via the welcome Say/Play Widget. When we configure our Twilio number to point to our Studio flow, we will pass in two URL query parameters. One is called *Org which is the organization name read out in the welcome Say/Play Widget. The other is the number we will forward calls that successfully traverse through the flow, called Fwd.
Next, the check_stir Split Based On Widget checks a key sent in as part of the call metadata called trigger.call.StirVerstat. This key is now exposed as part of the new STIR/SHAKEN capability we announced earlier this week. There is a lot of metadata sent into Studio which is viewable by clicking on the Studio Logs on the sidebar to the left.
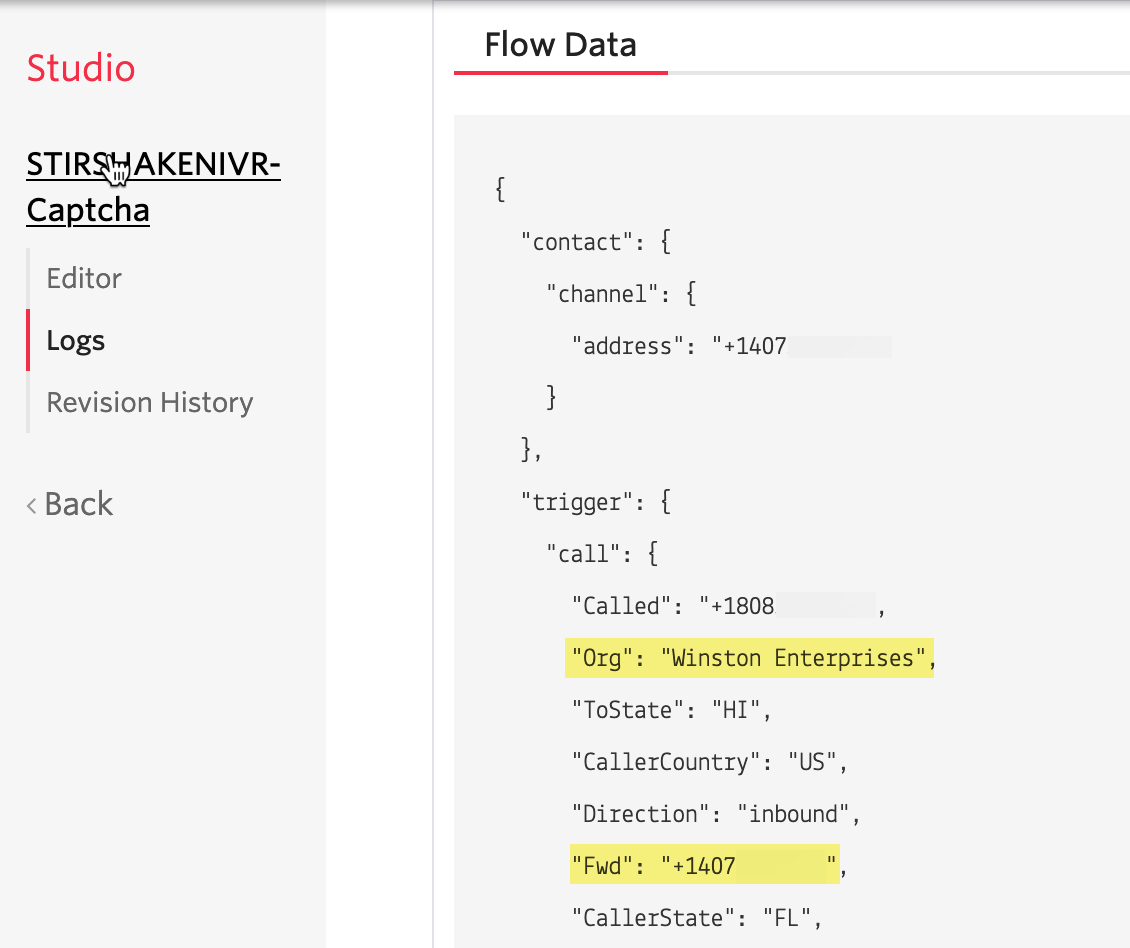
Currently, we do not have any execution logs but we will once we place a successful inbound call to our flow. When we have logs, clicking a Studio execution SID in the logs, then clicking the Trigger widget and expanding Widget & Flow Properties will show this metadata.
We are looking for a value of, TN-Validation-Passed-A, the highest level of STIR/SHAKEN attestation. If it is present, we confirm that their CallerID is verified in the status_confirmed Say/Play Widget, and bypass the CAPTCHA. We connect the caller to the callee, using the Fwd value we passed in as part of the URL query parameters defined when provisioning the number.
If the value, TN-Validation-Passed-A is not present, we proceed to the get_random, Run Function Widget, to generate a random digit CAPTCHA challenge which is read out by the captcha Gather Input On Call Widget. This same widget collects the response to the challenge, feeding it into the check_captcha Split Based On Widget. If the two values match, the calling party is greeted with a successful response in the thanks_human Say/Play Widget and connected to the callee using the connect_call Connect Call To Widget.
All failure paths are set-up to end the call through their respective widgets.
Configure your Twilio number & test it out!
Now that your Studio flow is built, let’s configure your Twilio number to test it out.
Visit the Phone Numbers console first, and select your Twilio number. You can learn how to search and buy a Twilio Phone Number if you don't have one already.
Normally, when associating a voice Studio flow with a Twilio number, you select Studio Flow under When a Call Comes In. However, in our case, since we are passing in two URL query parameters to Studio, we need to select Webhook and construct the webhook manually.
Construct your Webhook Manually
Back on the Studio canvas, click the Studio Trigger widget (the very first widget) and copy the Webhook URL to a plain text editor. It will look similar to the example below, with your unique account number for Studio flow SID:
https://webhooks.twilio.com/v1/Accounts/ACb33404c45a9773a28997fbabcdefghij/Flows/FW98ff686d39591bf73136a1abcdefghij
Now, we will add the two URL query parameters, Org and Fwd, which our Studio flow consumes to the very end of this phone number Webhook URL, as shown below:
https://webhooks.twilio.com/v1/Accounts/ACb33404c45a9773a28997fbabcdefghij/Flows/FW98ff686d39591bf73136a1abcdefghij?Org=Winston%20Enterprises&Fwd=%2b14075550100.
The URL with the URL query parameter appended will be pasted into the A Call Comes In and Primary Handler Fails fields for your Twilio number. The next field, Call Status Changes will take the URL without the URL query parameters appended. You can view the image below.
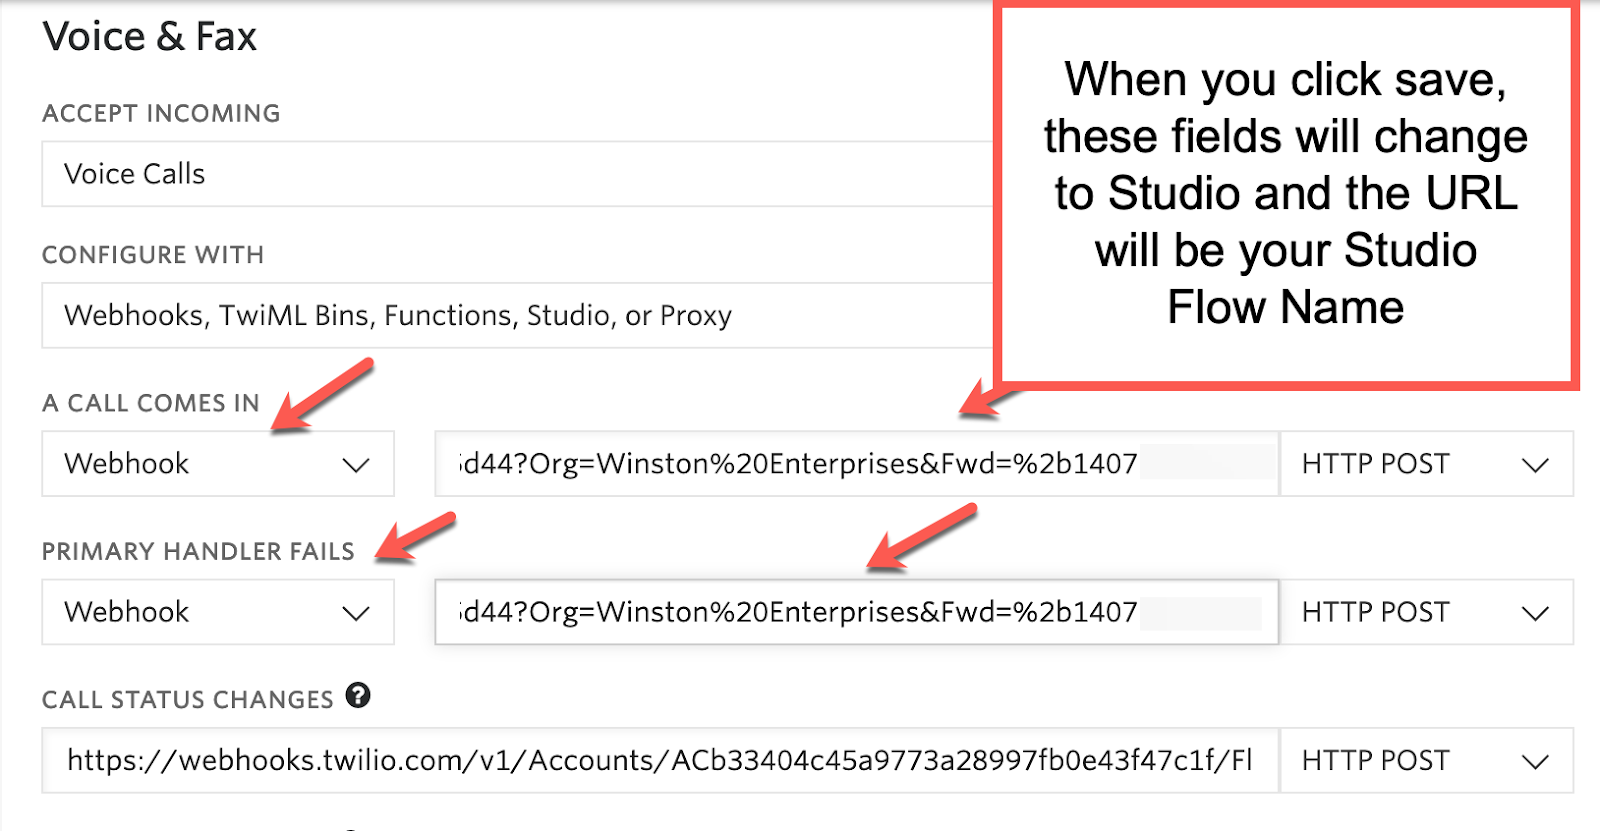

For this example URL, note the portion beginning with the ?. The %20 value is used to handle the space in the organization name (in my case Winston Enterprises) and the %2b is converted to a "+", to represent the telephone number in E.164 format. These are called URLEncoded values, basically representations of the actual values.
(The last two fields are required to avoid stuck executions.)
Set the HTTP request to POST and click Save. You are all set to test – simply place a call to your Twilio number!
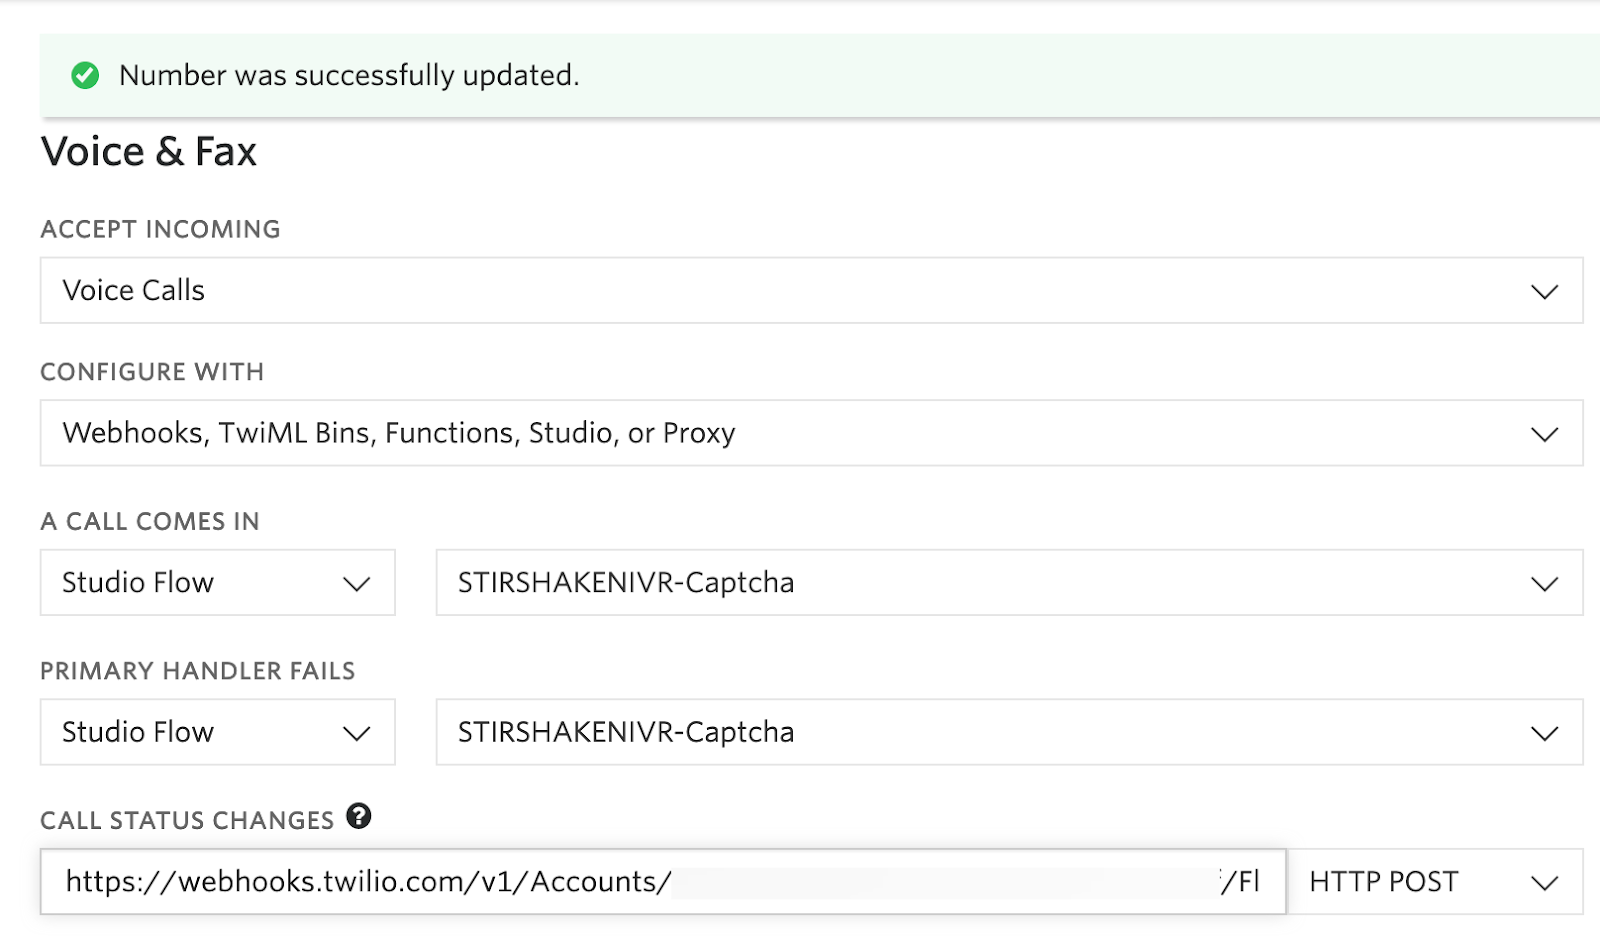

After sending your first call to the Twilio number to test this out, you will see your first log pop up in the Studio Logs as shown in the screenshot below:


Click on the execution SID, which always begins with "FN". Then expand the Trigger Widget and click on Widget & Flow Properties to see the details below:

Troubleshooting
You can view the STIR/SHAKEN status of your incoming calls in your call log. Inbound calls must have the “A” entry in the STIR STATUS column to follow through to the status_confirmed Widget in your Studio flow. STIR/SHAKEN is currently being deployed throughout the US carrier ecosystem so only a subset of inbound calls will be signed.


Building STIR/SHAKEN verification Into Your Voice CAPTCHA IVR
Now you have a fully functional IVR CAPTCHA or a virtual bouncer leveraging STIR/SHAKEN signing – when available – as a VIP card. If visitors don’t present a VIP card, you will fall back and CAPTCHA them before letting them in.
There are many ways you can enhance this IVR CAPTCHA and I’ve shared a number of useful additional resources below to get you started.
You can also combine this approach with other methods to further vet incoming calls, such as using a blocklist, or an allow list with people who have called before.
Some other ways I can think of to improve your IVR’s signal to noise ratio include:
- adding a blocklist, to deny specific problem numbers before they even enter the CAPTCHA
- adding a persistent allow list (fast pass), for callers who have successfully passed through the CAPTCHA on a previous call.
There are many different options – I bet you will come up with the ones that best fit your unique use case, that’s what makes Twilio so powerful!
Additional Resources to enhance the IVR CAPTCHA
- How to make trusted calls and protect against unlawful spoofing using STIR/SHAKEN
- Twilio Begins Signing Enterprise Calls Using STIR/SHAKEN Protocols To Help Stop Illegal Robocalls for End Users
- Your Phone, Your Call - Part I - Eliminating Robocalls
- Stopping Illegal Robocalls: It’s Complicated
- What to know about protecting customers from caller ID spoofing
- Prevent Blocked Numbers from Calling Your Application
- Twilio Client JS SDK - Display a STIR/SHAKEN trust indicator for your incoming calls
- Twilio Client iOS/Android SDK - Display a STIR/SHAKEN trust indicator for your incoming calls
- CodeExchange Example Using Spam Blockers
Alan Klein is a Principal Solutions Engineer based in Atlanta, GA Office. Alan is a Serverless solution champion and Programmable Voice and Elastic SIP Trunking SIP Expert at Twilio. He's currently focused on furthering his knowledge in Node.js and front-end development and sharing his knowledge with others. You can reach him at aklein [at] twilio.com or on Twitter at @SystemsEng.
Robert Welbourn is a Principal Solutions Engineer based in the Boston, MA area, specializing in Twilio's voice products. He can be reached at rwelbourn [at] twilio.com or @RobertWelbourn on Twitter.
Related Posts
Related Resources
Twilio Docs
From APIs to SDKs to sample apps
API reference documentation, SDKs, helper libraries, quickstarts, and tutorials for your language and platform.
Resource Center
The latest ebooks, industry reports, and webinars
Learn from customer engagement experts to improve your own communication.
Ahoy
Twilio's developer community hub
Best practices, code samples, and inspiration to build communications and digital engagement experiences.


