SMS Usage Alerts for your Twilio Account with Python and Flask
Time to read:
May 26, 2021
Written by
Reviewed by

The Twilio API has many capabilities, including allowing you to keep track of how much money you spend on it. In addition to checking your usage amounts, you can also set up a trigger that will let you know when you’ve spent a certain amount or made a given number of API calls. To learn how to do this, follow along!
Prerequisites
To get started with this tutorial, you’ll need the following items ahead of time:
- Python 3.6 or newer. If your operating system does not provide a Python interpreter, you can go to python.org to download an installer.
- A Twilio account. If you are new to Twilio click here to create a free account now and receive $10 credit when you upgrade to a paid account. You can review the features and limitations of a free Twilio account.
- A Twilio phone number
Project setup
In this section you are going to set up a brand new Flask project. To keep things nicely organized, open a terminal or command prompt, find a suitable place, and create a new directory where the project you are about to create will live:
Creating a virtual environment
Following Python best practices, you are now going to create a virtual environment, where you are going to install the Python dependencies needed for this project.
If you are using a Unix or Mac OS system, open a terminal and enter the following commands to create and activate your virtual environment:
If you are following the tutorial on Windows, enter the following commands in a command prompt window:
Now you are ready to install the Python dependencies used by this project:
The three Python packages that are needed by this project are:
- The Flask framework, to create the web application.
- The Twilio Python Helper library, to work with SMS messages.
- Pyngrok, to make the Django application temporarily accessible on the Internet for testing via the ngrok utility.
- python-dotenv, to import the application configuration from a .env file,
Configure Twilio credentials
To be able to send an alert SMS with Twilio, the Flask application will need to have access to your Twilio account credentials to authenticate. The most secure way to define these configuration values is to set environment variables for them, and the most convenient way to manage your environment variables in a Flask application is to use a .env file.
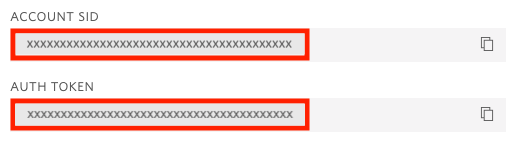
Open a new file named .env (note the leading dot) in your text editor and enter the following contents in it:
You will need to replace all the xxxxxxxxx with the correct values that apply to your Twilio account. These variables are your “Account SID” and your “Auth Token”. You can find them in the dashboard of the Twilio Console:
Creating a Flask project
In this step you are going to create a brand new Flask web application. Open a file named app.py in your text editor or IDE, and enter the following code in it:
This first version of the application creates a /usage-alert endpoint, in which later we will add the SMS alerting logic. For now it is just a placeholder.
Since we will be developing this application, it is a good idea to configure Flask to run in debug mode. This is done in a .flaskenv file (once again note the leading dot in this filename), which should have the following contents:
The FLASK_APP variable tells Flask where the application is stored. The FLASK_ENV variable set to development puts Flask in debug mode.
The server is now functional and can be started with the following command:
One of the features of Flask’s debug mode is that whenever code is changed, the server automatically restarts to incorporate the changes. Leave the server running in this terminal window as you continue working through the tutorial to take advantage of this functionality.
Starting an ngrok tunnel
The Flask web server is only available locally inside your computer, which means that it cannot be accessed over the Internet. But to implement the usage triggers, we need Twilio to be able to send web requests to this server. Thus during development, a trick is necessary to make the local server available on the Internet.
Open a second terminal window, activate the virtual environment and then run the following command:
The ngrok screen should look as follows:
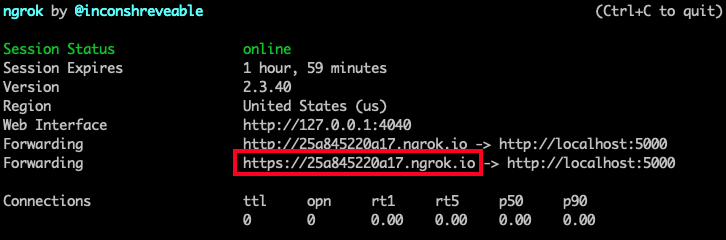
Note the https:// forwarding URL. This URL is temporarily mapped to your Flask web server, and can be accessed from anywhere in the world. Any requests that arrive on it will be transparently forwarded to your server by the ngrok service. The URL is active for as long as you keep ngrok running, or until the ngrok session expires. Each time ngrok is launched a new randomly generated URL will be mapped to the local server.
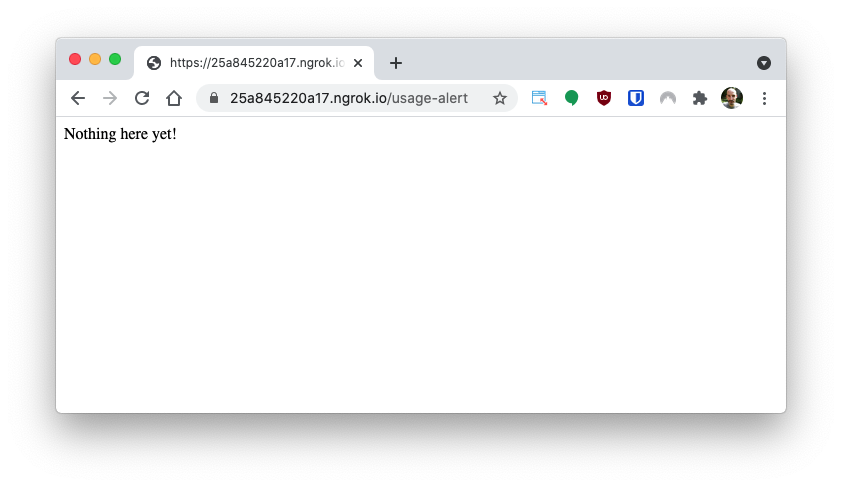
To ensure that your server is operational, launch your web browser, and copy the https:// forwarding URL shown by ngrok, followed by the /usage-alert path that we defined in the Flask endpoint. This should trigger the Flask route to run and return the placeholder text:
Leave the Flask and ngrok terminals running as you continue with this tutorial. If your ngrok session expires, stop ngrok by pressing Ctrl-C, and start it again to begin a new session. Remember that each time you restart ngrok the randomly generated subdomain portion of the URL will change.
Create an SMS alerting endpoint
Below you can see the updated app.py, this time with the complete code that sends an SMS notification when the /usage-alert endpoint is invoked:
This code uses the Twilio Python Helper Library to send an SMS to your personal number with a message informing you that you’ve reached your usage threshold. The message also includes information on the current value of the usage, which is provided by Twilio in the CurrentValue variable submitted with the webhook request.
The from_ and to arguments to the twilio_client.messages.create() function need to be changed to your phone numbers. Set the from_ argument to your Twilio phone number, and the to argument to your personal number. For these numbers use the E.164 format, which includes the plus sign and country code.
Create a usage trigger in the Twilio Console
What remains to complete this tutorial is to configure a Twilio usage trigger that invokes the endpoint we created in the previous sectio. For this tutorial, we are going to set up a usage trigger that will send your personal phone number an SMS every time your account makes a voice call. This is a very low threshold which was chosen only to make it easy to test the trigger.
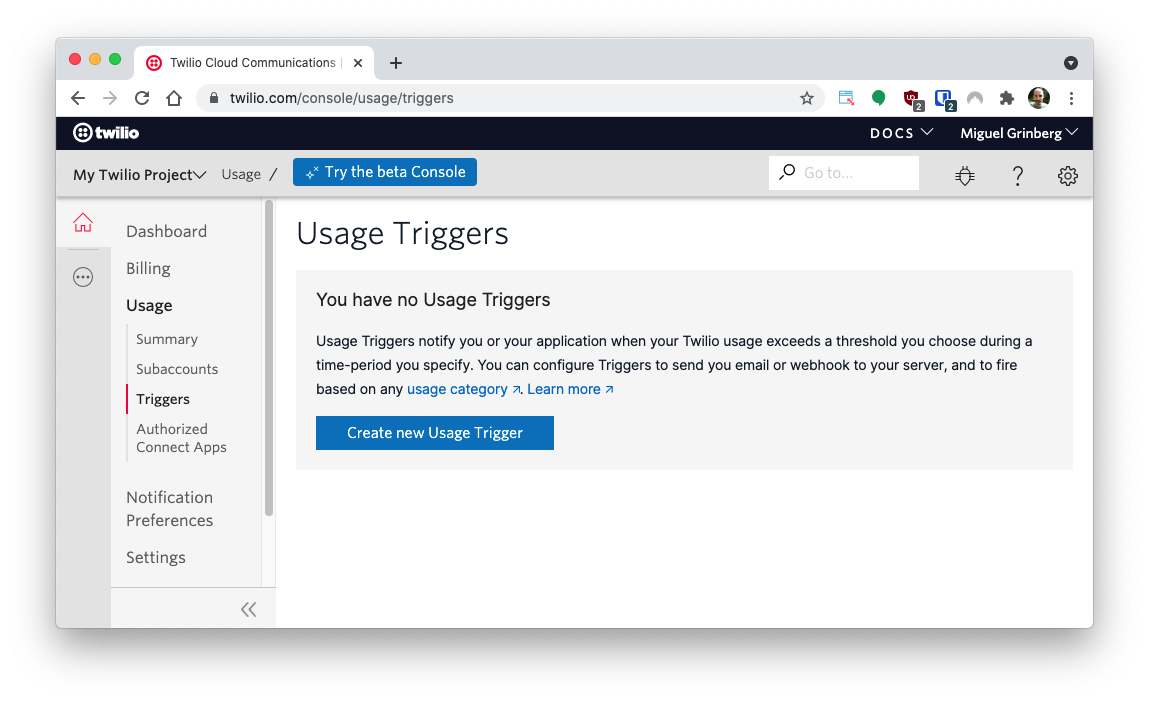
Open the Twilio Console in your web browser. On the left-side menu, select Usage. From the Usage submenu, select Triggers.
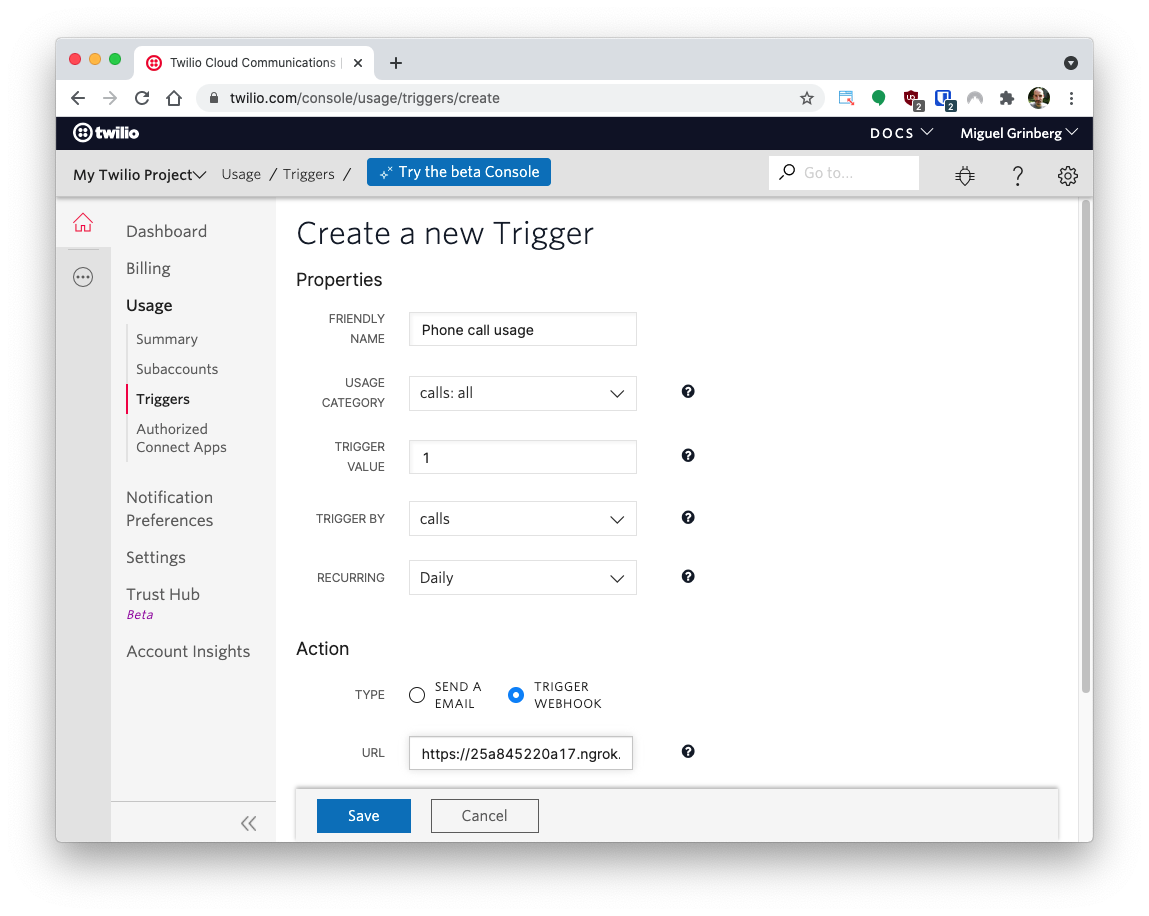
Create a trigger with the following properties:
- “Friendly name”: use an explanatory name here, such as Phone call usage.
- “Usage category”: feel free to browse through the available options to familiarize with them. For this tutorial, select “calls:all”.
- “Trigger value”: select 1, to be able to quickly verify that the trigger is working. For a real usage, here you will enter the amount that you want to cause the trigger to fire.
- “Trigger by”: select “calls” here. One interesting option here is to select “USD”, and then the trigger value is a dollar amount.
- “Recurring”: select “daily” here.
In the action section, select “Trigger webhook”, and paste the endpoint URL in the “URL” field. Make sure you use the ngrok URL, with /usage-alert appended at the end.
Here is how the trigger configuration should look:
Remember to click the “Save” button to activate this trigger.
Testing the trigger
To verify that the trigger is working properly, you need to make a phone call from or to the Twilio phone number. The easiest way to do this is to call your Twilio number from your own phone.
Make sure you have the Flask server running in one terminal and ngrok running in another, and then call your Twilio number. If you have never configured this number to handle incoming calls, you will receive a welcome response from Twilio. Once you hear the response, you can hang up.
Wait a minute or two, and the trigger will activate and send a request to the ngrok URL, which in turn will forward the request to the /usage-alert endpoint in the Flask application. The endpoint will send an SMS alert to the phone number you configured in the to argument.
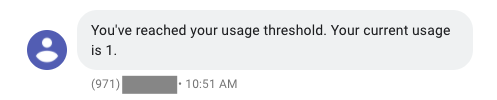
Each time you make a call to the Twilio number the trigger will fire again and you’ll receive another SMS with the updated usage count.
Congratulations on setting up your first usage trigger! Once you have verified that your trigger is working, you can go back to the console to adjust the trigger amount or change any of its other properties. There’s a ton of things you can do with triggers, so be sure to explore the documentation!
Miguel Grinberg is a Principal Software Engineer for Technical Content at Twilio. Reach out to him at mgrinberg [at] twilio [dot] com if you have a cool project you’d like to share on this blog!


Related Resources
Twilio Docs
From APIs to SDKs to sample apps
API reference documentation, SDKs, helper libraries, quickstarts, and tutorials for your language and platform.
Resource Center
The latest ebooks, industry reports, and webinars
Learn from customer engagement experts to improve your own communication.
Ahoy
Twilio's developer community hub
Best practices, code samples, and inspiration to build communications and digital engagement experiences.