Voice Biometrics Using Twilio Serverless and VoiceIt
Time to read:
September 27, 2022
Written by
Reviewed by
Biometrics technology is frequently used for authentication and identification purposes across industries, including financial services, healthcare, and the humanitarian sector. Integrating biometrics into development and humanitarian assistance programs can help to identify the people targeted for assistance, reduce fraud and de-duplication, and simplify registration and identification.
The World Food Programme uses biometrics to make sure that the right assistance reaches the right people. Vodacom Tanzania uses voice biometrics to enable people with disabilities to access their products and services more easily. Chase Bank uses Voice ID to identify callers accessing personal bank account information. Another interesting fact about voice biometrics is that if compromised, they can be invalidated by enrolling a new phrase. If your face, fingerprint, or iris data is hacked you cannot invalidate the data, and your identity is lost forever. It's complicated, however – we recognize that the use of biometrics has pros and cons, and it's up to each organization to weigh those for their program.
This tutorial shows how to use Twilio Programmable Voice with a voice biometrics integration to identify callers accurately and with just a few lines of code. In this tutorial, we are using VoiceIt as the voice identification system, but you can use other voice biometric vendors such as Veridas.
Prerequisites
For this tutorial, you’ll need:
- A VoiceIt account. VoiceIt offers an API for voice biometrics that we'll be using during this blog post. Follow this link to sign up: https://voiceit.io/contactUs. You can use a different API to integrate voice biometrics with Twilio, however you'll need to change some of the code.
- A Twilio account. Sign up here for a free trial: https://www.twilio.com/try-twilio
- An Airtable account. Sign up here for a free trial: https://airtable.com/#. You could use a different database or CRM here as well with some code changes.
- A Linux or MacOS terminal with npm and the Twilio CLI installed.
Build a VoiceIt integration
We will use Twilio Serverless and Programmable Voice to build a call flow that authenticates a caller using voice biometrics through VoiceIt. Each caller’s phone number and corresponding VoiceIt User Id are stored in Airtable.
Step 1: Clone the repo
The first step is cloning the repository that hosts the code for this demo.
- In your terminal, clone the tutorial repo by running:
git clone https://github.com/Gunjan-twilio/voiceit.git - Using a code editor of your choice, copy the contents of
.env.exampleinto a new file called.envin the same directory.
Step 2: Set up Airtable
The next step is to set up Airtable, a low-code collaborative platform, to store each caller’s phone number and biometric user ID. You could also choose to modify the code to use a different CRM or database.
- Log in to Airtable. Create a new workspace or use an existing one to create a new base.
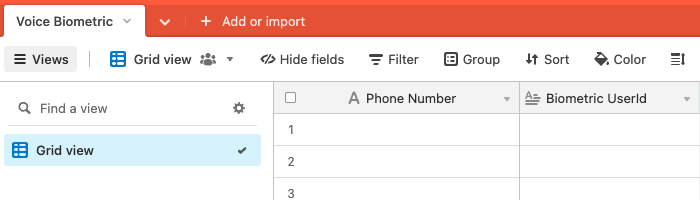
- Name the table “Voice Biometric”
- Rename the default primary field to “Phone Number”. Add another field for “Biometric UserId”. Your table should look like this:
- You'll need this table's Base ID to make changes programmatically. You can find that in the URL. For example, if your full URL is https://airtable.com/appXXXXXXXXXX/tblYYYYYYYYYYYY/viwZZZZZZZZZZZZblocks=hide, your Base ID is the section beginning with “app”: appXXXXXXXXXX. Update the AIRTABLE_BASE_ID value in your .env file.
- Copy your Airtable API Key from your Airtable Account page. Paste this value in your .env file after AIRTABLE_API_KEY=.
Step 3: Set up VoiceIt
VoiceIt provides a face and voice biometrics platform that allows for rapid development and deployment of security solutions.
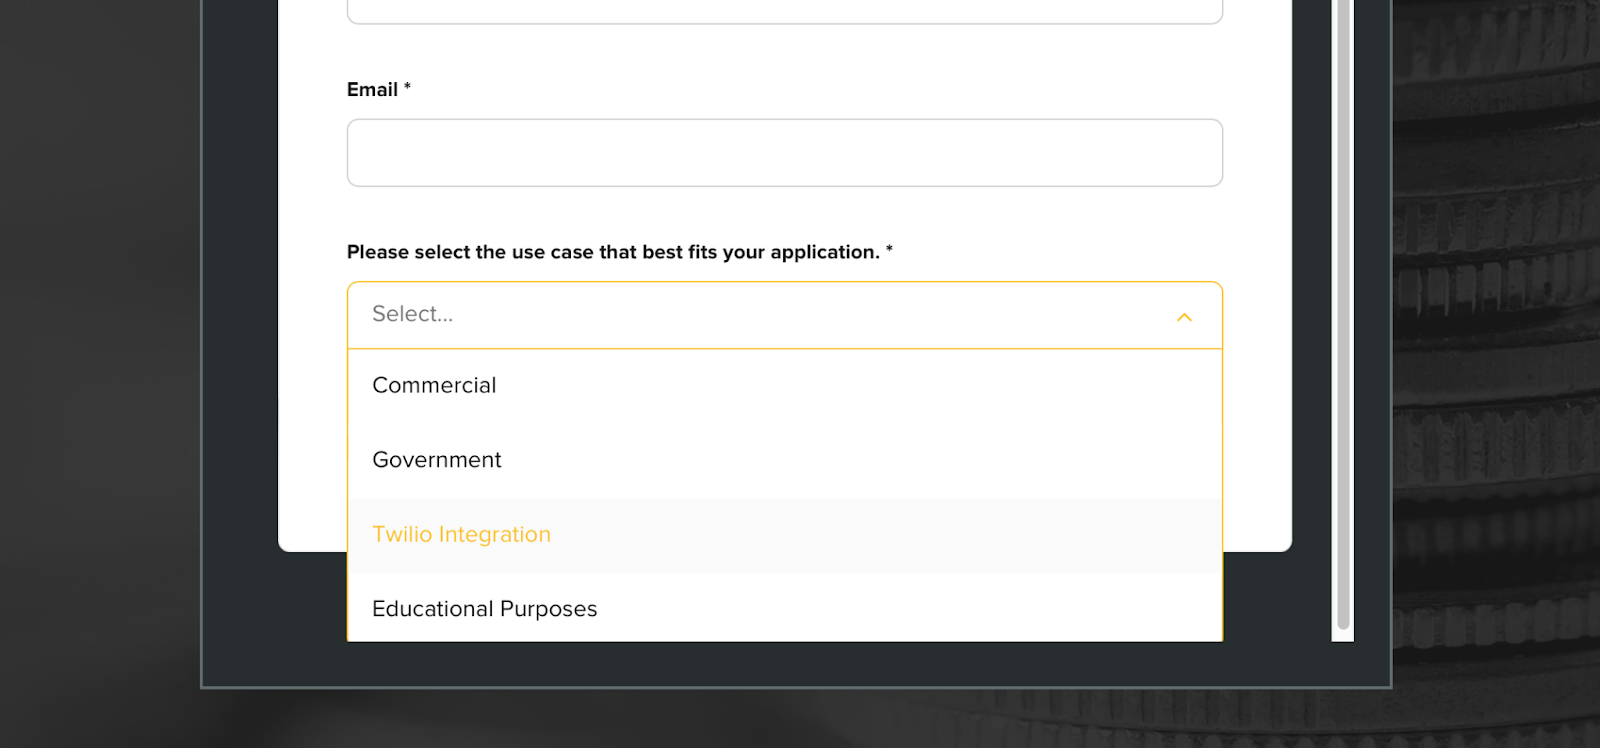
- Go to https://voiceit.io/contactUs, and fill out the co-pilot form
- Make sure to select Twilio Integration:
- After your registration is complete, you will be able to find your API key and token at https://voiceit.io/settings
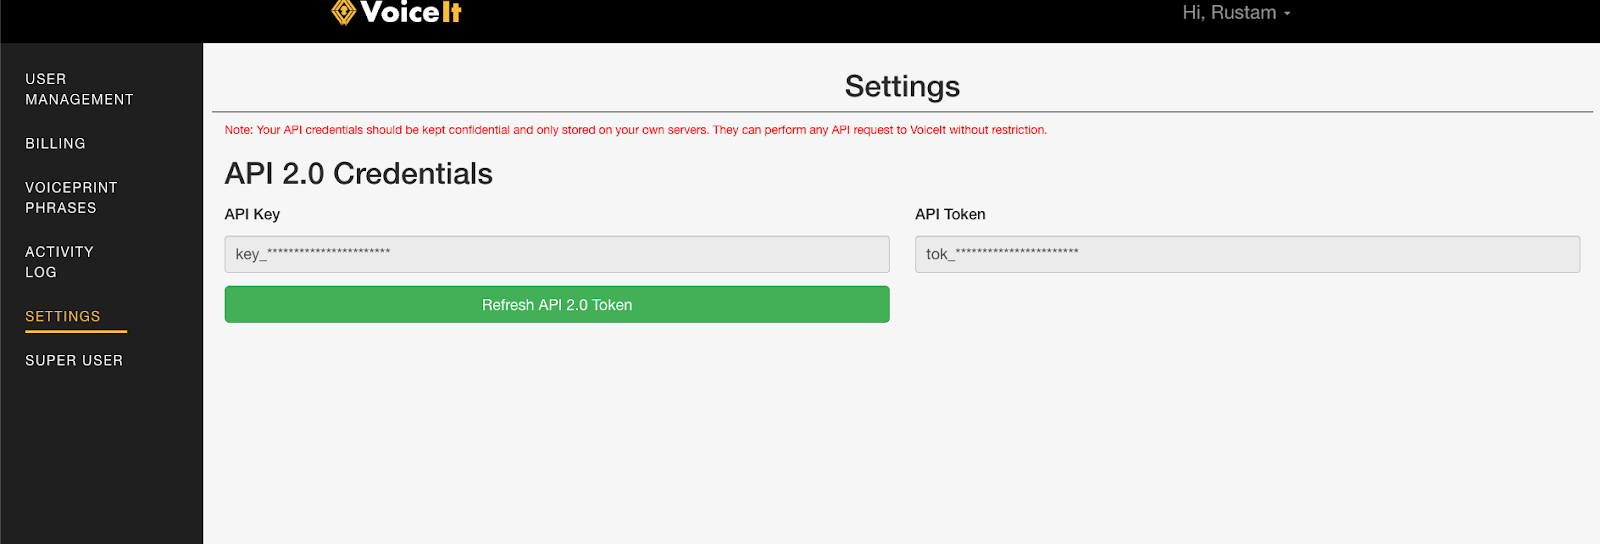
- Get your VoiceIt API key or VoiceIt API token
- Paste these values into your .env file accordingly.
Step 4: Deploy to Twilio Serverless
The Twilio Serverless API allows you to deploy Twilio Functions and Assets programmatically. You’ll use this API to create a Service that executes code to identify callers.
- In your terminal, navigate into the root directory of the repo you cloned above.
- Run
npm installto install the necessary packages. - Authenticate into your Twilio account in the command line by running the following command, replacing the default values with your own. You can find these values in the Twilio Console.
export ACCOUNT_SID=ACXXXXXXXXXXXXXXXXXXXXXXXXexport AUTH_TOKEN=XXXXXXXXXXXXXXXXXXXXXX Runtwilio serverless:deployto deploy your functions and assets to Twilio’s serverless environment.
Step 5: Connect your Phone Number
Now it's time to put it all together! The final step requires linking the code you just deployed to a Twilio phone number so you can test your experience out.
- If you do not already have a Twilio Phone Number, follow these instructions to buy one.
- Access the Active Numbers page in the Console. Click the desired phone number to modify.
- Scroll to the Voice & Fax section. Under Configure With, select Webhook, TwiML Bin, Function, Studio Flow, Proxy Service from the drop down.
- Under A Call Comes In, select Function.
- Under Service, select “voiceit”
- Under Environment, select “dev-environment”.
- Under Function Path, select “/voice/incoming_call”.

- Test it out! Call your Twilio number and register yourself using VoiceIt biometric identification. You’ll be asked to enroll yourself by repeating your VOICEPRINT_PHRASE three or more times. After completion, refresh your Airtable table to see your phone number and biometric user id.
Demo Experience
Optional: Change the Demo Language
Twilio supports text-to-speech capabilities in dozens of languages using Twilio Markup Language (TwiML). VoiceIt supports many languages and dialects, listed here. You can change the phrase and language of your demo by updating environment variables
VOICEPRINT_PHRASEandCONTENT_LANGUAGE, and redeploying the demo by running twilioserverless:deploy. To change these variables in VoiceIt, follow these steps:- Go to voiceit.io and login
- Go to the “Voiceprint phrases” section or directly to link: https://voiceit.io/phraseManagement
- Type in your new phrase and select the desired content language from the drop down
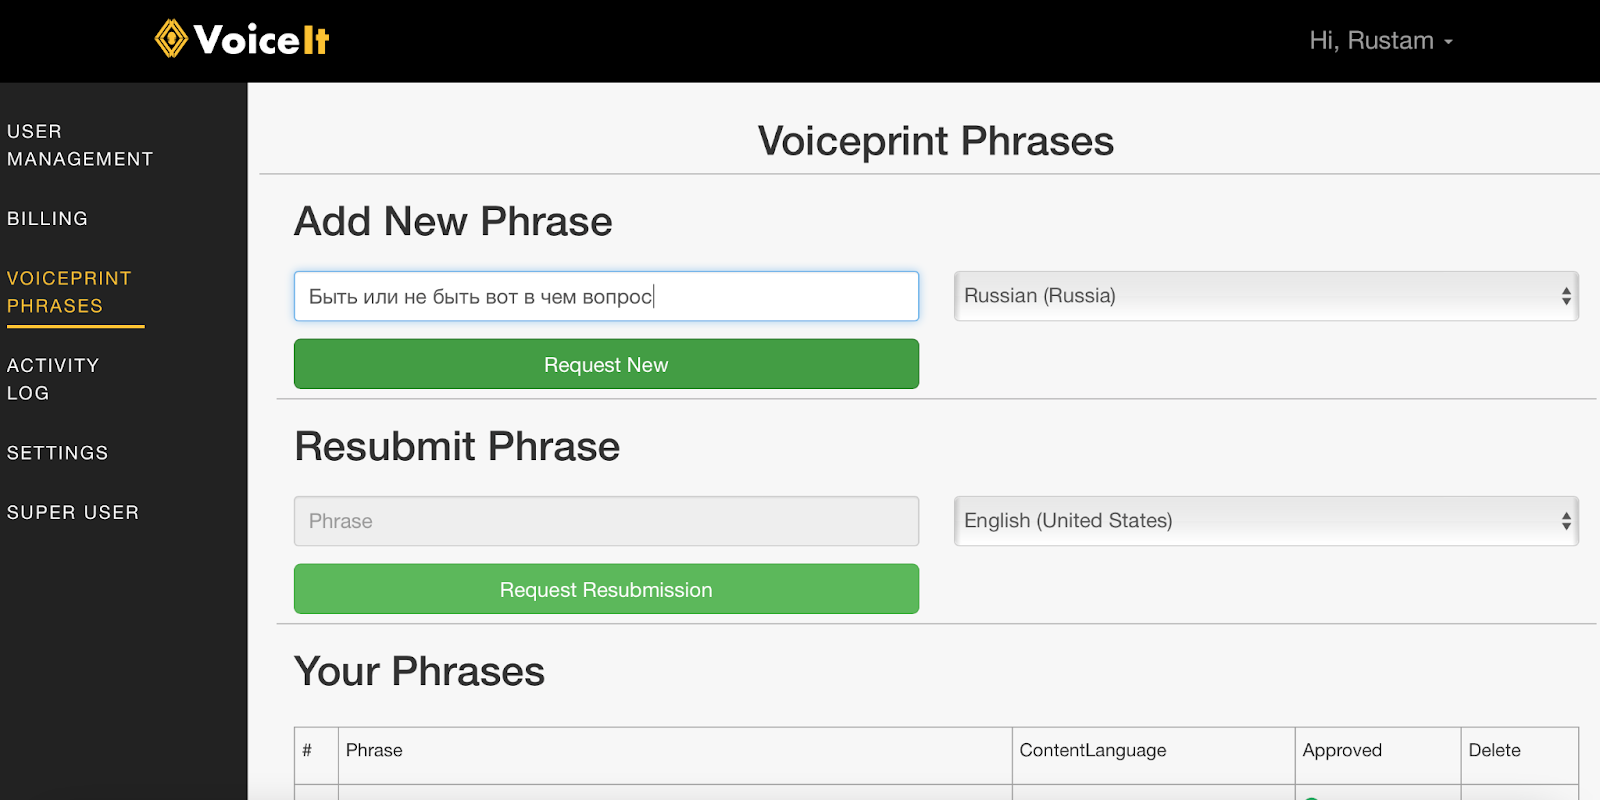
- Request the new phrase by clicking the “Request New” button, and look for an email that describes the next steps. Usually a new phrase requires 10 recordings from two different people to be approved, but these requirements can be more or less strict depending on the phrase and content language.
- Once the phrase is approved, make sure to change the environment variables
CONTENT_LANGUAGEandVOICEPRINT_PHRASEto their corresponding values. For the example above, it would be:

- Tips:
- When entering content language make sure to type it in exactly like in the content language table in VoiceIt documentation here.
- Try to choose phrases that are simple and are logically straightforward. People often forget the correct order of the words and swap words with synonyms.
Conclusion
Congrats! You’ve built a voice biometric identification phone line. Here's a video of the demo in action:
This solution could be used for identifying healthcare patients, independent family members on a shared phone number, bank customers, or vulnerable citizens with limited forms of identification. You could expand this demo to include other Twilio services such as Twilio Pay to accept authorized payments over the phone, and view key quality analytics using Voice Insights.
Angela Wieber is a Principal Solutions Engineer at Twilio, where she loves building and educating on cloud-based technologies that enable critical communications. She is based out of Austin, TX, home of the best BBQ and live music venues. She can be reached at awieber@twilio.com
Roo Kosherbay is a Full-Stack Software Engineer at VoiceIt, where he maintains a handful of projects that involve Golang, React, and Docker. Outside of work, his dog Kanga and Roo (Get it? 🦘) like to explore many of Minneapolis’ parks, forests, and lakes. He can be reached at rustam@voiceit.io

Related Resources
Twilio Docs
From APIs to SDKs to sample apps
API reference documentation, SDKs, helper libraries, quickstarts, and tutorials for your language and platform.
Resource Center
The latest ebooks, industry reports, and webinars
Learn from customer engagement experts to improve your own communication.
Ahoy
Twilio's developer community hub
Best practices, code samples, and inspiration to build communications and digital engagement experiences.