Add Facebook, Twitter, and GitHub Login To Laravel PHP Applications with Socialite
Time to read:
This post is part of Twilio’s archive and may contain outdated information. We’re always building something new, so be sure to check out our latest posts for the most up-to-date insights.

Using social media accounts to sign up for websites is common nowadays and preferred by users because they don’t have to remember a password every time they login to a website. Even though social signup is easy, you can also inadvertently end up with a bunch of very confused users in an app.
When a user signs up with one social provider such as Facebook and then signs up with a different provider such as GitHub the next time, we shouldn’t end up with two different users on the site. I should be recognized as the same user provided I am using the same email across different social platforms.
In this tutorial, we are going to add Social Authentication to a Laravel app through Socialite, an official Laravel package which makes adding social authentication to a Laravel app a breeze.
Overview: Social Authentication in Laravel
We’ll be adding three social providers to our app: Facebook, Twitter and GitHub. Along the way you will learn how to:
- Create an application on Facebook, Github and Twitter
- Add login strategies for Facebook, GitHub and Twitter
- write callbacks to authenticate users upon redirection.
The complete code for this tutorial is available here. Without further ado, let’s get started.
Environment Setup
This tutorial requires that you have a Laravel development environment set up before moving on. Also, since we’ll be cloning an existing project based on Laravel 5.5, a minimum of PHP 7.0+ is required for things to work. If you have one set up already, feel free to skip the installation section below.
Install Laravel Homestead or Valet
The official Laravel documentation is an excellent guide for setting up Laravel Homestead which is a pre-packaged Vagrant box for Laravel development. It’s the most popular as it is available across all OS platforms.
Mac users have the option of installing Laravel valet instead of Homestead. Note, however, Valet is not a complete replacement for Vagrant or Homestead, but instead provides a great alternative if you want flexible basics, prefer extreme speed, or are working on a machine with a limited amount of RAM.
Clone From GitHub
We’ll be adding authorization to an already existing Laravel app. Clone this repo and follow the instructions in the README to get up and running. The app is built on Laravel 5.5.
Assuming all the setup went well, we should be able to serve our app without any issues.
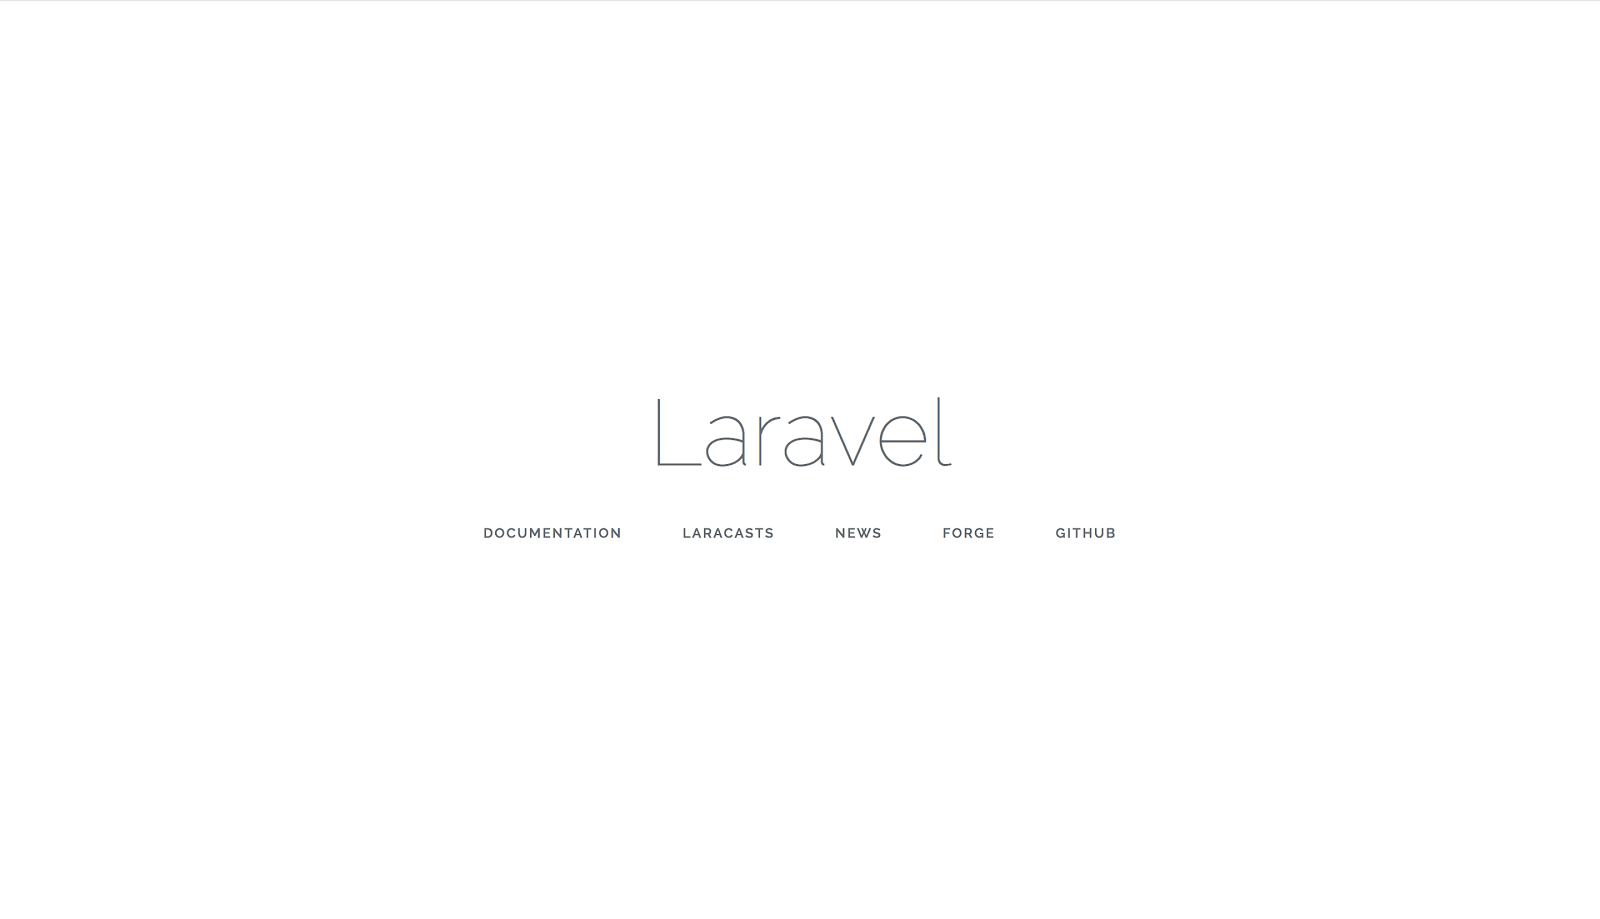
If you now visit the homepage, you should be presented with a view that looks like this:
Add Username/Password Authentication (Traditional Login)
To add authentication in Laravel applications, we run the following command on the command line in the directory we cloned the repo in.
The above command will generate all the authentication scaffolding you need, from routes to views and various auth controllers. By default, a new Laravel project comes with a create_users_table_migration to support traditional login. If you peep inside database/migrations, you’ll see the migration I am talking about.
To add social login on top of this traditional login, we’ll have to make a few tweaks. First, the email field must be nullable because Twitter doesn't require that users provide an email address. Second, the password field must also be nullable because the data we get from social providers will not have a password attribute. How you do this will depend on whether you are updating your own app or working on the cloned sample app.
Choose the section that matches your situation:
A) Migrating an Existing Laravel App
If you already had an existing Laravel app and did not clone the sample Laravel app, you will have to generate a new migration in order to make the email and password fields in the users table nullable. The snippet below demonstrates how to go about making changes to the email and password columns:
More info on how to make changes to table columns is available here.
B) Updating the Cloned Sample App
If you cloned the repo, update your up method in the users migration at database/migrations/2014_10_12_000000_create_users_table.php to look like this:
NOTE: The only change we need to make is to make the email and password fields nullable.
Link Users with Social Identities
We are not done yet! A single user may have more than one social account and yet we have to link users to different social accounts. To accomplish this, we’ll have to create a SocialIdentity model and a migration.
Let’s now define the relationship between users and their social identities. Add the snippet below to app/User.php to indicate that a user has many Social Identities:
Similarly, edit app/SocialIdentity.php to indicate that a social identity belongs to a user:
With the social identities table, we need to access the user_id, provider_name and provider_id columns. Change the up method for the create_social_identities_table migration to this:
Now we are all set to run our migrations and then get to the fun bit; setting up socialite. On the command line type:
Implementing Social Login with Socialite
With the code we have up until this point, our app only supports traditional login. You can test this out by visiting the /register URL from your browser:
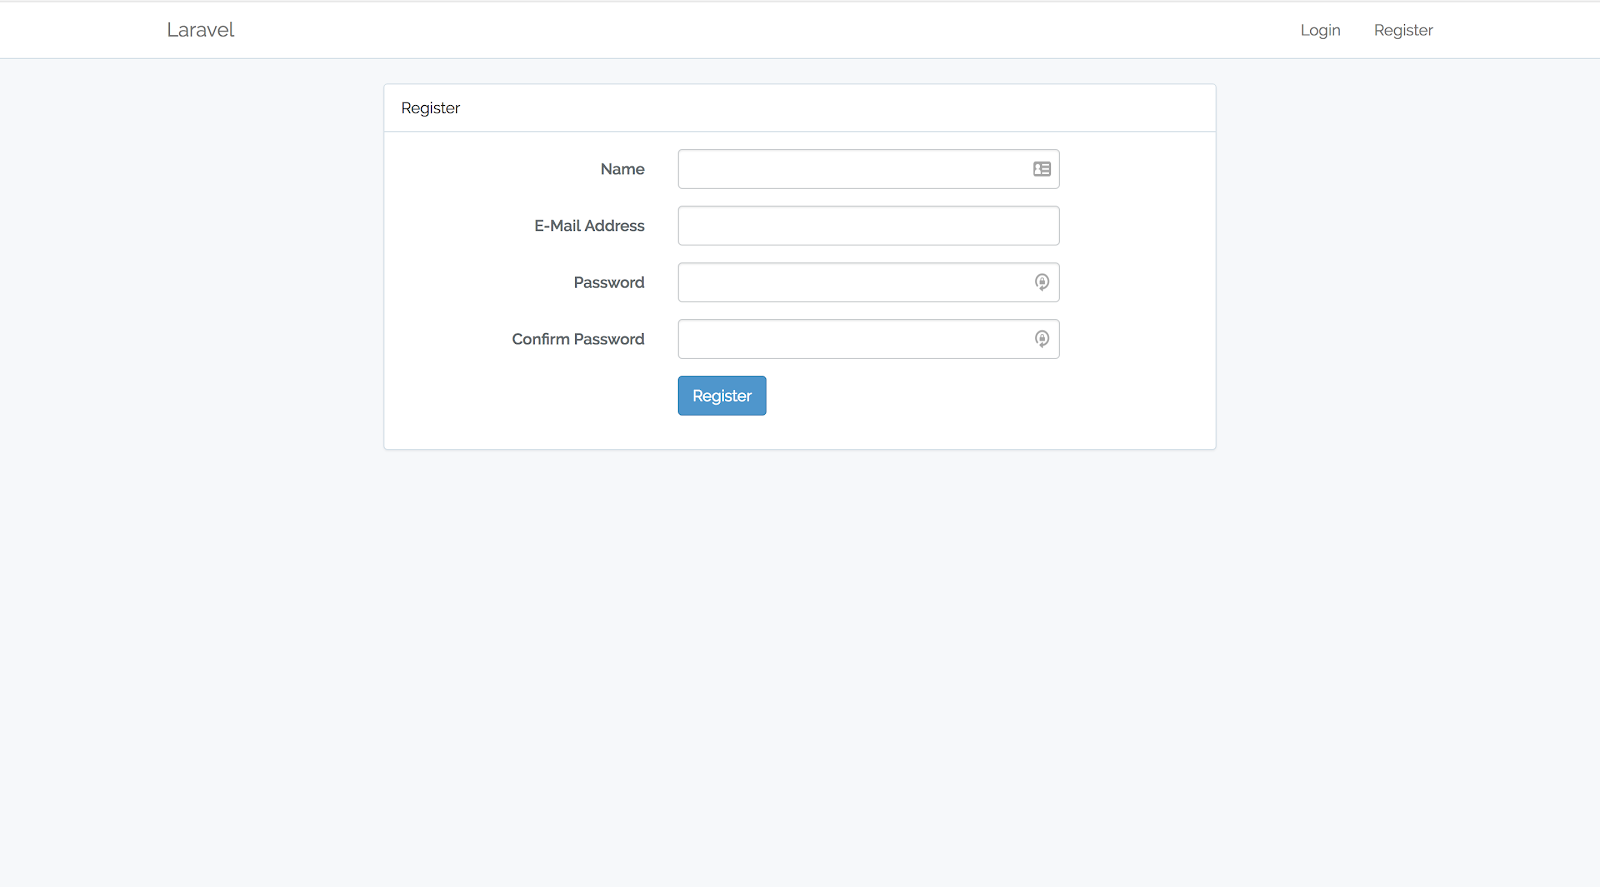
Sign up for an account by filling in all the text boxes and you will be logged in automatically upon clicking the register button. When logged out, you can always visit the /login URL and sign back in with the credentials you used when signing up.
To integrate social authorization, we’ll have to require the Socialite package:
Social Account Configuration
Before using Socialite, we will have to add the credentials for the OAuth services our app will make use of, which in our case are Facebook, Twitter and GitHub. These credentials will be loaded into the config/services.php file. Let’s create apps across the three platforms in order to get the necessary credentials:
A) Creating a Facebook App
Use this link as a guide on how to create an app on Facebook. Follow the instructions through step 4 ("Set Your App Details") in order to get the APP ID and SECRET. We’ll be adding these values to our .env file later.
Next, let's add Facebook Login capabilities to our app. Click the plus sign next to Products in the side nav. A new window will open up asking you to select the product you want to add. Select "Facebook Login":
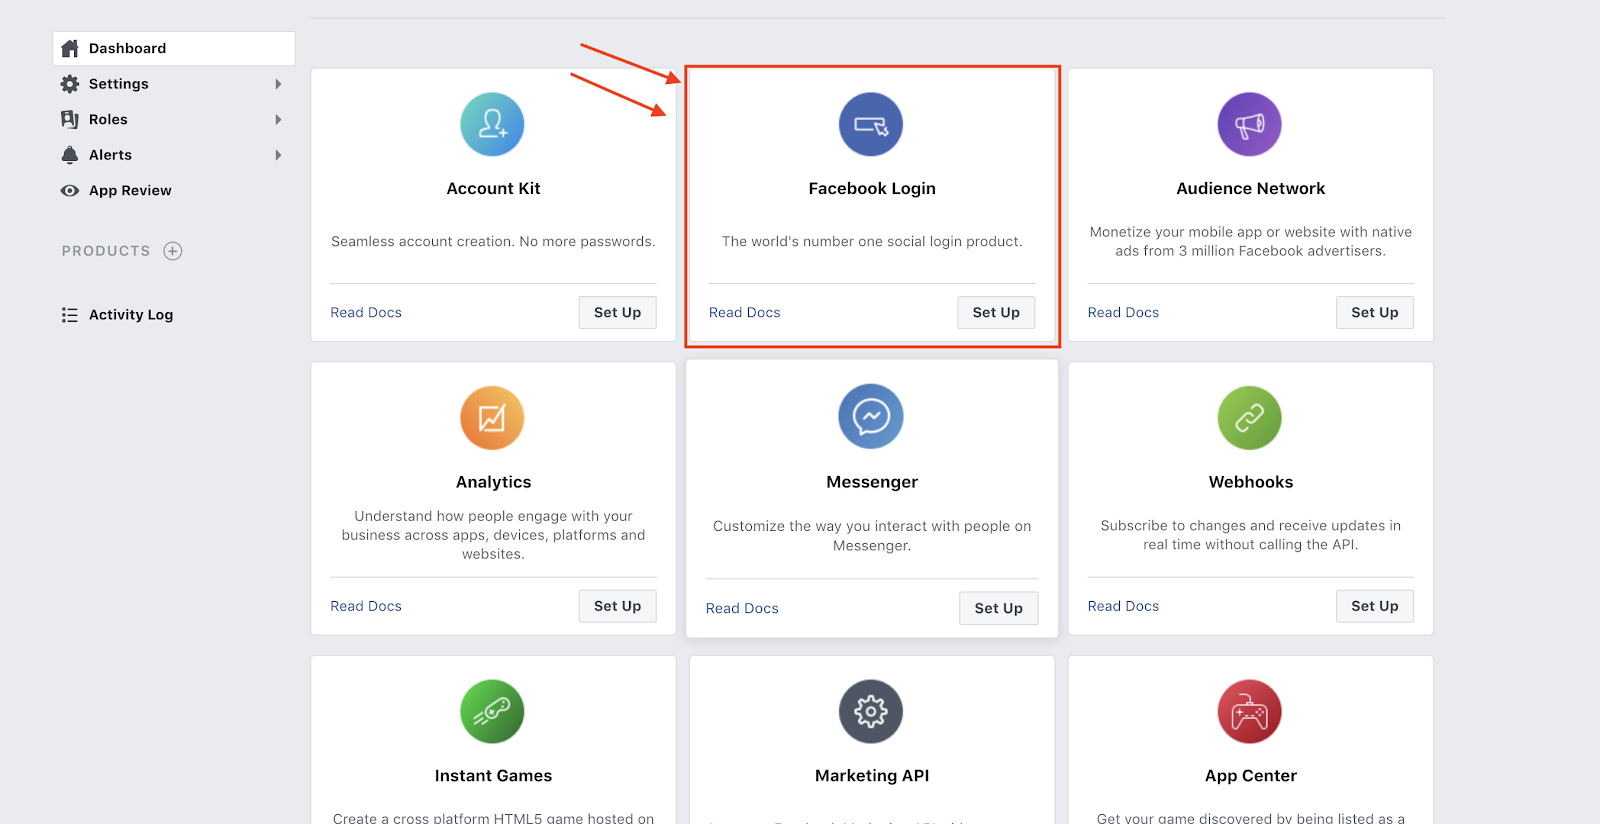
You will be redirected to another page asking you to choose the platform you want to add Facebook login to. Since we are creating a web app in this tutorial, choose web as your platform.

You will have to set your site URL before Facebook login can be added as a product to your Facebook app:
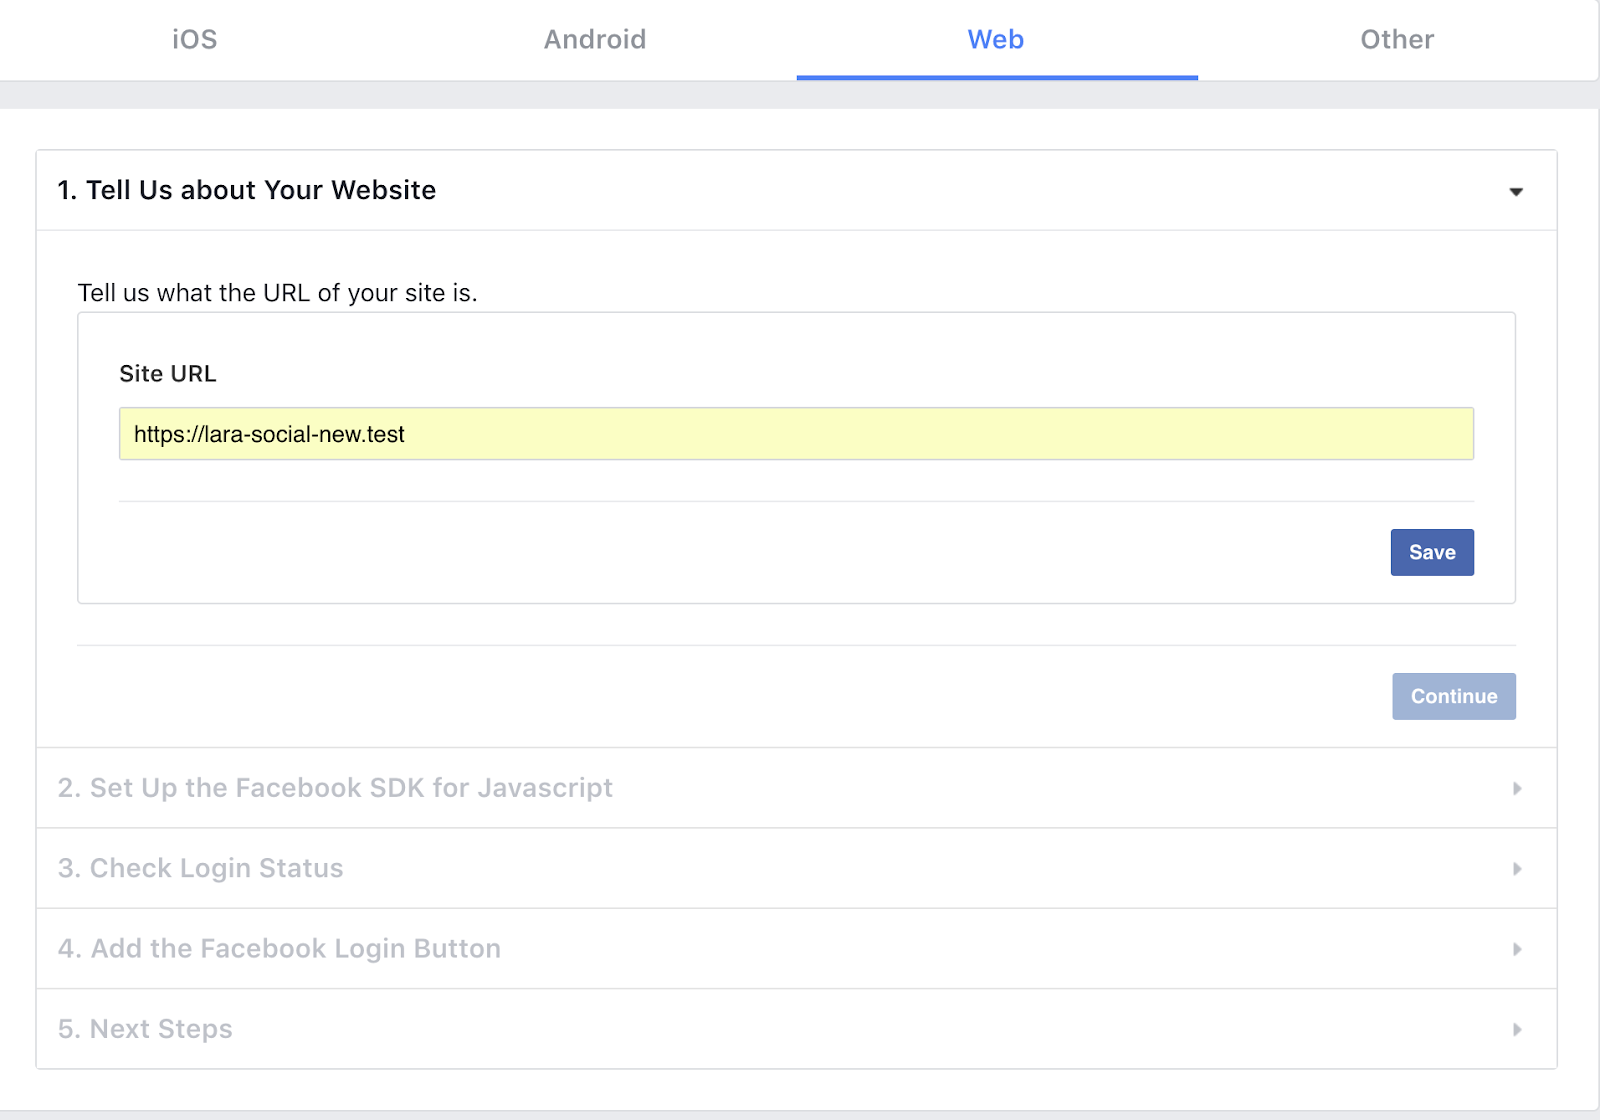
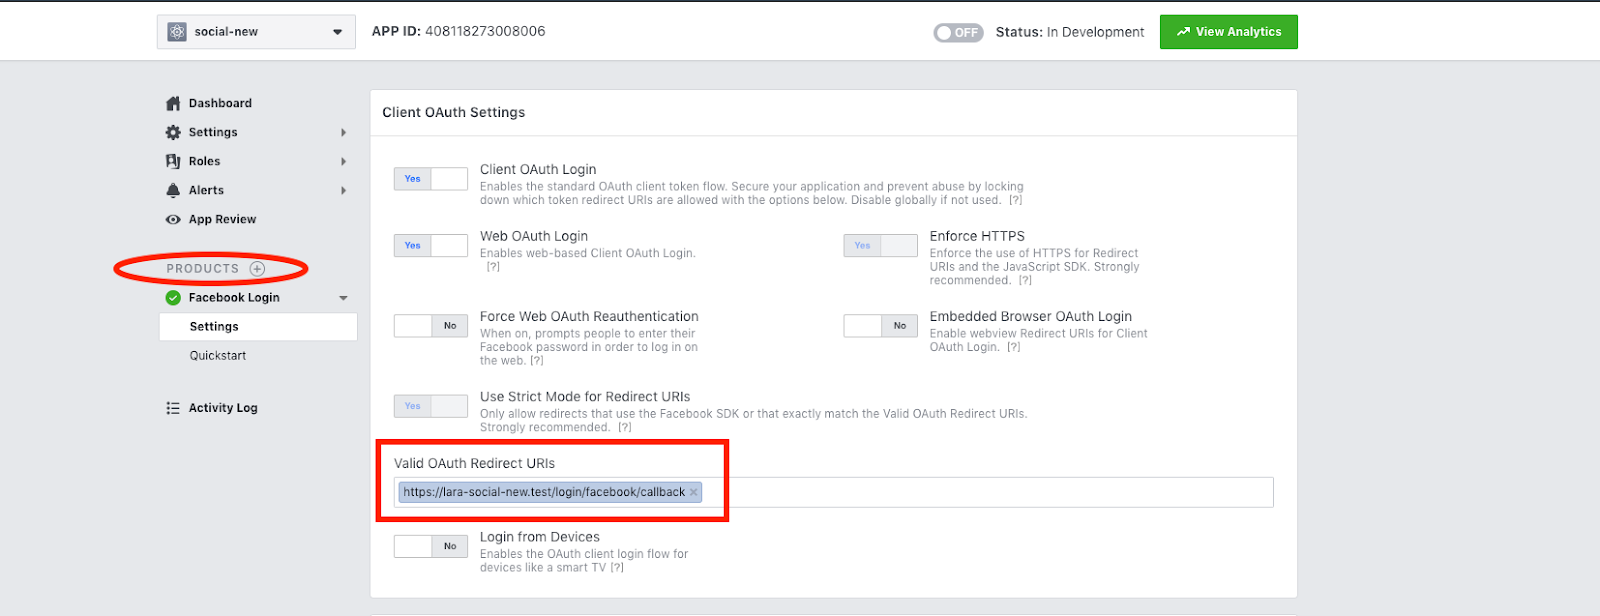
For each of the remaining steps, just click on "next" until you get to the last step. Lastly, for Facebook Login to work with our app locally, we have to set an OAuth redirect URI. To set the redirect URI, click on the newly created Facebook Login to open up a collapsible menu containing settings. Click "Settings" and then set the redirect URI under the "Valid OAuth Redirect URIs" section.
In my case, the redirect URI is https://lara-social-new.test/login/facebook/callback since my app is served from the URL https://lara-social-new.test. If you are coding along with the sample app, append login/facebook/callback to whatever domain your site is using locally.
NOTE: As of October 6, 2018, you won’t be able to use Facebook Login if your site isn’t HTTPS, or you will run into errors when trying to authenticate users. For those using Valet for development, this link will help you learn how to secure your site. For those using Homestead, you can refer to this post on how to setup HTTPS with Laravel Homestead.
Let’s now update config/services.php file to take note of Facebook login:
NOTE: You should not paste the Facebook app credentials directly into the config/services.php but should instead load them from your .env file. Update your .env file with the credentials i.e. 'FACEBOOK_CLIENT_ID', 'FACEBOOK_CLIENT_SECRET' and 'FACEBOOK_CALLBACK_URL' and their corresponding values. The FACEBOOK_CALLBACK_URL is the same URL you used for the Redirect URI above. These credentials can be retrieved by clicking on "Settings > Basic" from your facebook app dashboard.
B) Creating a Twitter App
Use this link https://apps.twitter.com/ to create a new Twitter app. Once the app has been created, you should be able to access the API_KEYand API_SECRET under the "Keys and Access Tokens" tab.
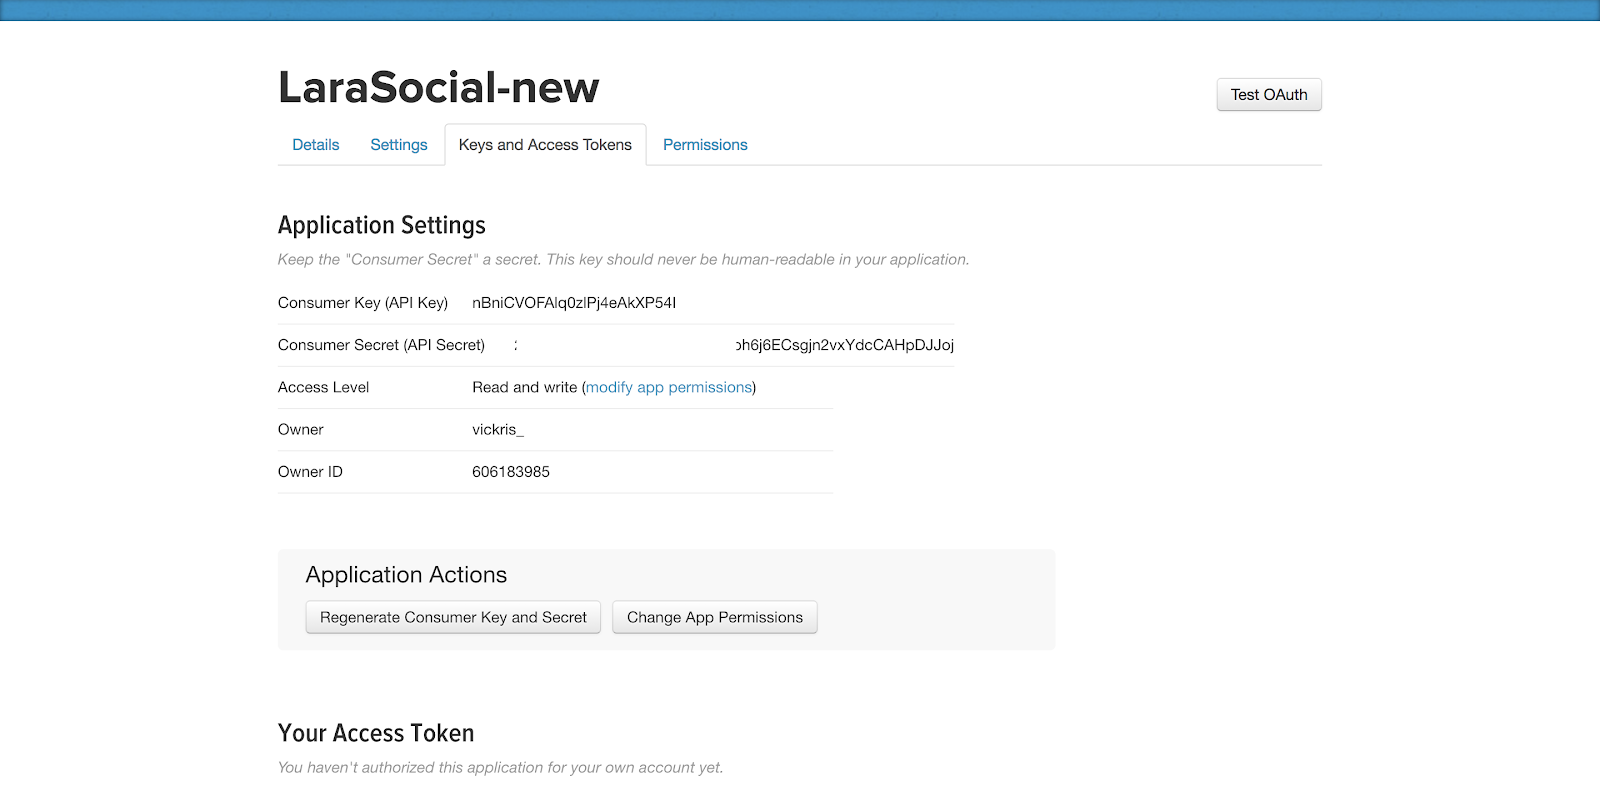
Then update your config/services.php file with the snippet below so as to take note of Twitter in the same way we did with Facebook.
Don’t forget to update your .env file with the Twitter credentials.
C) Creating a GitHub App
Follow this guide to create a GitHub OAuth application. For GitHub, your Authorization callback URL (step 8) should be https://your-app-url/login/github/callback. Once you click on register (step 9), you will be taken to a new window where you can access your GitHub Client ID and Secret.
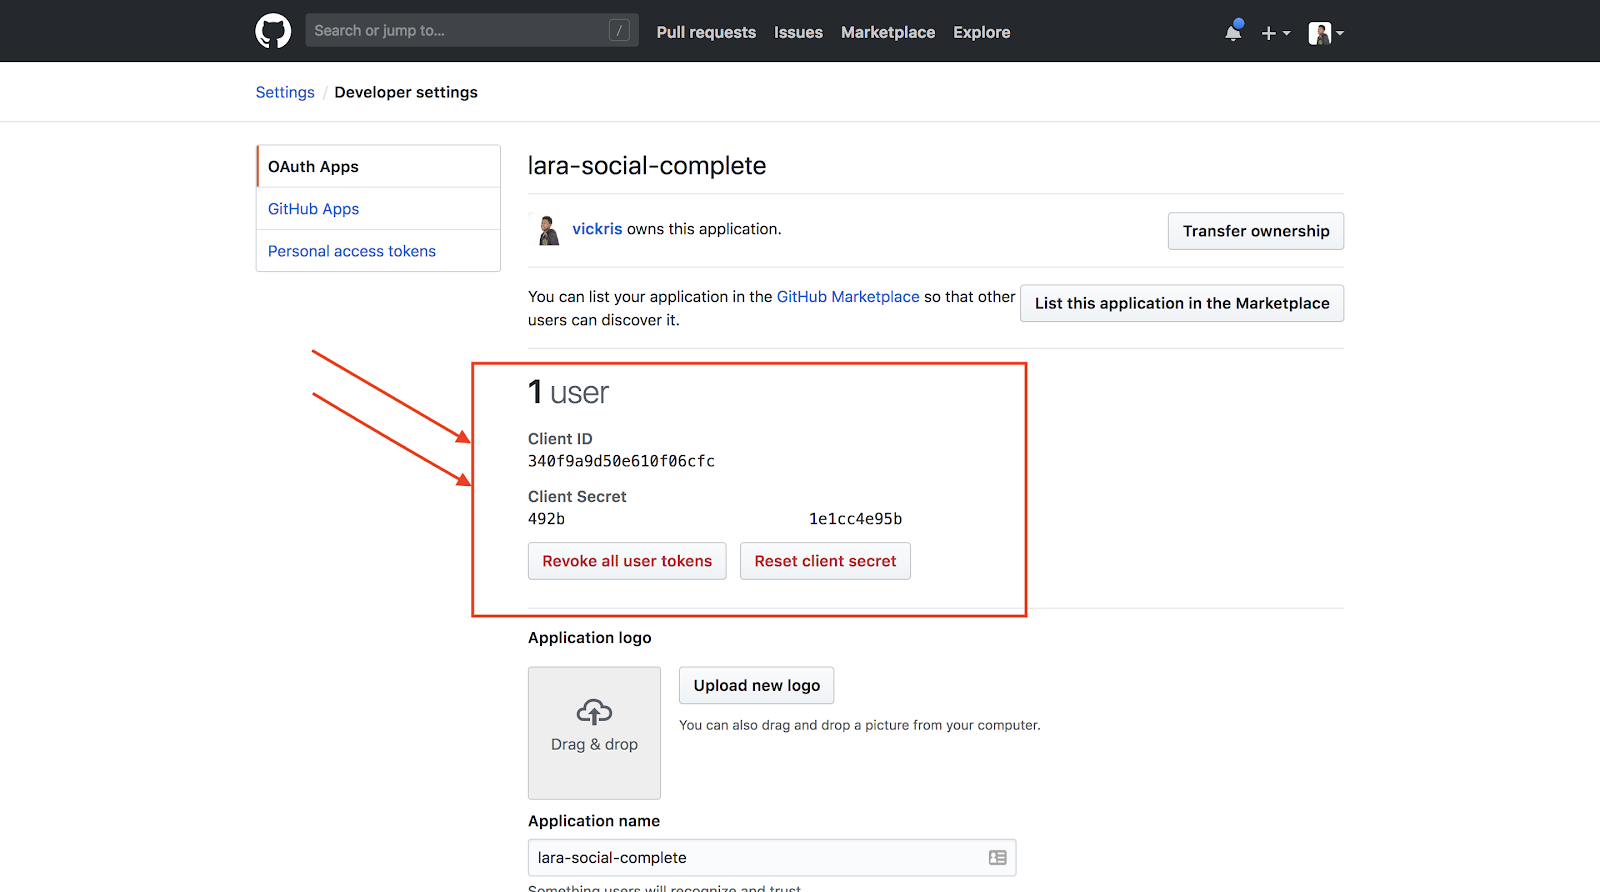
Then update your config/services.php and the .env file with your GitHub credentials. Use the same callback URL that you set when creating the GitHub OAuth app for the 'GITHUB_CALLBACK_URL' .env variable.
Routing
Now we are ready to authenticate users. For this, we need two routes: One for redirecting the user to the OAuth provider, and another for receiving the callback from the provider after authentication:
We are almost done. Our next step is updating the Login controller with the methods necessary for redirecting users to the OAuth providers and handling the provider callbacks. We will access Socialite using the Socialite facade:
Some explanation on what is happening above: The redirectToProvider() method takes care of sending the user to the OAuth provider, while the handleProviderCallback() method reads the incoming request and retrieves the user's information from the provider.
Inside the handleProviderCallback() we have to use a try-catch statement when retrieving the user from the provider. This is to take care of cases where authentication fails for some reason as the behavior of OAuth providers isn’t predictable at all times. It could be that the redirection failed or the user did not grant permissions to your application and in that event, the user will be redirected to the login page.
Notice we also have the findOrCreateUser() method which handles user creation if one does not already exist and populates the social identities table with the information captured from the social provider.
After retrieving the user object, we log the user in and redirect them to the home page.
Social Login Links
Lastly, we add the various login links to the Login and Registration pages in resources/views/layouts/app.blade.php.
We’ll be loading the icons for the various social providers with Font Awesome in resources/views/auth/register.blade.php.
Try visiting the registration page via the URL /register and you should now be able to see the social login links.
Testing Things Out
Let’s play around with our app to see if the social login work as expected. Navigate to the login page via the URL /register . All the three social login links should be present as shown below:
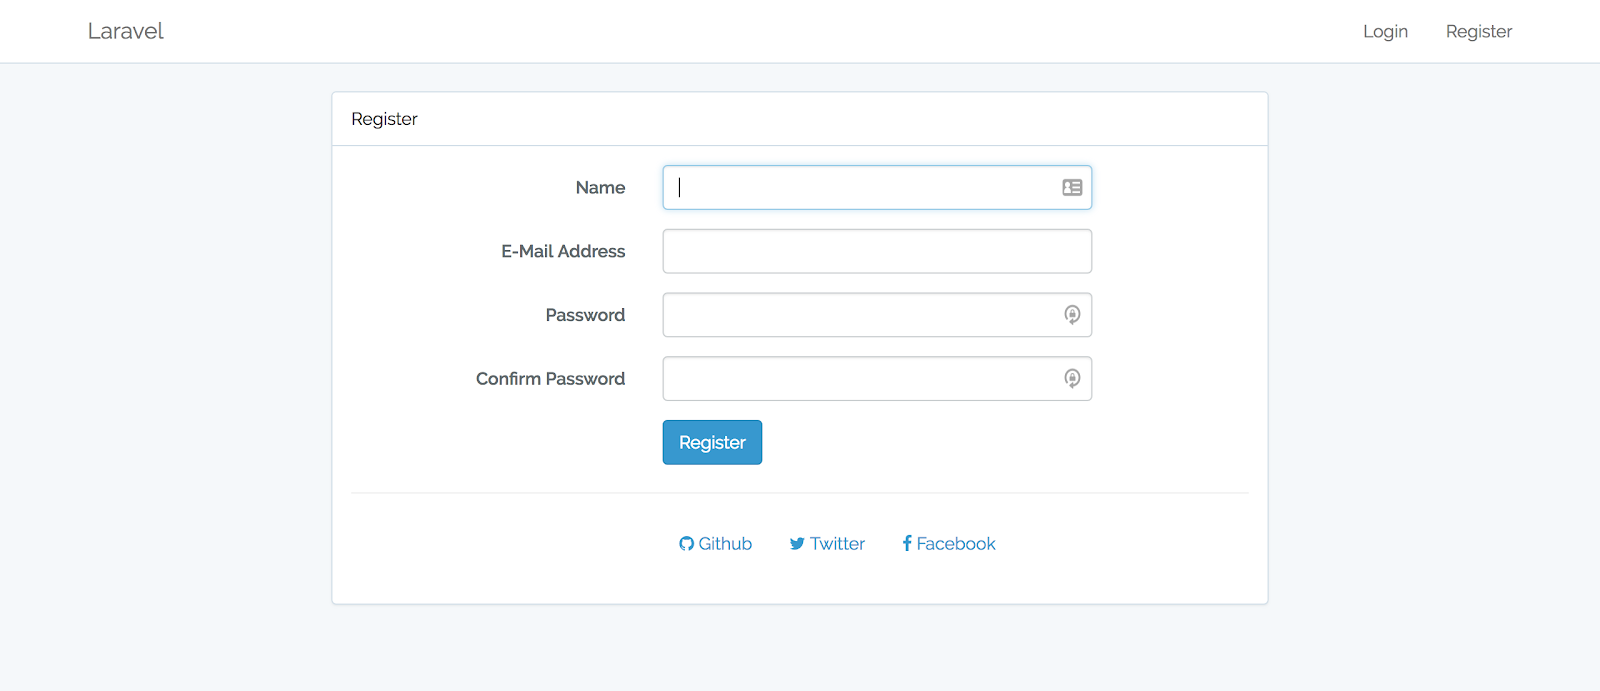
Try signing in with any of the social accounts. You should be redirected to the third party provider’s web page where you will be prompted to grant your application access to the user's data.
Below is a screenshot from GitHub:
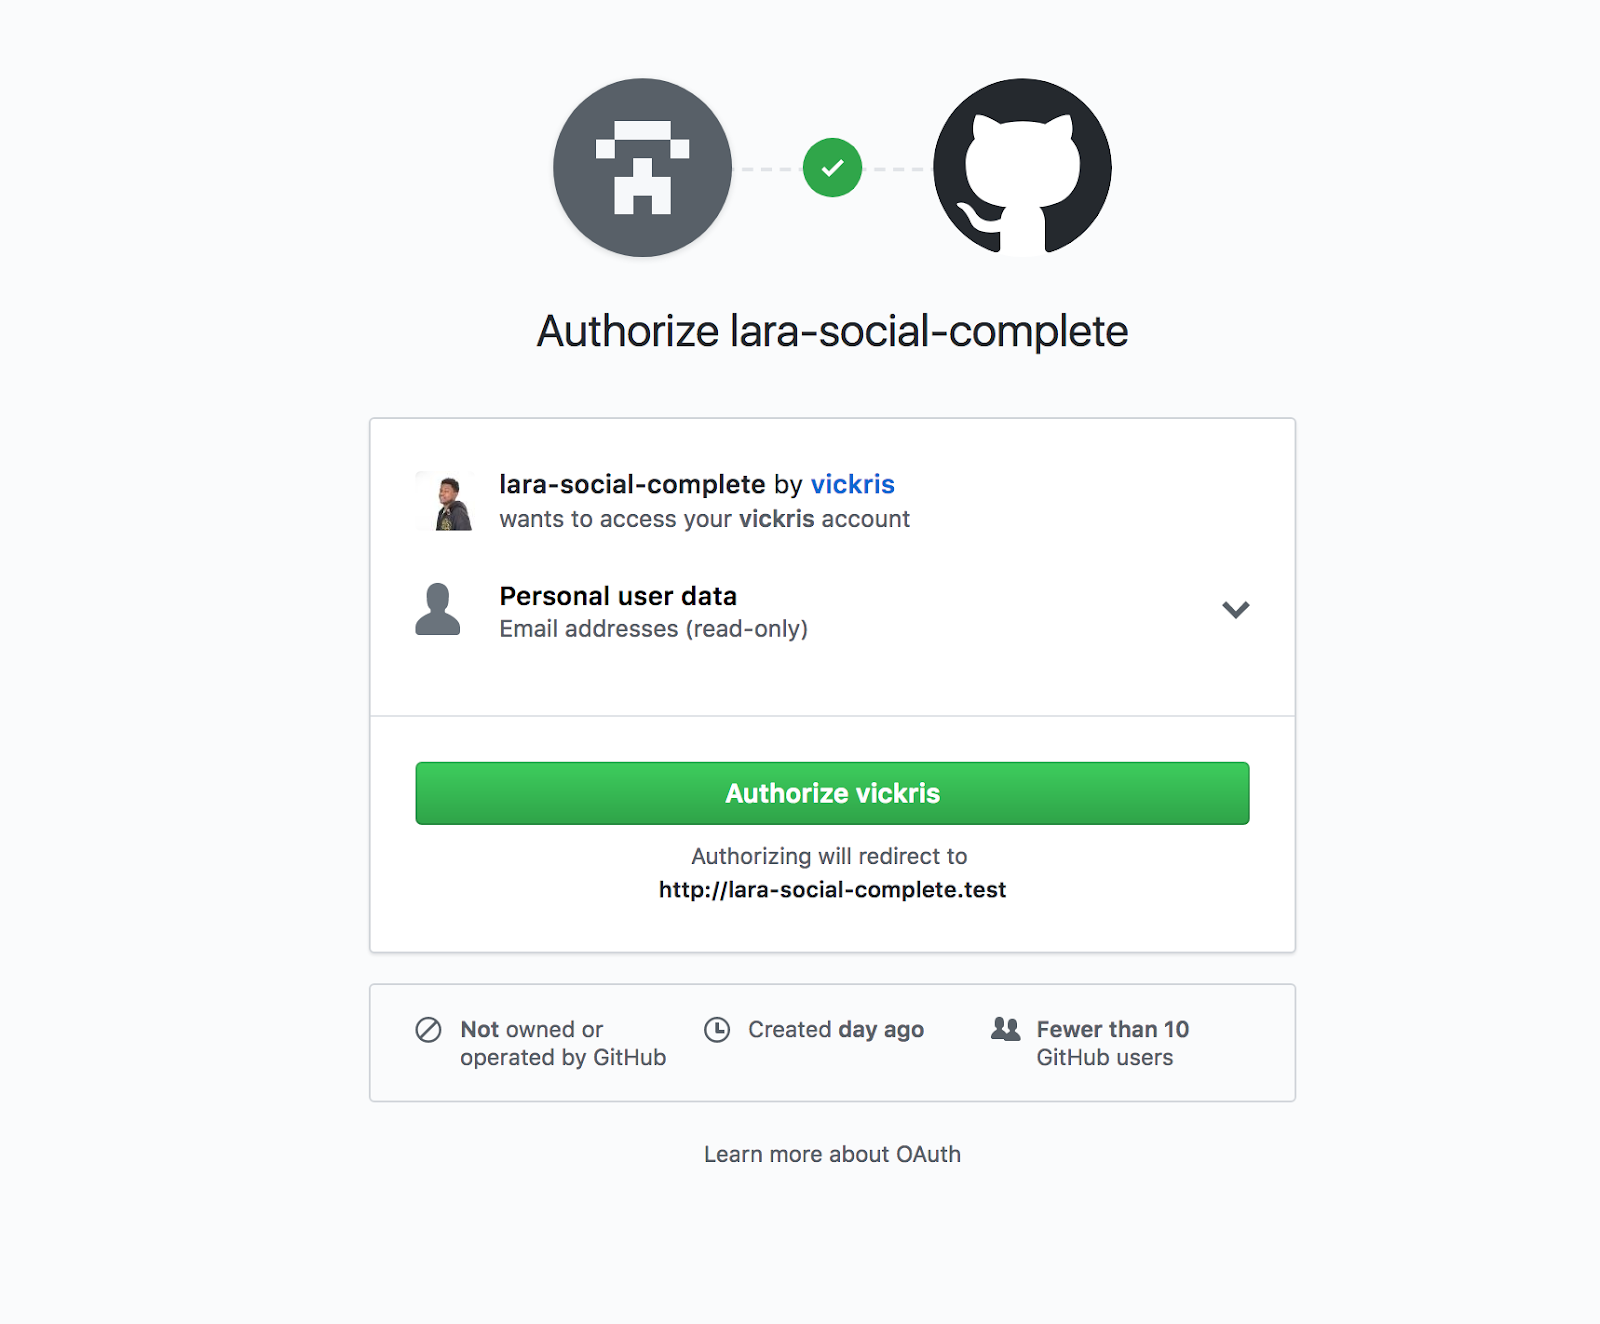
Once the app has been granted permission, we should be now logged in and taken to our home page.
Conclusion
We managed to add social login to our Laravel app. As you’ve noticed, Socialite makes this process straightforward as compared to writing your own implementation ground-up. Socialite is not just limited to Facebook, GitHub and Twitter as it supports lots of other providers like ones included here.
What’s Next?
Now that you’ve added social login to your site, you can now look at how to create your own social provider. More information on how to achieve that here. It’s fun!
Related Posts
Related Resources
Twilio Docs
From APIs to SDKs to sample apps
API reference documentation, SDKs, helper libraries, quickstarts, and tutorials for your language and platform.
Resource Center
The latest ebooks, industry reports, and webinars
Learn from customer engagement experts to improve your own communication.
Ahoy
Twilio's developer community hub
Best practices, code samples, and inspiration to build communications and digital engagement experiences.


