Build Callbacks With Stamplay, Twilio and Unbounce
Time to read:
January 06, 2017
Written by
This post is part of Twilio’s archive and may contain outdated information. We’re always building something new, so be sure to check out our latest posts for the most up-to-date insights.

Over the holidays I flew from San Francisco to New York with a stop in Denver. United Airlines delayed my flight from Denver to New York two hours. They said it might get cancelled. I called their customer support department, who didn’t help, and waited on hold for a supervisor. With all this time on my hands, I sent them a few tweets. I waited for an hour and 30 minutes before hanging up.
If someone from United had actually answered, I could have told them that building callback capability isn’t hard. Instead of spending my time listening to elevator music over the phone on hold, I could have thrown my phone number into their website and read a book while waiting for a callback.
We can’t change the past, but we can build a callback function with Stamplay, Twilio, and Unbounce. Let’s do it.
Psst…you can read the original blog post by Stamplay over here
Configuring the Unbounce landing page
Regardless from the starting template or graphical style of your Unbounce landing page the only thing that you really need is a Phone Number field.
If you’re starting from scratch you can find some templates on Unbounce that have the Phone Number form field already included like the Service Callback one.
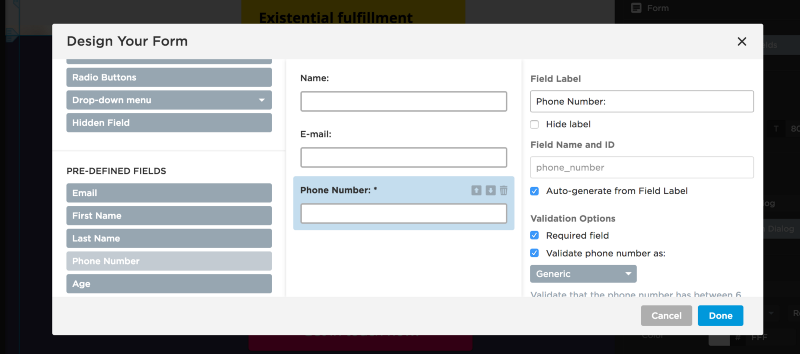
If you already have your form in place just be sure to add a Phone Number field, you can add fields to your form by double-clicking on the form itself. A pop up window will be shown allowing you to select the field from the Pre-defined fields on the left.
Once this is completed let’s get a Twilio account.
Getting Twilio Wired Up
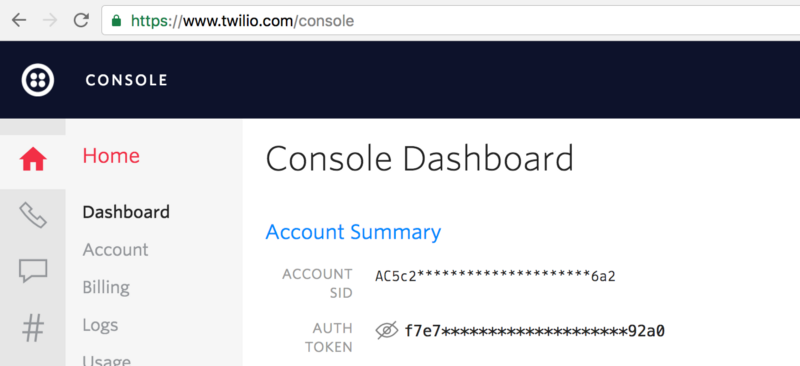
Create a Twilio account, buy a phone number, then head over to your Console Dashboard and find your Account SID and Auth Token. Copy the Account SID and Auth Token, we’re going to use them in a minute.
Configuring the Blueprint
This app is available as a Blueprint, a pre-built template to help you get started with proven integration solutions. To get started click here.
You’ll be prompted to pick a name for your project and then a walkthrough wizard will start. After that Stamplay will prompt you to:
- Connect your Unbounce account
- Provide a couple of Twilio credentials
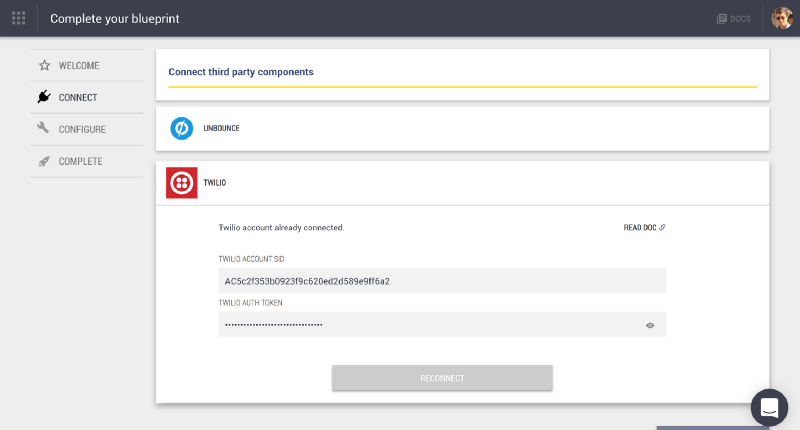
Once you have connected the two services click on Next.
Connecting Your Landing Page to Your Phone Number
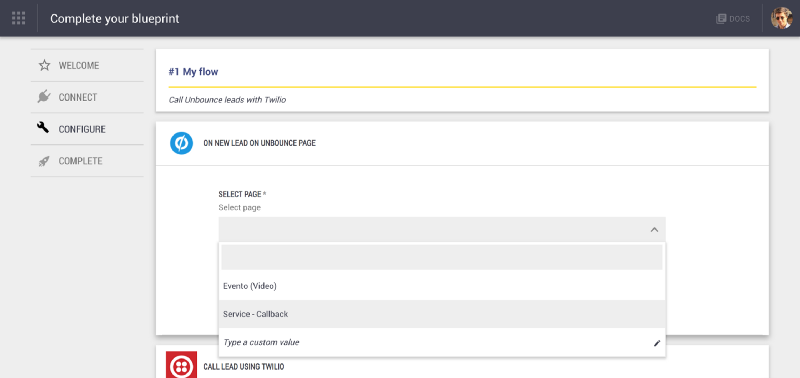
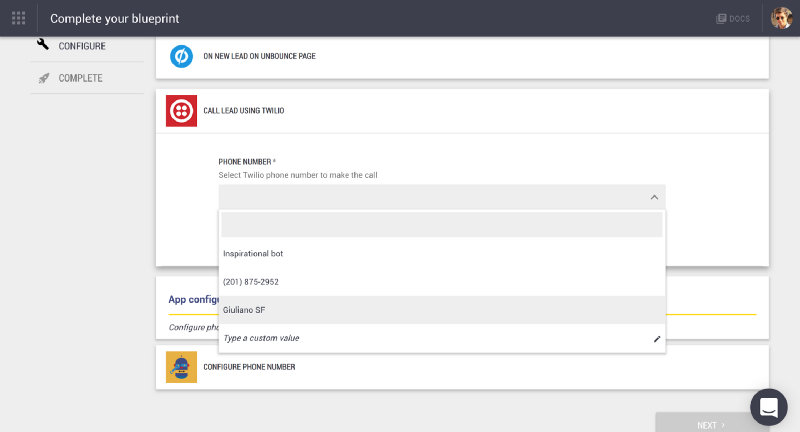
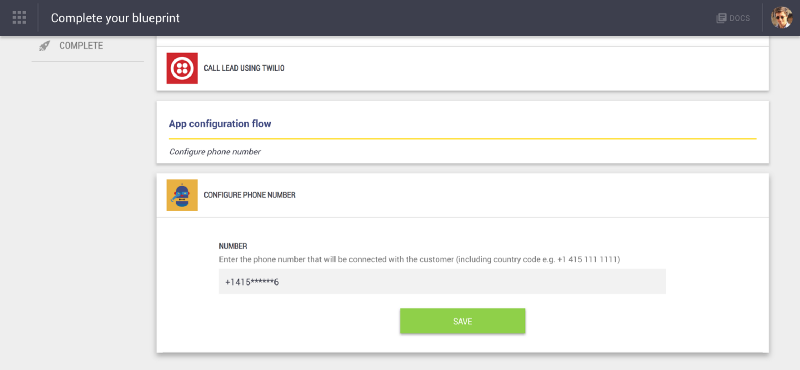
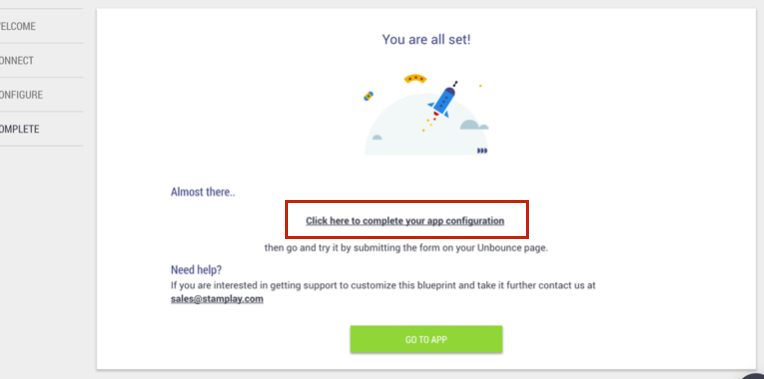
Next step is to select the Unbounce page containing the Phone Number field, then select the Twilio number that will be used to call your lead. Then type the phone number that will be called after your lead pick up the phone. Just be sure to include your country code (e.g. +14152225555). Once this you’ve completed the above mentioned steps the last thing that you still have to do is to click on the link to complete your app configuration.
How It Works Behind The Scenes
The blueprint is the result of mixing together all the key features of Stamplay, for the most curious here is the breakdown:
- an API Flow that is triggered by the Unbounce landing page and start the phone call with Twilio
- the persistent data storage
- a NodeJS serverless function that generates the TwiML required by the Call action
The Flow
The scope of the Flow is to collect informations from Unbounce and the configuration of our app containing the phone number that will be connected with the new lead and pass it the Twilio action.
The Twilio takes in input some parameters which are: the number of our lead (passed from the unbounce trigger), the Twilio phone number which will make the call and the URL of a TwiML file.
TwiML is a set of instructions to tell Twilio what to do when you receive make a call or receive an SMS. When someone makes a call or sends an SMS to one of your Twilio numbers, Twilio will look up the URL associated with that phone number and make a request to that URL.


The URL points to our Code Block https://APPNAME.stamplayapp.com/api/codeblock/v1/run/get_twiml?connectwith={{NUMBER_FROM_SETTINGS}}&first_name={{NAME}}
Responding With TwiML
The NodeJS Code Block simply return an XML response containing a message (that you can customize as it pleases you) that will be read by the text-to-speech engine of Twilio and the phone number that will be connected with the Unbounce lead.
That’s it! You’re good to go. Spare your customers from the United-style of customer service with the call back.


Related Resources
Twilio Docs
From APIs to SDKs to sample apps
API reference documentation, SDKs, helper libraries, quickstarts, and tutorials for your language and platform.
Resource Center
The latest ebooks, industry reports, and webinars
Learn from customer engagement experts to improve your own communication.
Ahoy
Twilio's developer community hub
Best practices, code samples, and inspiration to build communications and digital engagement experiences.