Build a VoIP System with Twilio, 3CX and Python
Time to read:
March 18, 2020
Written by

Spinning up your own VoIP phone line has never been easier with Twilio and 3CX. In this tutorial, we’ll go over how to integrate the two and get you well on your way to making cheap phone calls.
Project Dependencies
To implement this project we will use a number of products described below.
Twilio Elastic SIP Trunk
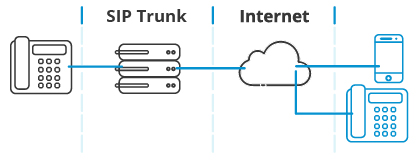
A SIP Trunk is a critical component that connects your VoIP phone system to the Public Switched Telephone Network (PSTN). Twilio’s SIP Trunking solution provides an affordable, flexible, and robust solution that can power enterprise businesses or a single home phone line.
More information about SIP Trunks can be found here.
Don’t have a Twilio account yet? Open your free account now. Use this link to sign up and you’ll receive a $10 credit when you upgrade to a paid account.
Twilio Phone Number
To make or receive phone calls, we’ll need a phone number. Twilio makes this easy with their programmable phone number offerings. Sign up for a number, or even consider using your existing number by creating a port request. For the purposes of testing, the programmable phone number is a quick method that can be used to validate your configuration before you port your own number into the Twilio ecosystem.
3CX IP PBX
An IP Private Branch Exchange (PBX) is a system that connects internal phone lines to external ones. When you make a call and get routed to a person’s extension, that’s going through a PBX. An IP PBX connects VoIP phones to a SIP trunk.
Two of the larger free IP PBX providers are FreePBX and 3CX. We’ll be utilizing 3CX for this tutorial, along with a free license. For higher levels of performance, you may purchase a license that meets your needs.
The installation of 3CX is beyond the scope of this tutorial, instead we point you to the excellent 3CX documentation that can assist you in installing 3CX for Windows or Linux, either on-premise or in the cloud. Once your installation is complete and you’re successfully passing the firewall test, you’ll be ready to integrate Twilio’s SIP Trunk into it.
Phones
If you’ve got a VoIP hard phone handy, check that it’s supported by 3CX. If not, do not worry, you can use their Android and iOS apps. Once your VoIP phone or app is configured, you’ll be able to make and receive calls from this phone via 3CX and the Twilio SIP Trunk.
Python
We’ll use Python and the Twilio library to aid us ensuring that our IP based access control list remains up to date. We will execute a periodic cronjob to check our public IP address and in the event that it changes, we’ll update it within Twilio.
Twilio Configuration
We can begin our exercise by configuring the Twilio side of things. Twilio’s SIP Trunk will serve as our bridge from the Internet to the PSTN.
SIP Trunk
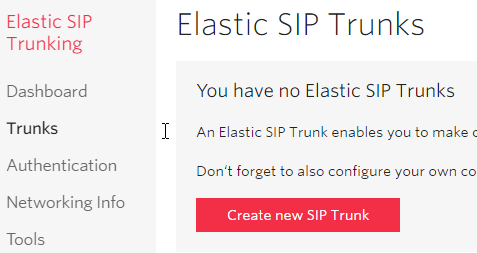
Let’s start by navigating to the Elastic SIP Trunking page:

Next, select Trunks, and then “Create new SIP Trunk”:
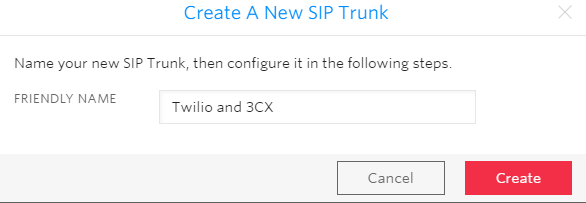
Give it a friendly name, then press create:
Trunk Termination
Once created, we can leave all of the settings on the General page untouched and switch over to the Termination section. When 3CX places a call, this is where it’ll be sending the call information to Twilio.

Go ahead and configure a unique URI:

This full value (“twilio-3cx.pstn.twilio.com” in this case, yours will need to be different!) will eventually be added into the 3CX Trunk configuration.
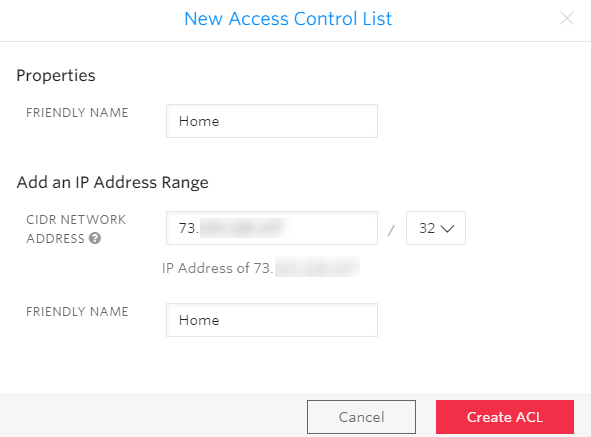
Now let’s move down to the Authentication section. Starting with an IP ACL, create one that has the public IP address of your 3CX installation. This information is present in the 3CX Dashboard:

Apply the same information into the New Access Control List creation dialog:
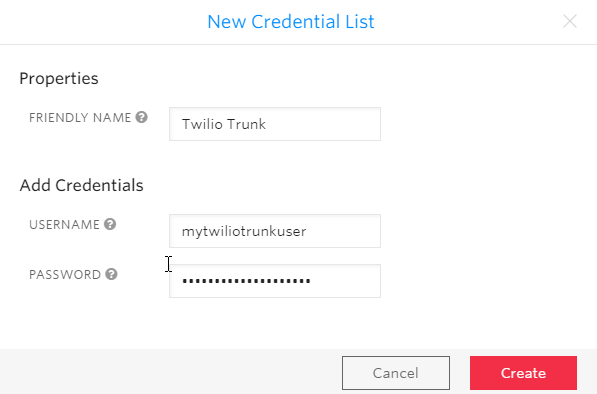
Next, create a username and password pairing in the Credential List. This info will also make its way into the 3CX Trunk configuration:
Press Create and now switch to the Origination page.
Trunk Origination
In the Origination section of the configuration add a new Origination URI, specifying your 3CX FQDN (available on the 3CX dashboard) with a ‘sip:’ prefix:

Trunk Numbers
Finally, in the Numbers section we need to provision a phone number to our SIP Trunk:
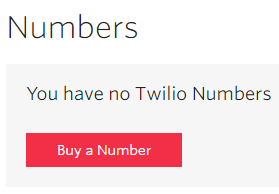
Find a number that meets your criteria, buy it, and it will be added to your trunk. And with that, the Twilio configuration is complete!
3CX Configuration
Now that we have created a SIP Trunk, it’s time to get it added to 3CX!
SIP Trunk
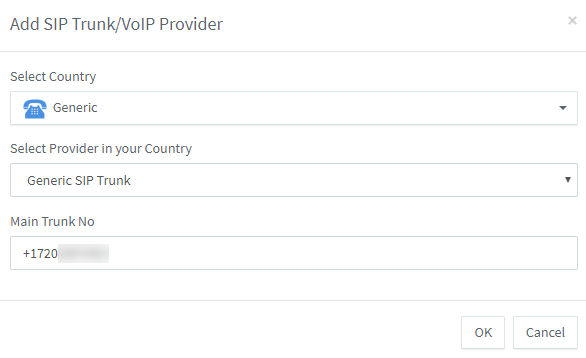
From the 3CX dashboard, go to “SIP Trunks”, and then “Add SIP Trunk”.
You will select a Generic country and a Generic SIP Trunk provider. The “Main Trunk No” is the full E.164 phone number that you added to the trunk.:
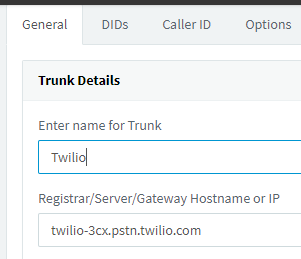
After pressing OK, you can give the Trunk a name such as “Twilio”. Additionally, we need to add the FQDN that matches our trunk’s Termination SIP URI:
Next, we configure the Authentication section. NOTE: we select the “Do not require - IP Based” option in the “Type of Authentication” dropdown, but still enter the ID and Password that we had defined in the Twilio Credential List. Twilio does not seem to support the 3CX registration process, but if we neglect the credentials, calls will be rejected with a 403 Forbidden error.

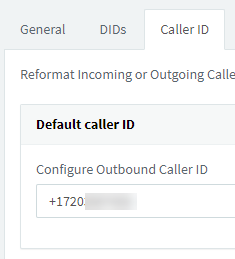
Now switch to the Caller ID tab and set the Default Caller ID to your number, again in E.164 format:
Save the SIP Trunk configuration before continuing.
Inbound Rules
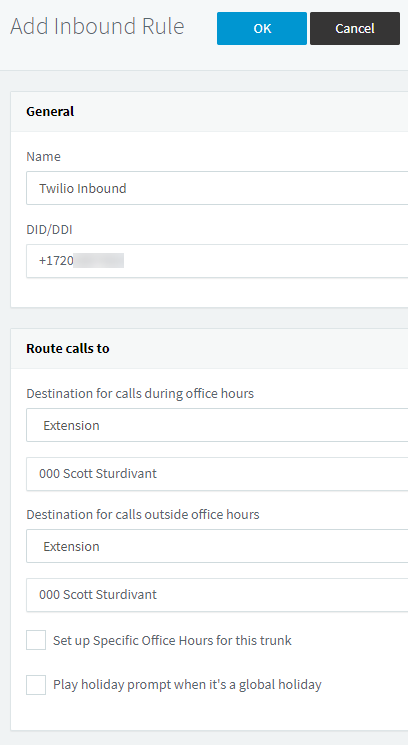
Select Inbound Rules and create a new rule. Here we configure 3CX so that it knows what to do when it receives a new call. In this case, I am just routing it to my extension, which must be configured as a VoIP phone with 3CX:
Outbound Rules
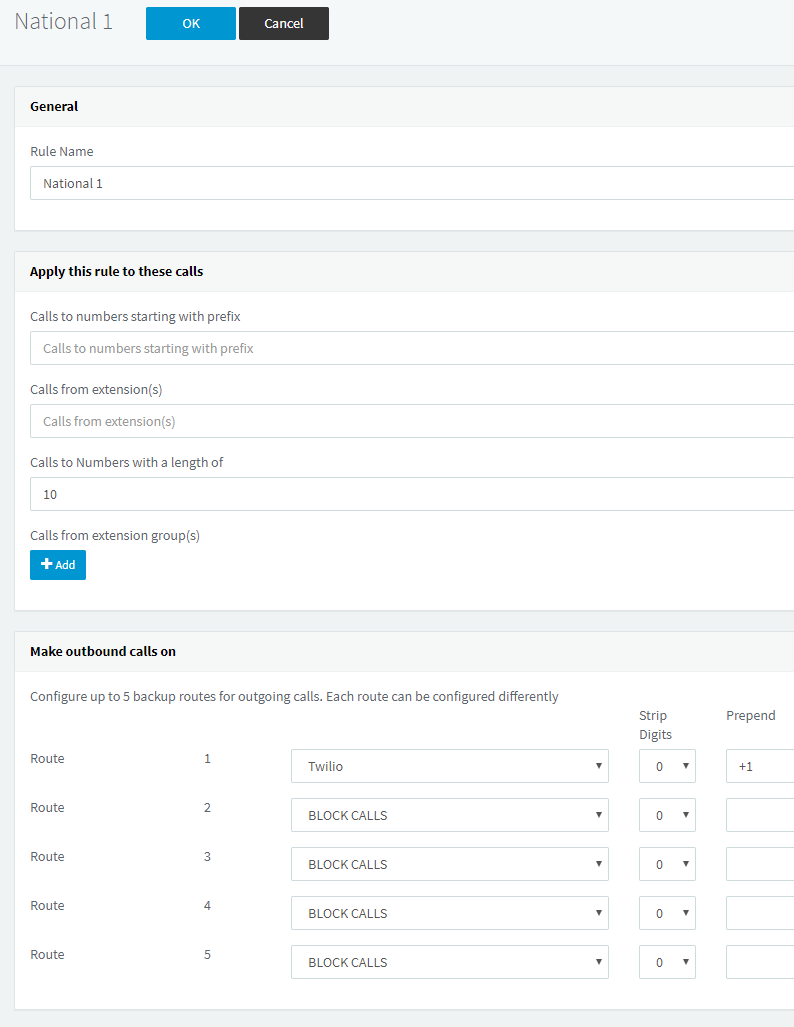
Finally, we set up the outbound rule. As someone within the United States, I would like to simply dial the area code and number and have the call be placed. Thus, to convert that into a valid E.164 number, I need to prepend “+1” to a ten digit number. With that in mind, let’s create the following rule, making sure to match numbers with a length of 10, routing the call to our Twilio trunk, and prepending +1 to it:
Depending upon your location and how you’d prefer to place calls, these outbound rules can be heavily customized to fit your needs. In fact, 3CX has some sample rules at the bottom of their Twilio documentation page.
In the event that outgoing calls are failing and you’re not sure why, check both the 3CX Activity Logs and the Twilio Logs associated with the SIP Trunk. Oftentimes failures are due to the incorrect formatting of the number being dialed.
Phones
If you have not setup your phone, go ahead and do so now. If you do not have a VoIP phone, the 3CX application that’s available for both Android and iOS can be quickly configured by scanning a QR code associated with an extension.
Updating the IP Access Control List
At this point, you should be able to place and receive phone calls. If you’re on a dynamic IP address like I am though, you are probably worried about this breaking when your IP address changes. To soothe those fears, we’ll create a simple application that updates our IP ACL when a change has been detected.
Python
To keep our libraries separate from the system libraries, we follow Python best practices and create a virtualenv and activate it:
We utilize the Twilio python library, where installation is as simple as:
The application itself is relatively small. Let’s call it update_acl.py:
At the start of the app, we can first see that the shebang path points to the Python interpreter associated with your virtual environment. It must be updated to reflect your virtual environment's path.
Next, three environment variables are going to be required. The Twilio Account SID and Auth Token can both be found in your Twilio Console. They are required for the Twilio REST client to authenticate properly. The ACL Name is required as it is how we will look up the IP ACL that needs to be changed. This is the “Friendly Name” you gave to the IP ACL. If you don’t remember it, it can be found by navigating to “Elastic SIP Trunking” -> “Authentication” -> “IP Access Control List”.
You can invoke this script manually from the command line as follows:
The Python script will compare its current external IP address to the last recorded value (stored in a file called ip.txt) and if it has detected a change, will find the IP ACL associated with your SIP Trunk and update its IP address.
crontab
Now that we have the ability to update the Twilio IP ACL all that remains is to schedule it periodically. If you are using a Unix-based system, crontab is a perfect fit for this task. Let’s create a cronjob that’ll run every fifteen minutes by typing crontab -e to begin editing your crontab. Add the following line:
Be sure to populate the environment variables with your actual values. Additionally, make sure the path to where you saved update_acl.py is accurate.
Now every 15 minutes, the script will execute and compare your current external IP address with your last recorded value. If it has changed, it will update Twilio’s IP ACL to reflect this new IP address with the end result being that your phone service will not be interrupted should your IP address change!
Conclusion
Both Twilio and 3CX are incredibly powerful and it’s great to be able to bring the two together! With a little bit of Python and the Twilio Python Helper Library, we’re able to add the last bit of glue that brings them together for a seamless experience.
I'd love to see what you build!

Related Resources
Twilio Docs
From APIs to SDKs to sample apps
API reference documentation, SDKs, helper libraries, quickstarts, and tutorials for your language and platform.
Resource Center
The latest ebooks, industry reports, and webinars
Learn from customer engagement experts to improve your own communication.
Ahoy
Twilio's developer community hub
Best practices, code samples, and inspiration to build communications and digital engagement experiences.