Build a Face Recognition System with Email Alerts using Python, OpenCV and SendGrid
Time to read:
August 10, 2021
Written by

If you wake up in the middle of the night to investigate a noise, it’s very important to identify the intruder as your sister or a stranger within a split second. Newborns as young as one to three years old can distinguish between known faces. Throughout the history of humankind, human brains have gotten really good at recognizing faces.
On the other hand, software that does face detection relies on machine learning algorithms to locate human faces in images and videos. Then software that does face recognition analyzes the detected facial characteristics to determine if there is a match within an existing dataset. To recognize a particular person’s face, we first need to train a machine learning model to classify an existing dataset of faces. This type of technology is used in a variety of modern applications, like for biometric passports in airports or to unlock your phone.
This tutorial shows you how to train a facial recognition model to identify visitors. Once a visitor is identified, you will receive an email announcing their arrival.
Tutorial Requirements
- Python version 3.6 or newer. If your operating system does not provide a Python interpreter, you can go to python.org to download an installer.
- A webcam (your laptop’s built-in webcam or an external one)
- A Twilio SendGrid account. A free account allows you to send up to 100 free emails per day.
Set up the Python virtual environment
From the command line, clone this example project, and change into the directory.
Create a virtual environment called venv. Activate the virtual environment, and then install the required Python packages inside the virtual environment. If you’re on Unix or Mac operating systems, enter these commands in a terminal:
If you’re on a Windows machine, enter these commands in a command prompt window.
The Python packages we’re using are:
- opencv-python - for real-time computer vision
- imutils - for image processing helper functions
- face-recognition - to recognize and manipulate faces
- sendgrid - for communicating with the SendGrid API to send emails from Python
- python-dotenv - to manage environment variables
The face-recognition package is a wrapper around the C++ toolkit dlib, which requires a C++11 compiler and CMake build system installed on your computer. If the pip installation above fails due to dlib, you may find detailed instructions in the following articles:
- Install dlib (the easy, complete guide) (for Mac OS, Ubuntu and Raspberry Pi OS)
- How to install dlib library for Python in Windows 10
This project uses code from community tutorials to build a custom face recognition dataset, do face recognition with OpenCV, and train a Raspberry Pi for facial recognition.
Create a custom face recognition dataset
Let’s start by gathering examples of faces we want to recognize in our facial recognition model. Add a new subfolder inside the dataset folder called by your first name like Joyce. For example:
The headshots.py script in the cloned repository uses OpenCV to access our webcam and capture and save images to disk in a new subfolder mapped to the name you will pass as a command line argument.
Run the script to open a new webcam window. You may need to grant permission for the terminal to access your camera from your machine preferences.
It’s time to vogue and strike a pose! Press the spacebar to capture a headshot. Take at least 10 photos of your face from different angles. If you wear glasses, take some photos with and some without. When you’re done, hit ESC to end the program.
Find the new subfolder under datasets/ to review the photos to make sure they are representative of your face. To add more people to the model, create a new subfolder in datasets and pass the new name in the command line argument to capture more headshots. If you want to add more photos for an existing person, just run the headshots program again with that person’s name as an argument.
Now that we have a dataset, let’s train our model to recognize these faces.
Encode the faces using a deep learning-based model
Every person’s face is as unique as a fingerprint. The encode_faces.py script uses the face_recognition Python package to analyze facial features by encoding and quantifying each face in our photos. For face detection, you can use a hog (histogram of oriented gradients) or cnn (convolutional neural network) method depending on the capability of your system. We are using hog on line 30 for faster processing, but sacrificing accuracy. The script outputs a new file called encodings.pickle that contains criteria for identifying all the faces in the dataset.
Run this command to train the model and encode the faces.
Next, let’s see if the model works.
Test the facial recognition model
The face detection part of the model relies on machine learning object detection algorithms called Haar Cascades. With this approach, each frame of the video is broken down into smaller regions, to proceed through a series, or cascade, of assessments to quickly discard non-faces. Regions that survive this filtering process are identified as faces by drawing a box around them. We are using a frontal face detector, but there’s other Haar Cascade classifiers for detecting things like Russian license plates or cat faces.
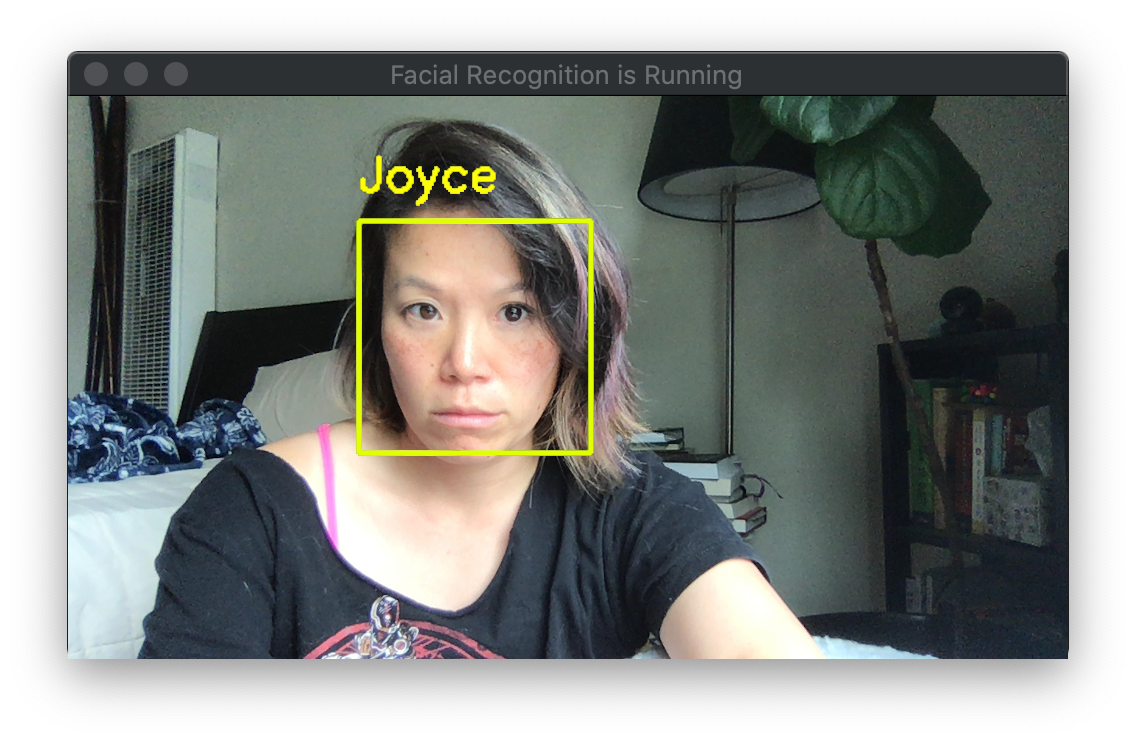
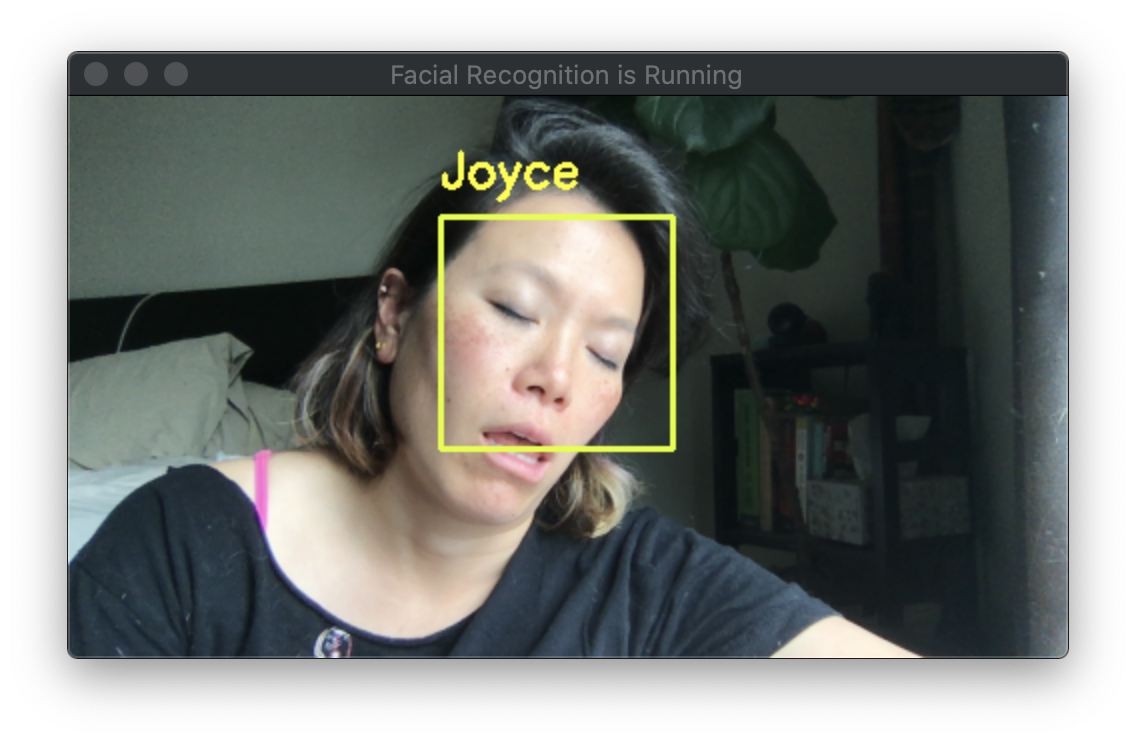
The facial_req.py script analyzes the video, frame by frame, to determine if there is a match within our existing dataset. Run this command to open a webcam window and test the model.
If your face is highlighted with a yellow box alongside your name, the model has been properly trained. With a broad enough sample in your test dataset, the model should be able to recognize you even if you’re making a silly face. Hit q to quit the program.
Set up SendGrid email notifications
The send_test_email.py script uses the SendGrid Python library to create and send an email. Make sure you set up either single sender verification or domain authentication to send emails from your own address.
Log into the console to create a SendGrid API Key. Create a new file called .env (notice the dot in front of this filename) to store the following credentials.
Run this command to send a test email.
Once your email is set up properly, let’s put it all together.
Add email notifications to face recognition
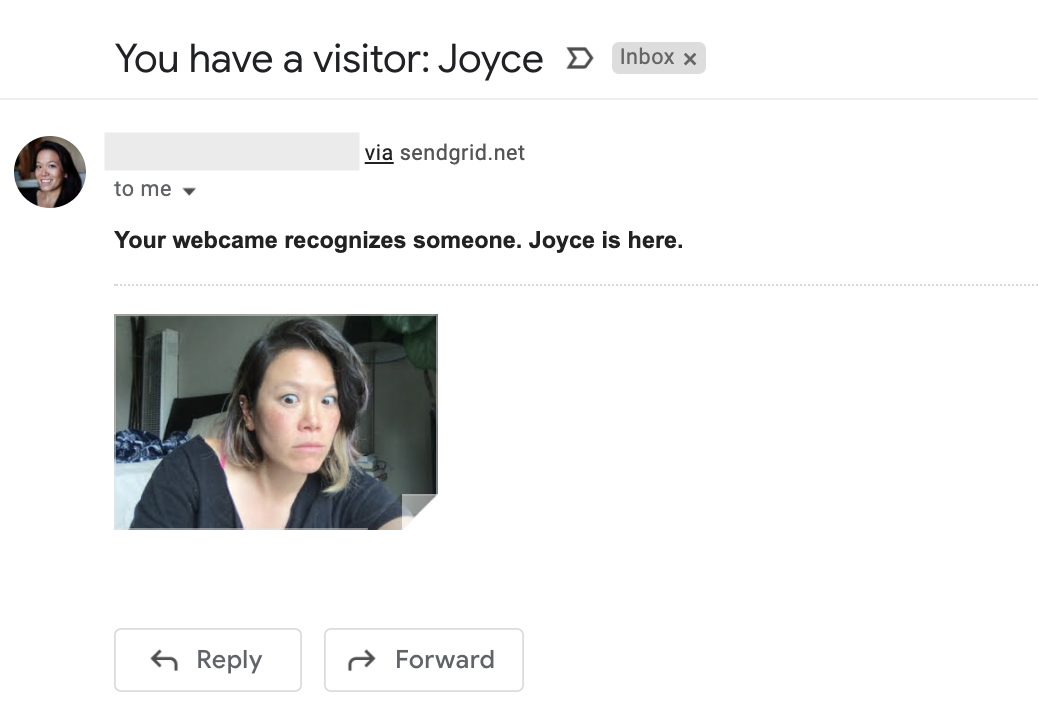
If someone from your dataset is recognized, the facial_req_email.py script snaps a picture and sends an email notification to announce the new arrival.
Run this command to open a webcam window and try it out.
Further exploration
Now you can make a front desk concierge for the office or a surveillance monitor for your home. For further exploration, you can:
- Add more friends and family to the facial recognition model, and customize the notification method(s) according to the person recognized
- Set up the application on dedicated hardware, like a Raspberry Pi and Pi camera
- Try other machine learning classifiers, like a model that detects cats
If you want to dive deeper into the machine learning concepts and mechanics explored in this tutorial, check out Face Recognition with OpenCV and Computer Vision, Deep Learning, and OpenCV from Adrian Rosebrock of PyImageSearch.
Joyce likes coding, cats, and second lunches. Find her on Twitter, Medium, and LinkedIn.


Related Resources
Twilio Docs
From APIs to SDKs to sample apps
API reference documentation, SDKs, helper libraries, quickstarts, and tutorials for your language and platform.
Resource Center
The latest ebooks, industry reports, and webinars
Learn from customer engagement experts to improve your own communication.
Ahoy
Twilio's developer community hub
Best practices, code samples, and inspiration to build communications and digital engagement experiences.