Finding Love on CallRoulette: An Android Studio Adventure
Time to read:
November 05, 2015
Written by
This post is part of Twilio’s archive and may contain outdated information. We’re always building something new, so be sure to check out our latest posts for the most up-to-date insights.

After connecting to a guy with an Al Gore mask, a group of loud college kids, and a yodelling expert, I met my current girlfriend of 3 years on ChatRoulette. Despite never having any luck with dating apps like Tinder or OkCupid, I was somehow able to find love there. I think it was precisely because ChatRoulette didn’t allow you to craft a persona beforehand that made it so awesome. It brought the chance encounters of life to the Internet through a series of blind dates that you could opt out of with the click of a button. I think it could be a great experience to have on a mobile device; with Twilio, we can make it happen.
Let’s build an app similar to ChatRoulette for Android devices. We’ll call it CallRoulette and keep things relatively simple to focus on the essentials. No login or signup will be necessary since everyone will be anonymous. The app will have one Activity and a single button that can both start and end a call. The purpose of the app is to allow the user to have a series of phone calls with random people in the hope that they might be able to find someone interesting. They can easily hang up at anytime by tapping the same button to start over. Since we’re keeping the interface simple, we’ll be able to focus on what’s happening under the hood.
Prerequisites
- Android Studio – http://developer.android.com/sdk/index
- Latest Android SDK https://www.twilio.com/docs/client/android
- Twilio account https://www.twilio.com/try-twilio
Configuring the Project
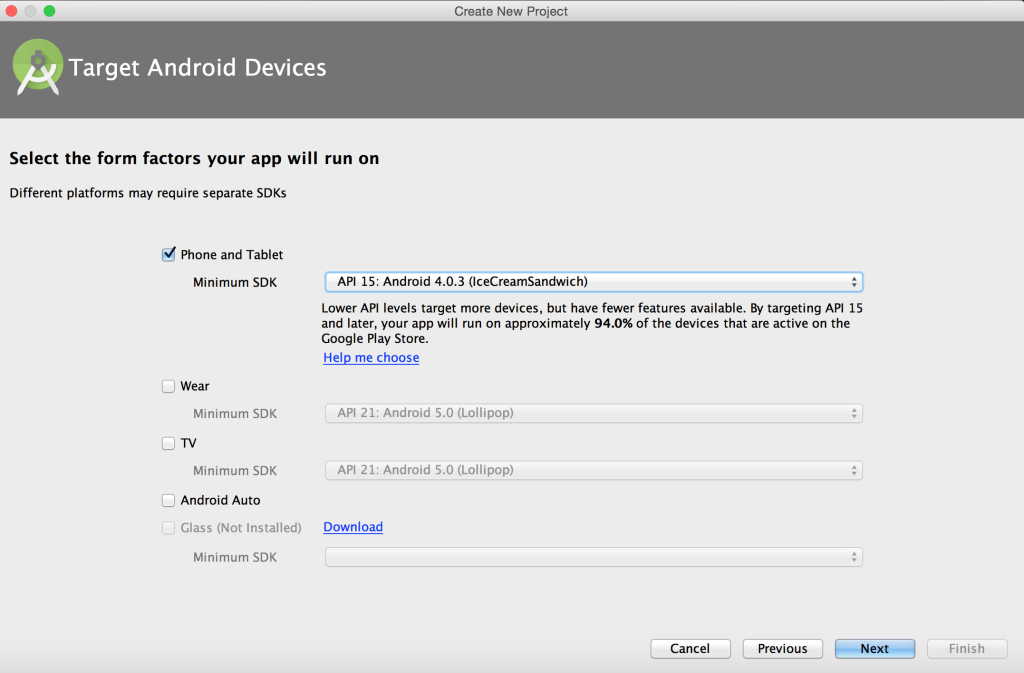
Let’s start by firing up Android Studio and selecting ‘start a new Android Project’.


Now we’ll want to add in our Twilio Client library. If you look in the Twilio client library root directory that you downloaded, you’ll see a ‘libs’ folder. In the libs folder, you’ll find a file called twilioclient-android.jar. That’s the Twilio library we’ll be using. Copy that library and paste it into the libs folder of our example app. Then go to your build.gradle and add the following line to the dependencies block.
So now it will look like this
We’ll also want to add a set of permissions to our AndroidManifest.xml file, found under the manifests folder
These permissions will allow our Android app to send the user’s voice to the Twilio cloud. Once you have the permissions set up in the manifest, your app will be configured and linked properly. Woot! Now we’re ready to start writing the bulk of the logic.
Building the UI
Generally, when I’m building an Android app, I’ll create one activity at a time. For each Activity, I follow the same development pattern that goes something like this
- Create skeleton UI using Layout Editor
- Wire any elements necessary to the backend
- Add logic to backend elements
- Style the UI elements
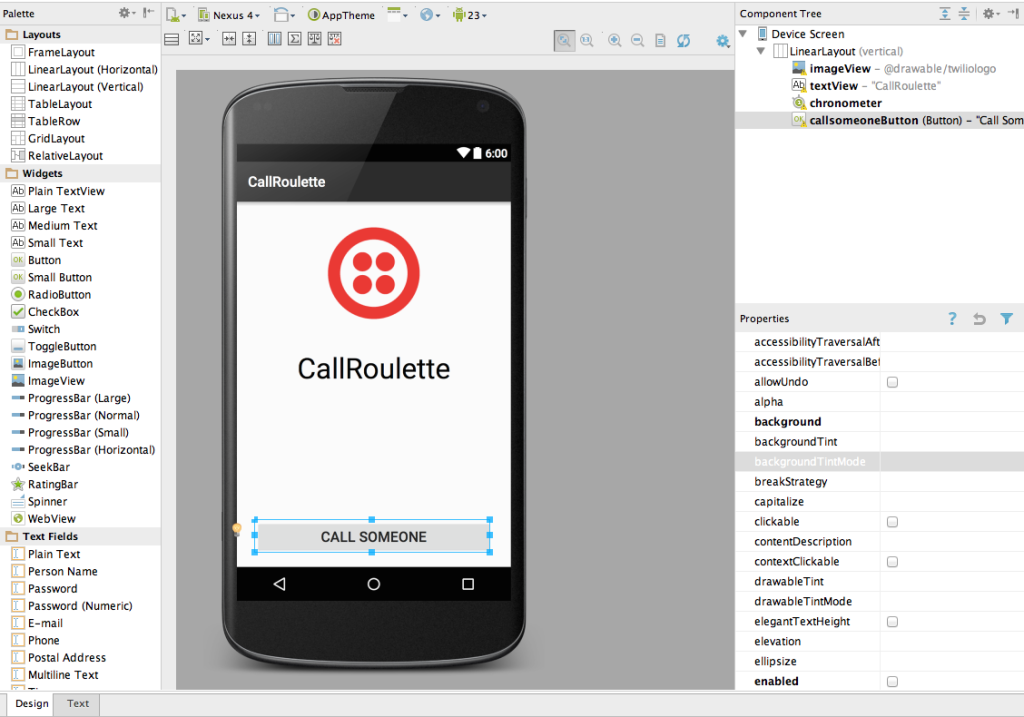
Let’s start by creating the skeleton UI using Android Studio’s Layout Editor. In the case of our app, we’ll want a vertical stack of elements. From top to bottom we’ll have: Logo, title, callTimer, and CallButton. So we’ll want to remove the default relativeLayout and replace it with a vertical layout. Go to your res/main/activity_main.xml and select the text tab instead of the design tab. Replace this
with this
The vertical LinearLayout helps align our UI elements with the correct spacing between each other vertically. Once we have that setup, we can drag and drop our elements onto the screen. Our 4 UI elements will each serve a distinct purpose
- imageView for our logo. (Drag this png of the Twilio logo to the res/drawable folder of your project. Link it by adding ‘@drawable/twiliologo’ to the src property of the imageView.)
- textView for our title.
- chronometer for our call timer
- callButton for calling
Once you’ve set up the elements, it should look something like this
There are certain things you can do to make it easier for your layout to adapt to different screen sizes. If I’m not hardcoding measurements, I generally like to use either ‘wrap_content’ or ‘match_parent’ for my elements’ layout_width and layout_height. ‘wrap_content’ basically says set the element length/width to the minimum size necessary to fit the content within that view, while match_parent says make the element expand to match the size of the parent view.
Android uses DP (Density-independent pixels) which helps express layout dimensions or position without depending on pixel density. You can also set your margin lengths under ‘layout:margin’ in the properties list on the right-hand sidebar of the layout editor. You don’t want an element at an edge of the screen to not appear in a smaller screen size, so margins can help here. Whenever you set a margin between the element and that edge, it will never exceed it.
Wiring our UI elements to our backend
Once we’ve set up all of our elements we can wire them to our backend. Make sure you’ve given each of them a name under the ‘id’ property of the right-hand sidebar.
First, let’s go to our mainActivity file (in my case, it’s in my package named twilio.com.twilioclient) and import our dependencies. It will be in your package
We’re going to need an event listener for our call button so we can act on it. Let’s implement that in the class declaration so it looks like this
Next, we’re going to need to reference our elements. We’ll make them private variables declared at the beginning of the class and reference them in several methods later on.
In our onCreate method, we can link our UI elements to the variables we’ve just declared
Now we just need to call our onClick method to have our code do something based on whether or not the user has tapped the call button
This code essentially says that if the user clicks a button and the text of the button says ‘Call Someone’, start the timer and set the button text to ‘End Call’. If the button says ‘End Call’, which means the call is in progress, restart the timer, make it invisible, and reset the text of the button.
Once this code is in place, we can compile and run the app on an Android device. When the call button is tapped, a timer appear and start counting seconds. The button text should also change. When tapped again, the button text will change and the timer will disappear.
MainActivity.java
Adding Logic to Backend Elements

We’ve arrived at the best part of this process. It’s time to integrate the app with Twilio! First things first, we’re going to need 2 new Java classes to make HTTP requests, AsyncHttpTask.java and HttpHandler.java. These 2 classes are totally boilerplate and can be used in almost any Android app that makes network calls. You can find them here. You can drag and drop them into your project under your java folder with MainActivity.
To start off, we’re going to create a class called ‘CallRoulette to handle our Twilio logic. Before we create the class, we can go ahead and reference it in our MainActivity class.
At the list of private variables at the top of the MainActivity class, we can add in a new one
and in our onCreate method, we can initialize it
Lastly, in our onClick method, if the button string equals “Call Someone” we can add this to the rest of the commands
else we’ll add this
Now that the references are in our MainActivity class, we can create our CallRoulette class. Go to ‘File > new > Java Class’, name it CallRoulette, and click create.
The class will show up right next to the MainActivity class in the project lefthand sidebar. Once we’re in the class, we can go ahead and implement the necessary dependencies
Make sure the class implements the Twilio listener
Before we add our methods, We’ll add the private variables we’ll need to the top of the class
The device and connection are Twilio objects; the device represents your phone and the connection maintains your link to the Twilio server. We’ll use the tag string to identify our log messages. The context gives the Twilio SDK access to application-specific resources and classes.
We can initialize the context in the constructor.
Next, we’ll want to implement our connect and disconnect methods. In our case, the phone number will be an empty parameter since everyone will be random. We’ll use the connect method on device to create a connection.
For our disconnect method, we can utilize the built-in disconnect method on the Twilio connection object. You’ll find that I also have a nested HttpHandler call in this snippet. This is because we’ll need a handler to perform a GET request on the hangup URL in order to tell the server that the client has ‘hung up’ the phone.
The disconnect method does two things, it ends the connection, retrieves the capability token, and tells the server to ‘hangup’ via a get request. We’ll only receive the capability token when we’ve authenticated successfully with the server, and it allows us to sign our communications from the device without exposing our AuthToken.
The connect method looks similar to the disconnect method
Lastly, we write some logic for the finalize method. This method is called by the Java garbage collector at runtime to help clear objects from memory. We’ll want to release our device if there are no more references to it.
I’m sure you’ve noticed how I have references to URLs that don’t exist in our class in both HttpHandler methods. I’m referencing the default urls.xml file found under res/values. The only default string name will be the app_name, in our case ‘CallRoulette’. We’re going to add two more
Now we’ll need to fill in those URLs with a link to our server. We’ll get to the server part last, so let’s finish up our UI with a little styling.
Styling our UI
I’ve attached two gradient XML files here that you can use . You can drop them into your res/drawable folder. Once there, we’ll be able to reference them gradients in the background property of the button by filling it with either @drawable/callgradient or @drawable/endcallgradient.
Then back in the MainActivity, we change the background gradient based on whether or not the user is currently in a call.
That’s it for our client-side logic! Now we can setup the server. If you haven’t done much server-side development, don’t worry. It’s 10x easier than you may be thinking right now.
CallRoulette.java:
Setting up the TwiML Server
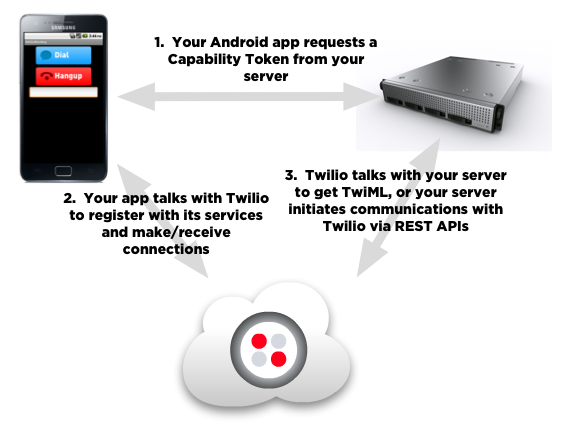
Setting up a TwiML app does several things for us. It helps determine what a user is allowed to do with the Twilio API using the Twilio Markup Language (TwiML). These permissions include things like the ability to make outbound phone calls and the ability to join a queue. It also provides a unique string identifier for the user so that the server can identify them in case they need to be reached via a voice call. So whenever a user taps the call button in our Android app, the TwiML server will generate instructions to determine what happens with the call. Here’s a picture for more clarity
TwiML is a pretty intuitive language and if you’re interested we have some examples online. Check out this link below to learn more about it.
You’ll need to register your TwiML app with Twilio Name it “ChatRoulette” and leave the rest of the fields blank for now. Save it when you’re done, we’ll come back to this.
To get you started quickly, I’ve pre-written the web app in Python. All you’ll have to do is click a single button to deploy it. The source code for the TwiML web app can be found here.
Once we press the ‘Deploy to Heroku’ button and it will generate a heroku link to the web app on our account. We’ll see 4 empty fields
App Sid (Click on your app and you will see it listed as under properties)
Once we’ve filled in the fields, click ‘deploy for free’ and the app will be deployed. It utilizes the Twilio Queue API to create a series of connections between different people. Everytime someone calls our server, we check if our queue is empty or not. If it’s empty, we put the user into the queue. They will listen to a pre-recorded Mp3 while they wait to connect to someone. If the queue isn’t empty, the user is connected to whoever is in the queue, and the queue returns to being empty. The queue then never reaches a size greater than 1! If a user in a queue hangs up, our client app calls the /hangup endpoint which empties the queue.
Now that we have a working link to your web app, we can paste it into the browser and hit enter. If all goes well, we’ll see a message on the page that says ‘Welcome to Twilio!’. If it does, congrats! The web app is working.
Back in our TwiML app we can paste in our request URL for the voice field. The link will be
The last thing we need to do is insert the link into our client library, in our urls.xml file. It will look like this
That’s it! We’re done with the programming portion, so let’s test out our app to see if it works!
Testing the App
Let’s go to our TwiML web app’s page and click the call button. You should hear an automated voice say “Please hold.” followed by some music. If so, congratulations on getting at least half of the app to work! Now we need to try another client to see if it connects to the caller in the queue. Keep the call going and fire up the app on your Android device. Tap the call button and wait. You should hear an automated voice say ‘You have been connected”. Speak into your phone, if you hear your voice coming out of your computer speakers, congrats! You’ve successfully created a session. The app can support multiple sessions as needed.
What’s Next?
We’ve successfully created an app using Twilio Client and Android Studio!

Check out the finished code on GitHub. The future of the web is on mobile and Android devices are the most ubiquitous mobile devices on the planet. There are still so many untapped opportunities to help people communicate with each other. Twilio Client is a great tool to make it happen.
Soon, with Twilio Video you’ll be able to add real-time video to conversations and with Twilio’s IP Messaging you’ll be able to add even more messaging functionality to your app. Whether you build a dating app or something else entirely, the web is about communicating with other humans, and that’s exactly what Twilio helps you do best. Hopefully I’ve given you some things to think about, and feel free to tweet us @twilio to tell us what you’re building!

Related Resources
Twilio Docs
From APIs to SDKs to sample apps
API reference documentation, SDKs, helper libraries, quickstarts, and tutorials for your language and platform.
Resource Center
The latest ebooks, industry reports, and webinars
Learn from customer engagement experts to improve your own communication.
Ahoy
Twilio's developer community hub
Best practices, code samples, and inspiration to build communications and digital engagement experiences.