How to Use Swift and Vapor to Generate Twilio Access Tokens
Time to read:
December 08, 2016
Written by
This post is part of Twilio’s archive and may contain outdated information. We’re always building something new, so be sure to check out our latest posts for the most up-to-date insights.

Twilio’s iOS SDKs for Programmable Chat and Programmable Voice require access tokens to authorize users. Generating these tokens must be done on a server. Rather than learning or using a different programming language on the server, let’s use Swift!
Setting Up the Token Machine

We’ll use the Vapor web framework for Swift and a small helper library to return access tokens from the server. Here are a few things we need for our project:
- Swift 3 and Swift Package Manager – this post walks through how to make sure you have these set up correctly
- A free Twilio account – sign-up for yours here
- Vapor – follow this guide to get Vapor running on your system
- TwilioAccessToken and Environment package packages for Swift Package Manager – we’ll add these to our project as dependencies in a moment. The Environment package isn’t essential but it does make working with environment variables in Swift easier.
Now that we have all of the parts we need for our server let’s create a new project. Run this in the terminal to create a new Vapor project:
You can edit the token-server project in a standard text editor. If you want to use Xcode you can find out about Vapor’s support for that here. Edit the Package.swift file to add the TwilioAccessToken and Environment packages using the highlighted lines:
Build the project to fetch the TwilioAccessToken and Environment dependencies:
Our project will use environment variables to store our Twilio credentials. Learn more about how to set environment variables from this superuser.com answer. Here are the credentials we need and the environment variables to set them in:
- Twilio Account SID – Find it in the Console and store it as TWILIO_ACCOUNT_SID
- Create an API Key and store the following credentials:
- Signing Key: Store this as TWILIO_SIGNING_KEY
- Secret: Store this as TWILIO_API_SECRET
Now that our base project and environment are set up and working correctly, our Vapor app can generate tokens.
Generating Twilio Access Tokens in Swift

The Vapor starter project contains a lot of boilerplate we don’t need for our application so the first thing to do is to replace the code in Sources/App/main.swift with a GET route to /token. We also need to add the import statements for the TwilioAccessToken and Environment packages.
Replace the contents of main.swift with the following code:
Our token generator requires a few parameters that must be passed in by the caller. We need an identity for the user requesting the token and the device they are using. We’ll use these for tokens that require an endpoint ID such as Programmable Chat. The Swift guard statement is the perfect tool to ensure these values are passed into our /token route. This is also a good place to verify that our environment variables are set. If they aren’t, we’ll abort the request. Add the highlighted code to the route:
Now that we have all of the parameters we need we can create an access token and set its identity. Add this code after the guard statement:
A Twilio access token needs to contain grants that specify some level of authorization to use a given SDK. Think of tokens as the pass that let a user into a members only club. The TwilioAccessToken package supports adding grants for Programmable Chat, Programmable Video and Programmable Voice. As an example let’s create a grant for video. You’ll need a Twilio Video Configuration Profile (also referred to as an RTC Profile Sid) which you can view or create here. Add the following code to the /token route after the access token creation:
If you want to create a grant for other Twilio SDKs check out the examples in the TwilioAccessToken Github repo. Once we have our grant(s) specified we can add them to the accessToken:
The only thing left to do is return the token in an HTTP response. To stay consistent with the way this is done in the quickstarts and tutorials in the Twilio docs return it as JSON and include the identity. Add this code to the end of the /token route:
Here’s how the entire /token route should look:
Head back to the terminal to build and run the server:
To generate a token, make a GET request to http://localhost:8080/token that passes in an identity and a device. For instance, try: http://localhost:8080/token?identity=Jane&device=iphone7. The response should look similar to this one:
If you get a 400 response code make sure that your environment variables are set up properly.
To verify all of the values are set correctly we can use the JWT Debugger found on https://jwt.io. Just paste in the token value on the left and you can verify the decoded token on the right:
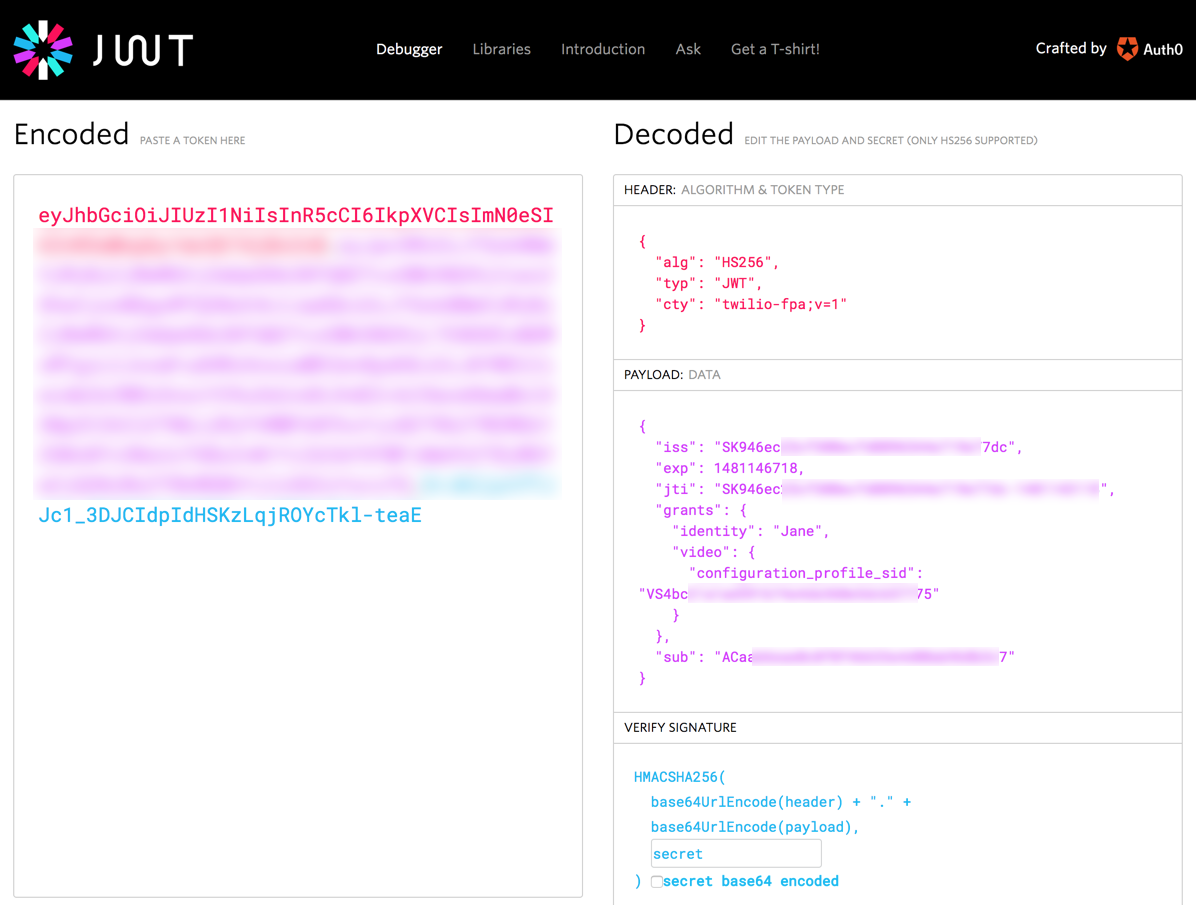
Plug in your Twilio API secret in the Verify Signature section to verify the token’s signature. You can read about the JWT format Twilio uses over in the docs.
If you generated a Programmable Video access token you can try it out in the Programmable Video Quickstart (GitHub repo for the Swift quickstart).
That’s a Wrap
Switching environments and programming languages can be difficult. Thankfully iOS developers have the option to stick with Swift on the server. Now that you know how to generate Twilio Access Tokens using Swift, here are some other things to try:
- Deploy your token server to Heroku.
- Add chat to your app.
- Try out the new Twilio Programmable Voice SDK.
Let me know what you build with the Twilio SDKs in your iOS apps. You can find me on Twitter @brentschooley or email me at brent@twilio.com.

Related Resources
Twilio Docs
From APIs to SDKs to sample apps
API reference documentation, SDKs, helper libraries, quickstarts, and tutorials for your language and platform.
Resource Center
The latest ebooks, industry reports, and webinars
Learn from customer engagement experts to improve your own communication.
Ahoy
Twilio's developer community hub
Best practices, code samples, and inspiration to build communications and digital engagement experiences.