Build an Incident Alert Bot with Twilio WhatsApp, Winston and Node.js
Time to read:
November 02, 2023
Written by
Reviewed by
Looking for important logs in the pools of log files and data can be a pain at times during development, testing or debugging processes.
If we can have a tool that gives a real-time report of critical, error and warning reports about the activities in our APIs, it will really make triaging and bug fixing a lesser issue for developers. Imagine a scenario when you get an alert on WhatsApp (personal or group) of incidents happening in your API as they happen, developers can readily remedy costly bugs in no time and maintain a good customer experience.
Through this tutorial, you will learn how to integrate Twilio's WhatsApp API and Winston to a Node.js API, making incident/error reporting and troubleshooting as easy as possible.
Prerequisites
Here is a list of what you need to follow along in this tutorial
- Node.js installation
- Git installation
- A Node.js API that is already built. (You can use this example)
- A free Twilio account (sign up with Twilio for free).
- Install Ngrok and make sure it’s authenticated.
- Knowledge of API documentation using Swagger
Setting Up Your Application
To set up your APIs, I attached a link to a codebase that contains the base application used for this tutorial. It contains all the code necessary to start a Node.js server and some already-made endpoints that work once you connect to a MySQL database. This section will work you through how to run the project on your local machine, set up Twilio and any other requirements you need to build your solution
Running the Node.js APIs
To get the project running on our local machine, you can follow the steps below:
Navigate to your terminal and clone the project from the GitHub repository by running the following command:
Make sure you are in the APIs-only branch and then run the installation script within the project directory to install the needed packages:
After the packages have been installed, open up the project directory on your preferred IDE and then create a .env file and add the code below with their values:
To set up MySQL on your local machine, you will download the XAMPP installer for your operating system from their official website and install it on your local machine. After installation, you will get this screen below when you run the application.
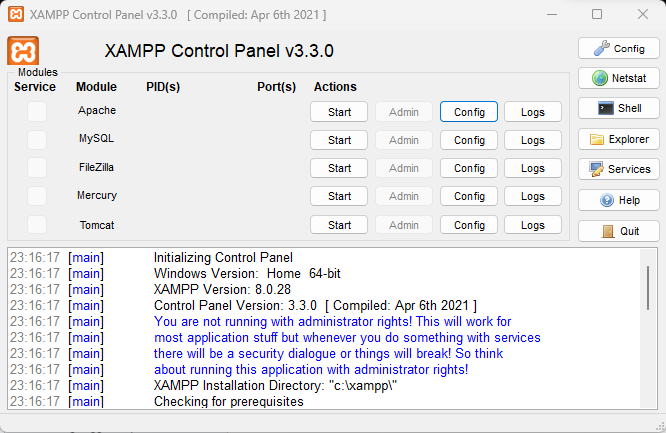
Start the Apache and MySQL server by clicking the Start button in the Actions section for Apache and MySQL. When the server is started, you can navigate to PHPMyAdmin with the following link: http://localhost/phpmyadmin/. Or you can click on the Admin button where a web page will open to the XAMPP dashboard where you can access phpMyAdmin from. The phpMyAdmin page is shown below:
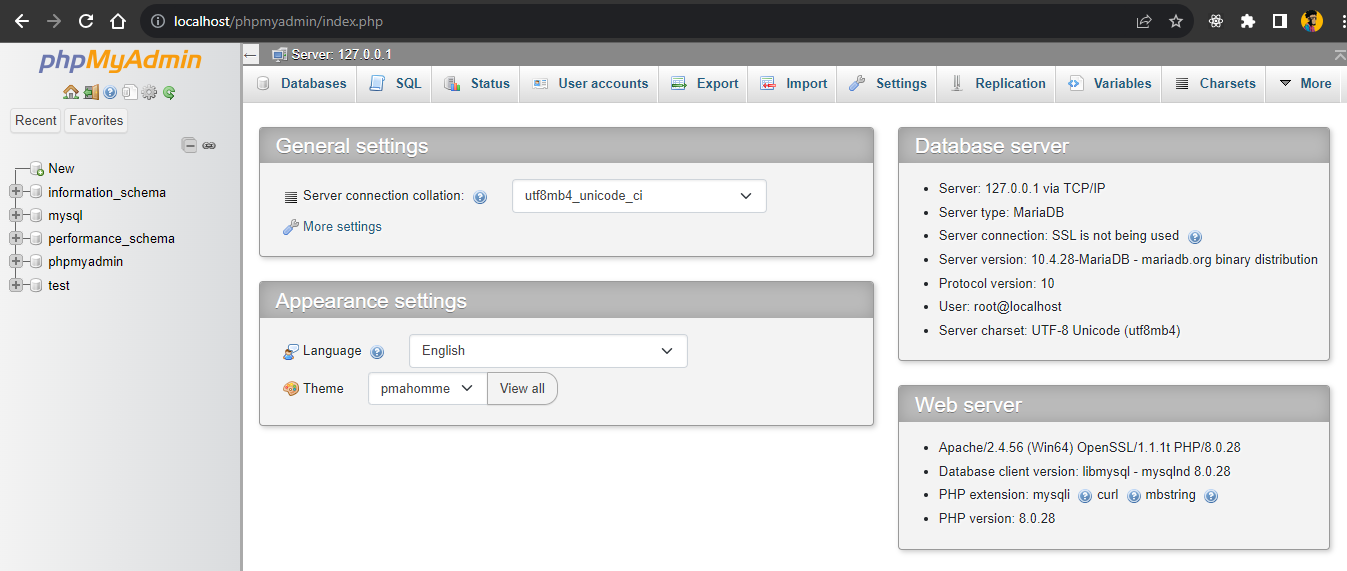
To create a new database, you will click the New button by the left sidebar, add the name you want your database to have and create it.

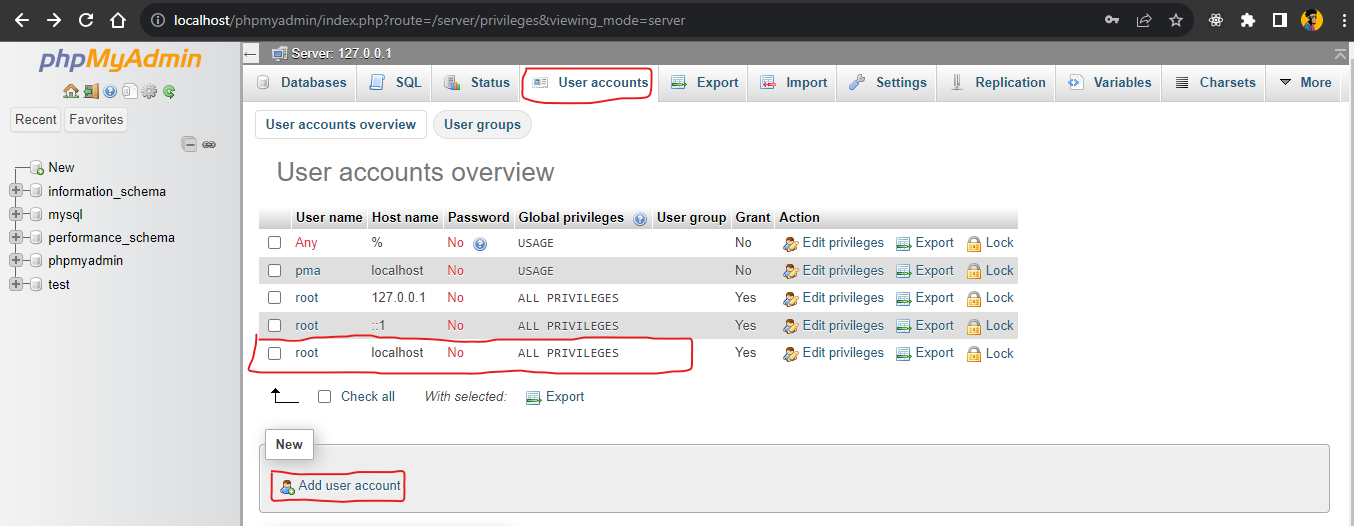
You can choose to set up a user account with a password to access your database or use the default root user with all Admin privileges and connect to your database. Click on the User accounts tab at the top to access the user accounts page. You will see all the users available, their username, password if any, host address and privileges. For this tutorial, you will use the root user with root as its username, localhost as its host, no password and all privileges.
Then, proceed to use the details in your .env file.
Running the code below can generate a random 64-bit ASCII string that can be used for encrypting JWT tokens. After you run the code, copy the token as the value for JWT_SECRET in your .env file:
The JWT_EXPIRES_IN variable in your .env file is used to moderate the time our JWT tokens will expire and users will have to login again to use the APIs. In this tutorial you will use 12h as the value which signifies 12 hours.
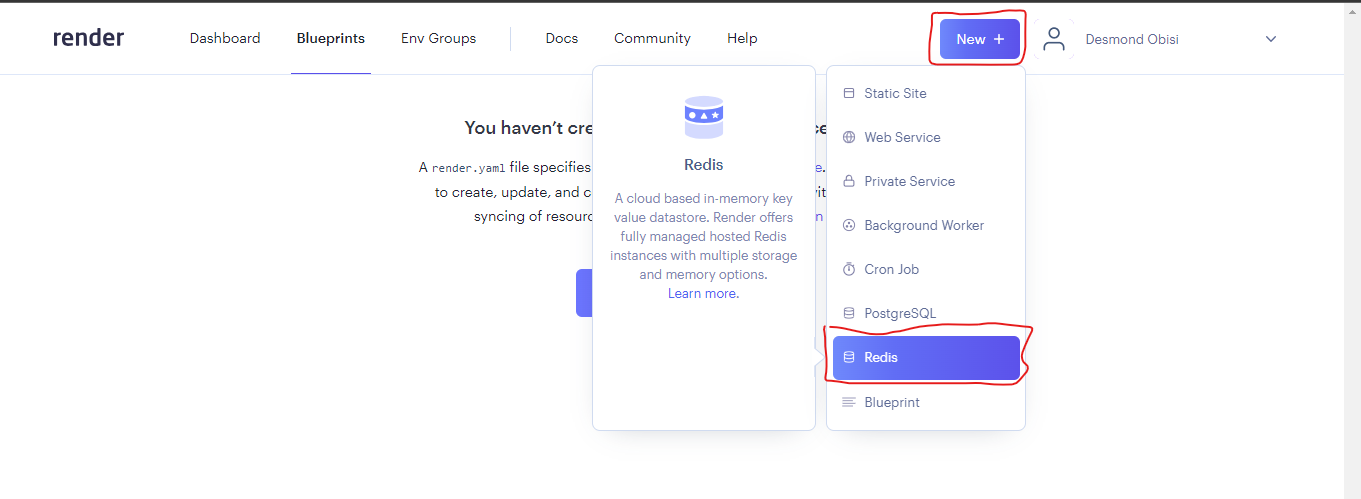
You can fetch the REDIS_URL from any Redis instance set up by any provider. In this project, you will use Render’s Redis provisioning. After creating an account on Render, you can click on the New button in the dashboard to set up a Redis server as shown below:
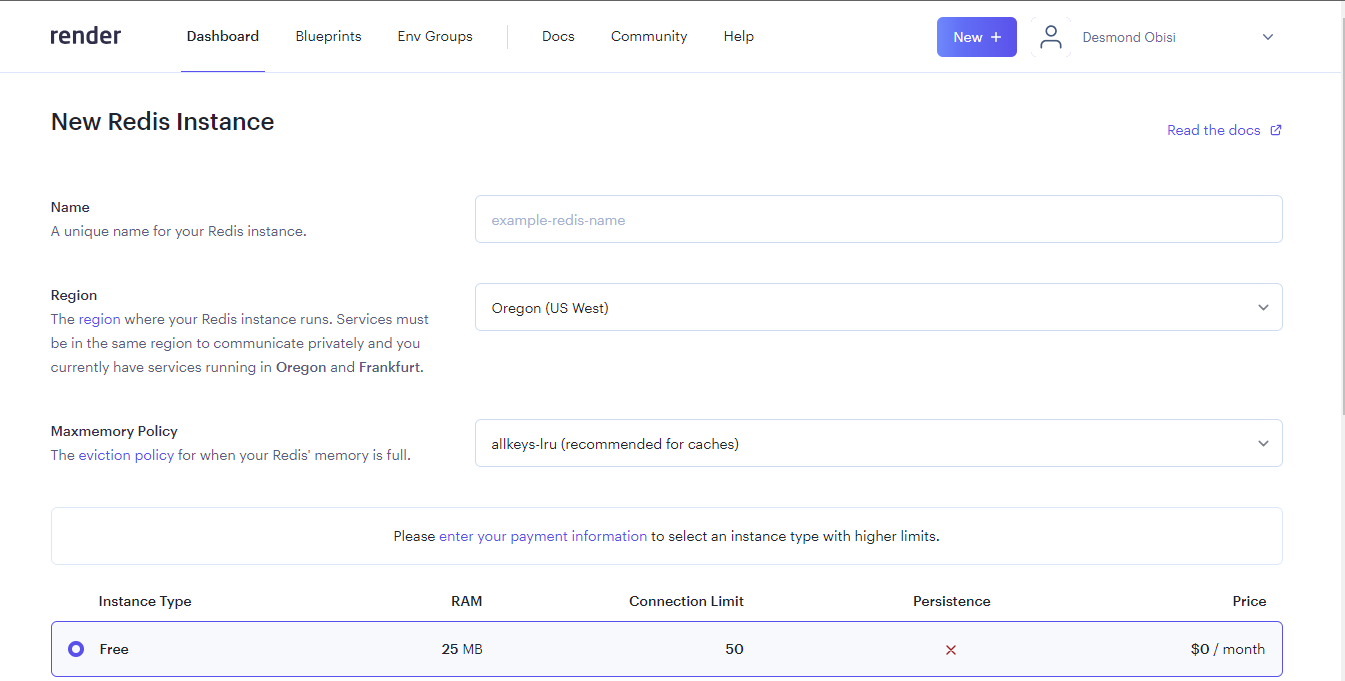
Enter a name for your Redis instance, choose the free tier and then click the Create Redis button to create the server as shown below:
After creating the server, go to the dashboard, click on the Redis server you created to get the credential you will use to connect to it. Scroll down to the Access Control section and click Add source. Enter 0.0.0.0/0 for the Source and click Save. This allows access to your Redis instance from any server whether you're hosting on your own local environment or a cloud server.
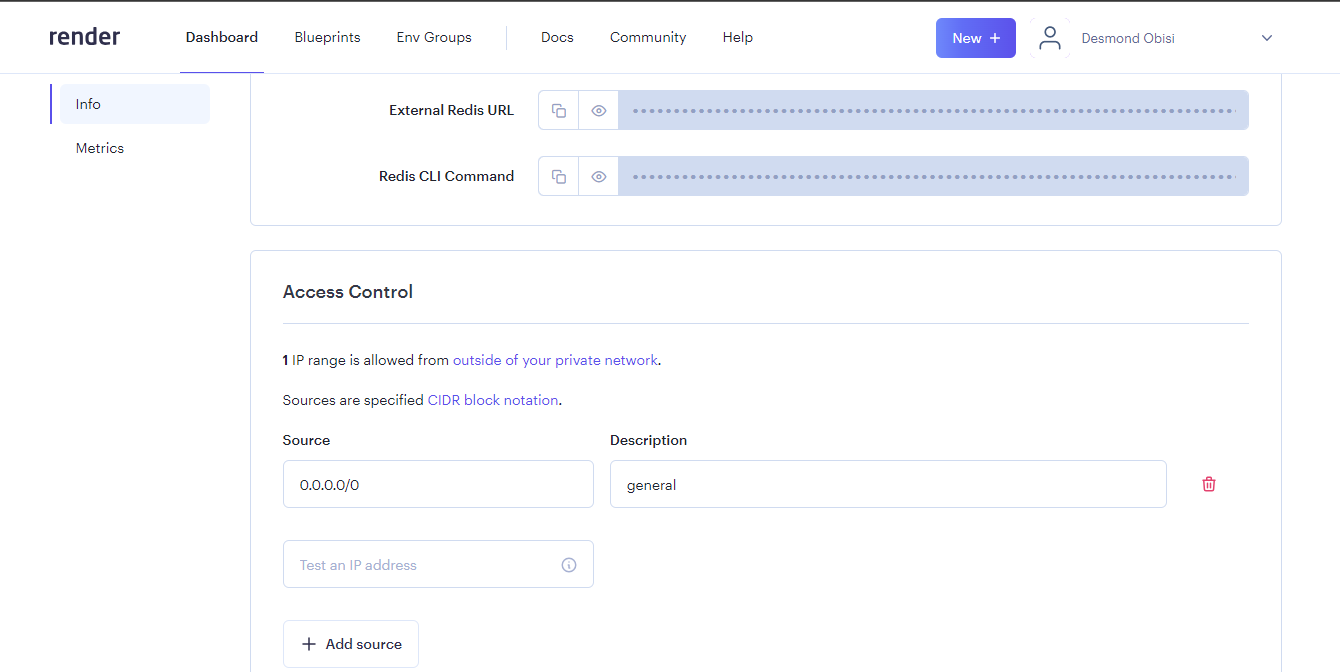
Now scroll up to the Connections section and copy the External Redis URL. Paste this value in your .env file for the REDIS_URL variable.
Alternatively, you can use a local instance of Redis on your machine if you have one set up already.
For Twilio credentials, you can get them from your account dashboard if you already have an account with Twilio or follow the step in the next section to set it up and you will see the keys as shown in the next section.
Setting up Twilio Account
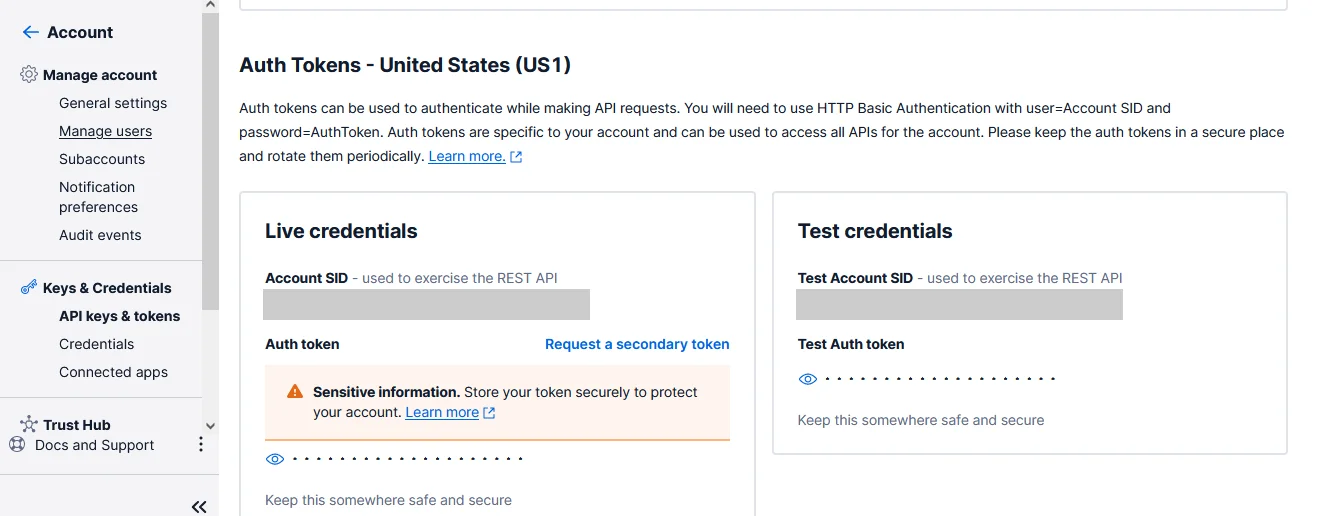
To set up your Twilio account, sign up for an account and log into your Twilio Console using your account details. From the toolbar's Account menu, select API Keys and Tokens. Take note of your test credentials as shown in the photo below, which include the Account SID and Auth Token. Head over to your .env file and add these values to the TWILIO_ACCOUNT_SID and TWILIO_AUTH_TOKEN variables respectively.
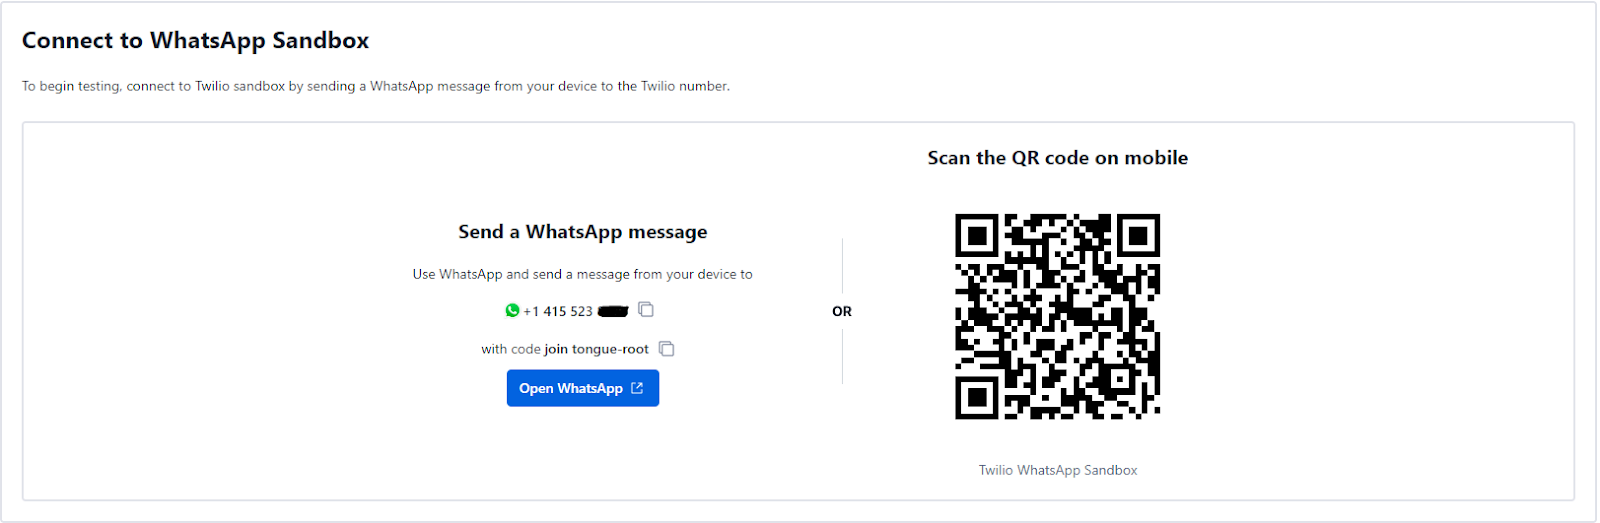
To complete the setup process, access your Twilio Console dashboard and navigate to the WhatsApp sandbox in your account. This sandbox is designed to enable you to test your application in a development environment without requiring approval from WhatsApp. To access the sandbox, select Messaging from the left-hand menu, followed by Try It Out and then Send A WhatsApp Message. From the sandbox tab, take note of the Twilio phone number and the join code.
Adding Logging and Alert Functionality with Winston and Twilio
In this section, you will delve into adding logging and alert functionality to your application. You will learn about Winston, a library that aims to decouple parts of the logging process in an API to make it more flexible and extensible. You will learn how to use it in a Node.js API, how to format logs, redact sensitive information and set it as a middleware to cover all your endpoints. You will also learn how to add the Twilio WhatsApp API function to send real-time messages for defined incidents in the API.
Creating Logger Helpers Function
In your codebase, you will install three new packages. Install them by entering the command below on your terminal:
This command will install the following packages:
- Winston: The tool you will use to get logs from every request and response in your APIs
- Winston Daily Rotate File: This package will help you organize your logs and save them in a file by the day they occur. This way, it is easier to find your logs by the day it occurred.
- Twilio: This is the Node.js package to connect to Twilio services and will be used to set up real-time WhatsApp messaging.
After a successful installation, you are set to create some helper functions for your logging functionality. These files should be created in the src/utils/log directory. The first one is the sensitiveKeys.js file. In this file, you will make a list of items you do not want to appear in the logs. Sensitive data like user information, payment details, and confidential data as we defined it in our database, services and config files are to be stored here. For our API, the list is small but for larger apps, it should contain as much as you want to redact from the log.
Create a folder within the src/utils folder called logs and within the logs folder create a file named sensitiveKeys.js. Once created, add in the following code:
Another helper function you will create is the constants.js file. This file is where we want to store some information about HTTP methods and HTTP headers and Response messages that stay the same throughout the entire codebase hence the name constants. Create a folder named constants in the src/utils folder and create the constants.js file in the new folder and add the code below:
The next helper function is the redactedData.js file. This file will take in the object from sensitiveData.js by their keys or value and replace them with ****** in the request or response JSON body that will be parsed by it. This way those sensitive data are not exposed in the log and in the alert sent to WhatsApp. Create the redactedData.js file inside the src/utils/log folder and add the following code inside the file:
Finally, for the helper functions, you will create indentation.js. This will help to define how we want to handle spacing and indentation in the log file seeing we are dealing with JSON objects most of the time. Create the indentation.js file in the src/util/log folder and add in the following code:
Creating the Twilio Function
Next, you will write the functions for the alert messaging using Twilio. For this, you will create a new file named alertFunctions.js in the src/utils/alert directory. These functions will be responsible for activities like formatting the message that will be sent to WhatsApp to a readable format and sending the messages as well. Notice how the code uses the Twilio keys obtained from the setup at the beginning of this tutorial to create an instance of a Twilio client for your use.
Create the alert folder in the src/utils folder and create the alertFunctions.js file within it. In your alertFunctions.js file, add the following lines of code:
The function formatErrorAlert does the formatting of the message and structures it in a readable manner while the sendWhatsAppAlert function takes the formatted message as a parameter and sends it to the number designated to receive the alert. It is worth noting the following parameters:
- Body - this contains the alert content to be sent.
- From - The sender, who the message is coming from.
- To - The recipient, who is receiving the message.
Creating The Logger Function
Here you will start with setting up the middleware that will be plugged into our APIs to capture the logs. You will create a log instance using Winston, define all the configurations and settings and finally define a transport system for outputting the log. In the src/middlewares directory, create a new file name logger.js and add the code below to it:
The function above shows how to create a logger instance, the format configuration of what you want to log and how it should look like, and the transport which either prints to the console when on development or test environment.It also saves to file using the DailyRotateFile method from the winston-daily-rotate-file package. To learn more about how to set up Winston for logging check out this documentation.
Next, you will write the function that formats your logs to readable JSON. This is where you will call the function that sends the alert to WhatsApp when certain conditions are met. You will also use the function that redacts sensitive information here to remove them from the formatted logs. Create a new file in the src/utils/log directory named formatLog.js and add the following code to it:
A few things to note about the code above:
- The responseBody is being parsed as a normal object to a JSON object.
- The textBody variable stores the details of the log we will share through WhatsApp.
- The messageParams are the parameters used in calling the sendWhatsAppAlert function to work
- All the message body parameters are parsed through the redactLogData function to remove sensitive data.
- If the status code is greater or equal to 400, it triggers the WhatsApp alert.
- The alert is tagged Critical for status code 500 and above and Error for status code 400 and below 500.
Lastly, for the logging functionalities, you will create a file that intercepts all requests that happen in the application to pick up the logs. It will be used in the entry server file as a middleware above where the routes that it should intercept are defined or instantiated. This file will be created in the src/utils/log directory and named interceptor.js. Add the following code to the file:
In this code, the incoming request and response body are picked by the middleware, the original res.send method is stored and the body is overridden to be used as the log data first then reset back to the original before it continues to the next thing which is sending the original res.send body to the client.
The getResponseMessage helper function does match the HTTP method in the response with the right message saved in the src/utils/constant/constant.js file. The logs are captured but first parsed through the formatHTTPLoggerResponse function we created earlier to get a formatted JSON object.
Updating the Server File
You will proceed to add the middleware to the server file which is our entry to the app. The file is located in the root directory as index.js. You will add the middleware before the route definitions so you can intercept the requests that will go through them. Update the code with the one below:
Testing and Product Demonstration
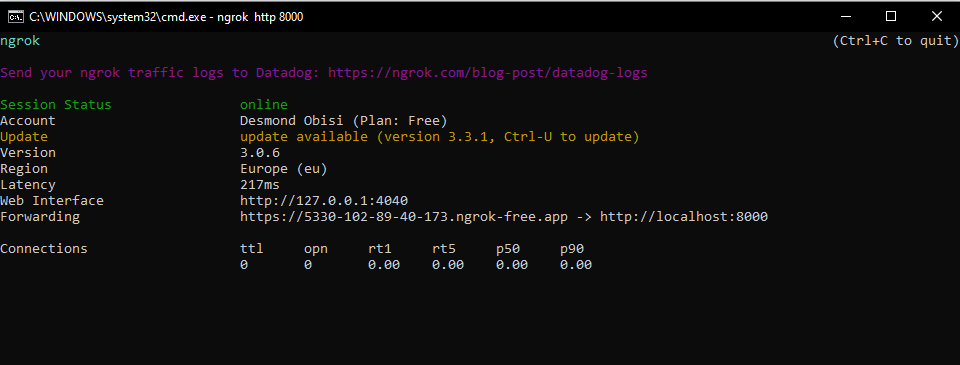
Your app is now ready for testing. Before you start testing on WhatsApp, you can proxy the localhost server with ngrok to the internet by running the below command on another tab on your terminal.
You will get a response like this with your public app address hosted on ngrok. Your server is now up and running.
Once the app is running, open your WhatsApp and send join <sandbox code> first in order to establish a connection to the sandbox. When you have established a connection, you can go ahead to make a sample request to your API. In this case, I created a user and tried to log in with the wrong credentials to get the alert. Below is a demonstration of how it works:
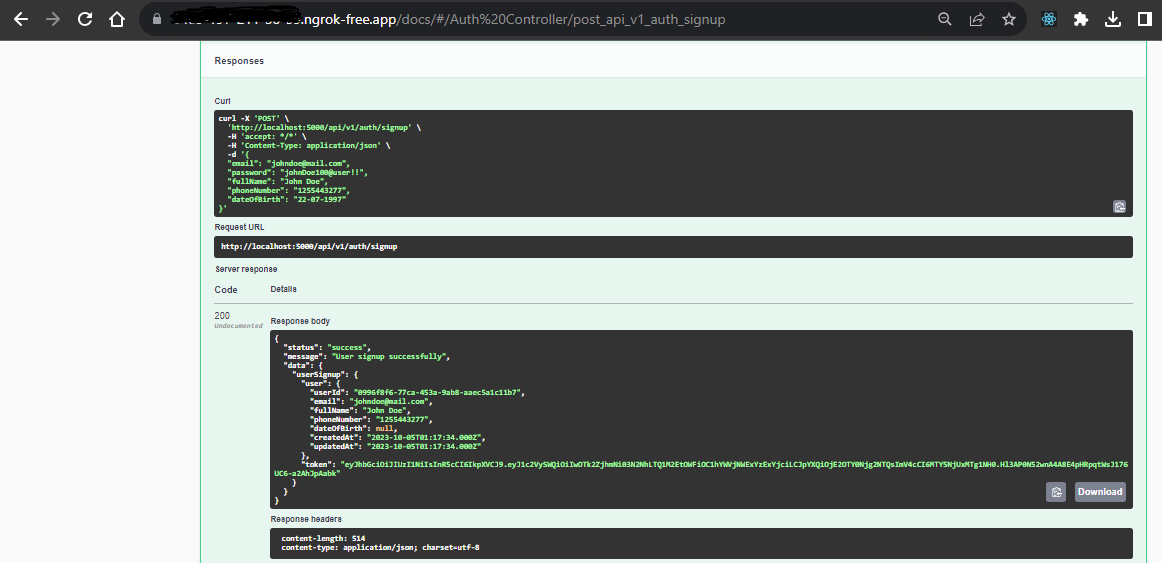
- Navigate to ngrok Forwarding URL and append /docs to open up the Swagger UI. Register a user using the /signup endpoint on the /api/v1/auth route
- Sign in or Log in using the wrong credentials to get a 400 status code. If it fails, try to copy the shown curl request on another tab on your terminal.
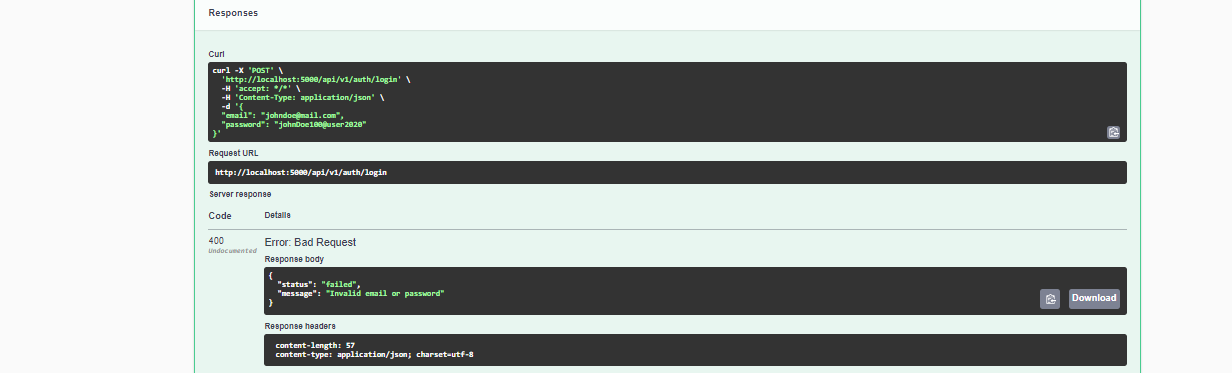
- Get the error alert on the WhatsApp number set as
toin the Twilio function.

Conclusion
If you followed till this point, congratulations! You have been able to use Twilio's powerful communication suites to build a handy incidence alert service. This service can be extended to many other possibilities like getting daily summaries on each endpoint with regard to your API health etc. You can also automate /slash commands that create a GitHub issue for any incident critical enough. You can learn more about using Twilio WhatsApp API in a production environment by referring to Twilio’s documentation.
Desmond Obisi is a software engineer and a technical writer who loves developer experience engineering. He’s very invested in building products and providing the best experience to users through documentation, guides, building relations and strategies around products. He can be reached on Twitter, LinkedIn or through my mail desmond.obisi.g20@gmail.com.

Related Resources
Twilio Docs
From APIs to SDKs to sample apps
API reference documentation, SDKs, helper libraries, quickstarts, and tutorials for your language and platform.
Resource Center
The latest ebooks, industry reports, and webinars
Learn from customer engagement experts to improve your own communication.
Ahoy
Twilio's developer community hub
Best practices, code samples, and inspiration to build communications and digital engagement experiences.