How to Build a Multilingual Chat App with Twilio Conversations, Python, and DeepL Translator
Time to read:
November 01, 2023
Written by
Reviewed by

Twilio Conversations is a powerful communication platform that enables businesses to connect with their target audiences seamlessly, spanning various channels such as SMS, MMS, WhatsApp, web, and mobile chat.
However, when it comes to start-up companies with limited resources, effectively serving a diverse and multilingual audience can pose challenges – particularly due to language barriers. In this article, you’ll solve this problem by building a chat application that enables real-time chat translations.
You will create a dynamic chat experience where messages are automatically translated to suit the default language of respective clients. By leveraging the capabilities of Twilio Conversations, along with Flask as the backend framework and DeepL API for language translation, you can provide a seamless and efficient communication solution for businesses operating in multilingual environments.
Prerequisites
Before proceeding with the tutorial, you should meet the following requirements:
- Python3.7+ installed.
- MongoDB Server installed.
- Some understanding or willingness to learn the Flask web framework and Jinja templating engine.
- Text editor.
- Package managers (NPM & PIP).
- A Twilio account. If you don't have one, you can create a free account here.
- A DeepL account. If you don’t have one, you can create a free account here.
Project structure
You'll be building an application that fuses frontend and backend technologies to produce a fully functioning web chat.
To get started, clone or download the starter files from this GitHub repository: startkit-flask-twilio-deepl.
Or, download the full project in this GitHub repository.
The repository contains the following folders and files:
- templates - This folder contains all HTML files used for the project. Each file typically contains HTML code with Tailwind utility classes for styling. There are Jinja2 codes for link building and passing variables from the backend to the front end.
- static - contains CSS styles generated by Tailwind.
- requirements.txt - Contains a list of Python dependencies.
- package.json - Contains a list of frontend dependencies and a script for starting the Tailwind build process.
- README.md - Provides information on how to run the app.
Create a virtual environment
Before you begin coding, you need to set up your development environment. Start by navigating to the GitHub repository you cloned and creating a new virtual environment.
Install virtualenv if it's not installed already.
Create a virtual environment:
Activate the virtual environment with the following command:
Virtual environments are a great way to isolate project dependencies to avoid conflicts.
Build out the backend of the chat application
With your virtual environment activated, you can safely install Python dependencies for the project. As mentioned earlier, the starterkit repository contains a file that contains a list of Python dependencies that are required for the project.
Install packages listed in requirements.txt with the command:
Here’s a breakdown of the installed dependencies:
flask: Flask is a popular web framework for Python. It provides a simple and efficient way to build web applications.flask-login: Flask-Login is an extension for Flask that handles user authentication and session management. It simplifies managing user logins, logouts, and user sessions in Flask applications.flask-wtf: Flask-WTF is an extension for Flask that integrates Flask with the WTForms library. WTForms is a flexible form validation and rendering library for Python. Flask-WTF simplifies the process of creating and handling web forms in Flask applications.flask-pymongo: Flask-PyMongo is also an extension for Flask that provides integration with the PyMongo library, which is a Python driver for MongoDB. It allows Flask applications to interact with Mongo servers easily.twilio: Twilio allows you to send SMS messages, make phone calls, and perform various other communication tasks.python-dotenv: python-dotenv is a Python library that helps in managing application configurations stored in a .env file. It allows you to define environment variables in a .env file and load them into your Python application easily.deepl: DeepL is a client library for the DeepL API, allowing you to integrate DeepL translation functionality into your Python applications.
Next, create a .env file in the project directory to safely store secret keys and tokens for third-party authentication.
Add the following lines to .env:
Here, you’ll assign credentials obtained from Twilio and DeepL to environment variables which you’ll use in later sections of the tutorial. The FLASK_SECRET_KEY is a random string that you can generate at your discretion to secure your Flask app.
For example, a Flask secret key could be "xPIOKah0mW", or something else you can generate with a random string generator.
Set up the frontend of the chat application
The starter folder contains the HTML templates and styling used to create this tutorial. However, in order to generate Tailwind styles, some packages need to be installed.
Install frontend dependencies from the package.json file by navigating to the root of the project directory and run the following commands:
Run Tailwind CSS by building with this command
The package.json file contains a build script that runs a command that starts the Tailwind build process.

Set up the Flask app
With the development environment set up, you can move ahead to create your base Flask app. Create an app.py file in the root of the project directory and write the following code:
Run the Flask app from your terminal using the command:
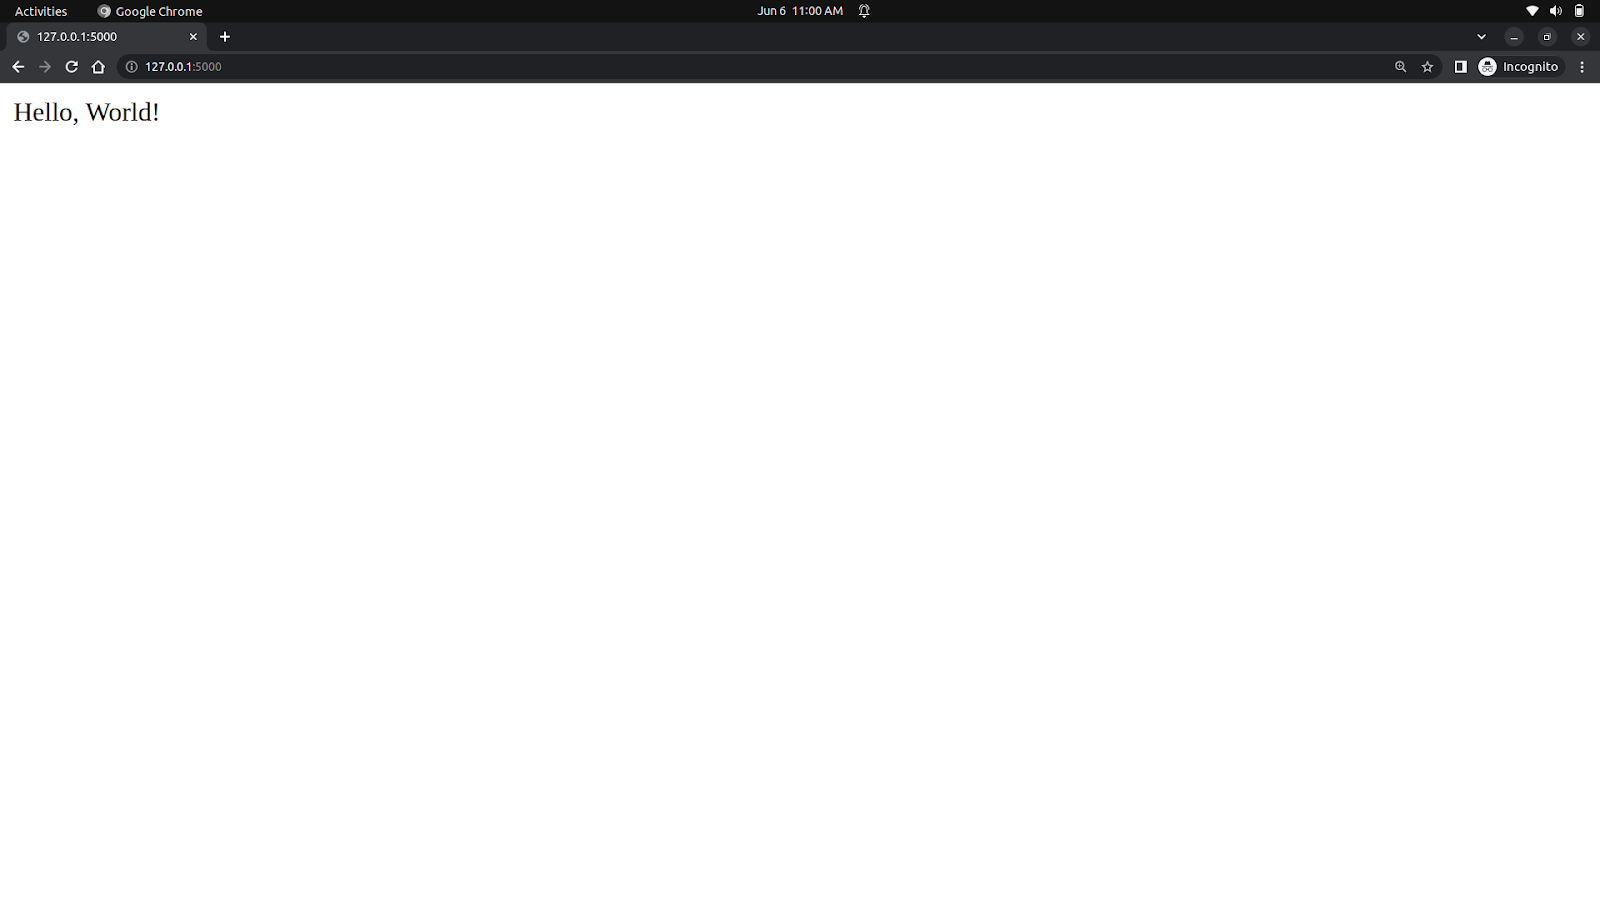
Here’s a screenshot of the running app on my browser.
If no errors are encountered at this point, you can move ahead to configure MongoDB to work with your Flask app.
Configure your database
Start by creating a file named db.py at the root of the project directory (i.e. startkit-flask-twilio-deepl/db.py).
Add the code below to the Python file:
Here, the PyMongo class was imported from flask_pymongo and assigned to a variable named mongo.
flask_pymongo is a wrapper for Pymongo’s MongoClient. It makes connecting to a Mongo server more convenient, and it provides some helper functions as well.
Next, you can import the mongo client and other necessary classes and libraries in app.py.
In app.py:
The updated code imports necessary modules and classes from different libraries, including the Mongo client from db.py.
In the code, load_dotenv() is called to give your application access to the environment variables defined in the .env file created earlier.
The MongoDB connection URI is set in the Flask app's configuration using app.config["MONGO_URI"]. By default, the local MongoDB server is accessible on "localhost:27017". The connection string instructs the FLask app to connect to a local MongoDB server on the default port and use a database named "webchat."
Also, a secret key for Flask sessions is set from the environment variable FLASK_SECRET_KEY using os.getenv("FLASK_SECRET_KEY").
Next, the MongoDB connection is initialized using mongo.init_app(app), where mongo is an instance of Flask-PyMongo used to interact with MongoDB.
Then, an instance of the DeepL Translator class is created using Translator(os.getenv("DEEPL_AUTH_KEY")). Where DEEPL_AUTH_KEY is retrieved from the environment variable. This allows your app to use the DEEPL translation service.
Create collections in DB
Collections in MongoDB are similar to tables in relational databases. The web chat will use two collections to store data for customers and customer representatives. You could choose to use one collection, that’ll work fine. I prefer splitting them.
The collections will have the structures below:
The language attribute will store acronyms for languages supported by DeepL. The list of supported languages will be available for customers to choose from when they sign up.
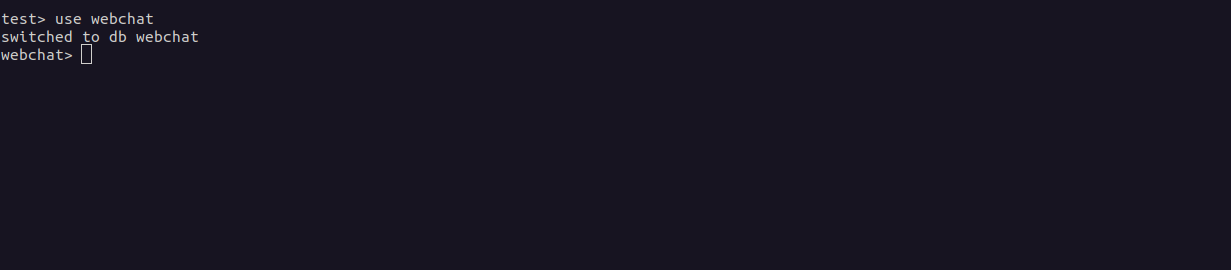
If you’re working on a Linux machine you can start your Mongo server with the command below:
Next, start the Mongo shell:
Switch database with the use <DATABASE_NAME_HERE> and create collections:
Create collections for customer and customer_rep with the commands:

For the sake of this tutorial, I won’t be creating an endpoint for signing up customer reps. Instead, you will create a record for a customer representative in the database using the Mongo shell.
Use the command below:
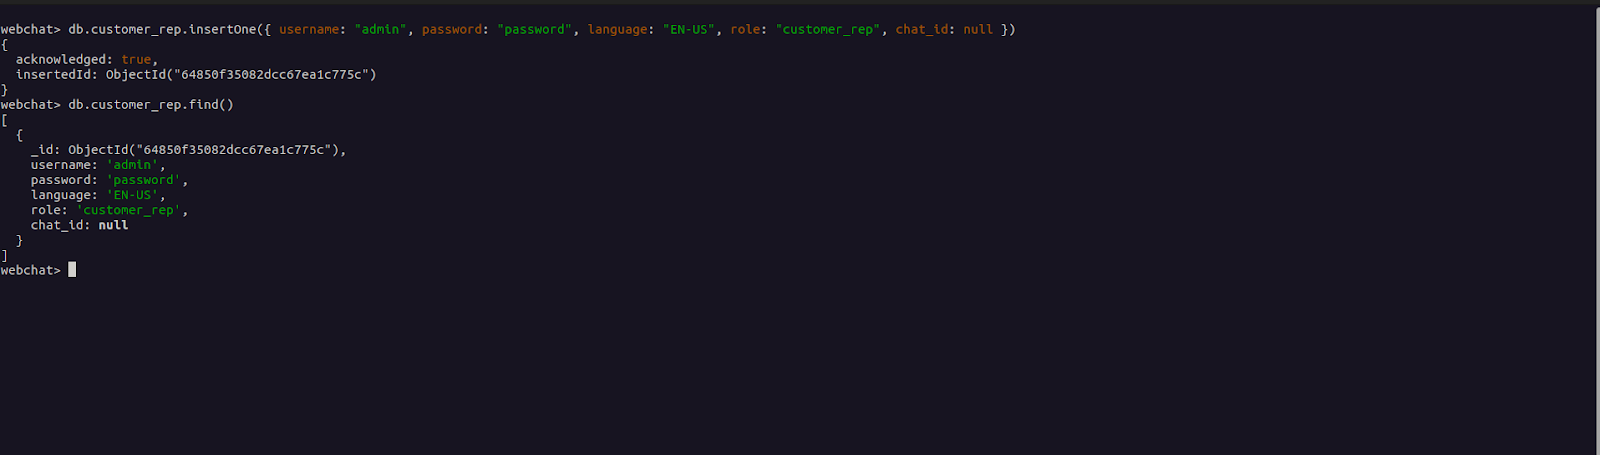
I didn’t hash the password for the customer representative profile you created. This is a bad practice that should be avoided, as only hashed passwords should be stored in a database. But, you can break the rules a bit for testing purposes.
However, you will hash passwords when creating customer objects.
Define a user object
The User object serves as a convenient way to access and manipulate information about a logged-in user. By storing user information in an instance of the User class, you can easily retrieve specific attributes like the username or role when needed. By doing so, you avoid constantly reading from the database to fetch certain details.
This object can be utilized in various parts of your application that require user-related functionality, such as translating texts based on a user’s language.
Add the following lines to db.py:
In the updated code, the UserMixin class is imported from the flask_login module and inherited by the User class. This inheritance allows the User object to be compatible with Flask-Login.
The User class represents a user in the application. It has an __init__ method that takes user data as input and initializes various attributes such as id, username, password, language, role, and chat_id. These attributes are assigned values based on the corresponding fields in the user_data dictionary.
Implement form validations
The web chat features sign-up and login forms for user authentication. You'll be defining some rules for form fields using Flask-WTF to ensure a user submits forms with the required fields.
Create a file named validations.py in the project directory.
Add the following lines of code:
The code above defines two Flask forms: SignupForm for user registration and LoginForm for user login.
SignupForm includes fields for username, language, password, and confirm_password, all of which have validation rules such as input required and matching password confirmation.
LoginForm includes fields for username and password, both with input required validation.
These forms help ensure that the submitted data meets the specified requirements before further processing or authentication.
Implement authentication blueprints
Flask blueprints are a way to organize and structure applications into reusable components. They provide a means to define and group routes, views, templates, and static files related to a specific feature or module of your application.
You'll implement blueprints to handle authentications for Customers and Customer reps, allowing you to customize the URL prefix for each blueprint.
First, you’ll create a subdirectory named auth in the project folder. In this subdirectory, create two files; customer.py and customer_rep.py.
Write the following code flask-twilio-deepl/auth/customer.py:
The code above imports the Blueprint class from the Flask framework and other Python packages. A new instance of the Blueprint class named blp was also created.
Here’s more detail about the arguments passed in the class constructor:
customer is the unique identifier of the customer blueprint. It is used to differentiate the blueprint you defined from others when registering it with the Flask application.
__name__ is a special Python variable that represents the name of the current module. It is typically passed as the second argument to the Blueprint constructor to ensure that Flask knows where to find the blueprint resources.
The url_prefix="/auth/customer" argument specifies the URL prefix that will be applied to all routes defined within this blueprint. In this case, the blueprint's routes will be prefixed with /auth/customer, meaning that any routes defined in this blueprint will be accessible at URLs like /auth/customer/<route_name>.
Next, you'll implement endpoints for customer sign-up and login.
Add the following lines to customer.py:
The code above implements a route within the customer blueprint for customer registrations. This route is accessible at /auth/customer/register and supports both GET and POST methods.
To ensure that users provide the necessary data during registration, the function utilizes the SignupForm object to enforce form validation. If the request method is POST and the form data passes validation (form.validate_on_submit()), the function proceeds to extract the username, language, and password from the form data. The extracted password is hashed using the generate_password_hash() function.
Run a query to the MongoDB database to check if a user with the same username already exists. If a user with the same username exists, a response is returned with the message "User already exists." If the username is unique, a new document is inserted into the "customer" collection in the MongoDB database. This document contains the username, hashed password, language, role, and chat ID fields.
The function then redirects the user to the customer.login route.
If the request method is GET or the form validation fails, the function renders the signup.html template and passes the form object to the template for further processing.
Next, you’ll implement endpoints to handle customer login and logout. Add the code below to customer.py file:
The code above defines two routes: /login and /logout. Inside the login() function, a LoginForm object is instantiated. The form.validate_on_submit() method is used to check if the form is submitted and passes the validation rules.
If the form is submitted and valid, the code retrieves the username and password from the request's form data. It then queries the MongoDB database to find a customer with a matching username. If a user is found and the hashed password in the database matches the provided password using the check_password_hash() function, the user is considered authenticated.
If authentication is successful, the login_user() function is called with a User object to log in the user. The user is then redirected to the index endpoint using the redirect() and url_for() functions.
Inside the logout() function, the logout_user() function is called to clear the current user's login session. Then, the index.html template is rendered to display the main page or homepage of the application.
The customer blueprint is now complete. Next, you will implement the customer_rep blueprint, which is a lot similar to the customer blueprint.
Paste the following code inside the flask-twilio-deepl/auth/customer_rep.py file:
The code above is similar to what you already have for the customer blueprint. If a matching customer representative is found and the password matches, the user is logged in using login_user(User(customer_reps)), where User is a custom user model that represents the customer representative.
The code fetches all customers from the database and creates a context dictionary with conversation information. Then, if the login is successful, the repchats.html template is rendered, passing the context data.
If the request method is GET or the form validation fails, the rep_login.html template is rendered, passing the login form.
Implement Flask Login
Flask-Login will be used for session management. To utilize Flask-Login, update app.py with the code below:
Notables changes made in app.py include the following:
Flask Login Manager Initialization: An instance of LoginManager is created using LoginManager(app) to handle user authentication and session management.
Blueprint Registration: Flask blueprints for different functionalities (customer_blp, rep_blp, chat_blp) are registered with the Flask app using app.register_blueprint(). Note that the chat_blp will be implemented in the next section of the tutorial.
User Loader Function: The load_user() function is a function used by Flask-Login to load and retrieve user data. It is specifically designated as the user loader function by using the @login_manager.user_loader decorator. It fetches user data from the MongoDB database based on the provided user_id and returns a User object representing the user.
Default Login View: The default login view for protected routes is set to "customer_blp.login" using login_manager.login_view. It ensures that unauthenticated users are redirected to the customer login page.
Index Route: The "/" route is defined using @app.route("/") and the associated function. It renders the index.html template using render_template(). If the current user is anonymous (not logged in), the template is rendered with the user_id set to "anonymous". Otherwise, the template is rendered with a user_id generated using a combination of the username and a unique identifier.
Set up Flask app to use Twilio Conversations
In this section, you'll configure your Flask app to use Twilio’s Python SDK to:
- Create and fetch conversations.
- Create and add participants to conversations.
- Generate a token for the Twilio Conversations client library.
You’ll start by creating a folder named conversations in your project directory. Breaking the code down into multiple folders helps to keep things organized. This can be done using a GUI or your terminal as shown in the code below.
Next, you’ll create a Python file named twilio_chat.py inside the conversations folder. This file will serve as a blueprint for implementing Twilio conversations on the backend.
Add the following lines to twilio_chat.py:
The os library is imported to access environment variables. The Twilio Rest library to access the Client object, and a Twilio Exceptions library for error handling.
Next, we declare the module as a blueprint named chat with a URL prefix set as /chat. Then, environment variables are loaded with the environment file created previously.
The values of the Twilio credentials are assigned to the variables account_sid and auth_token. These variables are then used to initialize the Twilio Client constructor and assign the created class instance a variable named client.
Create helper function
In this module, you’ll be generating access tokens for customers and customer reps. Having a helper function to handle this task will reduce the number of repeated codes in your Python script.
Append the code in twilio_chat.py with the following lines:
Here, you’ve declared a function named generate_access_token that accepts two arguments; identity and service_sid. identity refers to the identifier associated with a particular participant of a conversation. The service_sid is the unique ID of the Conversation Service a conversation belongs to.
First, the function retrieves the necessary credentials; Twilio account SID, API key SID, and API key secret, from environment variables so that an AccessToken can be created.
The function adds a grant to the access token using the add_grant method, which takes a ChatGrant object as an argument that is initialized using the Conversation SID as the service_sid.
Then the function returns the access token encoded as a JWT (JSON Web Token).
Create conversations for customers
As mentioned earlier, the web app will allow customers and customer representatives to engage in isolated conversations.
Add the following lines of code to twilio_chat.py:
The route is defined with the endpoint /<string:user_id>, which expects a user_id parameter in the URL path.
@login_required decorator ensures that the user needs to be authenticated to access this route. The conversation function checks if the current user is active and has an existing chat_id. If a chat_id exists for the user, it fetches the conversation details from Twilio using the chat_id.
An access token is generated for the user using the generate_access_token function, providing the user's username and the service SID from the fetched conversation. Relevant information, such as the access token, conversation SID, user role, and language, is stored in the context dictionary.
The chat.html template is rendered with the context passed as an argument.
The function also handles cases where the current user is authenticated but has no Twilio conversation associated with it.
A new conversation is created using the user's user_id as the friendly name. The conversation sid is stored as the chat_id for the current user in the database. The current user is added as a participant in the conversation that was created. An access token is generated using the same process as mentioned before. The context dictionary is populated with the relevant information, and then the chat.html template is rendered with the context passed as an argument.
The conversation endpoint ensures that a new conversation instance is created or an existing conversation is retrieved whenever a customer clicks on the Start Conversation button that will be provided on the frontend.
Based on this design approach, only customers can initiate conversations. Customer representatives only have a list of available conversations which they can join as participants.
Add customer representatives to the Twilio conversation
To add a customer representative to a conversation you will create a different endpoint that you can call join_conversation. Add the following lines to twilio_chat.py to implement this:
The join_conversation endpoint adds a customer representative to an existing Twilio conversation. First, it checks if a customer rep is already a participant of the conversation accessed. If no record exists, the current user is added as a participant. However, if a record is found, an access token is generated for the current user and the chat page is rendered on the client side.
The route is defined with the endpoint /support/<string:chat_id>, which expects a chat_id parameter in the URL path.
The function checks if the current user is authenticated and doesn't have a chat_id. It fetches the details of the specified conversation from Twilio using the chat_id and retrieves the list of participants associated with the conversation.
The code then iterates through the participants to check if the current user is already a participant in the conversation by comparing the usernames.
If the user is not found among the participants, they are added to the conversation using the participants.create() method. An access token is generated for the user using the generate_access_token function, providing the user's username and the service SID from the fetched conversation.
The relevant information, such as the access token, conversation SID, user role, and language, is stored in the context dictionary. Then, the chat.html template is rendered with the context passed as an argument.
Configure Twilio conversations on the client side
You’ll be working with HTML templates for this section of the tutorial. Navigate to your templates folder and open the chat.html. This file will handle the rendering messages between customers and customer representatives.
To get started, you’ll copy and paste the Twilio Conversations client library CDN script before the `</body> in the HTML template.
This approach sets a global Twilio.Conversations object in the browser, allowing you to instantiate the Client class with the access key generated on the backend.
Next, add the following lines of code below the CDN script tag:
The code above sets up the client-side JavaScript code to initialize the Twilio Conversations client using the access token. It handles the initialization success and failure events by logging messages to the console.
The role variable represents the role of the user in the chat (e.g., customer or customer representative). The language variable holds the language associated with the user (e.g., the default language for translation purposes).
A new instance of the Twilio Conversations client is created using the access token stored in the token variable. An event listener is set up for the initialized event of the client. When the client is successfully initialized, the callback function is executed, and a log message is printed to the console.
Another event listener is set up for the initFailed event of the client. If an error occurs during client initialization, the callback function is executed, and the error message is logged to the console.
Set up chat translations with DeepL
In the previous section, you’ve initialized the Twilio Conversations client using an access token generated from the backend. If the conversation is initialized successfully, a success message will be logged to the console, else, an error message is logged to the console.
Receive and process translation requests
Text translations will be executed on the server side. That means when a message is sent by participants of a conversation, the messages are intercepted and sent to an endpoint on the server side for translation, then the translated text is returned to the client and rendered to the screen.
First, create an endpoint to listen for incoming translation requests. Add the code below to app.py:
The code above defines a route /translate that listens for POST requests. When a request is received, the translate_text() function is executed.
When a POST request is received, the function retrieves the request data using request.get_json(). The request data is expected to be in JSON format. The JSON object received is expected to contain two keys: text and target_lang.
text represents the input text to be translated, and target_lang represents the language to which the text should be translated.
The function uses the previously initialized DeepL client library to perform the translation. It calls a method named translate_text() from the translator object, passing the input text and target language as arguments.
Then, the translated text is extracted from the response object using the text attribute and assigned to the response_text variable.
Furthermore, the translated text is returned as a JSON response using the Flask jsonify() function. The response is in the format {"response_text": response_text} where response_text contains the translated text.
Send translation requests
As stated earlier, messages exchanged between participants of a conversation will be intercepted on the client-side and translated. To translate texts, a POST request will be initiated from the browser.
In your templates folder, open up chat.html and add the following lines within the <script> tag:
The code implements a Javascript function named callTranslateAI(). It is an asynchronous function that sends a request to the /translate endpoint for text translation using DeepL.
callTranslateAI takes two parameters: text and targetLang. text represents the input text that needs to be translated, and targetLang represents the language to which the text should be translated.
Inside the function, a POST request is made using the fetch() function to the /translate endpoint of the running Flask app.
The POST request consists of a "Content-type" header that is set to "application/json" to specify that the request body is in JSON format.
The JSON.stringify() function is used to convert an object containing the text and target_lang properties into a JSON string. This JSON string is set as the request body.
After sending the request, the function waits for the response using the await keyword. This indicates that it will wait for the response to be received before proceeding.
Once the response is received, the function uses the json() method to parse the response body as JSON. The parsed JSON is stored in the json variable.
Next, the function returns the parsed JSON, which is expected to contain the translated text in the property "response_text".
Render messages to the screen
The next piece to implement is the displaying of messages on the screen. To render messages to the screen, you need to create a new conversation object or fetch an existing conversation and access the messages associated with the conversation object.
Since conversation objects are created on the server side, you will fetch a conversation using the Twilio Conversations client.
Add the following code to the initialized event listener within the <script> tag:
Once the client is successfully initialized, the getConversationBySid() method is invoked by passing a conversation ID (chat_id) as an argument. This method will fetch the conversation associated with the provided ID.
If the conversation exists, the conversation object is assigned to the conv variable and the messages associated with the conversation are fetched using the getMessages() method. The retrieved messages are then passed to a function called renderMessages() to render them on the screen.
Additionally, the messageAdded event handler from the Conversations API listens for incoming messages. When a new message is received, the function messageAdded is invoked to handle the event and render the new message on the screen.
If the conversation does not exist, the code logs a message to the console indicating that the conversation was not found.
In case of any errors during the process, the code uses catch() to handle and log the error to the console.
Create a function to send messages
To render messages to the screen, you must first be able to send messages. In the HTML template, a Javascript function is called to listen for key up events. This will be useful to send messages when a user hits "Enter".
Add the following code to the <script> in chat.html:
The code above defines a function named onSubmit(). As mentioned, it is an event handler function triggered when a user presses a key.
First, the function checks if the key pressed is not equal to "Enter" (ev.key !== "Enter"). If it's not the "Enter" key, the function returns early and does nothing.
If the "Enter" key is pressed, the function proceeds to get the value of an input element with the ID value of "large-input" using document.getElementById("large-input"). The value is stored in the input variable.
Then, the code checks if a conversation object (conv) exists. If it does, it means that a conversation has been previously fetched. In that case, the sendMessage() method of the conversation object is called and passed the input.value as the message content.
After sending the message, the input.value is set to an empty string, clearing the input field for the next message.
If a conversation object does not exist, the function logs a message to the console indicating that the conversation was not found.
Display stored messages
When a conversation is fetched using the client object, messages associated with a particular conversation are accessed and displayed on the screen.
Add the following lines of code within the <script> :
The code above implements an asynchronous function named renderMessages(), which takes an array of messages as input.
Inside the function, it starts by selecting an HTML element with the ID "message-log" using document.getElementById("message-log") and assigns it to the messageLog variable. This element is a container where the rendered messages will be displayed.
The next line messageLog.innerHTML = ""; clears the content of the messageLog element, ensuring a fresh start for rendering messages.
Then, a for…of loop is used to iterate over each msg in the messages array. For each message, a translatedMessage variable is declared.
Based on the value of the role variable, there are two possible scenarios:
- If
roleis equal to "customer_rep", it means the user is a customer representative. In this case, the message body (msg.body) is passed to thecallTranslateAI()function along with a language variable to translate the message using DeepL API. The translation is awaited and the result is stored in the translatedMessage variable. - If
roleis equal to "customer", it means the user is a customer. The process is the same as above, and the message body is translated using thecallTranslateAI()function.
After the translation is obtained, a new <div> element is created using document.createElement("div") and assigned it to the messageDiv variable. The inner HTML of the messageDiv is set to a formatted string that displays the message author (msg.author) in bold and the translated message text (translatedMessage["response_text"]).
Then, the messageDiv is appended as a child to the messageLog element using messageLog.appendChild(messageDiv), effectively rendering the translated message on the screen within the message log container.
Display new message
Displaying new messages on screen follows the same approach as the renderMessages function described above.
Add the following lines of code to the script tag, below renderMessages:
The code above defines an asynchronous function named messageAdded() that acts as an event handler for adding real-time messages to a conversation. It translates the message body based on the user's role (customer or customer representative) using DeepL. The translated message is displayed on the screen within the message log container.
With all of that done, you can move on to testing your app.
Test your multilingual web chat
To test your app, you need to work with two browser windows. But first, you must ensure your Flask app and local Mongo server are up and running. Also, you need to ensure your PC is connected to a wifi network.
Open up a terminal window and run the Flask app with the command below:
Open up another terminal and run Tailwind CSS. This will ensure CSS styles are generated for the templates:
Also, you can check the status of your Mongo server with the command:
If there are no errors, open up your browser and visit the address: http://127.0.0.1:5000
You should see this:
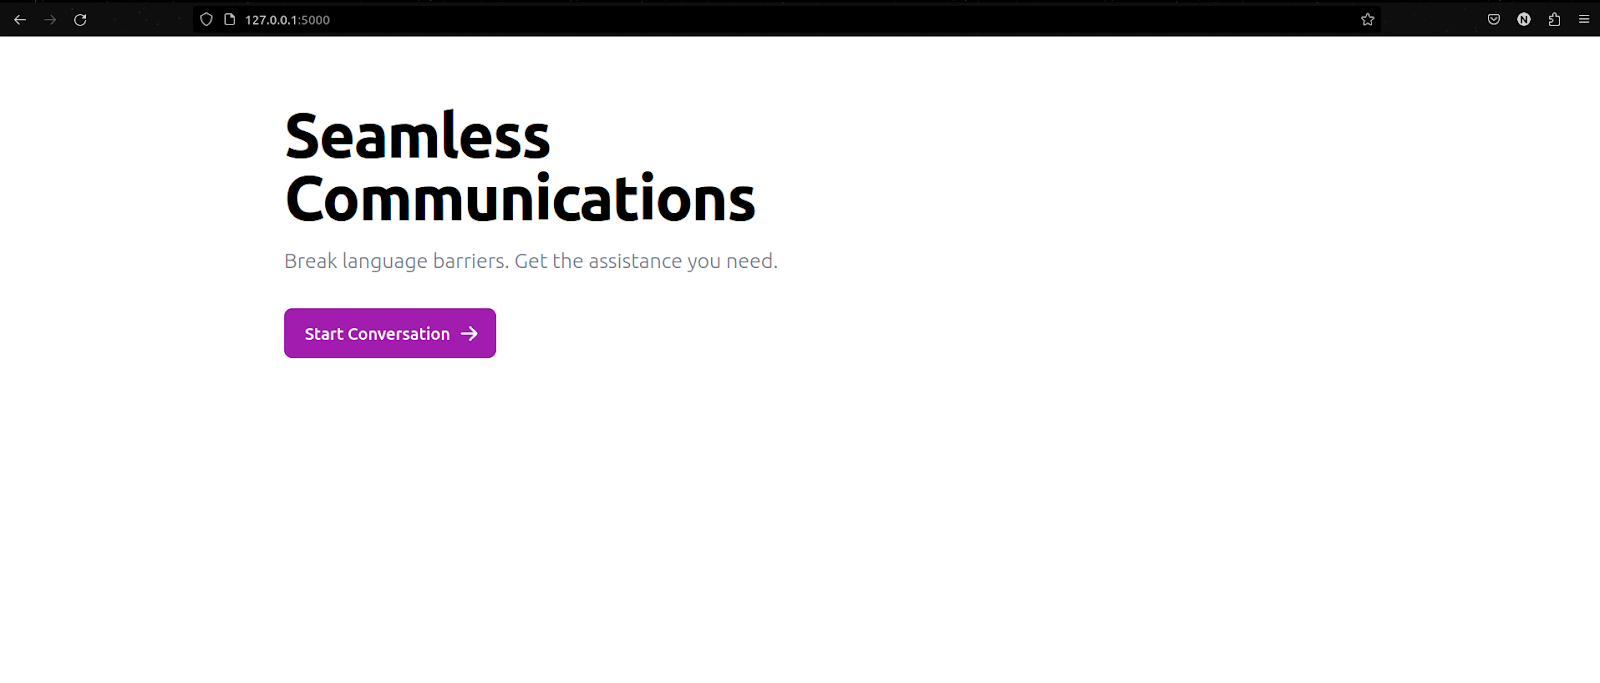
Clicking on the Start Conversation button will take you to the login page (because it’s a protected route that’s only accessible to authenticated users).
Next, visit the sign-up endpoint to create a user account for testing the app. Go to the address: http://127.0.0.1:5000/auth/customer/register
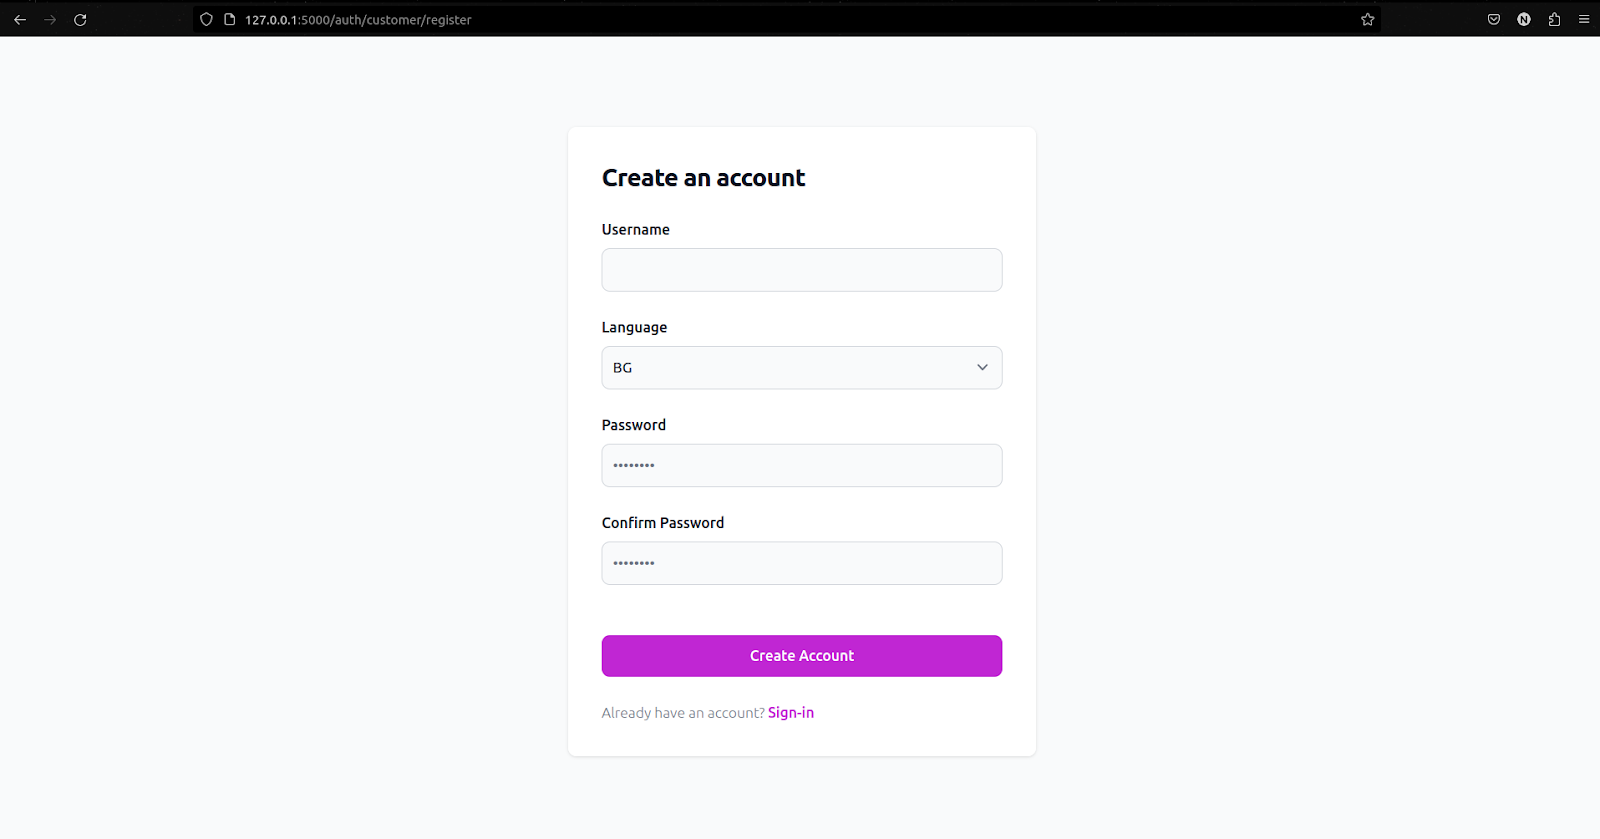
The language field sets the default language for text translations for a user. After creating a user account, you’ll be redirected to a login page to sign in. After signing in, you’ll be redirected to the index page.
On the index page, click on the Start Conversation button to open up a chat screen.
Next, open up another browser window to sign in to account for your customer rep. No need to create an account for this user (you created it from the Mongo shell):
Follow the route: http://127.0.0.1:5000/auth/rep/login
Use the credentials:
Username = admin
Password = password
When successfully signed in, you’ll find a list of available conversations:
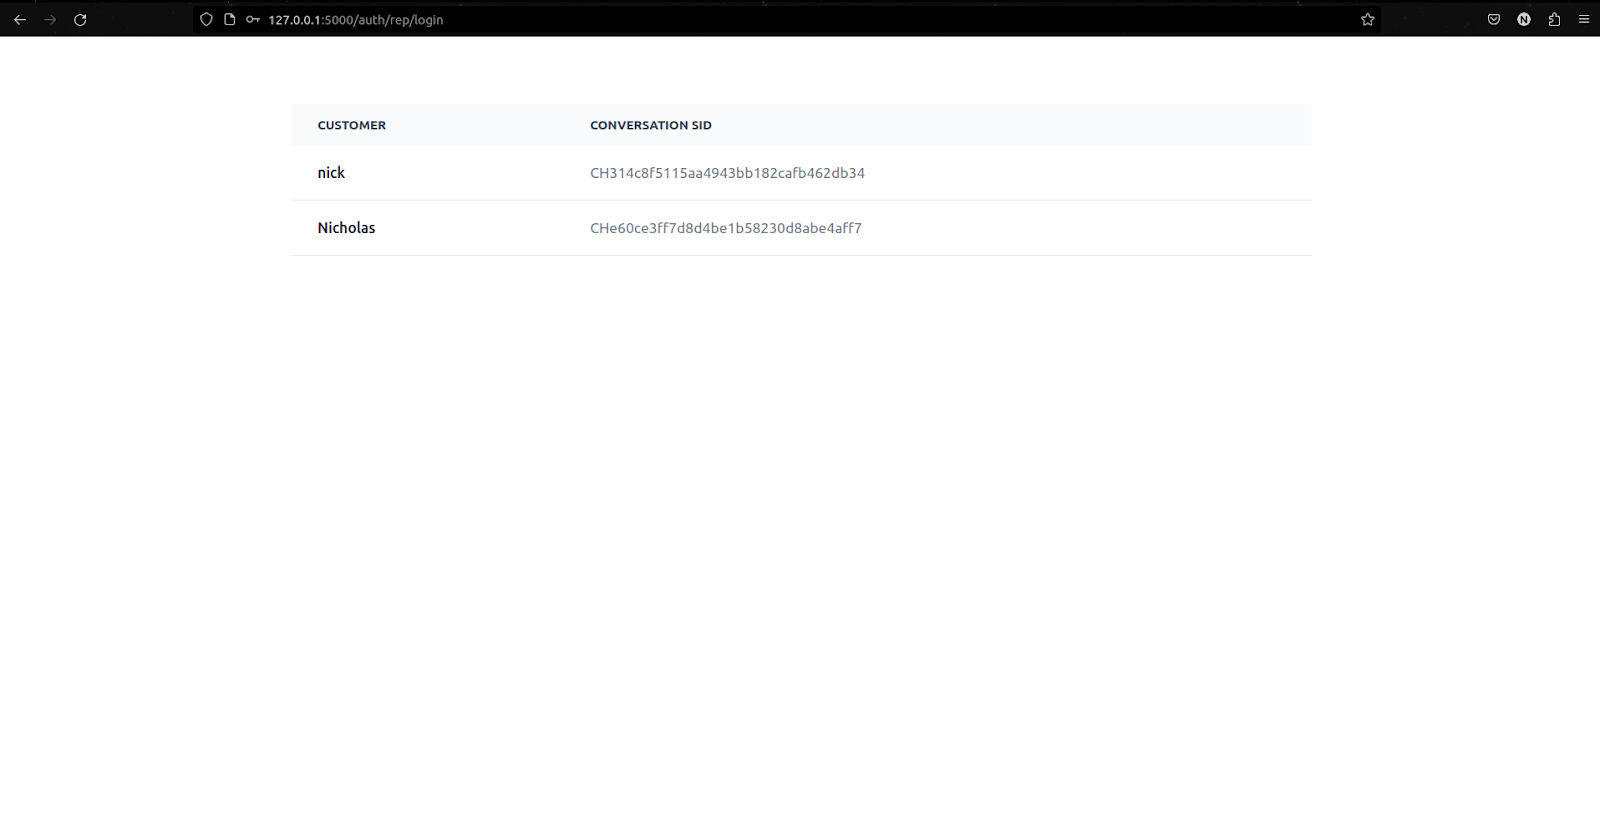
In my case, there are two available conversations because I created a customer profile while testing. On your screen, you should see the conversation you created.
Click on the name of the user you created to open the conversation screen.
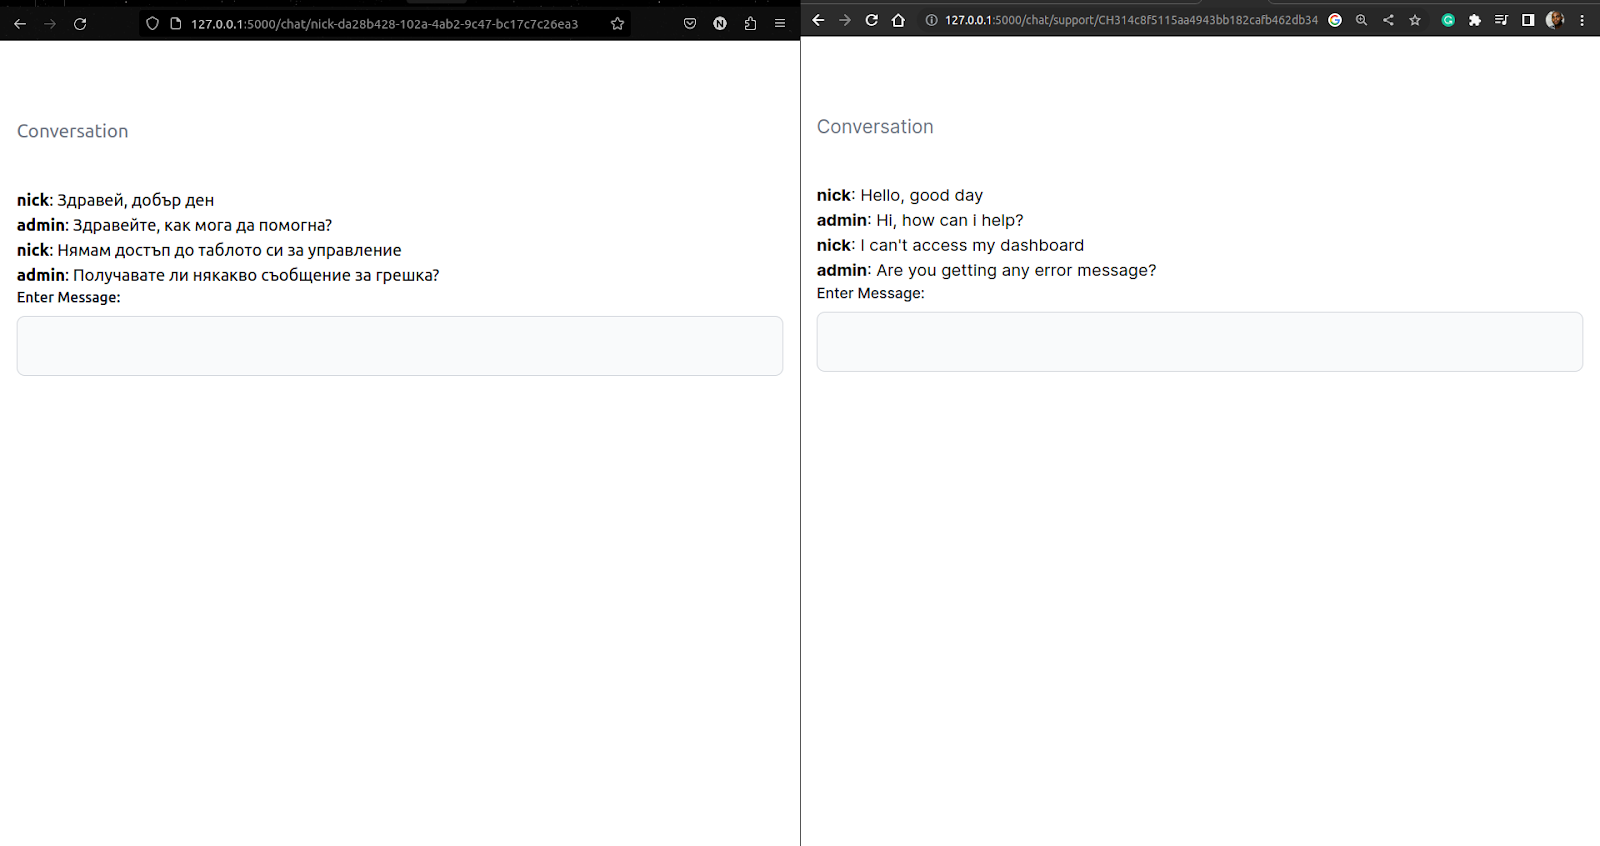
Finally, start making conversations. Send messages in the default language of the user. It’ll be translated to the default language of the receiver.
If you encountered any issues or errors while testing the code, download the full project folder from this GitHub repository.
What's next for multilingual chat applications?
Congratulations! Your multilingual web application is up and running. Currently, the app always translates all messages stored in the Message object. This is an expensive operation because DeepL charges you for each character translated.
A possible solution is to implement an in-memory caching system on the client side which will store translated messages and retrieve them once the page is loaded. This way, only new messages will be translated and the translated message will be cached.
That said, I hope you enjoyed this tutorial. Twilio offers many other awesome services and we’ll explore them in other tutorials. Till then!
Nicholas is a versatile software engineer proficient in Flask/Python and NodeJS. With a passion for learning, he constantly seeks out new technologies and skills to expand his knowledge. Connect with him on LinkedIn.

Related Resources
Twilio Docs
From APIs to SDKs to sample apps
API reference documentation, SDKs, helper libraries, quickstarts, and tutorials for your language and platform.
Resource Center
The latest ebooks, industry reports, and webinars
Learn from customer engagement experts to improve your own communication.
Ahoy
Twilio's developer community hub
Best practices, code samples, and inspiration to build communications and digital engagement experiences.