How to Build a Recipe Calculator With Twilio Programmable Messaging
Time to read:
February 27, 2024
Written by
Reviewed by
How to Build a Recipe Calculator With Twilio Programmable Messaging
There’s something about Christmas that brings out the baker in us. For many, this is a time to make memories, and what better way to do so than to share your kitchen creations? According to Nielsen Massey, the world’s leading manufacturer of professional-grade vanilla and flavour products:
More than half of US millennials bake over the holidays to connect and spend time with loved ones.
And for the savvy digital marketer, this season presents a golden opportunity for customer acquisition, which is why you’ll find so many Christmas recipe ebooks available for download in exchange for your email address.
However, seeing that SMS marketing is a more potent form of marketing than email, I've come up with a lead magnet tool that could be very handy in kickstarting that all-important seasonal marketing campaign.
In this tutorial, I will teach you how to build a recipe calculator.
How will the app work?
The app allows customers to input the price, weight, and unit weight of each ingredient, click the button "calculate", and instantly receive a text message with an itemised cost of each ingredient in the recipe.
Prerequisites
To follow along, you’ll need the following:
- A basic understanding of and experience with developing in PHP
- PHP 8.3 or above
- Composer installed globally
- A free or paid Twilio account with a verified phone number. If you are new to Twilio, click here to create a free account
- A smartphone to test your app
Create the project directory
Begin by starting your PHP server. Then, create the project’s root directory, named recipe_costs_calculator and switch into it by running the following command in your terminal.
Next, you’ll need to create the following files and folders inside the project's top-level directory:
|
File/Directory |
Description |
|---|---|
|
recipe_card.php |
This page will contain the recipe calculator form. |
|
ingredient_submission.php |
This is the page where the form is submitted to. |
|
message_customer.php |
This is the page that will trigger the Twilio SMS API. |
|
twilio_sms_client.php |
This is the page that handles the sending of the text message. |
|
success.php |
Upon successful submission of the form, the user will be redirected to this page. |
|
.env |
This file contains the Twilio credentials required. |
|
CSS/ |
This folder will store the app's stylesheet (i.e., style.css). |
|
Image/ |
This is where the background image will be stored. |
|
JS/ |
This is the folder that contains the input_template.js file that dynamically generates an ingredient form. |
To create the files, either run the following command or create the files in your preferred text editor or IDE.
Now, paste the following code inside the .env file.
Replace YOUR_TWILIO_ACCOUNT_SID, YOUR_TWILIO_AUTH_TOKEN, and YOUR_TWILIO_PHONE_NUMBER with your Twilio Account SID, Auth Token, and phone number respectively, which you’ll find in your console.
Now, finish by downloading this image to the image folder.
Install the required packages
Now, it's time to install the required packages, of which there are only two: Twilio's PHP Helper Library and phpdotenv. They simplify interacting with all of Twilio's APIs using PHP, and keep secure credentials and configuration variables out of the code.
To install them, run the following command.
Create the recipe form page
In your preferred editor, open recipe_card.php and paste the following code into it.
The <link> tags allow us to import our CSS and Bootstrap for styling. We will also give the page some lovely fonts from Google Fonts.
The <form> tags contain the contents of our page. There are two forms, the first captures the name of the recipe, the customer’s name and phone number. The second captures the following:
- Ingredient name: The name of the ingredient being calculated
- Weight in grams: The quantity of the ingredient required in the recipe
- Unit price in USD: The price the customer paid for tor the ingredient
- Unit weight: The gross weight of the ingredient as listed on the packaging
As there will be multiple ingredients per recipe, the name="ingredient[1][ingredient_name]" attribute of the form contains squared brackets so that the information captured will be in the form of an array.
The design of the page is such that one ingredient form will be displayed, but to add more ingredients the customer needs to click the Add Ingredient button to dynamically generate more form elements.
We finish by including the Javascript code that will generate the dynamic form.
Create the code to dynamically generate ingredient forms
Next, open the input_template.js file and copy and paste the following code into it.
We begin by creating a counter variable named next_ingredient and assigning it the number 2. Then we create a function that contains a template form similar to the one in the recipe_card.php file, but instead of hard coding the array numbers into the input fields, we use the counter variable.
Then we grab the recipe_card_container by its id, create a div element and place the ingredient template inside of the DIV. Lastly, we append the ingredient element to the container and increment the counter.
Now, every time our function is clicked, a new ingredient form is generated.
Style the recipe page
Now is the perfect time to make the recipe form page look fully professional. To do this, copy and paste the following code into the style.css file.
The code starts by giving the body a background image. Then we style various elements of the page, such as the content container, input fields, text and buttons.
If you have a keen eye, you would have noticed that we have styling for a class named success-text but that class doesn’t exist in our current HTML. Don’t worry because this class will be applied to the success-page.php page that we’ll soon create. In the meantime, check that it all works as expected by running the following code.
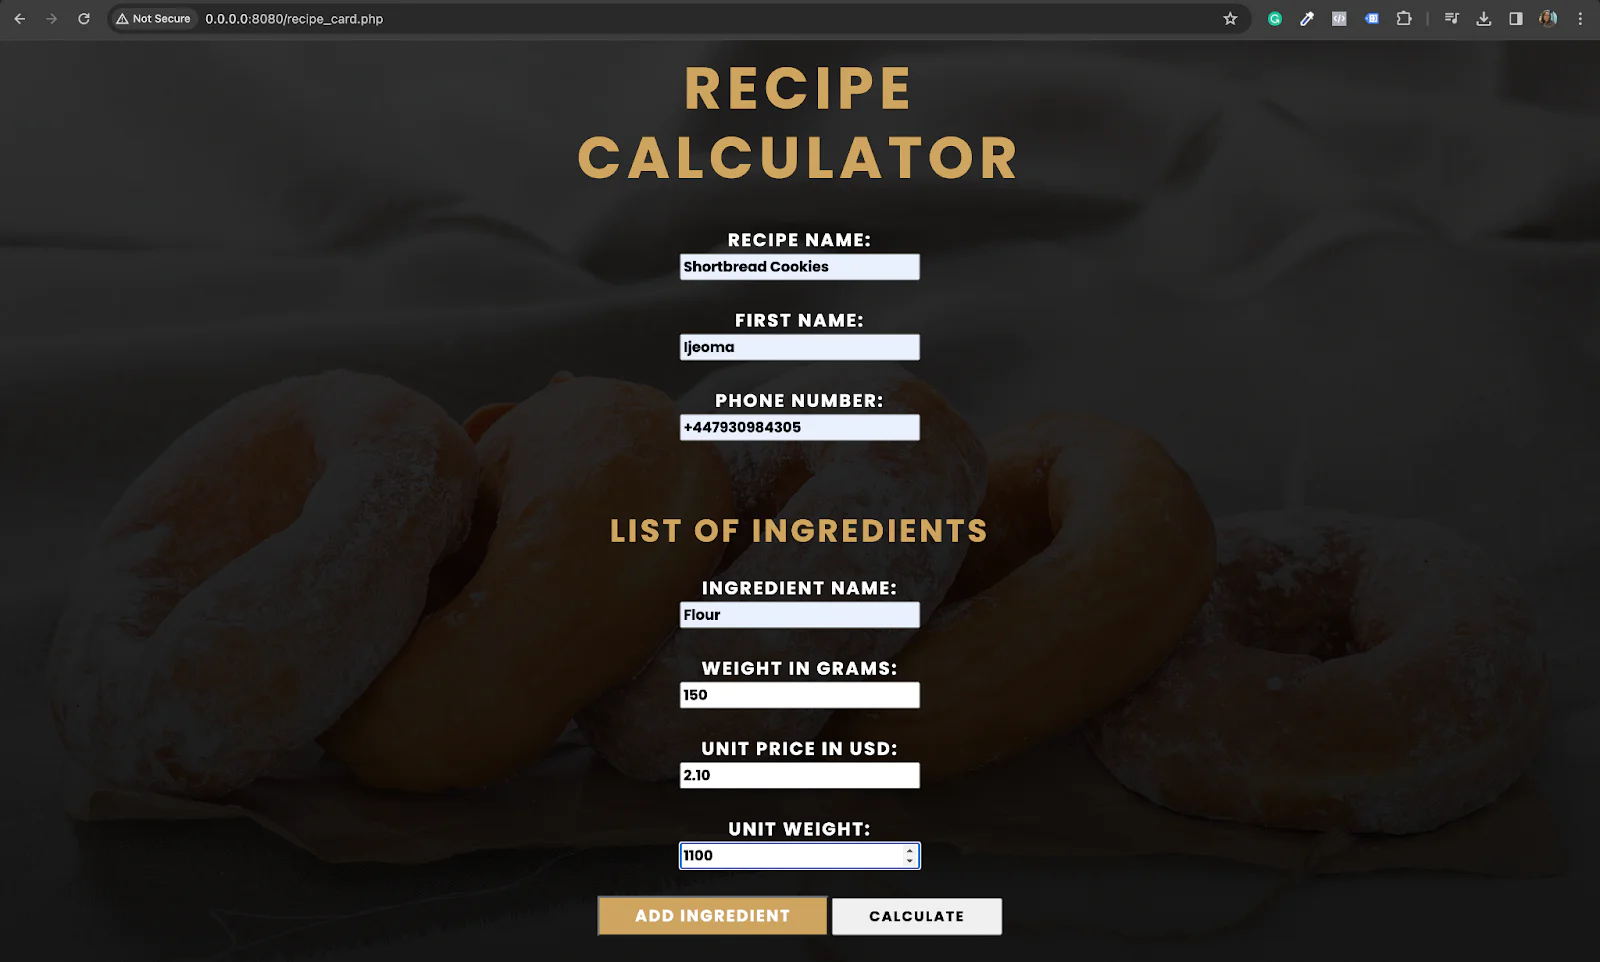
Now, navigate to the path /recipe_card.php and if you’ve been coding along, you should have a similar result to the one below.
Create the recipe form submission page
Next, we’ll create the code that handles the form submission. To do so, open the ingredient_submission.php page and paste the following code into it.
Firstly, two important files are required:
- autoload.php: this includes the Twilio SMS dependencies we need.
- message_customer.php: this allows us to call a function that will send the text message to the customer.
We use the isset() function to check that a form has been submitted, otherwise to alert the customer that they have not submitted the form. If the form has been successfully submitted, then redirect the user to a page named success.php. Next, we create a function that grabs the array of ingredients submitted and uses the formula (weight/unit weight) * price to calculate the price of each ingredient.
The function bcdiv() is used to return the decimal price without rounding the numbers. Lastly, the function returns an associative array which contains the ingredient and price as key-value pairs.
Create the Twilio SMS client
It’s almost time to text the customer with a list of ingredients and prices. But first, you need to create the Twilio SMS client. To do this, copy and paste the following code into the twilio_sms_client.php file.
The code begins by requiring two important files:
- autoload.php: this includes the dependencies we need to interact with Twilio's Programmable Messaging REST API
- ingredient_submission.php: this gives us access to the message_customer() function so that we can send the text message.
Next, we create a function that accepts two arguments. The first argument is the price of ingredients, which will be assigned to the body of the text message. The second is the customer’s phone number, which we will be texting.
Create the message customer function
It’s finally time to create the function that will text the customer. Copy and paste the following code into your message_customer.php file.
We begin by requiring two essential files:
- ingredient_submission.php: this page handles the function that calculates the costs of each ingredient that the customer submitted through the form.
- twilio_sms_client.php: this is the Twilio SMS API that will handle the sending of the text message.
Next, we assign the function with the array of the ingredients and prices to the variable $recipe. Then we create an array containing the name, phone number, and recipe name, and assign that to a variable named $customer.
The first message we send to the customer is a greeting; an informal way to let them know they’ll be receiving the costs of each ingredient in their recipe. The second message is contained inside a foreach loop that loops through the list of ingredients, extracting the ingredient and price as key-value pairs which are sent to the customer.
Create the success page
Now, we need to create the success page where the user will be redirected to when they successfully submit the ingredient form. To do this, copy and paste the following code into the success.php page.
This is a very simple HTML boilerplate that leverages some of the existing CSS to create a nice looking form-submission-success page. As you can see the <body> and <main> tags share the same classes as the <body> and <main> tags on the recipe_card.php page. The only new element here is the class named success-text. This applies the CSS we wrote earlier to the text on this page.
Let’s test that the application works!
Start the application with your preferred PHP server, such as PHP's built-in web server with the command below.
Then, navigate to http://localhost:8080/recipe_card.php, input the ingredients of your favourite recipe, and click the submit button when you’re done. You should now receive text messages like the one below.

Congratulations on getting to the end of the tutorial. You’ve learned a very practical, entrepreneurial skill. Now, go and build something awesome!
Ijeoma Nelson is a London-based software developer and technical writer with a passion for building awesome things and teaching how to build awesome things. When she’s not tinkering with code you can usually find her whipping up a batch of cookies because baking is also her thing.


Related Resources
Twilio Docs
From APIs to SDKs to sample apps
API reference documentation, SDKs, helper libraries, quickstarts, and tutorials for your language and platform.
Resource Center
The latest ebooks, industry reports, and webinars
Learn from customer engagement experts to improve your own communication.
Ahoy
Twilio's developer community hub
Best practices, code samples, and inspiration to build communications and digital engagement experiences.