How to Send a WhatsApp Message in 30 Seconds Using Java and Gradle
Time to read:
March 29, 2022
Written by
Reviewed by

Approximately Two billion people across the globe use WhatsApp as a communication medium. It is fast and a convenient app to use as it does not only provide peer to peer messaging, but it is also used by companies and entrepreneurs to run their businesses through WhatAapp business. Over the years, WhatsApp has proven to be an important tool to engage with customers as at least more than 58% of its users use it more than once in a day.
The Twilio WhatsApp Business API is handy and secure and enables you to accomplish a number of tasks including sending and receiving media files, sharing map locations and driving engagement with your users. It is a great enabler for businesses worldwide. So, why not scale your business and leverage tools that have proven to work over time?
In this tutorial, I will take you through how to send a WhatApp message in 30 seconds using Java and Gradle.
Prerequisites
- Java 11.
- Gradle 7.1.
- Twilio account.
- Intellij Idea Community Edition.
- A smartphone with WhatsApp installed.
Twilio Project Setup and Sandbox Activation
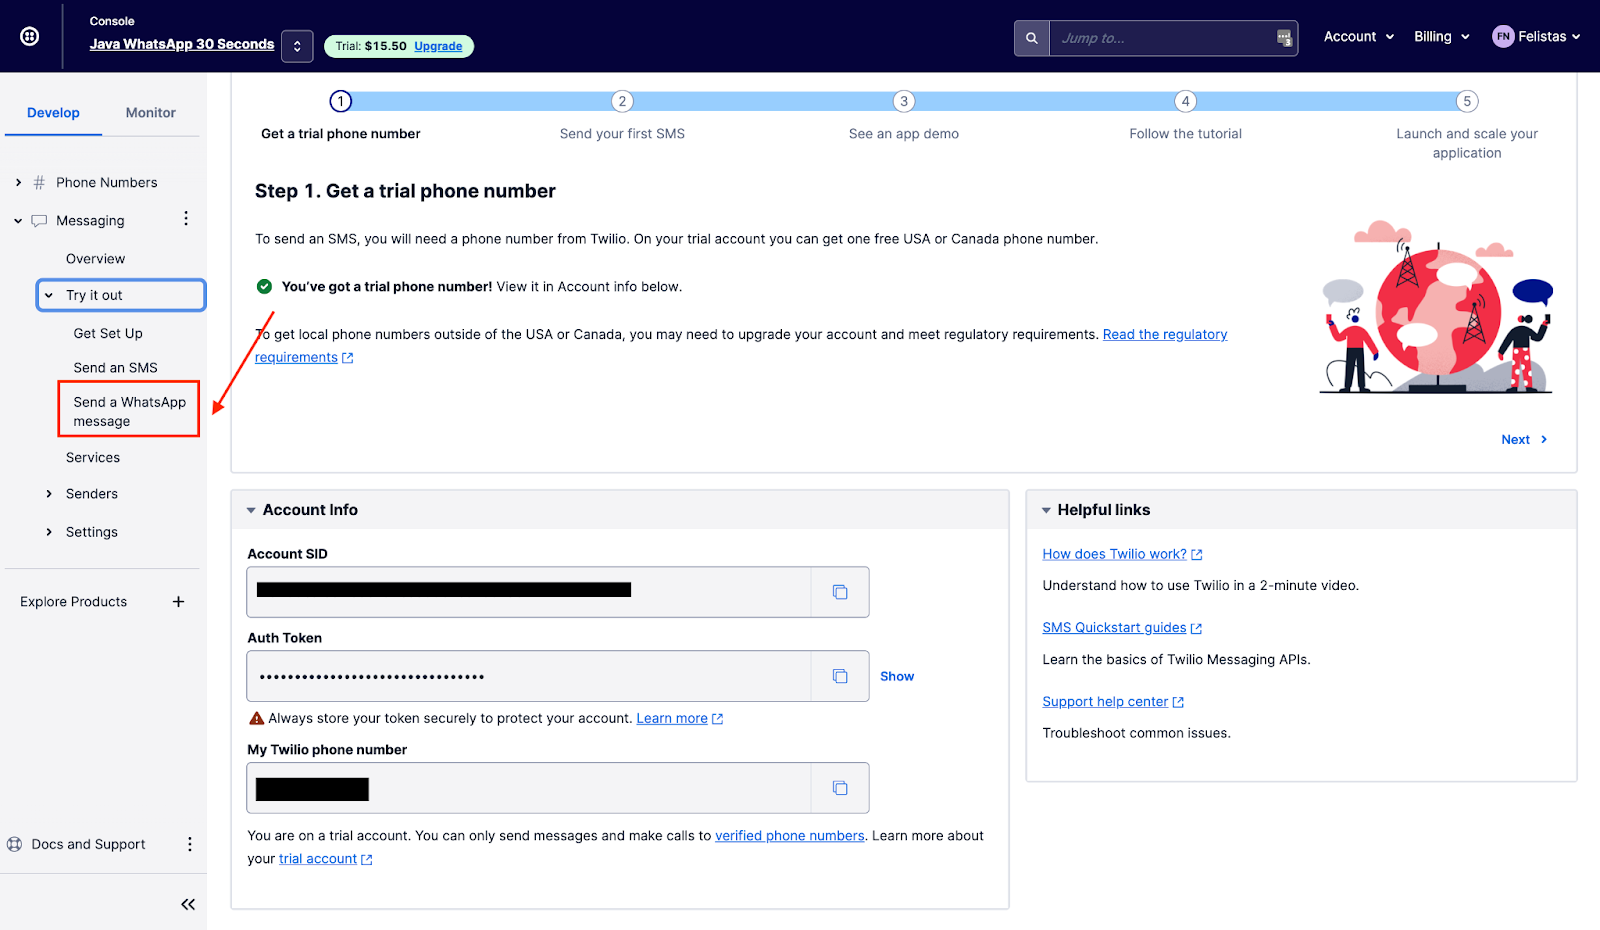
After creating and verifying your account on Twilio, navigate to the Twilio console and create a new account, stating the Twilio project you would like to use, in this case Messaging. In the resulting dashboard, take a note of the ACCOUNT SID and AUTH TOKEN. We will need them later in our code.
Next, select Messaging on the left menu, Try it out, then click on Send a WhatsApp message to activate the WhatsApp sandbox.
A similar screen should appear as shown below:
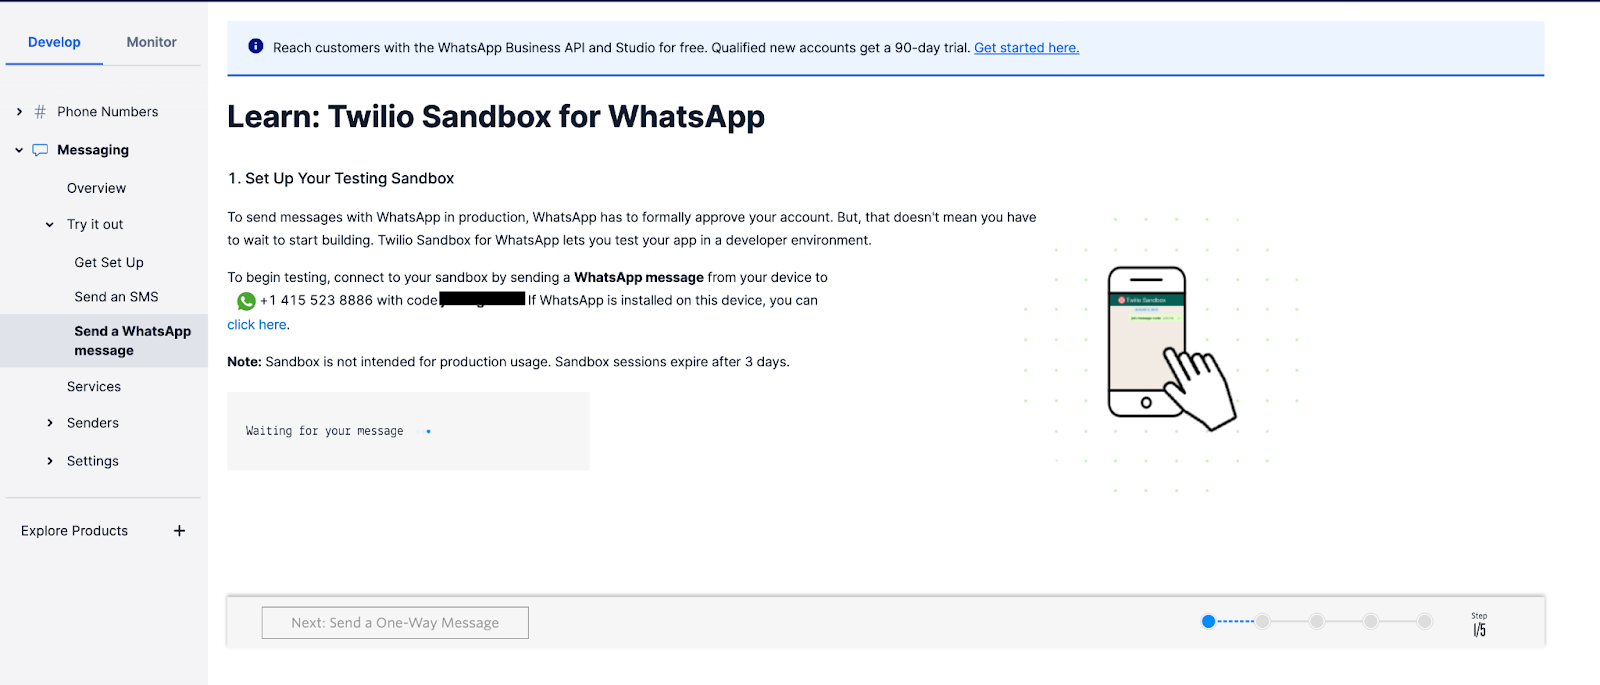
Take your WhatsApp enabled device and text the unique join code to the WhatsApp number displayed on the screen in order to join the Twilio Sandbox. Shortly after you send the message you should receive a reply from Twilio indicating that your mobile number is connected to the sandbox and can start sending and receiving messages.
If you intend to test your application with additional smartphones, then you must repeat the sandbox registration process with each of them.
Java Project Setup
After downloading and installing the Intellij community edition, open and create a new Gradle project. Select Java 11 as the SDK and specify your project folder in the resulting window.
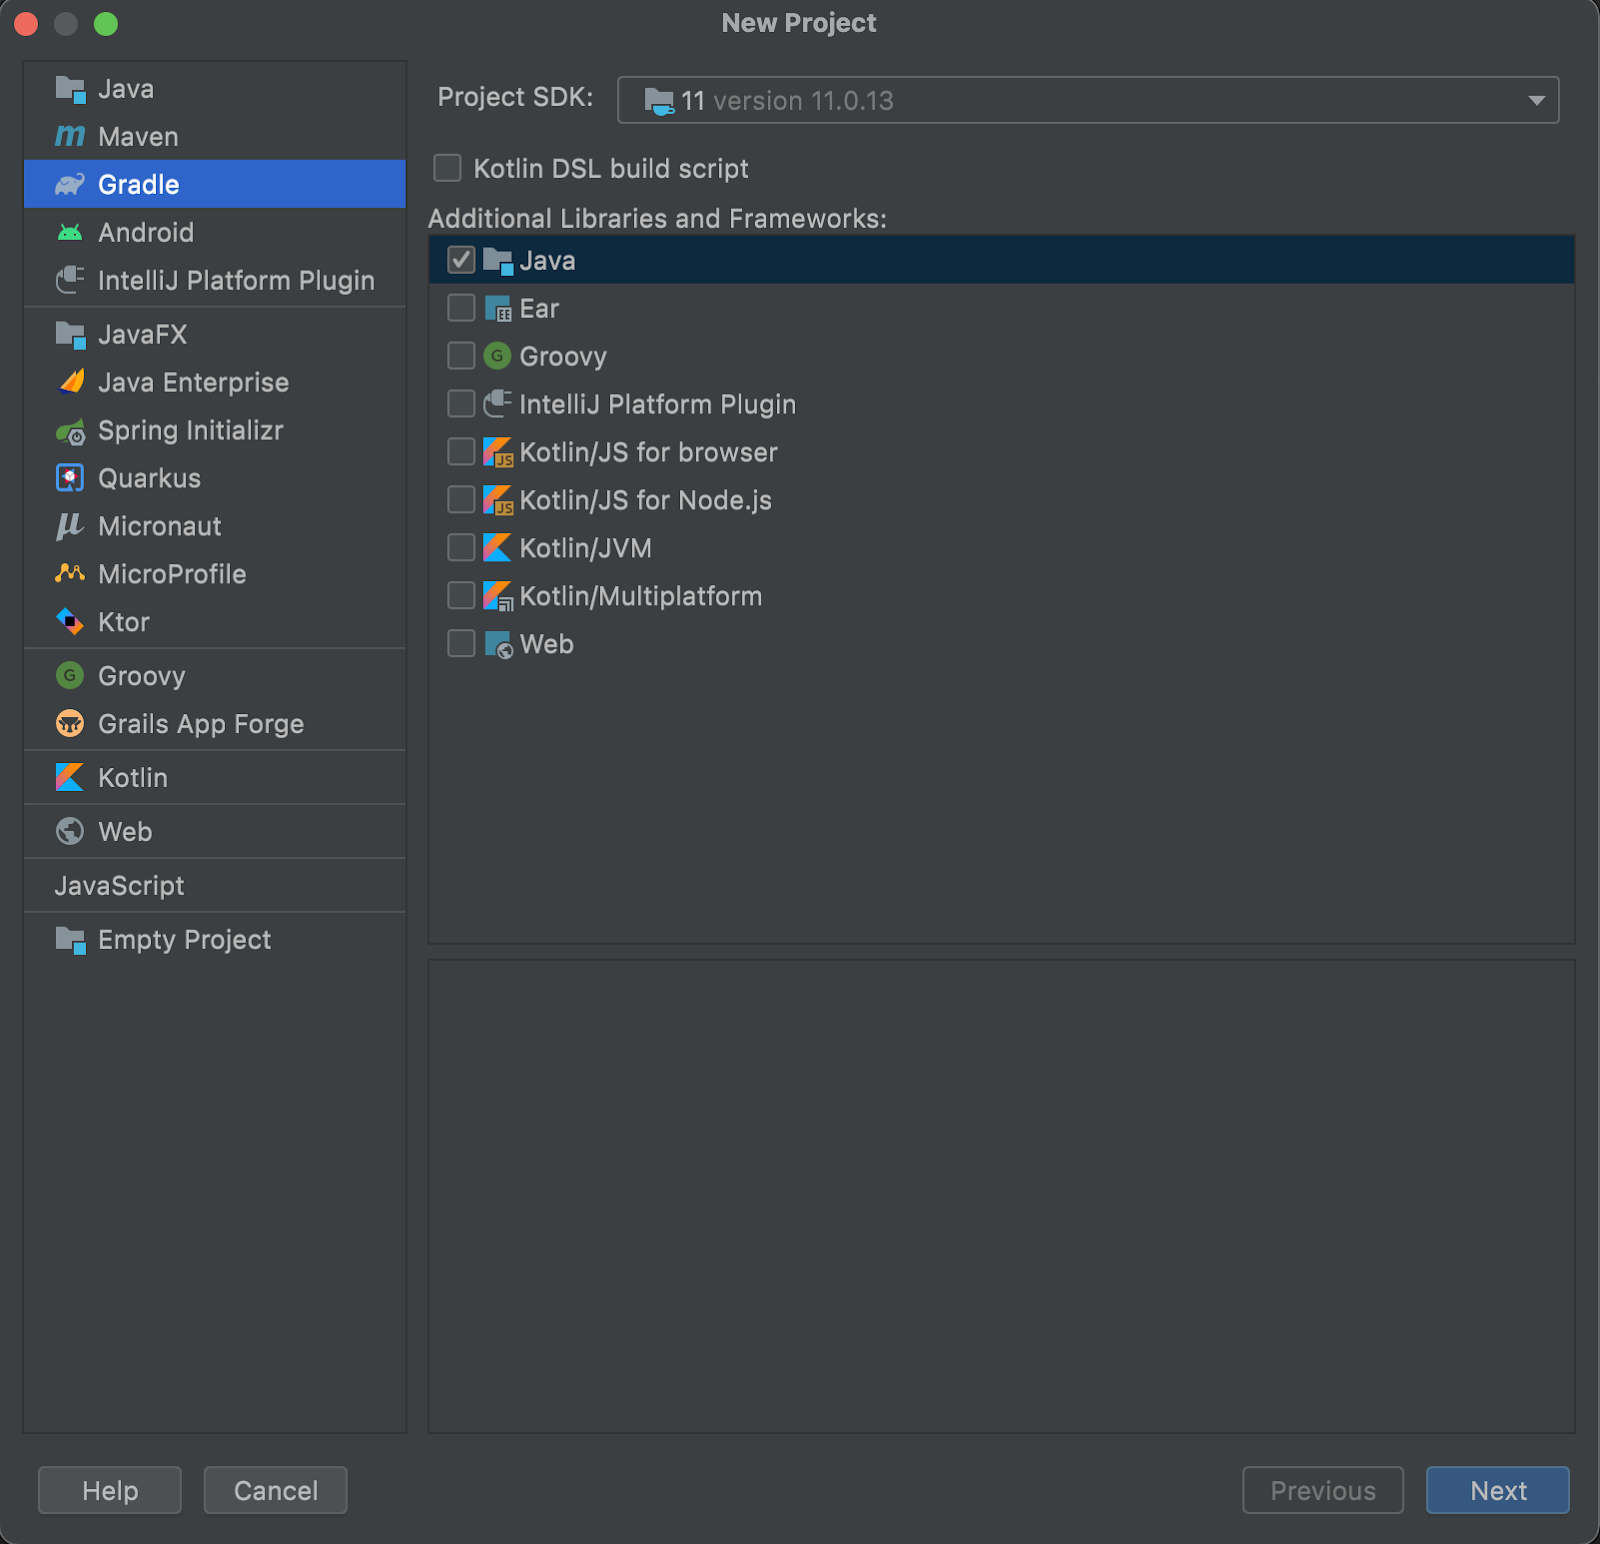
This bootstraps a Gradle project in the folder you specified.
In the root folder, navigate to the /src/main/java folder and create a file called WhatsApp.java inside it. This is where our project code will live.
Locate your build.gradle file and add the Twilio dependency to be part of the project:
This will enable us to use the Twilio API in our project.
Next, open the WhatsApp.java file that you just created and add the following lines of code:
The above code initializes Twilio client with an ACCOUNT SID and AUTH TOKEN. We then construct a message, specifying who we are sending the message to, who it is from, and the body of the message.
The message is then sent when the create() function is run. A successful operation of this function will print the Message SID on the terminal.
NOTE: Ensure to replace your_phone_number and whatapp_test_number, with their respective values. Your phone number should include your country’s code e.g +1 for US residents or +44 for UK residents.
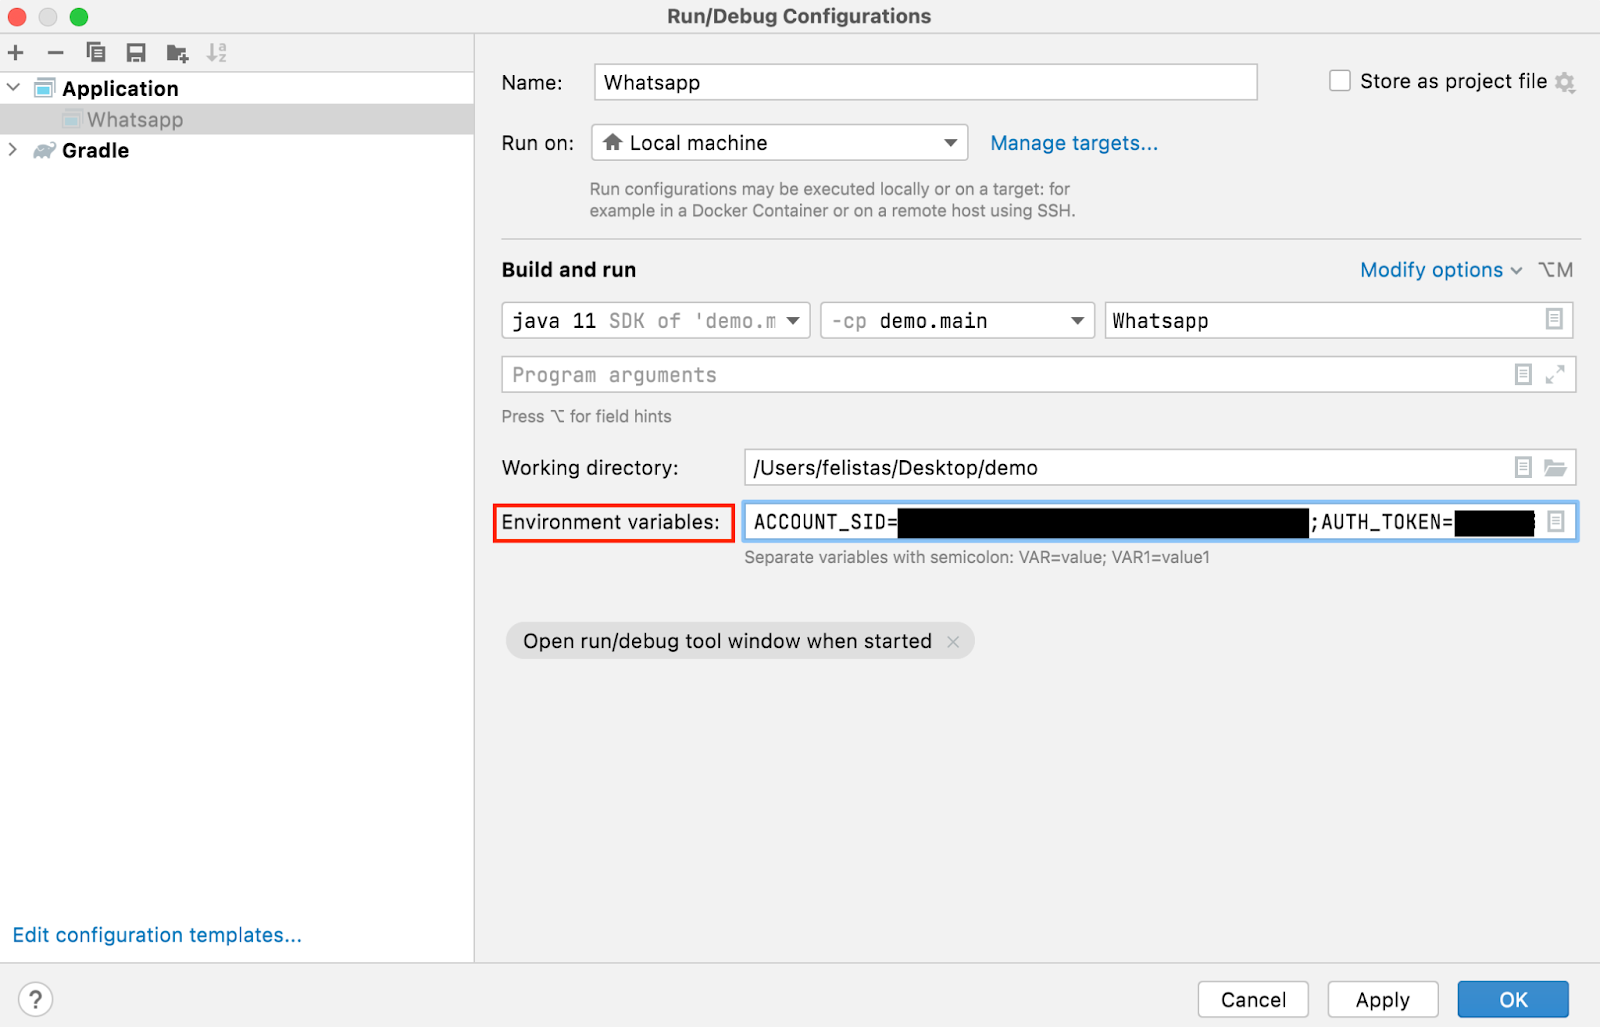
Inside the Intellij console, select Run and click "Edit Configurations" in the console. Add a new run configuration for the "WhatsApp" application to include the ACCOUNT_SID and AUTH_TOKEN environment variables, as seen in the image below:
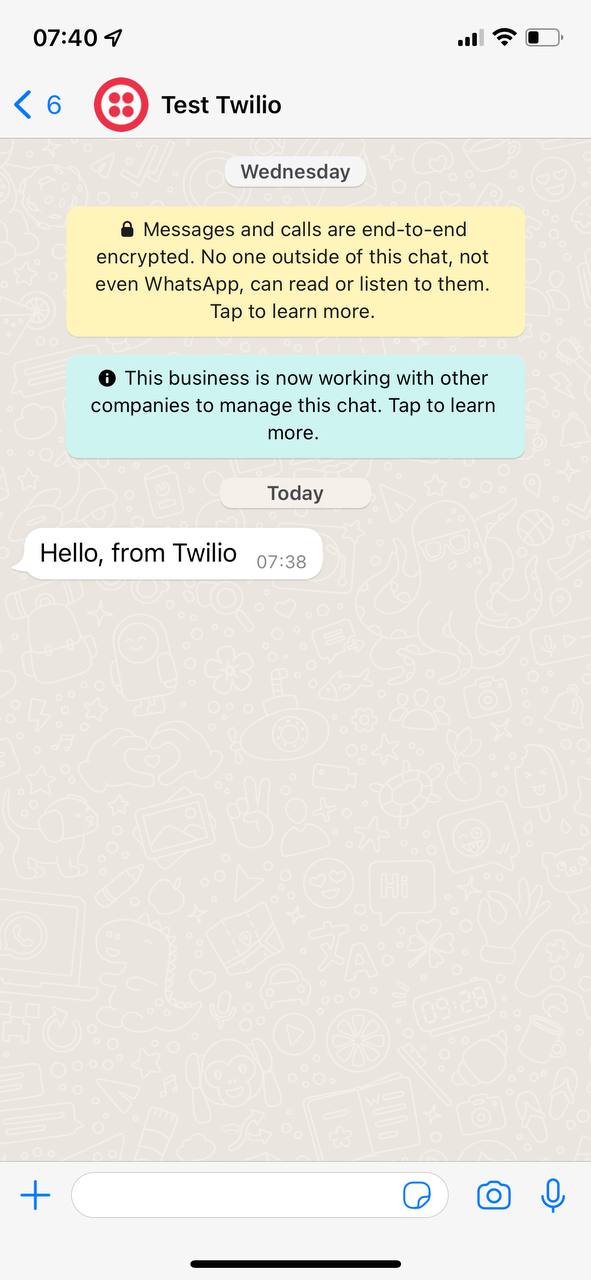
Next, run the project and you should receive a WhatsApp message on your device as shown below.
Conclusion
Congratulations on making it to the end. In this tutorial, we have learned how to send WhatsApp messages using the Twilio API within a short period of time. You can get more insights on the Twilio Java library and build cool stuff with it.
Felistas is a software developer who enjoys writing technical articles from time to time and solving issues via code.

Related Resources
Twilio Docs
From APIs to SDKs to sample apps
API reference documentation, SDKs, helper libraries, quickstarts, and tutorials for your language and platform.
Resource Center
The latest ebooks, industry reports, and webinars
Learn from customer engagement experts to improve your own communication.
Ahoy
Twilio's developer community hub
Best practices, code samples, and inspiration to build communications and digital engagement experiences.