Build a Browser-Based Walkie Talkie with React, Twilio Programmable Voice, and Twilio Functions
Time to read:
October 28, 2020
Written by
Reviewed by

In this tutorial you’ll learn how to implement in-browser calling in a form reminiscent of a walkie talkie. It's a unique way to connect with other people in real time and bring back some childhood fun! The lessons learned in this post can also be applied to any number of browser-based calling applications.
To complete this tutorial, you’ll need the following:
- The Twilio Serverless Toolkit plugin for the Twilio CLI
- A Twilio account
- A GitHub account if you’d like to deploy your app to GitHub Pages
This app has three parts:
- A React.js frontend
- A Node.js backend running on Twilio Functions
- A TwiML application created through the Twilio Console
The TwiML application is the bridge between the frontend and backend. Because this app involves browser-to-browser calling instead of phone-to-phone calling, you’ll learn how to create a virtual Twilio Device that connects to your TwiML application. This Twilio Device is a stand in for an actual phone - it can make and receive phone calls.
Set Up Your Environment
Install the CLI and Twilio Serverless Toolkit Plugin
If you don’t already have the Twilio CLI installed, you can install it using the following command from your command prompt or terminal:
After installing the CLI, you can add the Twilio Serverless Toolkit via a plugin:
Twilio Function Service
First, you’ll set up your backend, which will be deployed using Twilio Functions. Twilio Functions is a serverless environment that lets you deploy backend services without the overhead of setting up a server.
Create a folder on your computer called walkie-talkie. This will be your project’s root directory, and will house both your frontend and backend folders.
Change directory into walkie-talkie and login to the Twilio CLI.
This will prompt you to enter your Twilio account SID and AUTH TOKEN, which you can find on your Console dashboard. It will also prompt you to enter a shorthand identifier - feel free to enter whatever you like for this value.
A Twilio Function Service is a collection of all the individual functions, assets, and environments that support a single application. Initialize a new function service named walkie-talkie-service by running the following command:
This will create a new project folder with some stock sub-folders and files. Delete any contents inside the provided assets and functions folders, but hang on to the folders themselves.
Also included in your new project folder is a .env file that has been pre-populated with your account credentials. Open this file and add the following few lines:
You’ll be capturing the values for these new environment variables when you set up your TwiML application in the next section. For now, you can save the file with the unset variables.
Your function service will contain two functions: call and token.
To start building these functions, create two new blank files inside walkie-talkie-service/functions named call.protected.js and token.js.
API Keys and TwiML Application
Inside your Twilio console, head to the Programmable Voice dashboard. On the left hand side, select Settings and then API Keys. Click the red plus sign to create a new API key. Give your key a recognizable name in the Friendly Name text field and leave the Key Type as Standard. Click the red button that says Create API Key.
On the following screen you’ll be shown several pieces of data, including an SID and SECRET. The SID is your API key. Copy this value and paste it into the .env file in your backend project folder as the value for the API_KEY environment variable. Then, copy the value for the SECRET into your .env file as the value for the API_SECRET environment variable.
You may want to make an additional backup of these values, because once you leave this screen, you won’t be able to access your SECRET again.
After copying your API credentials, click TwiML on the left-hand menu of your Programmable Voice dashboard, then click TwiML Apps. Click the blue plus sign to create a new TwiML App. Give it the name walkie-talkie, leave the other fields blank, and then hit the Create button.
Clicking the Create button will take you back to the TwiML Apps dashboard. Click on the app you just created to find your app SID immediately beneath the app’s name. Copy this value, and just like with your API credentials, paste it into your .env file as the value for the OUTGOING_SID environment variable.
Feel free to leave this page open in your browser, if you like. You’ll be coming back to it in a little while.
React Frontend
Back in your command prompt, navigate out to your project’s root directory (walkie-talkie), and run the following command to generate a new React app called walkie-talkie-frontend.
This command uses the create-react-app utility to scaffold up a new React app quickly.
When your new app has finished scaffolding, change directory into your new frontend folder:
Install the Twilio Client JS SDK, which is the SDK you’ll use to add voice capabilities to your browser (the virtual Twilio Device mentioned earlier).
At this point, the basic structure of your project is complete. Now it’s time to get coding!
Build the Walkie-Talkie Interface
The UI for the app will be built using a React class component. Open up the App.js file that’s inside your React project’s src folder. Delete the contents of the file and replace it with the following:
This code handles the basic imports your component needs, including the virtual Twilio Device you’ll be using to make and receive calls from the browser. It also creates a shell for the App class component.
Create the Constructor Method
The next step is add a constructor method to the App component that sets the component’s initial state. Inside the App class of App.js, add this code:
The three pieces of state initialized in the constructor are:
identity, which is the name that will eventually be assigned to the Twilio Devicestatus, which is the connection/call status of the deviceready, abooleanindicating whether or not the device is able to make or receive a call
Initialize the Twilio Device and Add Event Listeners
Underneath the constructor() method, add a new method called componentDidMount():
This is a special React lifecycle method that only runs when the component is first loaded, and not on subsequent rerenders. This is a great place to fetch data, add event listeners, or perform other actions that should only happen one time, on loading.
In this method, you’ll be initializing your Twilio Device, and adding several Twilio-provided event listeners on the device.
First, initialize the Twilio Device, and add it to the component’s state, so it’s accessible throughout the app:
As different events happen on the device, you’ll want to listen for them in order to perform certain actions and update the App component’s status state. Knowing the device’s status is especially helpful for logging and debugging. The events you’ll listen for are:
ready, when the device is authorized and set upincoming, when there is an an incoming call to the deviceconnect, when the device is trying to connect or accepts an incoming connectiondisconnect, when the device is no longer connected to another device
Add the highlighted lines to your componentDidMount() method to set up these event listeners.
Render the Component
Now, it’s time to add the render() method to the component. This is where your component comes to life! Beneath the componentDidMount() method, add the following code:
The render() method creates a <div> element with the class name App. Inside this element, the component checks to see if it’s ready state is true, indicating the device is ready to make a call.
If the device is ready, the render() method displays a <button> element with the text “Press to Talk”. Otherwise, the method displays a short form with a text field asking for the user’s name and a submit button. In either case, the status state is shown.
Eventually, the name that the user enters will become the identity of the Twilio Device. This identity is very important - without it, a device in another browser would not be able to find it.
Check and see if everything is working properly by saving your file and starting your local server.
In your command prompt, at the root of your walkie-talkie-frontend, your React project’s folder, run the command:
This will start a local server on port 3000, and you’ll be able to view your app at http://localhost:3000.
It will look similar to this:
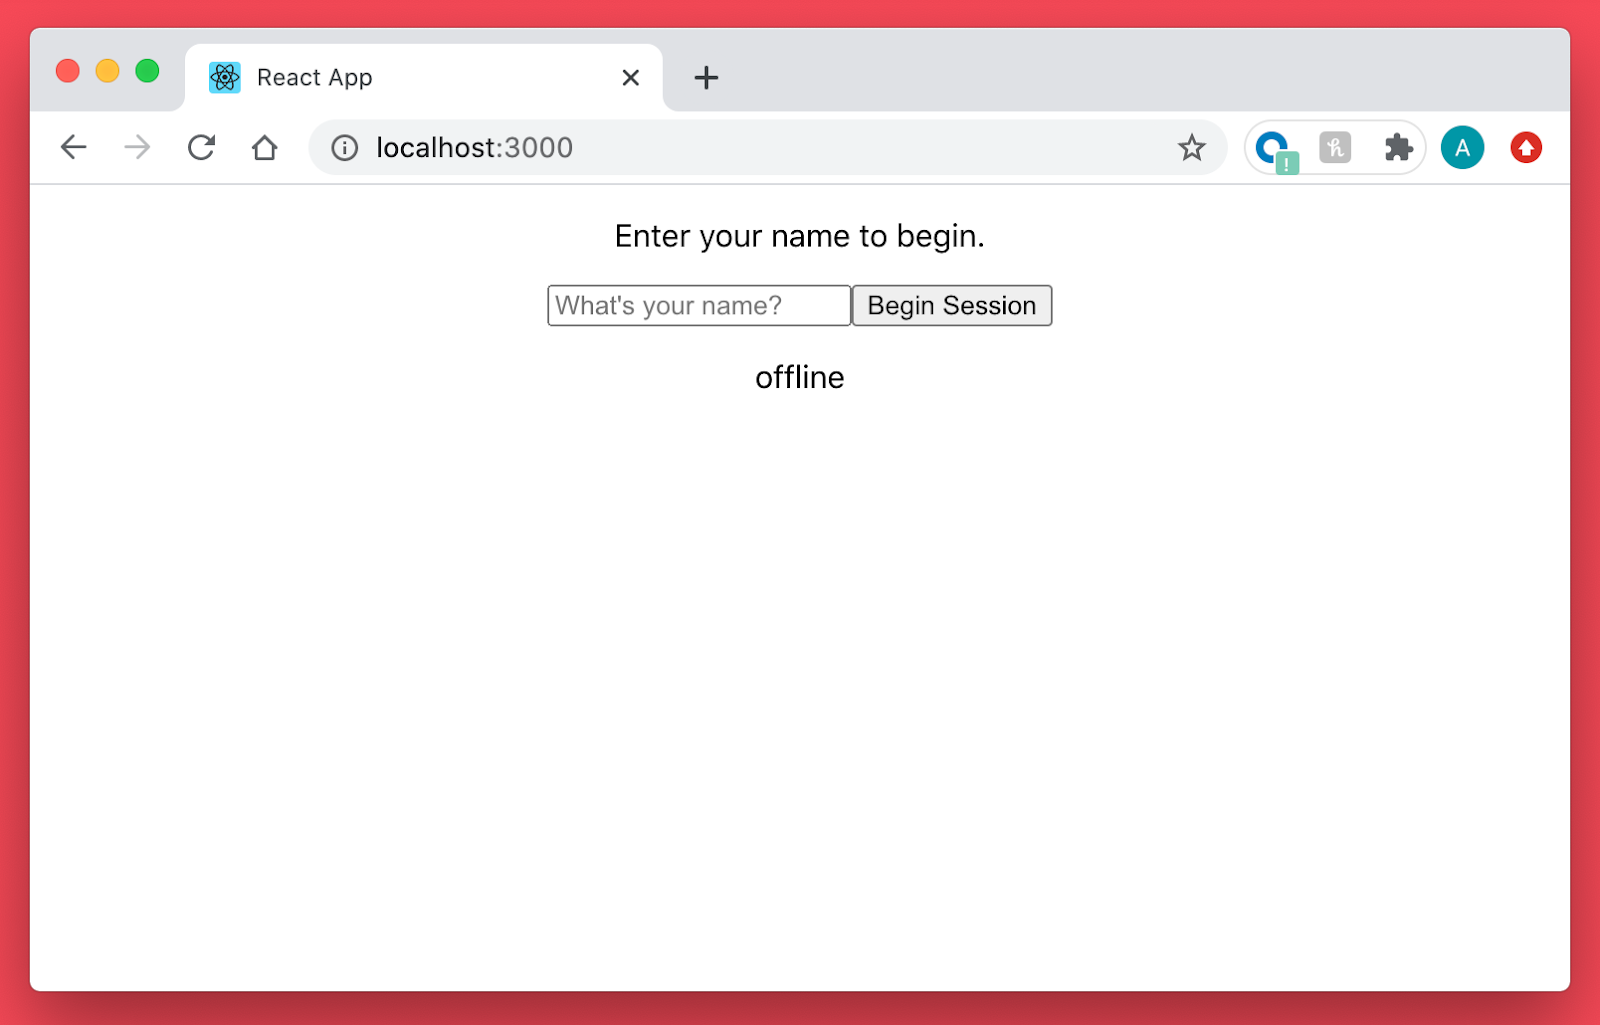
At this point the form is not functional, and you haven’t yet added the component methods necessary to set up and connect your device. Setting up those tasks will be your next steps.
Form Submission and Setting Up the Device
Back in App.js, between the componentDidMount() and the render() methods, create a new method called setup() that receives one argument: event.
This method will be called when a user submits the form to enter their name. This method is responsible for getting an access token from Twilio and using this token to set up the device. Because tokens are short lived, you don’t want to get one until you need it. That’s why this step isn’t triggered until a user action.
The second benefit of not setting up the device until there is triggering user action is that it tells the browser that the audio from the device is desired, and not background audio playing on its own.
At this point, it’s time to switch gears and head to your backend code. Before you can fetch an access token in the setup() method, you need to create the API endpoint that generates and returns the token.
Build Out the Backend
Generate the Access Token
Head to walkie-talkie-service, your backend project’s root directory, and look in the functions folder for the file you created called token.js.
Inside this file, create the shell for the Twilio Function that will generate the token:
Next, load all the environment variables you previously created. All of the environment variables are available in the context object provided by Twilio Functions.
When your React app fetches from this API endpoint, it will pass a URL parameter containing the identity set by your user. This identity will be shared with Twilio when you generate the access token for the device. This enables each device to have its own identity which can later be used to call that specific device.
This URL parameter will be available in the event object. Add a line saving this value to a variable:
Then, load the AccessToken object from Twilio.
Initialize a new AccessToken with your Twilio credentials and the device’s identity:
Another important step that you need to take is issuing your device a VoiceGrant. A VoiceGrant allows your device to use Twilio’s voice capabilities. You could also, if you wanted, give it a ChatGrant or a VideoGrant if you wanted your Twilio Device to be a participant in a Twilio Programmable Chat or Twilio Programmable Video app.
Finally, generate and send the endpoint’s response, being sure to set CORS headers so that your React app can actually receive the response:
Write Your Call Endpoint
Now you’ll build out the call.protected.js file. This endpoint is the webhook that will be called by your TwiML application when your device tries to connect. This is the function where the browser-to-browser connection is actually initiated.
It receives a recipient which represents a device identity (the identity of the device it’s going to connect to), creates a new VoiceResponse object, and uses that object to dial the recipient device.
Inside call.protected.js, add the following code:
Deploy the Backend
Save and close your call.protected.js and token.js files. You won’t need to edit them anymore.
In a new command prompt window, navigate to your backend project’s root directory, walkie-talkie-service, and use the Twilio Serverless Toolkit CLI to deploy your Twilio Function Service.
When the deploy command finishes running, you will see a list of your service’s functions and assets and their respective URLs.
Hang onto the URLs for the token and call endpoint - you’ll use them in upcoming steps.
Revisit the Frontend
Connect the Form to the Setup Method
With the backend deployed, and URLs in tow, you can now finish up the React frontend.
Back in App.js inside the walkie-talkie-frontend/src folder, find the setup() method you added earlier. Inside setup(), add the highlighted code, taking care to replace the first part of the placeholder fetch URL with your actual token endpoint URL. This URL should look like this https://walkie-talkie-service-xxxx-dev.twil.io/token.
This code makes a request to the token.js endpoint in your Twilio Function Service. In response, it receives the access token and uses it to set up the device. On lines 7-9 in the code above, the default sounds associated with making and receiving calls are turned off.
On line 3, the code makes a reference to the identity state. Until the user begins filling out the form, this value is an empty string. You want to ensure that this.state.identity accurately reflects what the user entered into the form at the time the setup() method is called.
To make this connection, revisit your render() method. On the form input, add a new attribute for value, and a second new attribute for onChange. See the highlighted lines below:
The value of the form input is now always tied to the current value of the identity state, which right now, is still an empty string.
The second new attribute, onChange, however, gives you the ability to update the value of identity everytime the value of form input is changed by the user.
When the user types into the form, a method named onChangeUpdateState() updates the value of this.state.identity to reflect the complete contents of what has been typed. When the component’s state is changed, a rerender occurs, and the new state is now the value displayed back to the user in the form field. This results in a seamless typing experience for the user, and an always up-to-date value for this.state.identity.
To add the onChangeUpdateState() method, copy the following code directly above the render() method:
Now, to connect the form to the setup() method, alter the <form> element to add theonSubmit attribute to the form:
Now, in your constructor method, add the highlighted lines to bind the JavaScript keyword this, so these new methods are able to access the component’s state within them:
Now, when the user submits the form, the setup() method will successfully be called.
Test out what you’ve done! Save your App.js file and restart your local React server if it's not already running by typing npm start in your command prompt at the root directory of your React project.
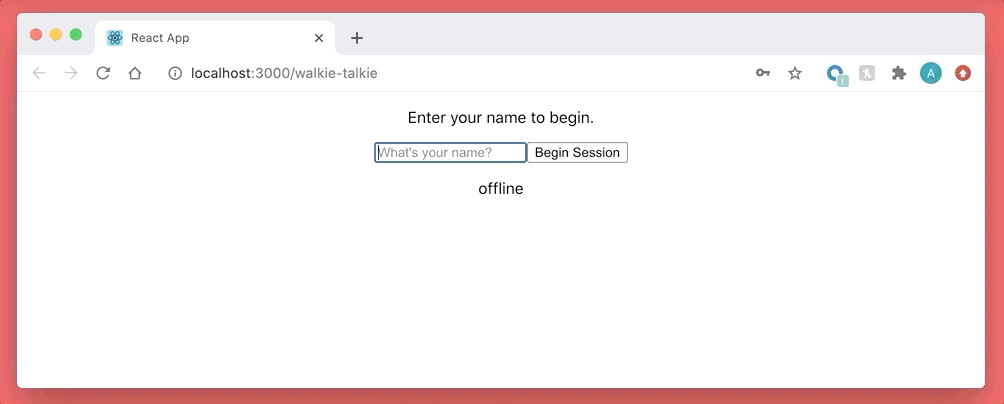
After ensuring your server is running, visit http://localhost:3000. At this point you will be able to type into the form and hit submit. The setup() method will run behind the scenes, and when your app has successfully set up the device, a Press to Talk button and the status of the device will be visible.
Go ahead and type your name and click on the Begin Session button to test it out.
Add Connect and Disconnect Methods
If you happened to click the Press to Talk button you would find that nothing happened.
This brings you to the last part of your React app: making a call with your device!
In true walkie-talkie fashion, the idea is that you press a button and hold it to talk. When you let go, the connection ends. An incoming connection could happen at any time, assuming your walkie-talkie is idle.
So, when the Press to Talk button is depressed (onMouseDown), a connection is made. When the click ends (onMouseUp), the connection is severed.
To implement this functionality, add onMouseDown and onMouseUp attributes to the <button> element in your render() method:
Now, when there is an onMouseDown event on the <button>, a method on the component named connect() will be called. Likewise, when there is an onMouseUp event on the <button>, a method named disconnect() will be called.
Beneath componentDidMount(), add the connect() method:
After setting the recipient, your connect() method calls the Twilio connect() method on your device, passing the recipient along with it.
The Twilio connect() method is, in essence, the same as dialing a phone number from a phone. It’s a call from your Twilio device.
Remember, any devices created via your React app are attached to the TwiML App you created in the first section of this post. When one of these devices makes a call, the call is captured by the webhook that you’ll soon set in your TwiML app, and sent to your backend (your call.js Twilio Function), where a TwiML VoiceResponse object dials the intended recipient device.
Finally, add your disconnect() method, beneath your connect() method:
This calls the disconnectAll() method on the device, severing the connection.
The last step in your React app is to add the bindings for the connect() and disconnect() methods to the constructor method, so they, too, are able to access the component’s state within them.
At the end of your constructor() method, add the highlighted lines:
With this, your React app is done!
Add the Webhook to the TwiML App
In your browser, navigate to the TwiML Apps section in your Twilio Console and click on the name of the TwiML App that you created earlier.
Copy and paste the URL to your call endpoint into the field called REQUEST URL under the Voice heading. This URL was created earlier when you deployed the app and should look something like https://walkie-talkie-service-xxxx-dev.twil.io/call.
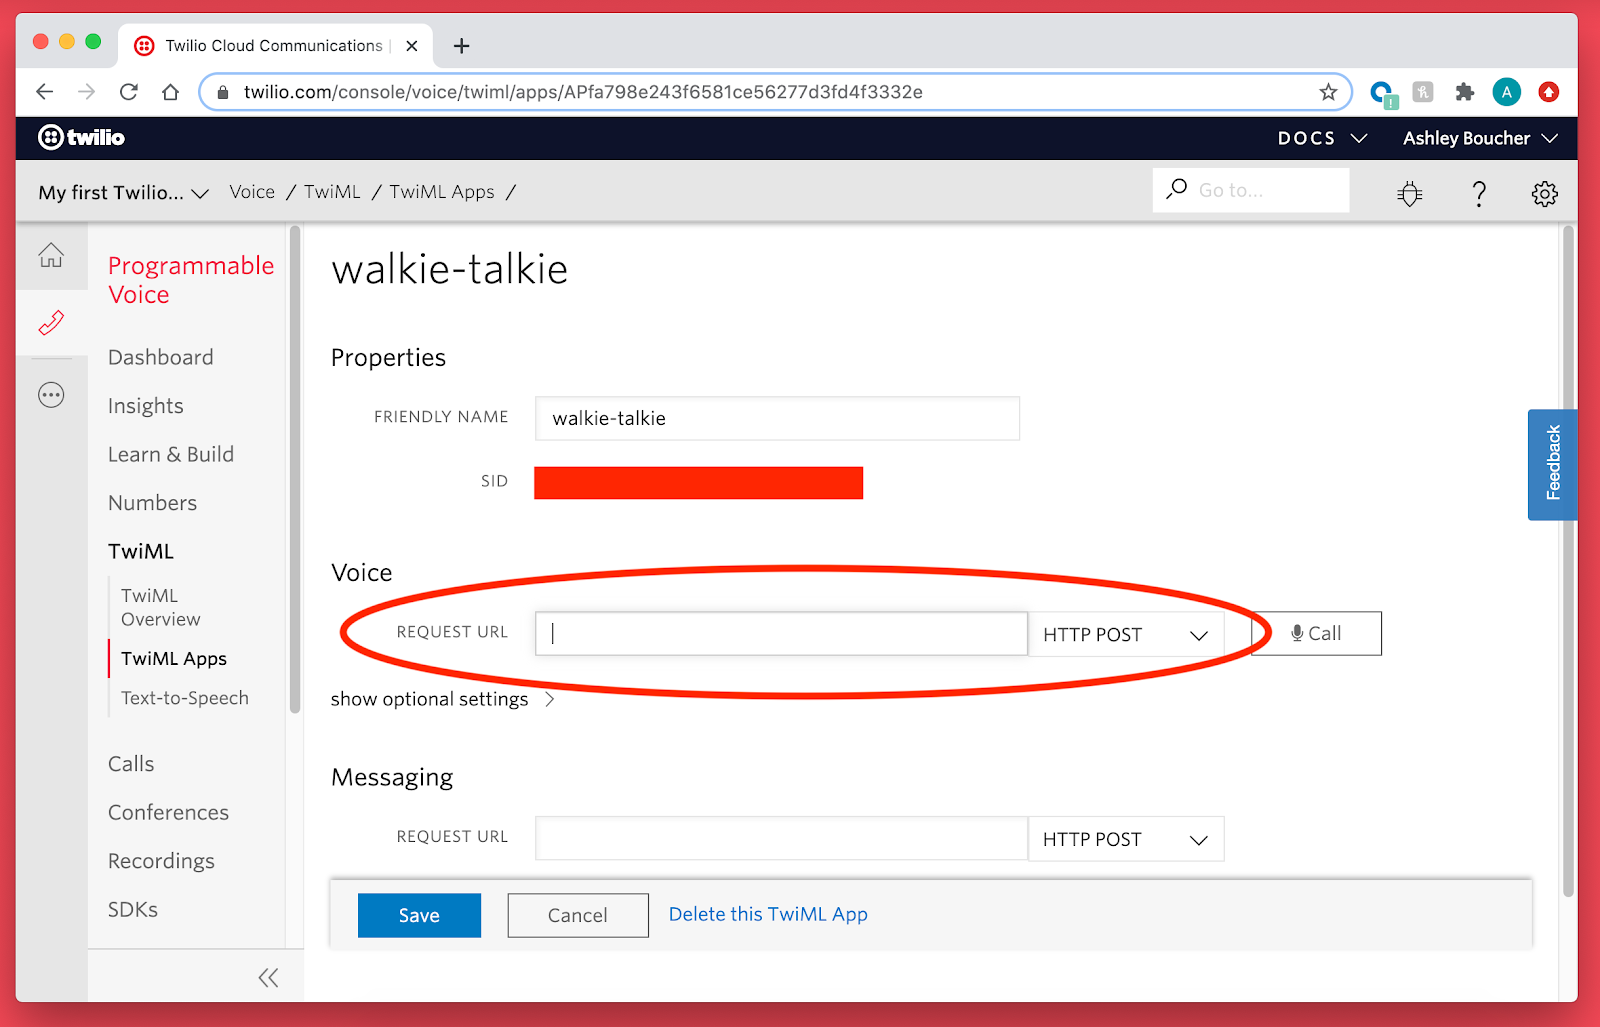
Click the Save button. You’re done!
Test the App
In order to test your app, you’ll need to be able to access your React app on two different browsers - ideally, on two different desktop devices (grab your partner or a friend, it’s fun!). You have a couple of choices:
- You can deploy your React app to GitHub pages or another location
- You can create an ngrok tunnel to your local React server
Either option will yield a secure URL to your app that you can follow on a second device.
Enter the name friend1 on one device, and friend2 on the second device.
Press and hold the Press to Talk button on the first device to have your voice transmitted to the second! When you’re done speaking, let go of the button. At that point, the other device can reply.
Next Steps
This tutorial gave a small window into the types of projects you can build with browser-based calling thanks to Twilio Programmable Voice. Aside from a walkie-talkie, there are plenty of applications that might involve initiating or receiving calls in-browser.
Feel free to extend this app, turn it into a browser extension, or install a local copy on your partner’s computer to chat with them all day long. It may (or may not) be better than texting.
I can’t wait to see what you build!
Ashley is a JavaScript Editor for the Twilio blog. To work with her and bring your technical stories to Twilio, find her at @ahl389 on Twitter. If you can’t find her there, she’s probably on a patio somewhere having a cup of coffee (or glass of wine, depending on the time).


Related Resources
Twilio Docs
From APIs to SDKs to sample apps
API reference documentation, SDKs, helper libraries, quickstarts, and tutorials for your language and platform.
Resource Center
The latest ebooks, industry reports, and webinars
Learn from customer engagement experts to improve your own communication.
Ahoy
Twilio's developer community hub
Best practices, code samples, and inspiration to build communications and digital engagement experiences.