Build a Video Chat App with JavaScript, Vue.js and Programmable Video
Time to read:
August 30, 2018
Written by

Vue.js is a powerful and approachable JavaScript framework that focuses on building user interfaces. One of the reasons why I like Vue is because it is easily adoptable. In this article, I will show you how to build a video chat application using Vue.js and Twilio Programmable Video. In the app, the participants will provide a username to get access to the chat app, then join a room (on the left of the screenshot below) to start chatting.
Here is a preview of what we'll be building:
Prerequisites
Basic knowledge of the following will be useful, but extensive knowledge is not required:
- Vue.js
- JavaScript
- Node.js (version 8 or above)
Before you continue, make sure you have Node.js installed on your system.
Getting Your Twilio API Keys
The first step to using Twilio Programmable Video chat is to get an access token. Twilio will generate a token using your API Keys. Twilio uses this token to make sure people using your app are authorised to do so.
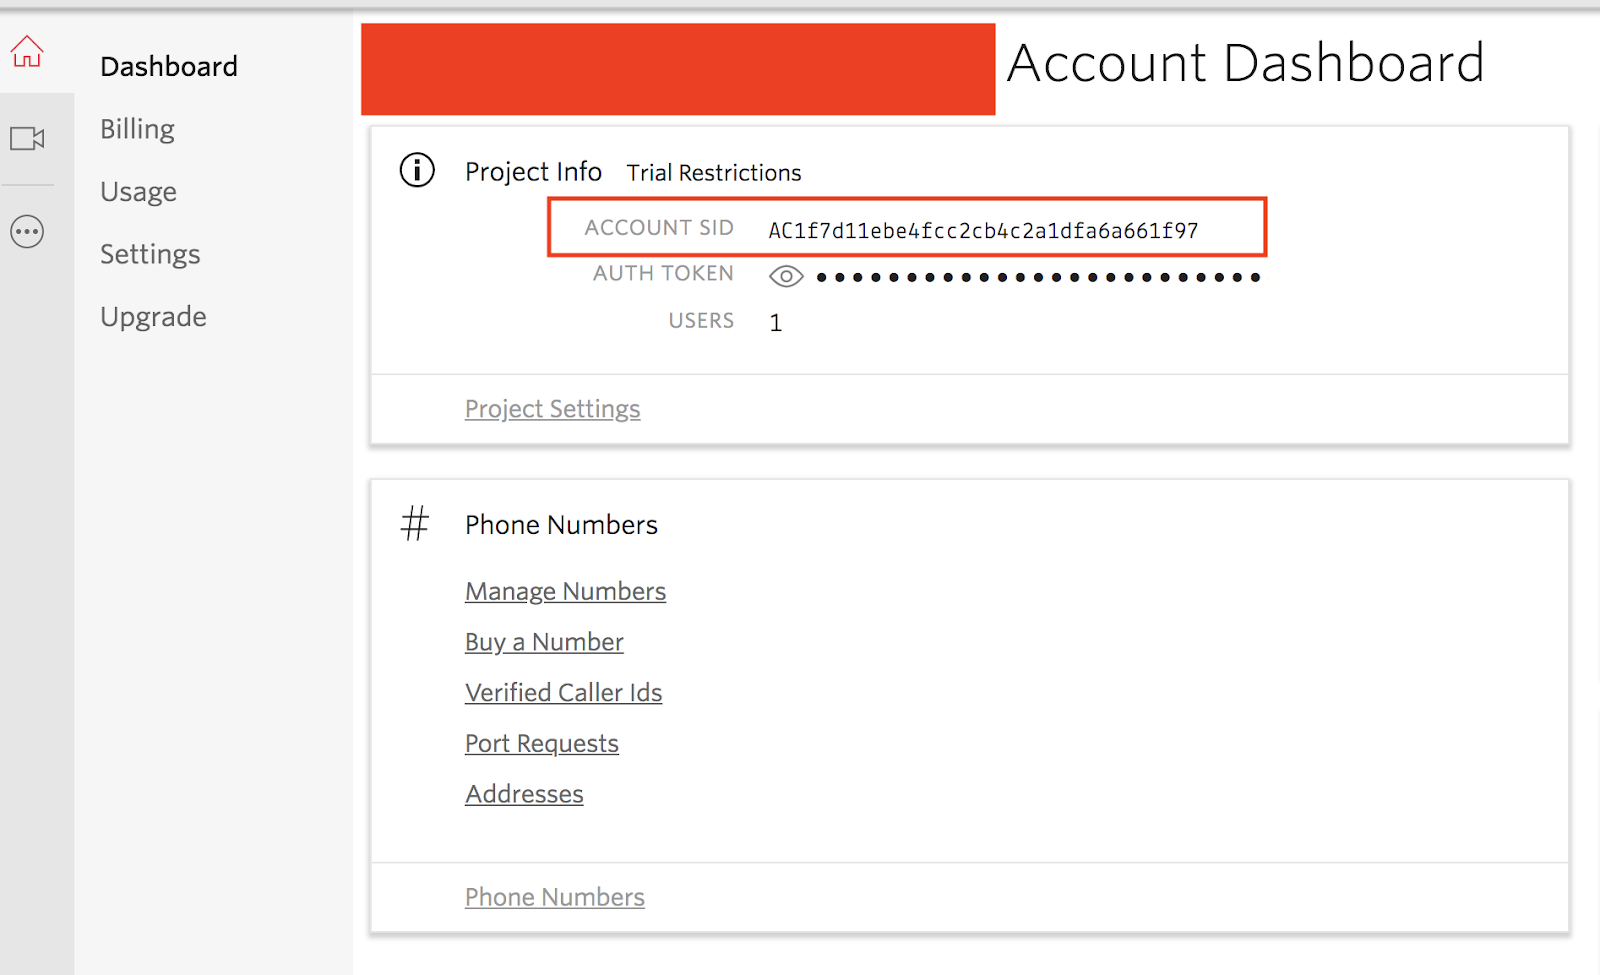
To get your Twilio API Keys, login or sign up for a free account. Once you are logged in, take note of the ACCOUNT SID on your dashboard.
Next, go to All Products & Services by clicking the icon on the left as shown in the image below:

On the popup that appears, click on Programmable Video. The Programmable Video dashboard will be loaded for you.
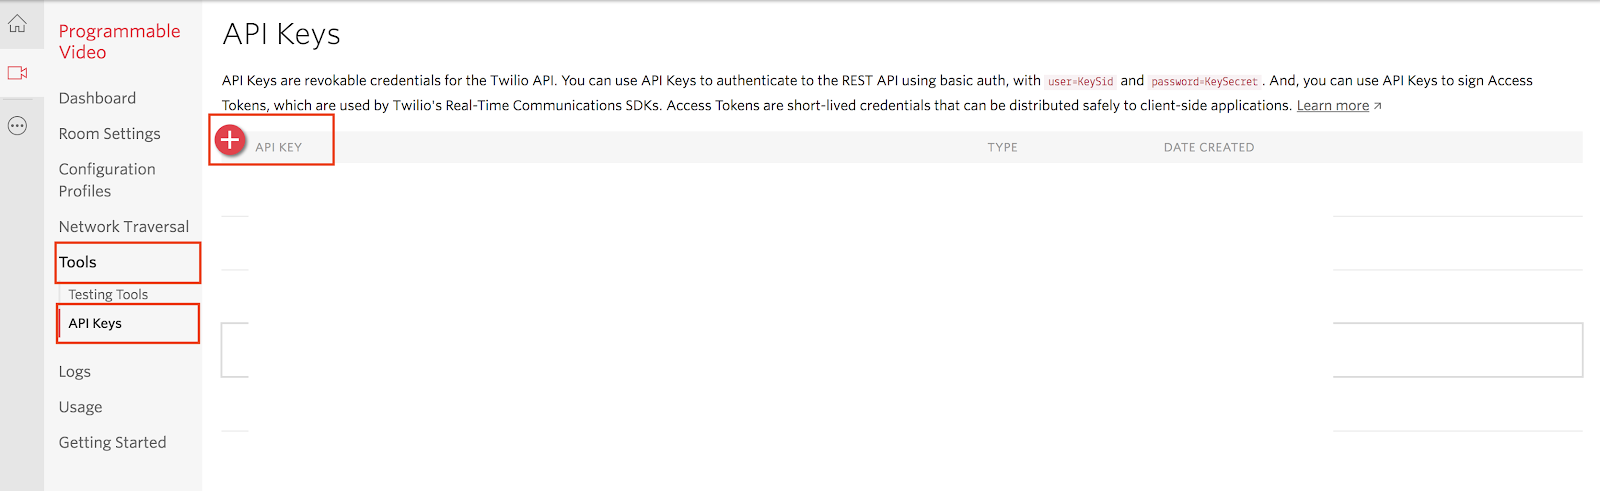
Next, click on Tools, then click on API Keys, and then click on the + icon as seen in the image below:
Lastly, input a friendly name in the FRIENDLY NAME input field and then click on Create API Key.
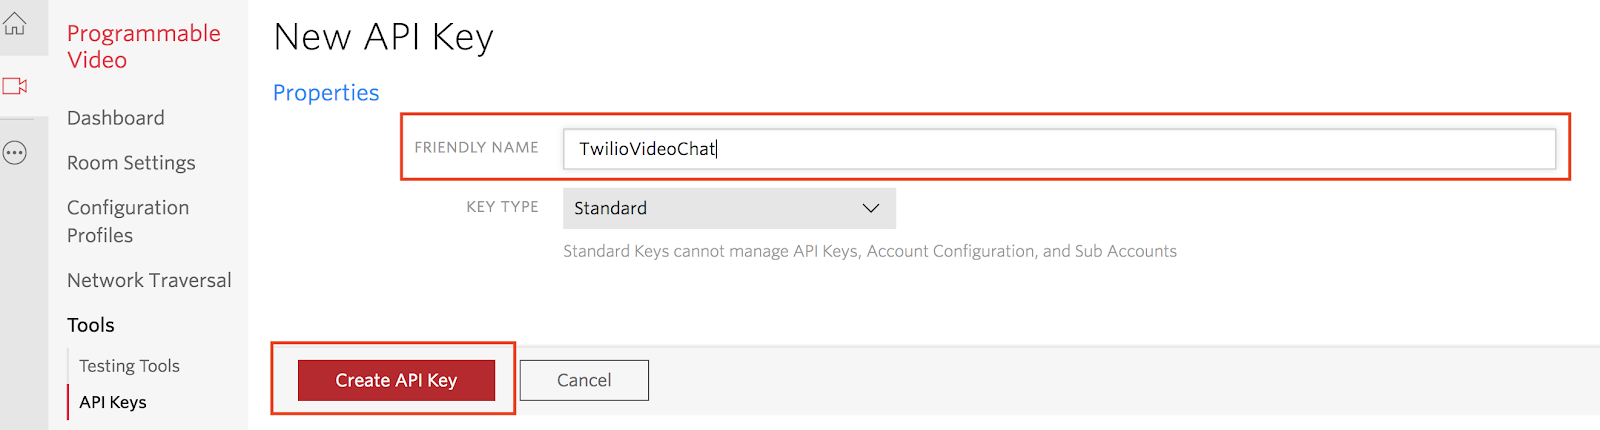
The page that will be loaded contains your API Keys. Note down your API SID key, SECRET key, and also your ACCOUNT SID key. We'll make use of these keys in the next section.
Generating the Access Token
I have written a basic Node.js app for generating tokens. Go ahead and clone the repository on Github, then start it up. You’ll find instructions on how to get the app up and running on the Readme. You'll need your API Keys.
💡 You can make use of any programming language to generate the token, provided you have your Twilio API Keys.
After installation, make sure to keep the server running. We'll connect to the server to generate token later on.
Setting Up the Vue App
Vue provides an official CLI for scaffolding a new Vue.js project. First, you'll need to install the Vue CLI globally on your system (if you don't have it installed already). Then, you'll create a new Vue project with the CLI commands .
To create a new Vue project, run the following commands on your command prompt:
If everything went well, your final command line output should be similar to this:
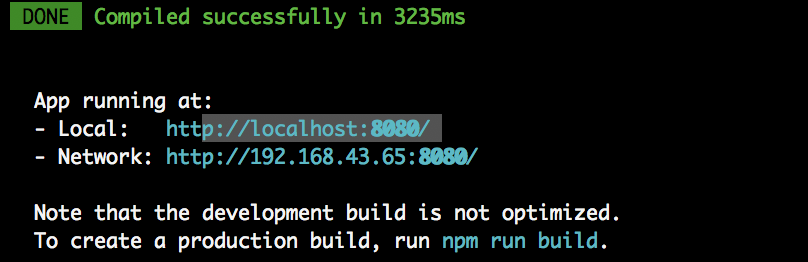
Now, visiting http://localhost:8080 will take you to a Vue default page which indicates that your setup is complete and successful. While the build is running, open a new terminal from where you can install dependencies. Also, make sure to change your directory to the project's root directory.
Install Dependencies
Twilio provides a JavaScript SDK that makes it easy to communicate with its Programmable Video API.
Add Twilio JavaScript SDK to the project by running the below command:
We'll use the axios module to make requests to our server for an access token. Add the axios module by running the below command:
Make sure you are in the root folder of the project before running the commands.
Twilio Programmable Video API Overview
Now that everything is set up, let's define some terms associated with the Twilio Programmable Video API:
- Room: This represents a real-time audio, video, and/or screen-share session.
- Peer-to-peer Room: This is a type of room in which media flows directly between participants. It supports up to 10 participants.
- Group Room: This is a type of room in which media is routed through Twilio's Media Servers. Up to 50 participants can be accomodated in this room.
- Participants: This represents client applications that are connected to a room and sharing audio and/or video media with one another.
- Tracks: This represents the individual audio and video media streams that are shared within a Room.
- LocalTracks: This represents the audio and video captured from the local microphone and camera.
- RemoteVideoTracks: This represents the audio and video tracks from other participants connected to the room.
Composing the Chat Interface
It's time to start creating the interface for our app. We'll use Bootstrap to help design the app. To add Bootstrap to the project, update the code in public/index.html with the following:
Here, we have added bootstrap css since we'll be using it to design our app.
In Vue, components are elements of the full app that encapsulate reusable code. The next thing we'll do is to divide our app into smaller components so we can build them separately:
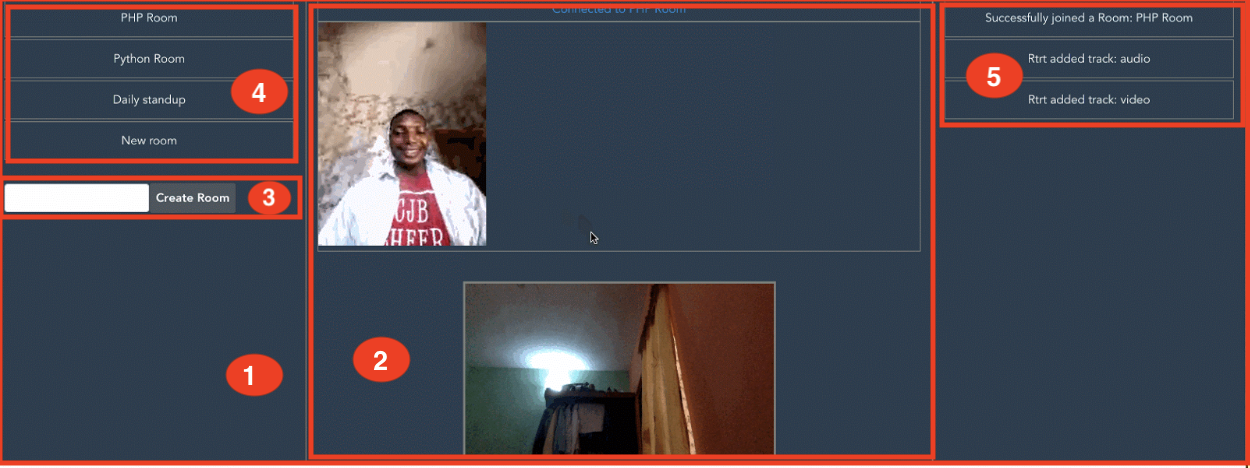
In the above image, we have:
- [1] - Our main component that will house other components. This is usually the
App.vuefile. - [2] -
VideoComponent. The component that we'll use to list the Local of Remote tracks. - [3] -
AddRoomComponent. Component for adding new rooms. - [4] -
RoomsComponent. Component for listing rooms. - [5] -
LogsComponent. For displaying logs.
We will be creating this component in the next sections.
Triggering and Listening to Events
Before we start creating our components, let's talk about how our components will interact with each other.
At times, child components need to communicate with one another. For example, the AddRoom component will contain a form which will be used to create a new room and the Rooms component needs to know when a room form is submitted so it can list it.
When the user submits a new room to be created in the AddRoom component, our app will send a trigger to the Rooms component so it knows what has happen and take action.
This can be achieved using event bus, which is a Vue instance.
Create a new file called Event.js in the src folder and add the following code to it:
Here, we are exporting a vue instance.
When there is a need to trigger or listen to an event in a component, we'll import the Event.js file.
Putting all the Components together
Although we've not created any component yet, it will make sense to bring all the components that we'll create together now. So that when you build along, you'll be able to see the changes.
Now let's bring all the components we'll create together. We'll import all components to App.vue which is the main entry component file.
Update src/App.vue with the following code:
Here, you will see that we've added - <Rooms />, <Video>, and the <Logs /> component.
Also, we used the v-if directive to determine which view to display to the user when they load up the app. Since we need a username to create an access token for each user, once they open the app, we'll display a form for them to supply their username.
Once the user enters a username we'll display the app view for chatting. The app uses the authenticated data to determine which view to display. We haven’t declared the authenticated data yet, we'll do this next.
Also, we passed down the username provided by the user to the Video component as property.
Next, add the following code to src/App.vue immediately after the closing </template> tag:
First, we imported all components that we'll create to this file.
In the data method, notice that username is empty and authenticated is false. When the user enters their username, we'll update the username data. Then, if the provided username is valid (not empty, in our case), we'll set authenticated to true.
When the authenticated data is set to true, the user can now start chatting.
NOTE: You'll get an error on the page when you visit http://localhost:8080/. It's okay to get the errors for now because we've not created the components we imported yet.
AddRoom Component
Next, let's create the AddRoom component which will contain a form for adding a new room.
Create a new file called AddRoom.vue in the src/components folder and add the following code to it:
If you are familiar with Vue, you should have an idea of what is going on here. This is one of the ways of creating a Vue component known as the single file component.
Here, we have three sections: <template>, <script>, and <style>. All HTML elements goes to the <template> tag, all JavaScript code goes to the <script> tag, and the styling for the component goes to the <style> tag.
Also, we'll use the v-model directive to create a two-way data bindings for the form input. The @submit.prevent directive will prevent the form from submitting normally, and thereby call the createNewRoom() method.
We'll also use the createNewRoom() method to trigger an event named new_room using EventBus.$emit('new_room', name);.
The first parameter passed to the $emit() method is the name of the event while the second parameter is the value we want to pass along, which in our case is the room name. We'll listen to this event in the Rooms component which we'll create next.
Rooms Component
We'll use the Rooms component to list rooms. To add the Rooms component, create a new file named Rooms.vue in the src/components folder. Then add the following code to it:
The v-for directive in the <template> tag will render the rooms. Also, we'll use the @click directive to listen to click events from the user. When a room is clicked, we'll load up the chat for that particular room by calling showRoom() method.
Next, we'll use the showRoom() method to trigger an event - 'show_room'. When a room is clicked, we'll call the showRoom() method, which will be responsible for listing tracks for the particular room.
We also have some default rooms as seen in the data() method which we have hard-coded to the app. We'll list these rooms once the app is loaded.
Let's listen to new_room event. In the AddRoom component, there is a form for adding a new room. Once the room form is submitted, a new_room event will be triggered. We need to know when this happens in this component (Rooms component) so we can append the newly created room to the list of rooms. To achieve this, update the created method in src/components/Rooms.vue, which is empty with the following code :
The created() method is a Vue method for executing statements as soon as Vue is loaded.
Log Component
It feels good to see things as they happen. We'll add logs of all the action taking place in a room, such as when a user joins a room or leave a room.
Create a new file named Logs.vue in src/components/ folder and add the following code to it:
Here, in the data() method, we've have defined an array for holding logs. When there is a new log, we'll append the log to the array.
Then with v-for directive, we'll loop through the log array and display the logs to the view.
In the created() method, we are actively listening for a new_log event. When there is a new log, we'll append the log to the logs array.
Video Component
We'll use this component to display local and remote tracks. When a user clicks on a room, we will initiate a chat for that room and display the tacks to the respective DOMs.
Create a Video.vue file in src/components and add the following code to it:
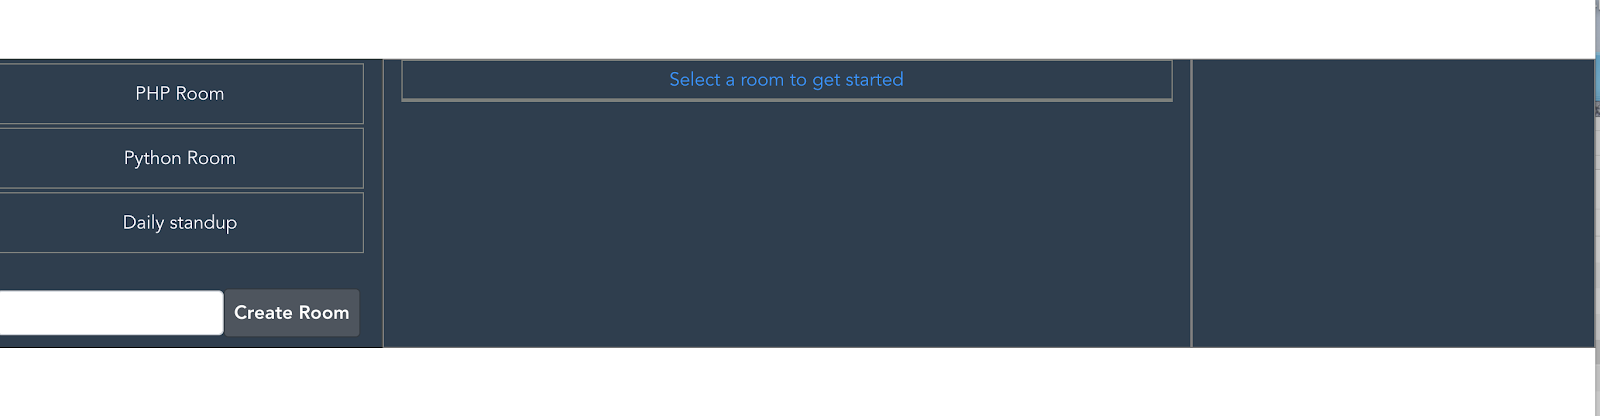
In the <template> tag, we have a couple of conditions that check if we are loading up a chat. So if we are initiating a chat, we'll display Loading... {{roomName}}. If we are not loading a chat and the roomName has been set, we'll display Connected to {{roomName}}. Otherwise, we'll display Select a room to get started.
In the data() method, we have initiated some variables which we are going to use soon.
We also imported the Twilio JavaScript package to this component, which will make it easy to interact with Twilio.
Also, in the methods block, there are a couple of empty functions we have defined in there. We'll be adding their respective code step by step as we proceed in this tutorial.
Now that we have all the components. The page should now look like below:

When you enter a username and submits:
Starting up the chat
To start up a chat, we need a token. Let's add a function for generating these access tokens. Add the below code to the getAccessToken() block in src/components/Video.vue:
💡 http://localhost:3000/ is the address of the Node.js server we created earlier.
Here, we are connecting to our Node.js server to generate a token.
this.username is passed as a props to the Video component. We'll ask a user to provide a username before they can access the chat. Then, we'll use this username to uniquely identify each user using our application. We'll implement this soon.
Next, add a function for triggering a log events. Add the below code to the dispatchLog(message) function in src/components/Video.vue:
Next, add a function for attaching track to the DOM. Add the below code to the attachTracks(tracks, container) function in src/components/Video.vue:
Next, add a function for attaching the participant's tracks to the DOM. Add the below code to the attachParticipantTracks(participant, container) function block in src/components/Video.vue:
Next, add a function for removing attached tracks from the DOM. Add the below code to the methods: { } block in src/components/Video.vue:
Next, add a function for removing the attached participant's tracks from the DOM. Add the below code to the detachParticipantTracks(participant) function block in src/components/Video.vue:
Finally, add a function for leaving a room a user joined. Add the below code to the leaveRoomIfJoined() function block in src/components/Video.vue:
Let's create a function for creating a chat room. Add the following to the createChat(room_name) function block of src/components/Video.vue:
In the preceding code:
this.getAccessToken()will fetch access token for a user from the Node.js server we created earlier.
connectOptionsis a variable that holds the option for creating a new chat in Twilio. Here we passed in the room name, video frame width, etc.- Next, we call the
Twilio.connectmethod which will create the room which requires a token.
Next, let's attach all tracks of all participants already in the room before a user joins.
Add the following code to the Twilio.connect method block in src/components/Video.vue file just after the // Attach the Tracks of all the remote Participants. comment.
Next, log an event when a user joins a room. Add the following code to the Twilio.connect method block in src/components/Video.vue file just below the // When a Participant joins the Room, log the event. comment:
Next, add tracks to the DOM as soon as a user attaches a new track. Add the following code to the Twilio.connect method block in src/components/Video.vue file just below the // When a Participant adds a Track, attach it to the DOM. comment:
When a participant removes a track, we need to remove the track from the DOM. Add the following code to the Twilio.connect method block in src/components/Video.vue file just below the // When a Participant removes a Track, detach it from the DOM. comment:
Next, let's remove the tracks of a participant from the DOM as soon as they exit the chat. Add the following code to the Twilio.connect method block in src/components/Video.vue file just below the // When a Participant leaves the Room, detach its Tracks.:
At times, before joining a room, you want to see how you look. Let's display a local track to the DOM.
Finally, add the following code to the Twilio.connect method block in src/components/Video.vue file below the // if local preview is not active, create it comment:
If you've followed closely, your Video.vue file should look like this.
Once Vue is initiated, we'll start listening to events for when a user wants to enter a new room.
To do that, add the following code to the the created() method block of src/components/Video.vue component:
Now, when there is a show_room event, we'll call the function we just created above - createChat, to create a chat for that room.
Wrapping it Up
Well done! To test what you have built, load up the application in different tabs on your browser, fill in your username, and then click on any room to start communicating.
In this tutorial, you have seen how to add video chat to your Vue.js application using Twilio Programmable Video chat technology.
One more thing. We used a simple means to get a username for those using the application, but this method isn’t quite secure. If what you are building is not meant to be publicly accessible, you should consider a means of authenticating your users, so that only users you trust can use the app. You can check out https://www.twilio.com/docs/authy for authenticating users. You can also get the full app on Github.
If you have any questions or contributions, I'll love to hear from you. You can reach me on Twitter: @onwuka_gideon.
Related Resources
Twilio Docs
From APIs to SDKs to sample apps
API reference documentation, SDKs, helper libraries, quickstarts, and tutorials for your language and platform.
Resource Center
The latest ebooks, industry reports, and webinars
Learn from customer engagement experts to improve your own communication.
Ahoy
Twilio's developer community hub
Best practices, code samples, and inspiration to build communications and digital engagement experiences.