Build a Progressive Web Application with Django and Angular Part 1: Backend API with Django
Time to read:
July 05, 2022
Written by
Reviewed by
Progressive Web Applications (PWAs) are web apps that use a variety of design techniques and browser-based technologies to appear and behave like native mobile or desktop apps. When properly implemented, PWAs provide both users and developers with the best of both worlds from these different platforms. Web applications have many advantages over native apps: they are easily discovered via online search engines, can be shared by URL links, and have the ability to be deployed at will and visited almost instantly in any web browser. For both developers and users, this provides a more seamless process than going through a proprietary app store for the software release and update process, as well as the installation and download experience. Native apps, however, offer access to device features such as cameras, microphones, and geolocation. They can also be used offline and conveniently opened directly from a user’s home screen.
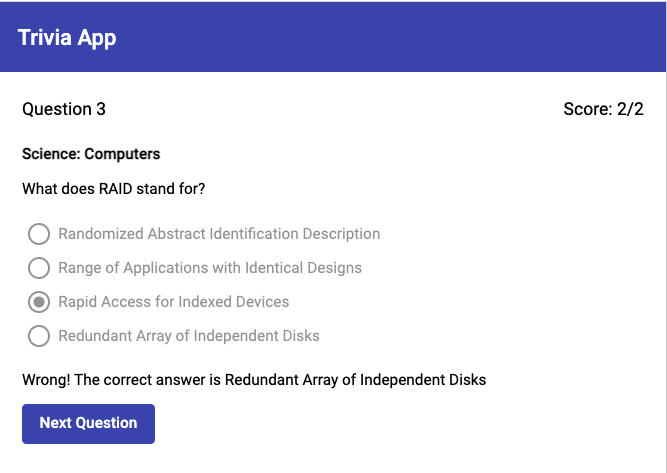
In this tutorial series, we’ll build a simple trivia game as a PWA that combines the best aspects of both web and native apps using Python and Django for our server-side API and Angular with TypeScript for our frontend interface. For part one, we will focus on building our project’s backend API.
Tutorial requirements
- Python version 3.6 or higher. If you do not have Python installed on your computer, you can download a free installer here.
- The Django backend web framework which we will install with Python’s pip package manager in the section below.
Django project setup
Begin by setting up a local Django project for your PWA’s backend API. Create a new directory on your file system to hold all of your project’s files beginning with a fresh Python virtual environment where you can install your Django project’s dependencies:
Then activate the virtual environment with the following command for Mac or Linux:
On Windows the source activation command looks like this:
With your virtual environment activated (you should see its name at the beginning of your command line prompt in parentheses), install your project’s Python dependencies with the pip package manager:
Here you installed Django along with the Django Rest Framework which will allow you to use Django for building your PWA’s backend API, the Django Cors Headers package to facilitate cross-origin communications between the frontend and backend of your app, and the Requests library for consuming your trivia data from a free, public API with Python.
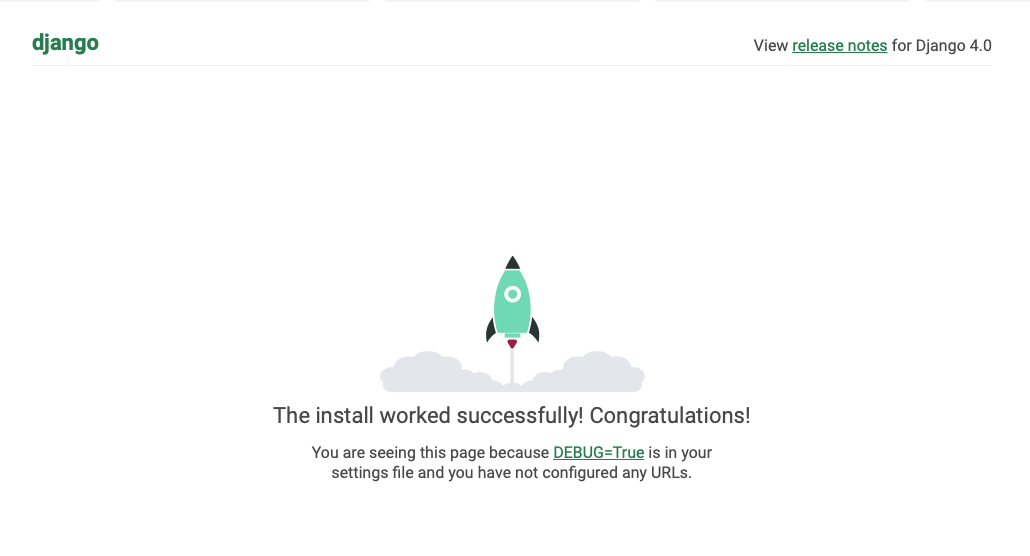
Create your new Django project and check that everything is working properly with your installation by running the following commands:
Now if you open http://127.0.0.1:8000/ in your browser, you should see the default Django start screen.
Build the Django Trivia API
Our Django Trivia API will provide a single read-only endpoint for retrieving a list of trivia questions from our project’s database in JSON format. Let’s begin by creating a new Django app inside our Django project with the necessary files to get started coding our API. Open a new terminal tab with your project’s virtual environment activated and run the following command from your Django project folder at djangular-trivia-pwa/djangular_trivia_api/:
Open your Django project in a text editor or IDE, and you should see a new trivia directory containing the auto-generated files that we need to start building our Django application. Edit your project’s settings file at djangular_trivia_api/djangular_trivia_api/settings.py to add the trivia app to the INSTALLED_APPS setting so that Django knows to load the app as part of your project. Go ahead and add rest_framework and corsheaders to INSTALLED_APPS as well, as we will use these 3rd party Django packages that we installed via pip in our project shortly:
For our API’s trivia data, we will use the Open Trivia DB API, which provides a freely available dataset of trivia questions and answers licensed under the Creative Commons Attribution-ShareAlike 4.0 International License.
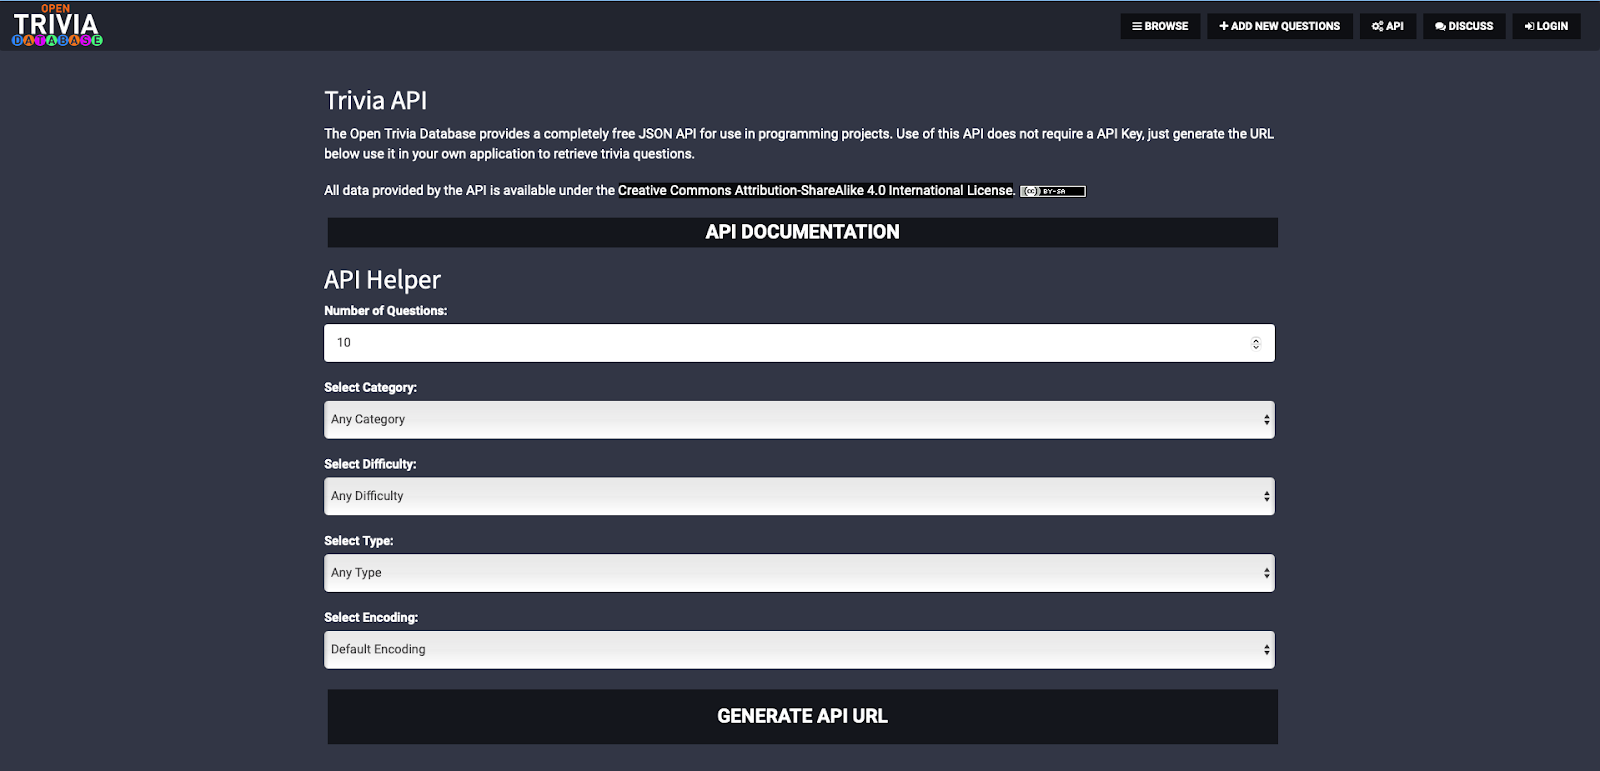
In order to know how to model our application’s trivia data, we’ll need to take a look at the format of the data that the Open Trivia DB API provides. Click on the GENERATE API URL button and you should receive a message with an endpoint that looks like this https://opentdb.com/api.php?amount=10.
From the command line in your Django project folder alongside the manage.py file, run the following command to open the interactive Django shell:
Your terminal should show the following output, and the commands you enter will now be run in the context of your Django project environment, allowing you to import modules from your project dependencies along with any custom modules, classes, and functions that you create within the scope of your Django project:
In order to consume trivia data from the Open Trivia DB, we can import the Python Requests library which we installed in our virtual environment along with our other dependencies. Import the library in the Django shell, and make a GET request to the Open Trivia DB API with the following commands:
Now if you enter response.json() into the shell, you should see a blob of JSON trivia data dumped to the console. Under the 'results' key in the outer JSON object, there is an array of individual question objects. Take a look at one of these objects so that you can determine how to model your own trivia data for storing in your project’s database:
It’s up to us how much of this data we want to store and use in our app but we will need one table in our database for storing questions, and another for storing the multiple-choice or true/false answer options associated with those questions.
Close out the active Django shell session by entering quit() at the command prompt and open the djangular_trivia_api/trivia/models.py file. Replace that file’s contents with the following code:
Here we’ve defined two separate Django model classes, one for questions and one for answers. The Question model includes a category field so that we can display the category to our end users along with the question itself. The Answer model includes a ForeignKey to the Question model in order to create a one-to-many relationship between a question and its associated answer choices. The Answer.is_correct BooleanField allows us to indicate which of the answer choices is the right one. Finally, the __str__ methods included on both classes tell Django how to build a readable representation of our model classes for displaying in the Django admin interface as well as in the Python console.
In order to use these model definitions to create your actual database schema, run this Django management command from the outer djangular_trivia_api folder.
The makemigrations command will produce the following terminal output, indicating that your migration file has been successfully generated at djangular_trivia_api/trivia/migrations/0001_initial.py :
We can now execute our database migration by running this command:
When you run the migrate command, Django uses your migration file to execute SQL commands on the SQLite database included with your project’s starter template files, creating the actual database tables for your project’s trivia data (as well as the rest of Django’s default database tables).
With our database schema defined and tables created, it’s time to seed the initial data for our project.
Open a new session in the Django shell:
Import the Requests library and call the Open Trivia DB endpoint again, this time storing the response.json()['results'] data in a trivia_questions Python variable so that you can work with it in the shell:
Now if you enter trivia_questions at the prompt in the shell, you should see the list of questions as Python dictionaries printed to the console.
One of the handiest things about the Django shell is that it allows you to interact directly with your Django models, querying your database for model data or creating new model instances to populate the rows of your database tables. Enter each line of the following script one at a time in the shell, being sure to indent your Python code blocks 4 spaces, and you will be rewarded with a fully seeded database of trivia questions and answers:
Here we loop through the trivia_questions list, instantiating a new Question model instance, q, with the 'category' and 'question' data using the Question.objects.create() method. We then create an Answer model for the 'correct_answer' item, setting the is_correct field to True, and associate it with the proper Question model by setting the question field to the model instance value q. The same pattern is used for creating incorrect Answer instances and setting is_correct to False.
To confirm that your Django models saved as expected and the data is stored in your database, enter the following variable assignment into the shell:
If you enter questions at the shell prompt, you should see a Python list of 10 random trivia questions.
Now that we’ve created our models and saved the initial data for our project, we can use the Django Rest Framework (DRF) to build our API endpoint and serve that data as JSON for the frontend of our application to consume. Create a new file called serializers.py inside of the djangular_trivia_api/trivia/ folder and add the following code:
DRF’s serializers.ModelSerializer class provides an interface for translating data from your Django models into serialized JSON that you can serve to your frontend client app. If you are familiar with Django’s built-in form handling classes, DRF serializers work in much the same way. ModelSerializer sub-classes will validate incoming data according to the Django model field validators in the same way that a ModelForm allows you to create HTML forms with validations based on existing model field definitions.
The AnswerSerializer will serialize the data from your Answer model and specify which model fields you want to provide in the JSON representation with the inner Meta class’s model and fields attributes. This serializer is then utilized to define the answers field in your QuestionSerializer class and to represent a nested relationship in the JSON where each question object contains an array of serialized answer objects.
After defining your serializers, open the djangular_trivia_api/trivia/views.py file and replace its contents with the following code:
DRF’s ViewSet classes can be used to automatically generate URL endpoints from serializer classes that perform CRUD actions on the models in your database based on RESTful API conventions and the standard HTTP methods of GET, POST, PUT, PATCH, and DELETE. In this case, we use the viewsets.ReadOnlyModelViewSet as the base class for our QuestionViewSet to allow only read-only GET requests for our data. We then set the queryset to return all of the Question objects in our database and the serializer_class attribute to specify the QuestionSerializer class that defines our data’s JSON representation.
We can now use our QuestionViewSet along with the DRF routers.DefaultRouter class to generate the URL endpoints for our API by replacing the contents of djangular_trivia_api/djangular_trivia_api/urls.py with the following code:
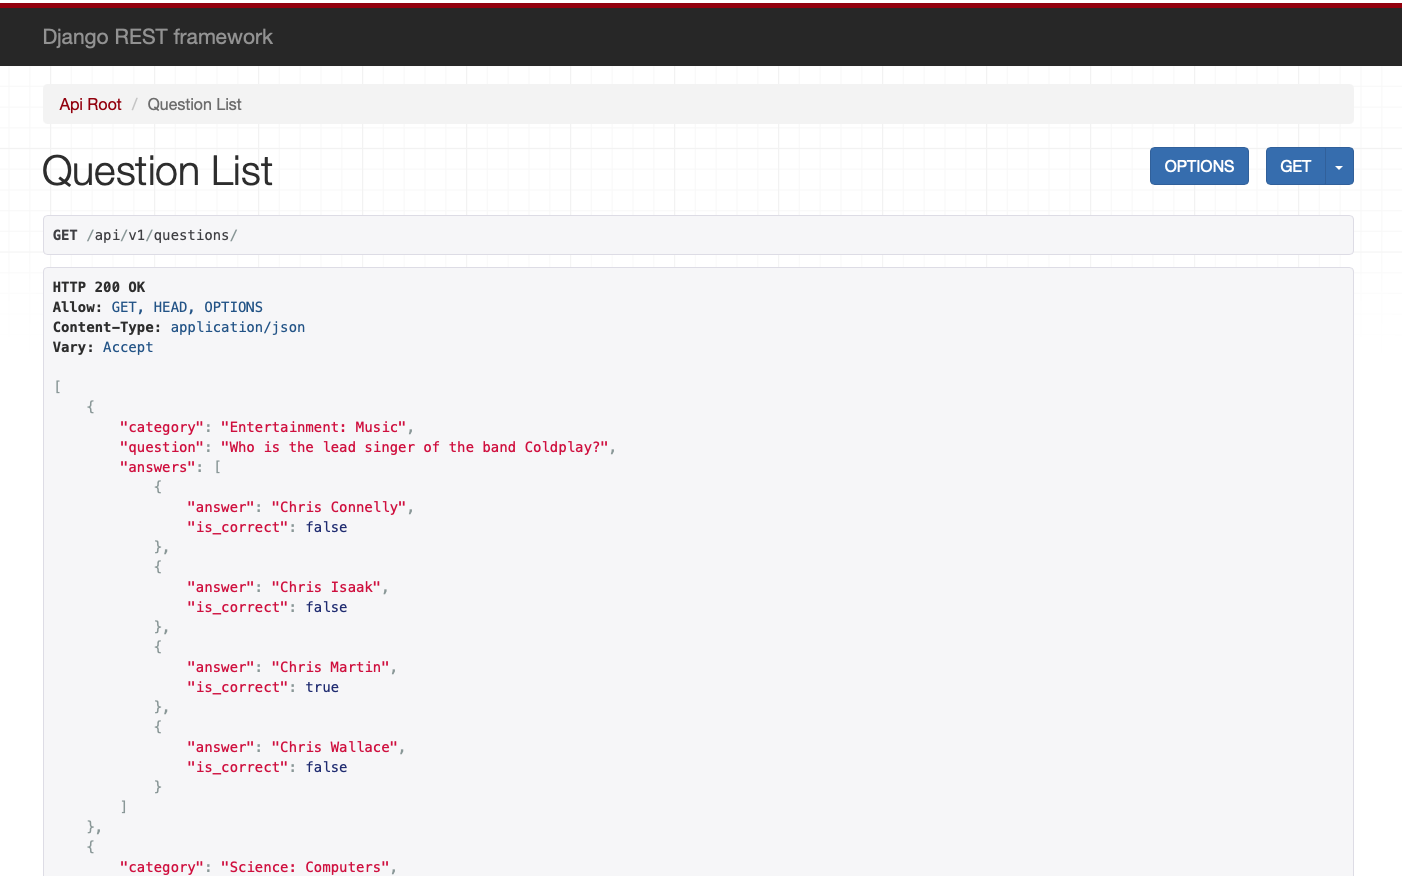
After registering your ViewSet with the router, with your local Django server running, navigate to http://127.0.0.1:8000/api/v1/questions/ in your browser and you should see something similar to the following screenshot of the DRF’s browsable API displaying the JSON representation of your trivia data:
Nice. Now that your API is serving JSON, we just need to add a bit of configuration for the Django corsheaders package to facilitate cross-origin communication with our Angular frontend. Open djangular_trivia_api/djangular_trivia_api/settings.py and add this line to the top of the MIDDLEWARE setting:
Then create a new CORS_ALLOWED_ORIGINS setting at the end of the file to allow communication with our locally hosted Angular application:
Conclusion
In part one of this tutorial series we built the backend API for a Progressive Web Application that will serve data to our project’s frontend interface. We used Django models to create and populate our database and the Django Rest Framework to create an API endpoint for our application’s UI to consume. With this in place, we can now shift our focus to building the frontend of our trivia game PWA and create the user interface code with Angular in the second part of the series.
Robert Alford is a software developer, writer, and educator based in Seattle. You can find him on GitHub and LinkedIn.

Related Resources
Twilio Docs
From APIs to SDKs to sample apps
API reference documentation, SDKs, helper libraries, quickstarts, and tutorials for your language and platform.
Resource Center
The latest ebooks, industry reports, and webinars
Learn from customer engagement experts to improve your own communication.
Ahoy
Twilio's developer community hub
Best practices, code samples, and inspiration to build communications and digital engagement experiences.