Build Round Robin Call Forwarding Using Twilio Studio & Functions
Time to read:
April 07, 2020
Written by

One of the most common application workflows – regardless of the context – is round robin routing.
You can build round robin routing in a straightforward way with programming logic. However, to run this logic, you need a web server which must be managed – introducing a whole new realm of responsibility. While for larger operations this isn’t a problem, mom and pop shops don’t want to take this on and it often puts this functionality out of reach.
Now with the help of Twilio’s Runtime suite, including Twilio Studio and Functions, you can build your own round robin call forwarding application without worrying about your own web server. In this post, I’ll show you how to set up a serverless round robin call forwarding solution.
Prerequisites
In order to follow this tutorial, you will need:
- A Twilio account and active number. If you don’t have an account, go ahead and create one now.
Optional Installation
If you already have Node.js installed on your machine (or are interested in using it in the future) then follow the steps below to make sure the Twilio Node.js module is installed and ready to use.
Otherwise, feel free to skip ahead and either follow the curl instructions or use another helper library to create the variables.
Install Node.js
You can check if you already have Node.js installed on your machine by opening up a terminal and running the following command:
node --versionYou should see something like:
node --version
v8.9.1
If you're on version 2.11 or earlier, we recommend you upgrade with the most recent version.
If you don't have Node.js already installed, you can install it with homebrew, another package manager by going into your terminal and typing this on the command line:
brew install nodeIf you have a Windows machine, you should install nvm-windows to install both Node.js as well as npm, the Node.js package manager. Windows users can follow this excellent tutorial.
Install the Twilio Node.js Module
The easiest way to install the library is using npm, the Node.js package manager that lets you install the libraries you need.
Simply fire up a terminal or command line interface on your machine that already has Node and npm installed, and run the following command in a new directory:
npm install twilioCreate your serverless counter variable
The main piece of a round robin is the counter that keeps track of where we are in the round robin list. In our case, this counter will be keeping track of which number we will be forwarding the next call to. To store this counter, we are going to use the Twilio Serverless API to create a variable that we can refer to and increment when a call comes in.
To create a serverless variable, we first need to create a Service, then an Environment within that Service.
As I said before, I am providing instructions to do this with curl and Node.js. If you’ll be following the Node.js section, feel free to skip directly to the Node.js Section.
Alternatively, you can use any of the other Twilio helper libraries if you prefer using the examples shown in the documentation here.
curl instructions
As stated above, the first step to create a serverless variable is to create a Service. To do this, you can simply POST to the serverless API endpoint with the parameters shown below.
If you don’t have your Account SID and Auth Token already set as environment variables, you’ll need to either add them following the instructions here or paste your values into the code below manually. The values can be found in the Project Info pane of your Twilio Console Dashboard.
curl -X POST https://serverless.twilio.com/v1/Services \
--data-urlencode "IncludeCredentials=True" \
--data-urlencode "UniqueName=rr-call-forwarding" \
--data-urlencode "FriendlyName=Robin Robin Call Forwarding" \
-u ${TWILIO_ACCOUNT_SID}:${TWILIO_AUTH_TOKEN}
To run this code, simply copy and paste it into your Terminal or Command Prompt and hit enter.
Copy the Service SID (the 34 character string that starts with ZS), from the output and save this. You’ll be storing this as an environment variable for the Function you create later.
Next, let’s create your Environment within the Service you just created. You’ll do this similarly to how you created the Service by POSTing to the Environment resource under your Service with the parameter shown below.
Simply replace the Service SID in the code below with your own, then copy and save the Environment SID from the output (starts with ZE).
(Also, be sure to change the Service SID below)
curl -X POST https://serverless.twilio.com/v1/Services/ZSe086d9c56d50ce53c929d06f62349fe8/Environments \
--data-urlencode "DomainSuffix=prod" \
--data-urlencode "UniqueName=production" \
-u ${TWILIO_ACCOUNT_SID}:${TWILIO_AUTH_TOKEN}
Now, the last thing we need to do with the Serverless API is to create your counter variable within the environment you just created.
Just like the prior two steps, you’ll be POSTing, but this time, to the Variable endpoint under your service and environment with the parameters shown below. Then, just like the other POSTs, you’ll need to copy the Variable SID and save it for later (starts with ZV).
curl -X POST https://serverless.twilio.com/v1/Services/ZSe086d9c56d50ce53c929d06f62349fe8/Environments/ZEbe3fcfa9b6ad823ce07c14eb475ab6df/Variables \
--data-urlencode "Key=counter" \
--data-urlencode "Value=0" \
-u ${TWILIO_ACCOUNT_SID}:${TWILIO_AUTH_TOKEN}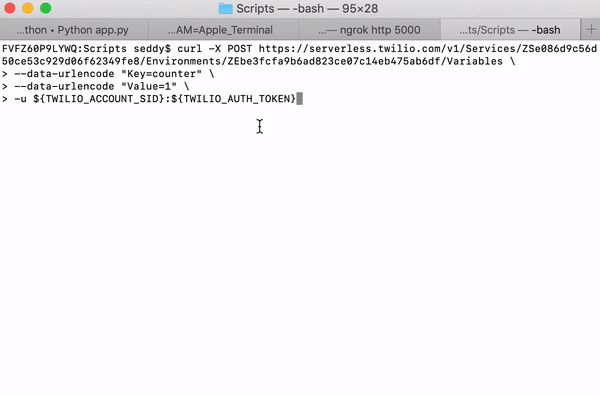
Node.js Instructions
To create a serverless variable using the Twilio Serverless API, you first need to create a service and environment for the variable to live in. As shown in the curl instructions above, this can be done with separate steps by copying the SID from the output, then making another `POST`.
An alternative is to do this dynamically by either nesting your POSTs or using Async / Await functions and then grabbing the SID from the response for the next post. In this example, we’ll be using Async / Await to wait for Twilio’s response from each POST before proceeding to the next. All your output will then be nicely printed to your console for you to copy for your Twilio Function.
To get started, create and save a file called `rr_init.js`, then let’s define our Account SID, Auth Token, and Twilio Client on the first 3 lines. Let’s go ahead and create a placeholder for our async function definition and call it at the bottom of your file as shown below:
Write a POST request to create a service
Ok, now let’s write our POST request to create your Service inside our function.
Since we’ll be needing the SID from the response, for our next request, we will store the response and add the await operator in front of our call. (We’ll do this for the other 2 calls as well.)
Inside the call, we’ll include parameters for the service’s unique and friendly names, as well as whether or not your credentials will be included. Since we are awaiting the response, we don’t need to nest the console output, and we can simply take the sid parameter from the service response that we save. Lastly, we’ll go ahead and write our try / catch blocks.
Create an environment for our counter variable
We also need to create an environment to store our counter variable. We’ll do this similarly to how we created our service using the .create() call and store the response object, but we’ll be using the SID of the service we just created in our call and some slightly different naming parameters. Since we’re not creating multiple environments for test and staging, we’ll just call this our production environment.
Put this section under your service section but within the try block:
Create the counter variable in our service
The last step is to create our counter variable within the service and environment we just created. Just like we did before, we’ll be using .create() and referencing the two SIDs we stored, and then saving the response and printing the SID to console. The parameters we’ll use for the variable will be the key, which is the name of the variable, and the initial value we’ll want to set.
We’ll be using the variable SID to identify our variable, so feel free to call your variable whatever you want without worry. Additionally, we’ll be setting our counter value to 0 to reference the first number in our round robin number array.
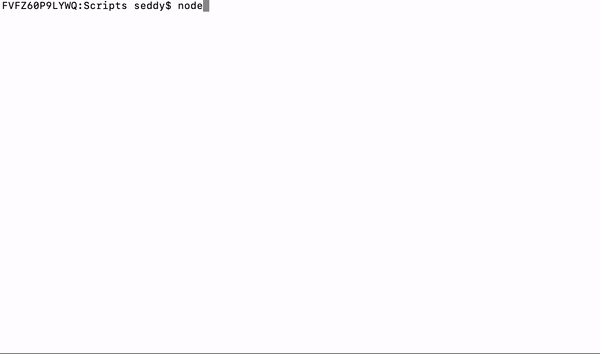
Run your script and retrieve the SIDs
Now that script is done, let’s not forget to run it, so we can get the SID values for our Twilio Function.
To run your script, simply go to the directory that you created your script in, and type `node`, followed by the name of your .js file. Once the SID values are printed, be sure to copy them and/or don’t close your terminal, because we’ll need these in the next section.
Create your Twilio Function
Alright, now that your counter variable has been created, everything is completely serverless from here on out. You won’t have to run anything else from your machine / server and the remaining functionality will be created and executed on Twilio’s servers.
The next piece we’re going to build for your round robin application is your Twilio Function.
Set Environment Variables & Twilio Client version
While we’ve still got those SIDs handy, let’s go ahead and save them as environment variables for your Twilio Function.
To do this, login to your Twilio Account and go to the Functions Configure page, then click the red plus (‘+’) sign under the Environment Variables section to create a new variable.
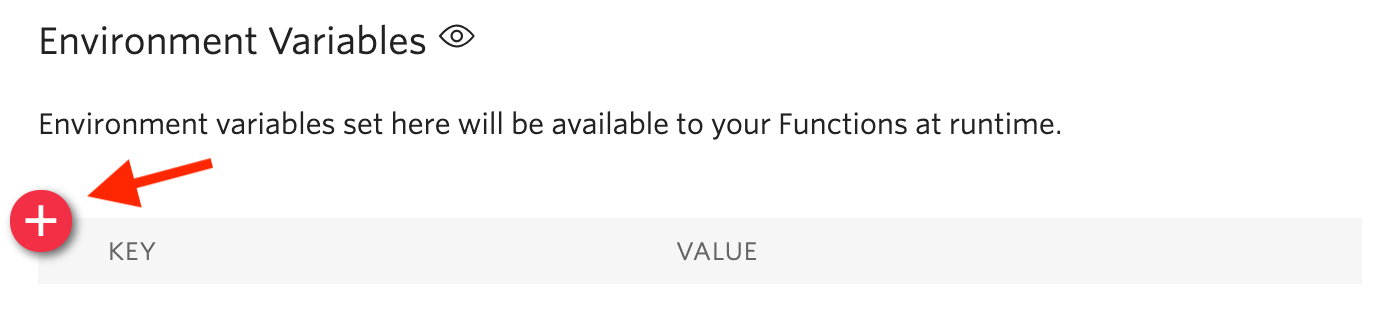
You’ll need to create the following three Environment Variables and paste their respective SID values that you saved from the last section.
RR_SERVICE_SIDRR_ENV_SIDRR_VAR_SID_CTR
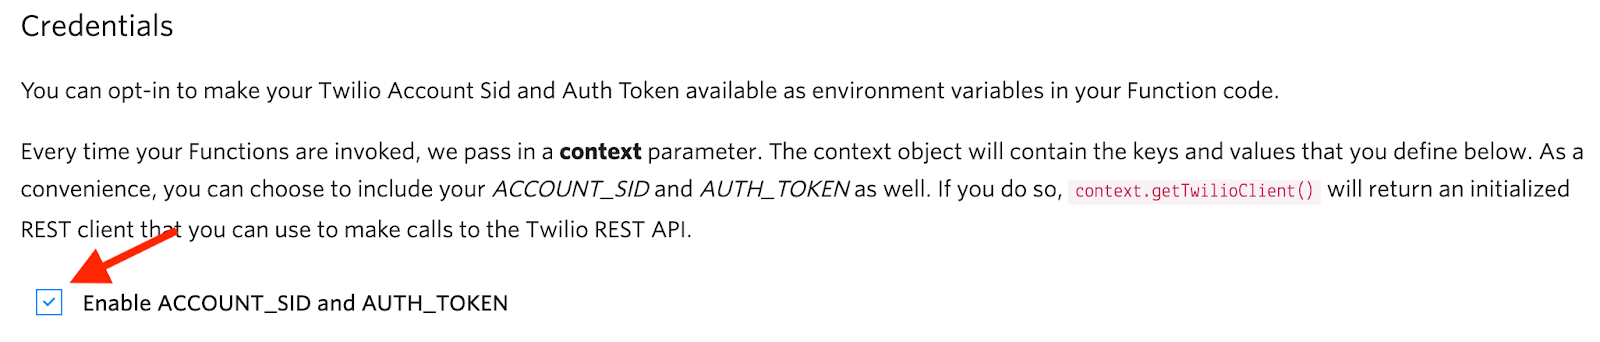
Next, make sure you check the Enable ACCOUNT_SID and AUTH_TOKEN checkbox above the Environment Variables section under Credentials.
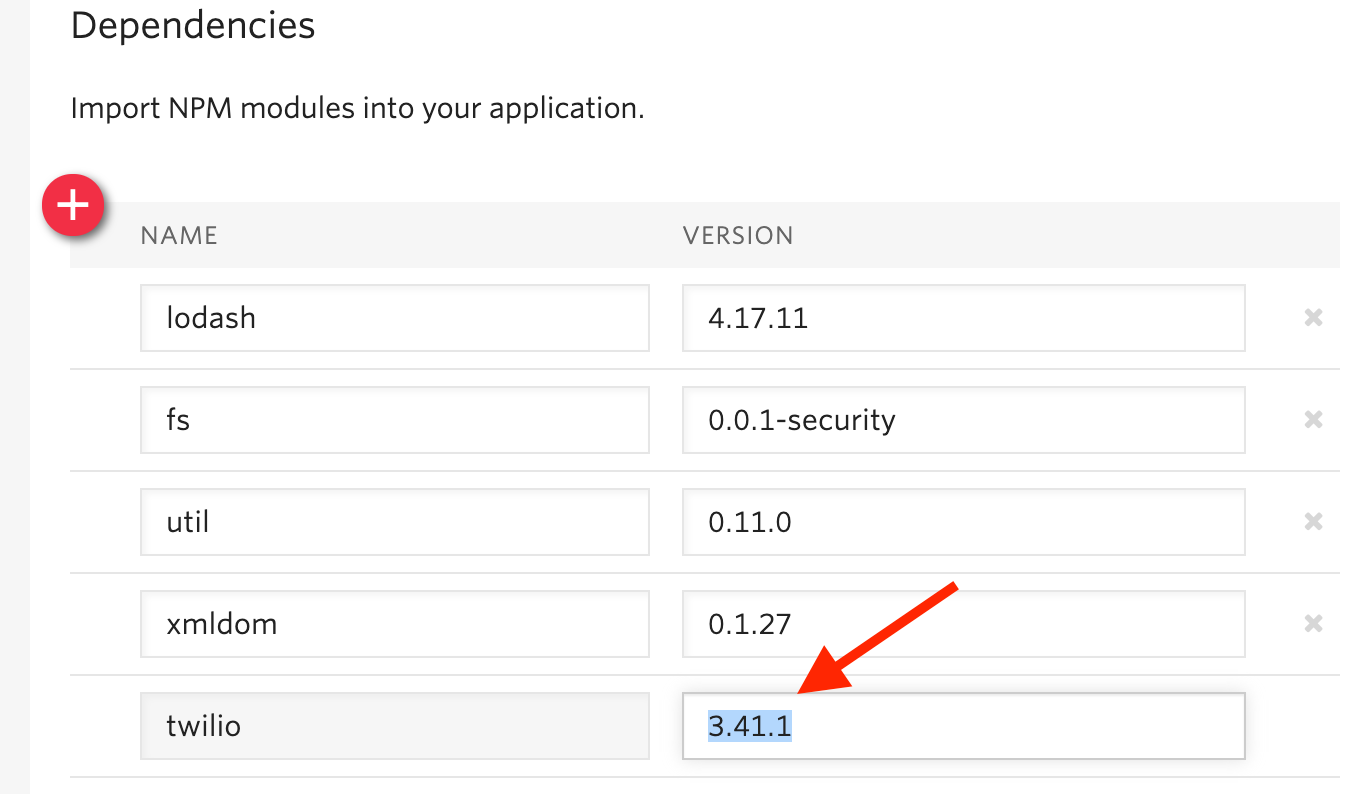
You can confirm the latest version by scrolling down to the Versions section in our twilio-node library reference here. In the dependency section, Twilio Client is identified simply as twilio, as shown below.
Lastly, be sure and hit ‘Save’ at the bottom of the page.
Write your Function
Now that we’re all set with configuration, let’s build our Twilio Function. Within the function, we will define our number list and use the Serverless API to fetch the counter variable you just created. We will then use the counter to select a phone number from your list, use the Serverless API to increment the counter variable, and lastly, return the selected number in the function callback.
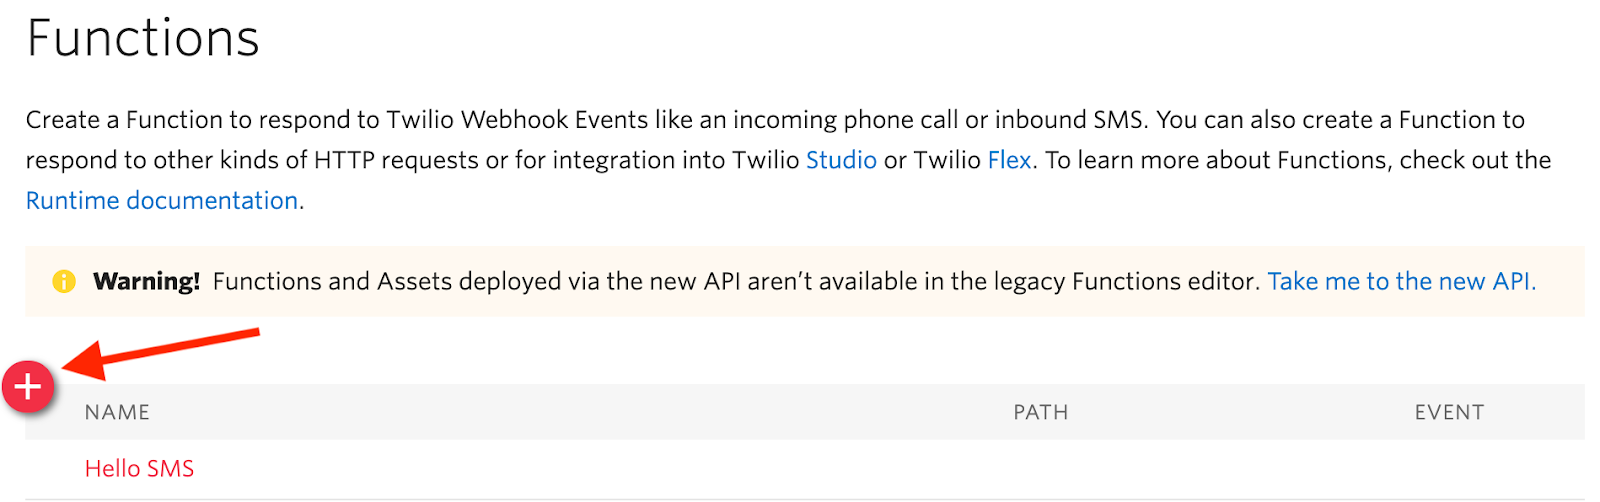
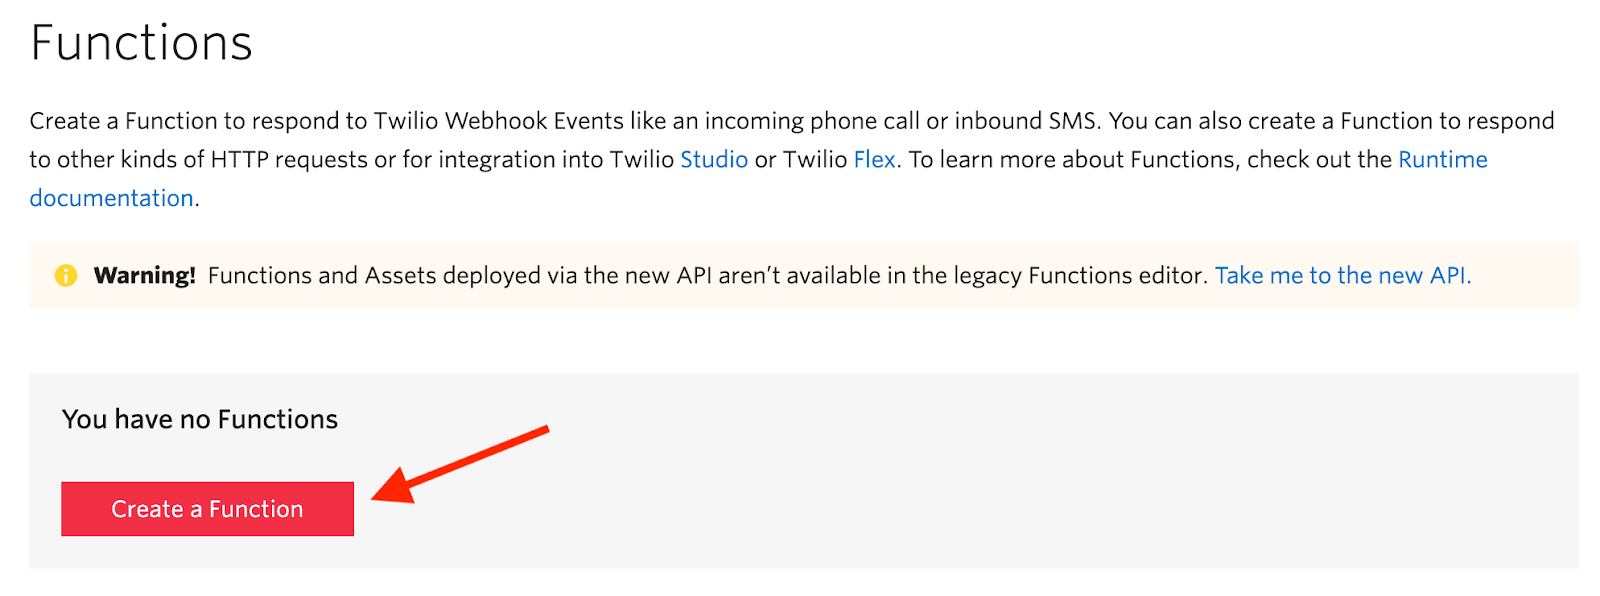
To get started, go to the Functions Manage page in the console, and click either the red plus (‘+’) sign (if you already have at least one function created) or the red Create a Function button (if you this will be your first Twilio Function).
OR
Next, click the Blank template and hit Create, then give your Function a name and a path (I called mine Round Robin and set the path to rr).

You will now see the basic Function template in the code section that looks like this:
If you’re interested in how the handler function or the required arguments work, check out the Function Execution section in the docs here.
The first thing we want to do is clear out everything within the handler function and define our number list. Our numbers list will just be an array of number strings, but we’ll also add a comment with a name for the number to make it a little more user friendly.
Go ahead and put all the numbers you want in your round robin, each on their own line as shown below, while being sure to keep the comma between each entry:
Next, let’s initialize our Twilio Client from the context argument and use it to write our call to get our counter variable.
As shown in the docs here, we’ll use the fetch() command along with our environment variables to get it. Since Twilio Functions doesn’t support async / await like we previously used in the Node.js section, we will need to nest our code within the promise handler to execute our code synchronously and make use of the counter value as shown below.
Let’s now write the code to determine which number we want to call and increment our counter.
We’ll call our Promise handler variable, then use the returned counter value to save the number we want to call. Let’s then create a new variable equal to the current counter value, increment or reset it, then update our serverless counter value with another API call. To determine if we need to increment or reset our counter, we will add an if statement that uses the length of our number list and increments when the counter is equal to the length minus one.
Now that we have the new counter value and the next number to call, we can update the serverless counter value for the next execution. To do this, we will make another API call, only this time we will use update() instead of fetch and set the value to our ctr variable. We will nest our callback that contains a null error response and a response object with the number we want to call within the Promise handler of this second request.
And last – since we nested our Promise handlers, don’t forget to close out both of them, then click Save!
Create Your Studio Flow
The last part of our build is the Studio Flow that will run the Function we just wrote, then call the returned number.
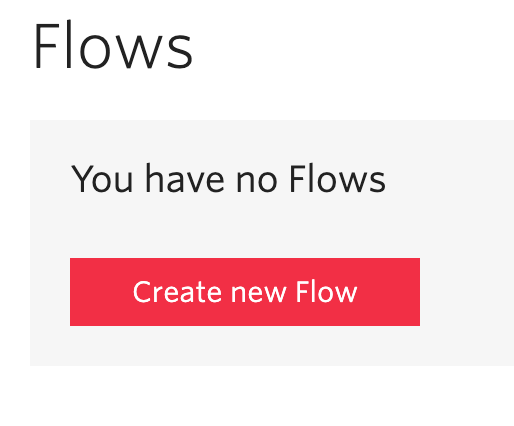
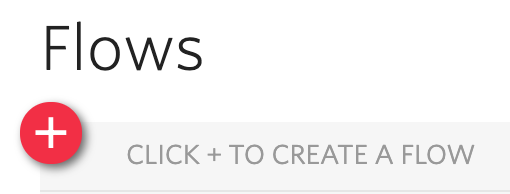
To get started, go to the Manage Flows Studio page, then click either the red Create new Flow button (if this is your first Flow) or the red plus (‘+’) sign (if it’s not your first Flow).
OR
Next, give your Flow a name and click Next. If you’d prefer to build your Flow yourself, select “Start from scratch” in the menu, and click Next again. Otherwise, you can scroll down and select “Import from JSON”, then paste a copy of my Flow, which can be downloaded as a text file here.
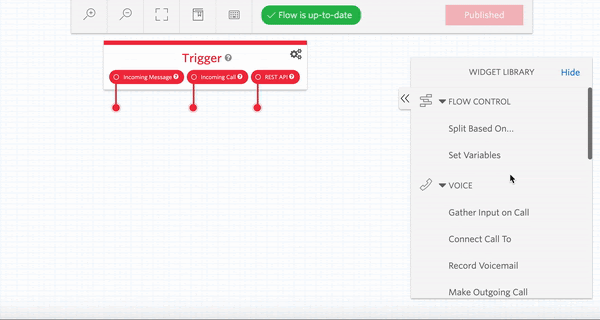
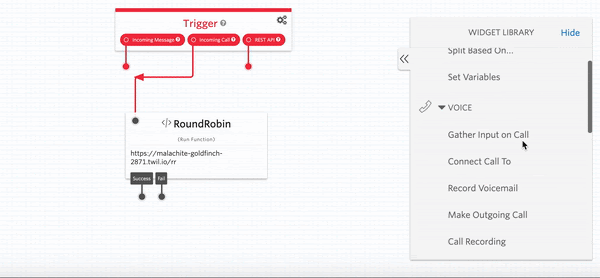
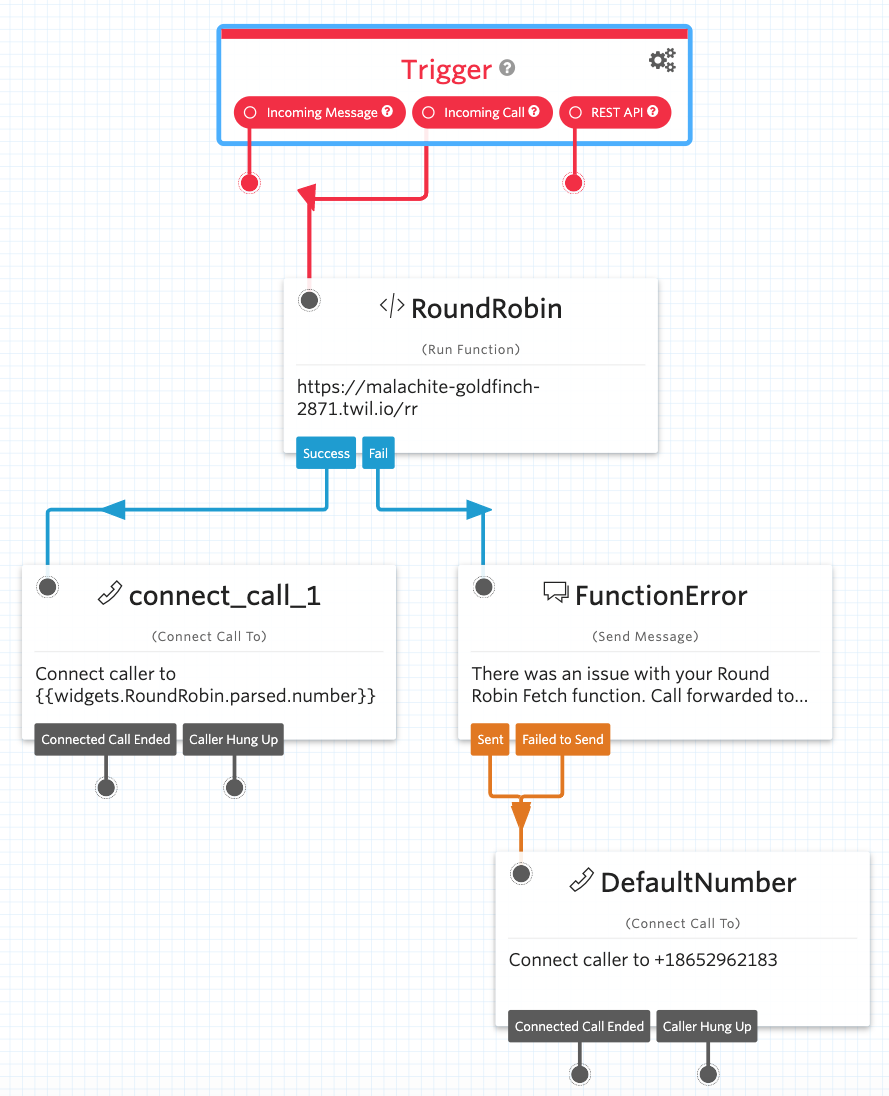
To use the round robin function we just built, we will drag a Run Function widget from the Widget Library into our canvas. Since we want to use this for call forwarding, we will connect the Incoming Call port on the Trigger with this widget. We’ll then click on the Run Function widget, give it a name (I called mine RoundRobin), and select the Default Service from the Service dropdown.
Functions built from the console reside in the Default Service, so be sure and select this instead of the Service we created earlier that holds your counter variable. Finally, select the Function we wrote in the Function URL dropdown and click Save.
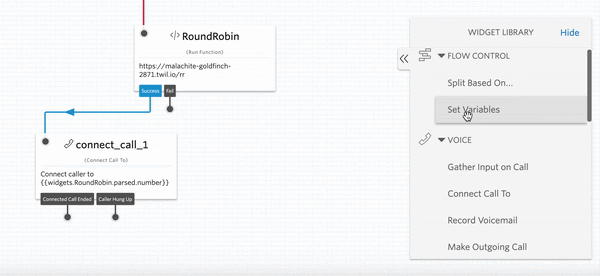
Next, we’ll add a Connect Call To widget and connect the Success port of our Run Function widget to it. We’ll set the number we’re going to call in the CONNECT CALL TO field by referencing the JSON returned by our function.
As shown in the docs here, we can reference the JSON within the parsed context of the widget like this: {{widgets.MY_WIDGET_NAME.parsed}}. Since my widget is named RoundRobin and the variable holding the number is called number, I reference the number like this: {{widgets.RoundRobin.parsed.number}}.
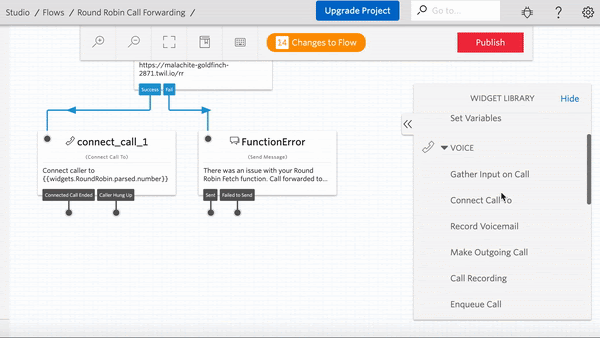
Now this is really all we need to get round robin working, but there’s one more thing we can do to prevent an outage in case an issue comes up in the future. To avoid an outage, we can add a fallback method to our function that will alert you that your function failed and forward calls to a default number. There are a few ways you can alert yourself, but the simplest way is to send a text message.
To get this setup, drop a Send Message widget onto the canvas and connect it to the Fail port of your function. Add some kind of error message in the MESSAGE BODY field to let you know that the function failed, then open the MESSAGING & CHAT CONFIG dropdown and put your default number in the SEND MESSAGE TO field.
Finally, let’s add another Connect Call To widget and connect both ports of your Send Message widget to it, then add your default number. Don’t forget to hit Save, and then very importantly, click Publish at the top of the canvas.
And that’s it! You should now have a Flow that looks like this:
Configure your Twilio number & test it out!
Now that your Round Robin is built, let’s configure your number to use it and test it out!
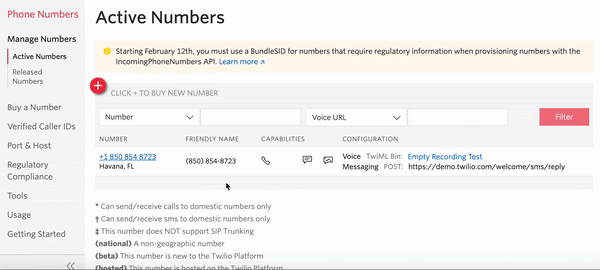
If you’re not familiar with how to configure a Twilio number for incoming calls, just click on the number you want to use for your round robin (e.g. your office number) in your Active Numbers here, then scroll down to the A CALL COMES IN dropdown in the Voice section and select Studio Flow. Then, select your new Flow in the Select a Flow dropdown to the right. After that, hit Save at the bottom, and you’ll be all set to test!
If everything went smoothly, your calls should now be forwarding through your round robin:
Building a Round Robin call forwarding system on Twilio Studio
And that’s it folks! You now have yourself a completely serverless round robin call forwarding application.
A couple things to note - one, since your round robin function simply returns a number, you could use this same workflow for a round robin text forwarding application. And two, Studio can be great for relatively simple forwarding flows like round robin or business hours forwarding, but for more complex routing such as skill based routing and tiered support routing, I recommend trying out Twilio TaskRouter. TaskRouter comes built with a framework that supports these features more easily.
Samuel Eddy is a Senior Technical Support Engineer at Twilio. When he’s not helping customers build at work, he’s often building for himself, friends, or family at home. He can be reached at seddy@twilio.com.

Related Resources
Twilio Docs
From APIs to SDKs to sample apps
API reference documentation, SDKs, helper libraries, quickstarts, and tutorials for your language and platform.
Resource Center
The latest ebooks, industry reports, and webinars
Learn from customer engagement experts to improve your own communication.
Ahoy
Twilio's developer community hub
Best practices, code samples, and inspiration to build communications and digital engagement experiences.