Building an SMS notification service with Serverless.
Time to read:
November 24, 2020
Written by
Reviewed by
This post is part of Twilio’s archive and may contain outdated information. We’re always building something new, so be sure to check out our latest posts for the most up-to-date insights.

Ethereum is a blockchain with a cryptocurrency. As with Bitcoin, it costs users to send ethereum transactions, or interact with a smart contract (an on chain programme). The cost of these transactions is called gas, and the price can vary depending on usage. If lots of people are using the network, gas prices can get very high. Read more on gas prices, and how they skyrocketed earlier this summer here. Savvy users wait for lower gas prices to interact with Ethereum smart contracts. Twilio’s SMS API is the perfect tool to keep you updated on prices. I am going to show you how to write a serverless application to send SMS notifications when gas fees are below a certain level.
If you aren’t interested in gas prices, the flow in this tutorial can be used to query and connect any https REST api via Serverless to Twilio’s SMS api.
Technical requirements
For this tutorial, you will need:
- A free Twilio account. If you use this link to register, you will receive $10 credit when you upgrade to a paid account
- A Serverless account
- Node.js and npm installed
Let’s get started!
Creating our Serverless Application
We will be using the Serverless framework to write our application. Serverless is handy for creating serverless functions hosted on AWS Lambda. Serverless will abstract the AWS interface away from us, meaning we can work via their UI, with minimal use of the AWS console. We will trigger our function at intervals, so we don’t need a server running around the clock. For this tutorial we will use the Serverless free tier, to avoid paying costs.
Install the Severless CLI as a global npm module.
Then create a new directory and run the following command to generate a serverless application.
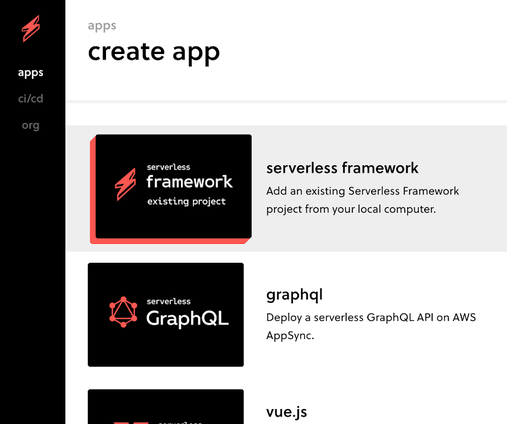
In the Servless.com UI, after creating your account, select create app and serverless framework.
Open up the newly created servless.yml and add the org as shown in the UI. Also in the serverless.yml uncomment, and update the path to:
This creates an endpoint to trigger for our serverless function. We will later replace this with a scheduled timer to trigger at intervals.
Then login and deploy in the CLI with:
You should now see your application in the dashboard of Severless.com. The Serverless UI, and console output will also provide you the url endpoint. Test this out in your browser to check the function deployed correctly.
Querying the DeFi pulse API
To get the data on gas costs, we will be querying the Gas Station API using a GET request to the following URL:
https://data-api.defipulse.com/api/v1/egs/api/ethgasAPI.json
Testing this out in the browser, postman or via curl, you will be returned an object with gas price data. Add the request to your handler.js function:
Here we have used Axios to make our https request, read more about making requests here. Install axios with npm install axios. Then we are going to run our serverless function locally to check it is working. To run the function locally, install the serverless offline plugin, npm install serverless-offline --save-dev add it to your yml file:
then run:
Navigating in the browser to http://localhost:3000/dev/users/create, you should see a JSON object containing the gas data we need. Logs will be displayed in the terminal when working locally. Once this is working, you can deploy remotely using the serverless deploy command, to be able to view the same in the provided URL.
Adding Twilio
Now we have the data we need, the next step is to connect our function up to Twilio and to send an SMS. If you haven’t got one already, first purchase a number. To do this login to the Twilio Console and navigate to Phone Numbers > Buy a Number. Search for and purchase an SMS enabled number.

Open up your serverless.yml and add the following as environment variables:
Your Twilio ACCOUNT_SID and AUTH TOKEN can be found on the console dashboard.
Next npm install the Twilio helper library to our function. Then we import it and pass in our credentials to create a Twilio client.
Inside our function, after the if statement catching errors, we can add the following:
Test locally again. If running into errors locally, write logs and check in the terminal to debug. Once this is working, uncomment the if statement, so messages are only sent when gas prices are low. Of course feel free to adjust the parameters of the if statement to the level you need!
Scheduling our triggers
We have our function working, but let’s switch the trigger from being an endpoint to a scheduled trigger. Again we do this in our serverless.yml. Find the events section and remove the http attribute. Uncomment the schedule value and replace with the time interval of your choice.
Run serverless deploy one last time, and congrats, you now have a serverless SMS notification system to alert you to low gas fees!
Conclusion
This tutorial shows you how to create an SMS notification system for Ethereum gas prices. For further blockchain and twilio inspiration, checking out; Bitcoin prices with php and SMS, Convert Bitcoin to Local Currency using PHP. If you are building anything blockchain and twilio related - hit me up on twitter or at rblack@twilo.com.
Of course, you can also replace the Gas Station API call for any other rest API you want, or have access to. Serverless and Twilio are a great combo to build out services like these to notify yourself, or your users on the go.


Related Resources
Twilio Docs
From APIs to SDKs to sample apps
API reference documentation, SDKs, helper libraries, quickstarts, and tutorials for your language and platform.
Resource Center
The latest ebooks, industry reports, and webinars
Learn from customer engagement experts to improve your own communication.
Ahoy
Twilio's developer community hub
Best practices, code samples, and inspiration to build communications and digital engagement experiences.